Education
Importing the Script
There are two script input methods in FilmToolz – you can either add scenes manually or import an existing script.
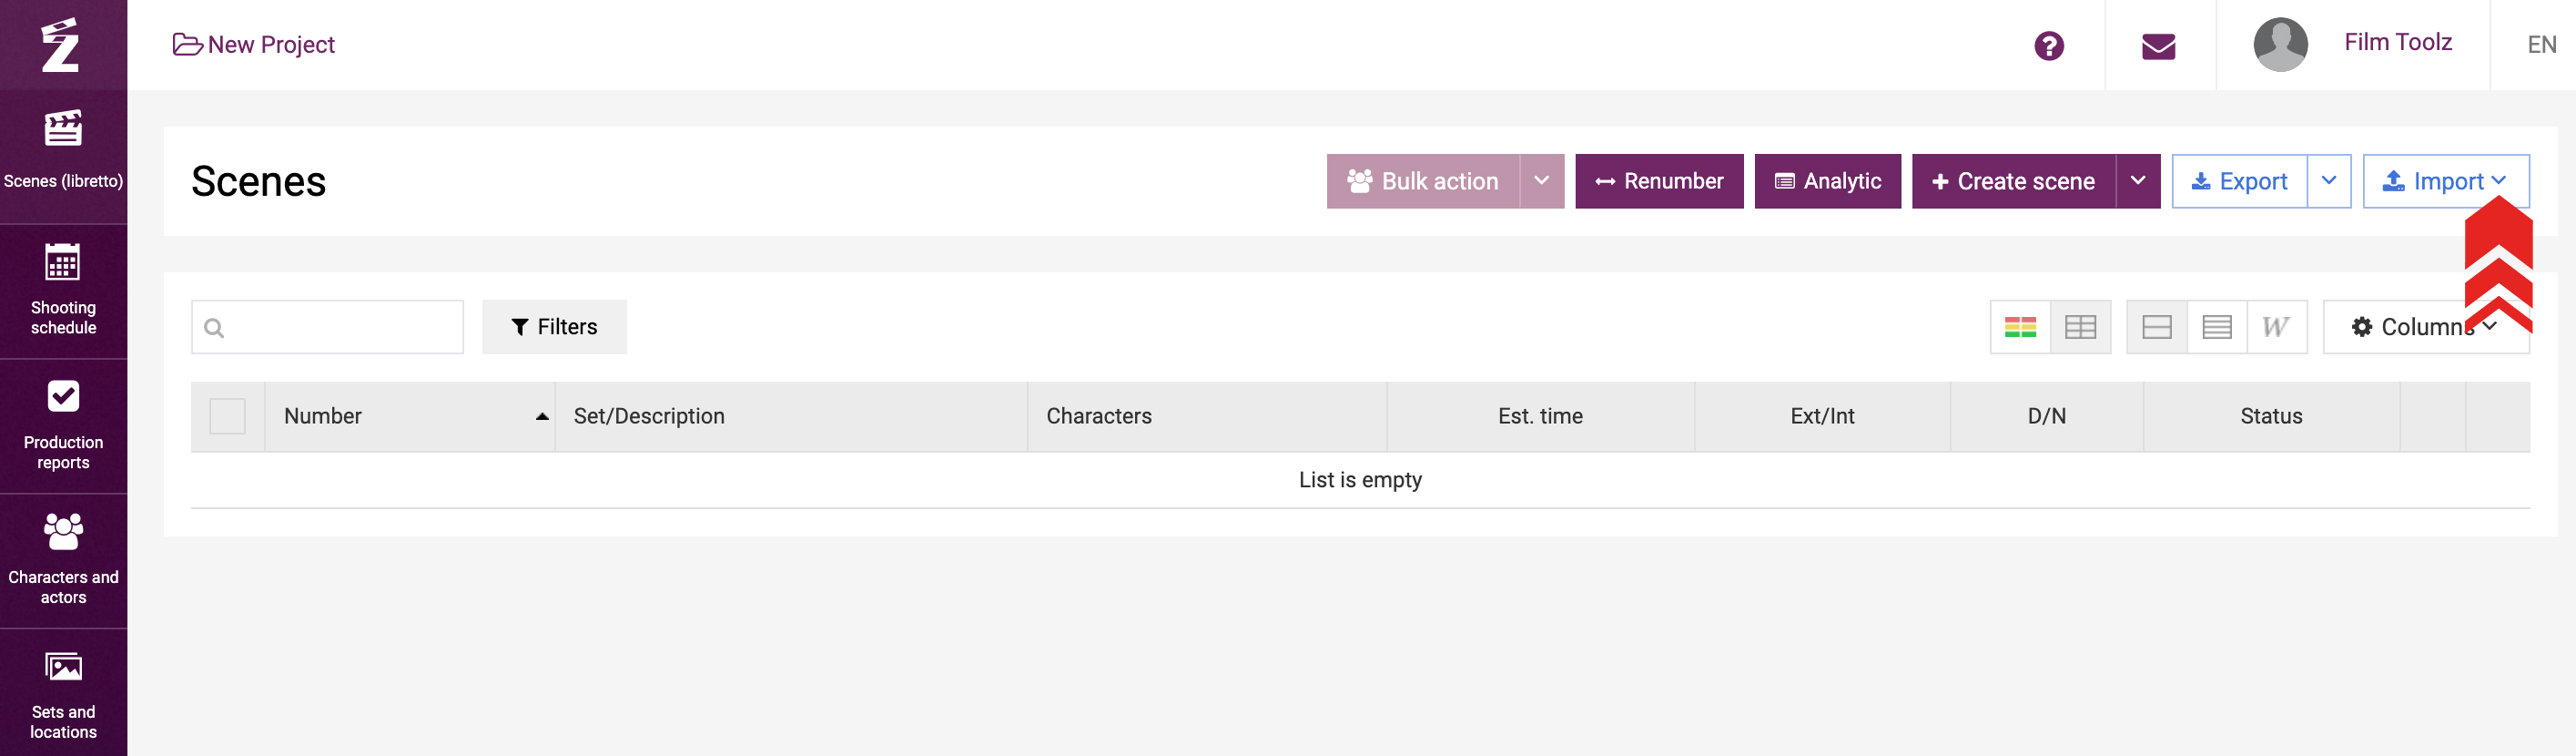
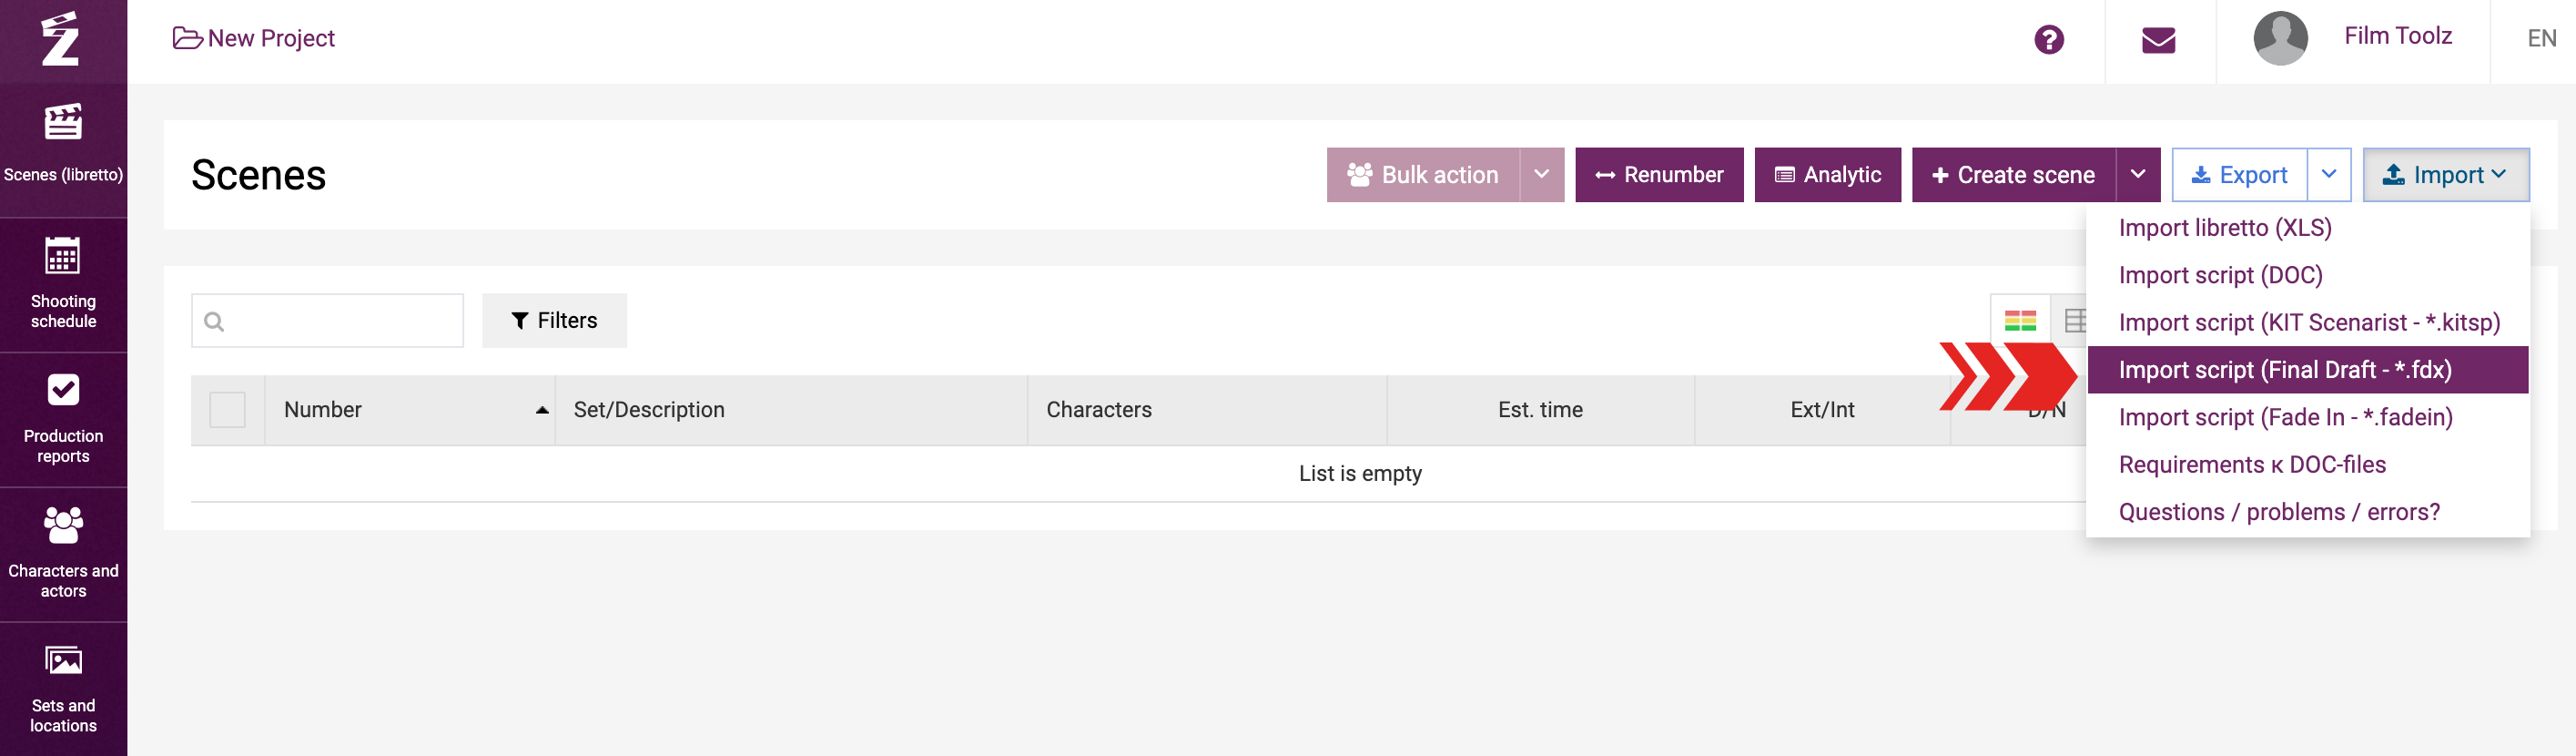
If you choose to import, go to the scene list page.
Then click on the arrow next to “Import” button.
You will see the list of formats available for import: a standard Word / PDF file and a few formats used by dedicated script-writing software such as Final Draft, Fade In, etc.
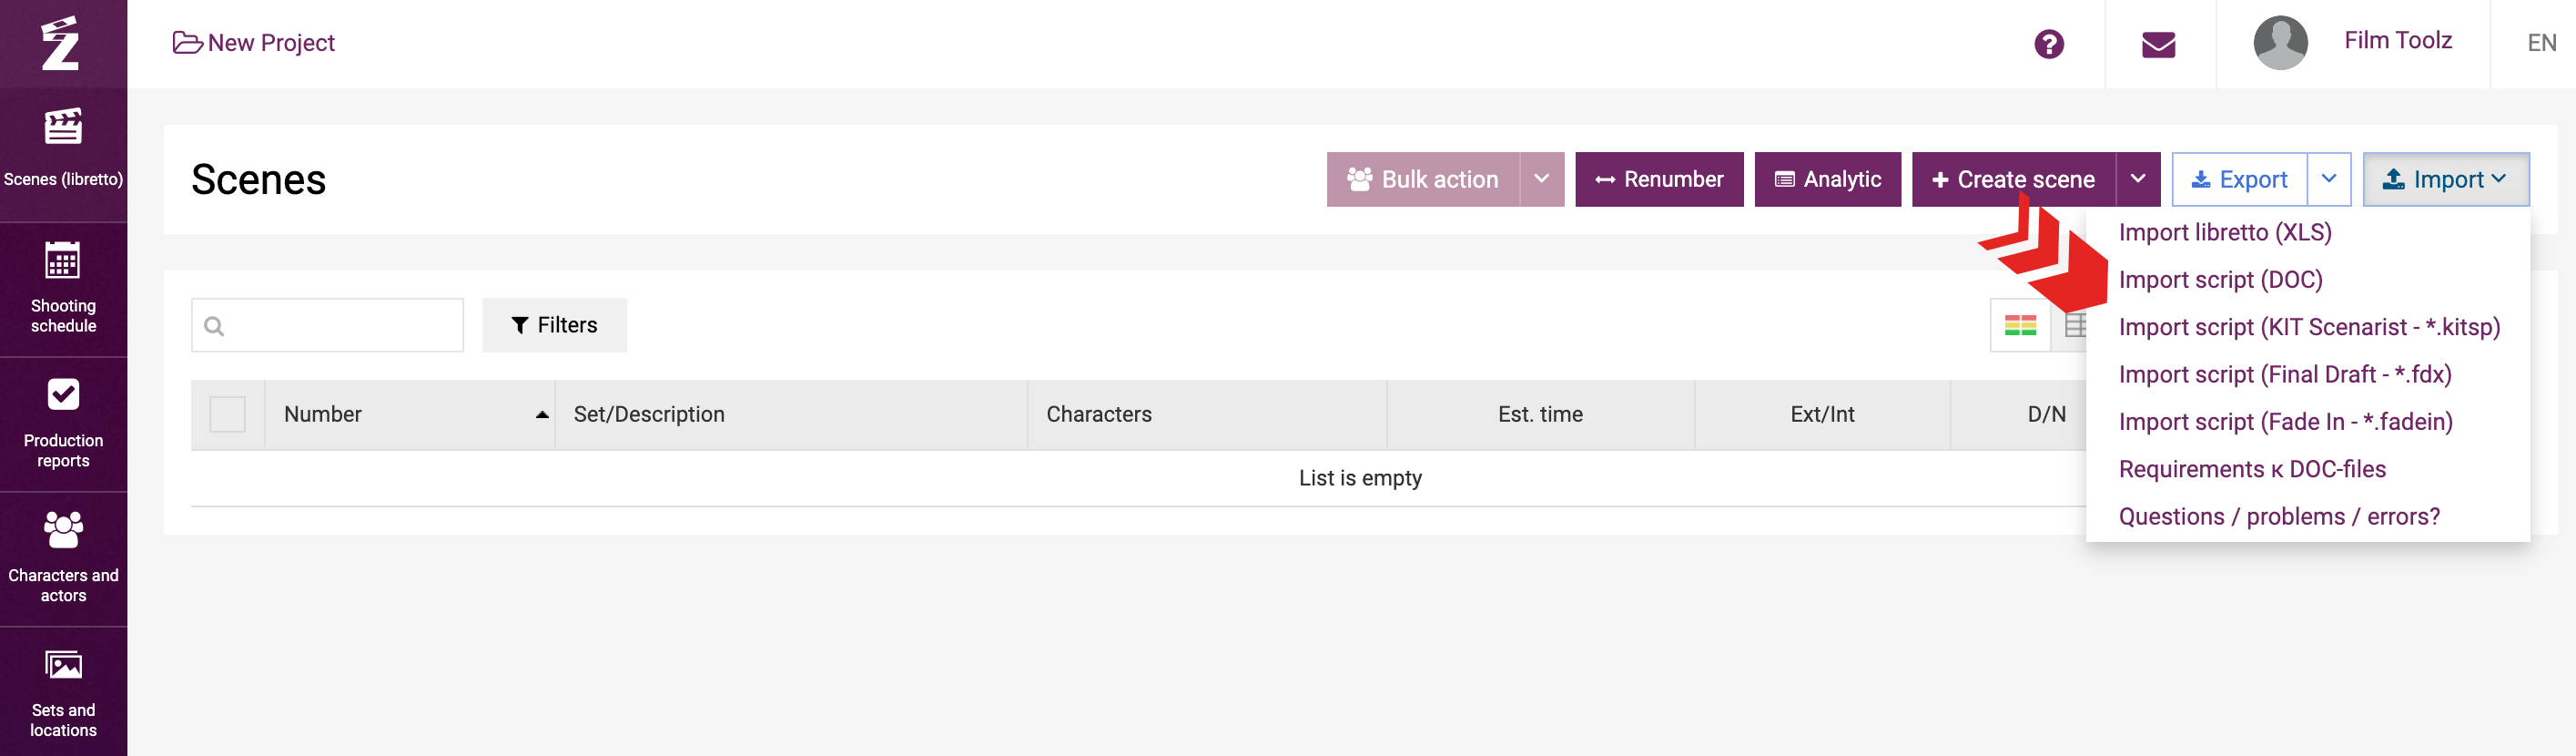
The system also supports the option to import the list of scenes (i. e. the stripboard of your project) from an Excel file. However, the only files recognized by this import method correctly are the files previously exported from FilmToolz, and this method does not provide for adding any supplementary information and adjustments to these files. The files exported from script-writing software will normally contain structured data on the sets, characters, screen time, and on the scenes themselves, which is the reason why this importing method is the preferred and recommended method.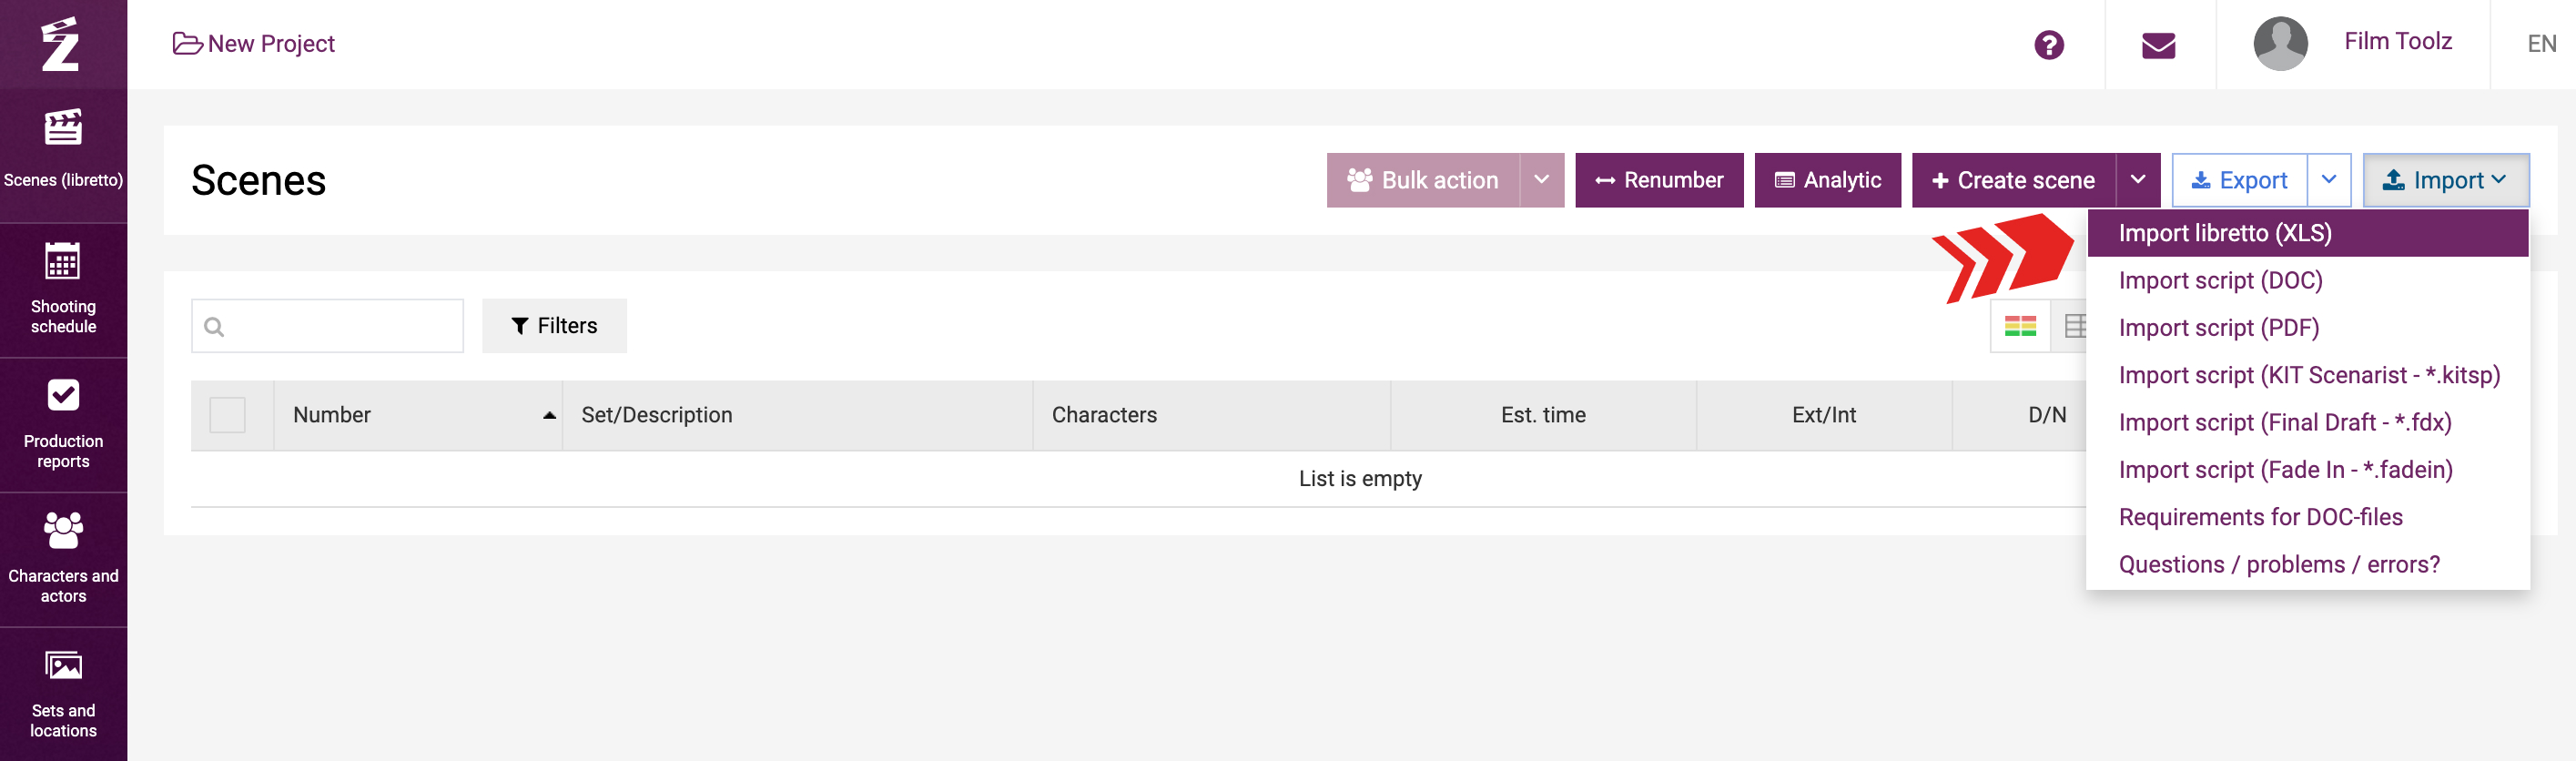
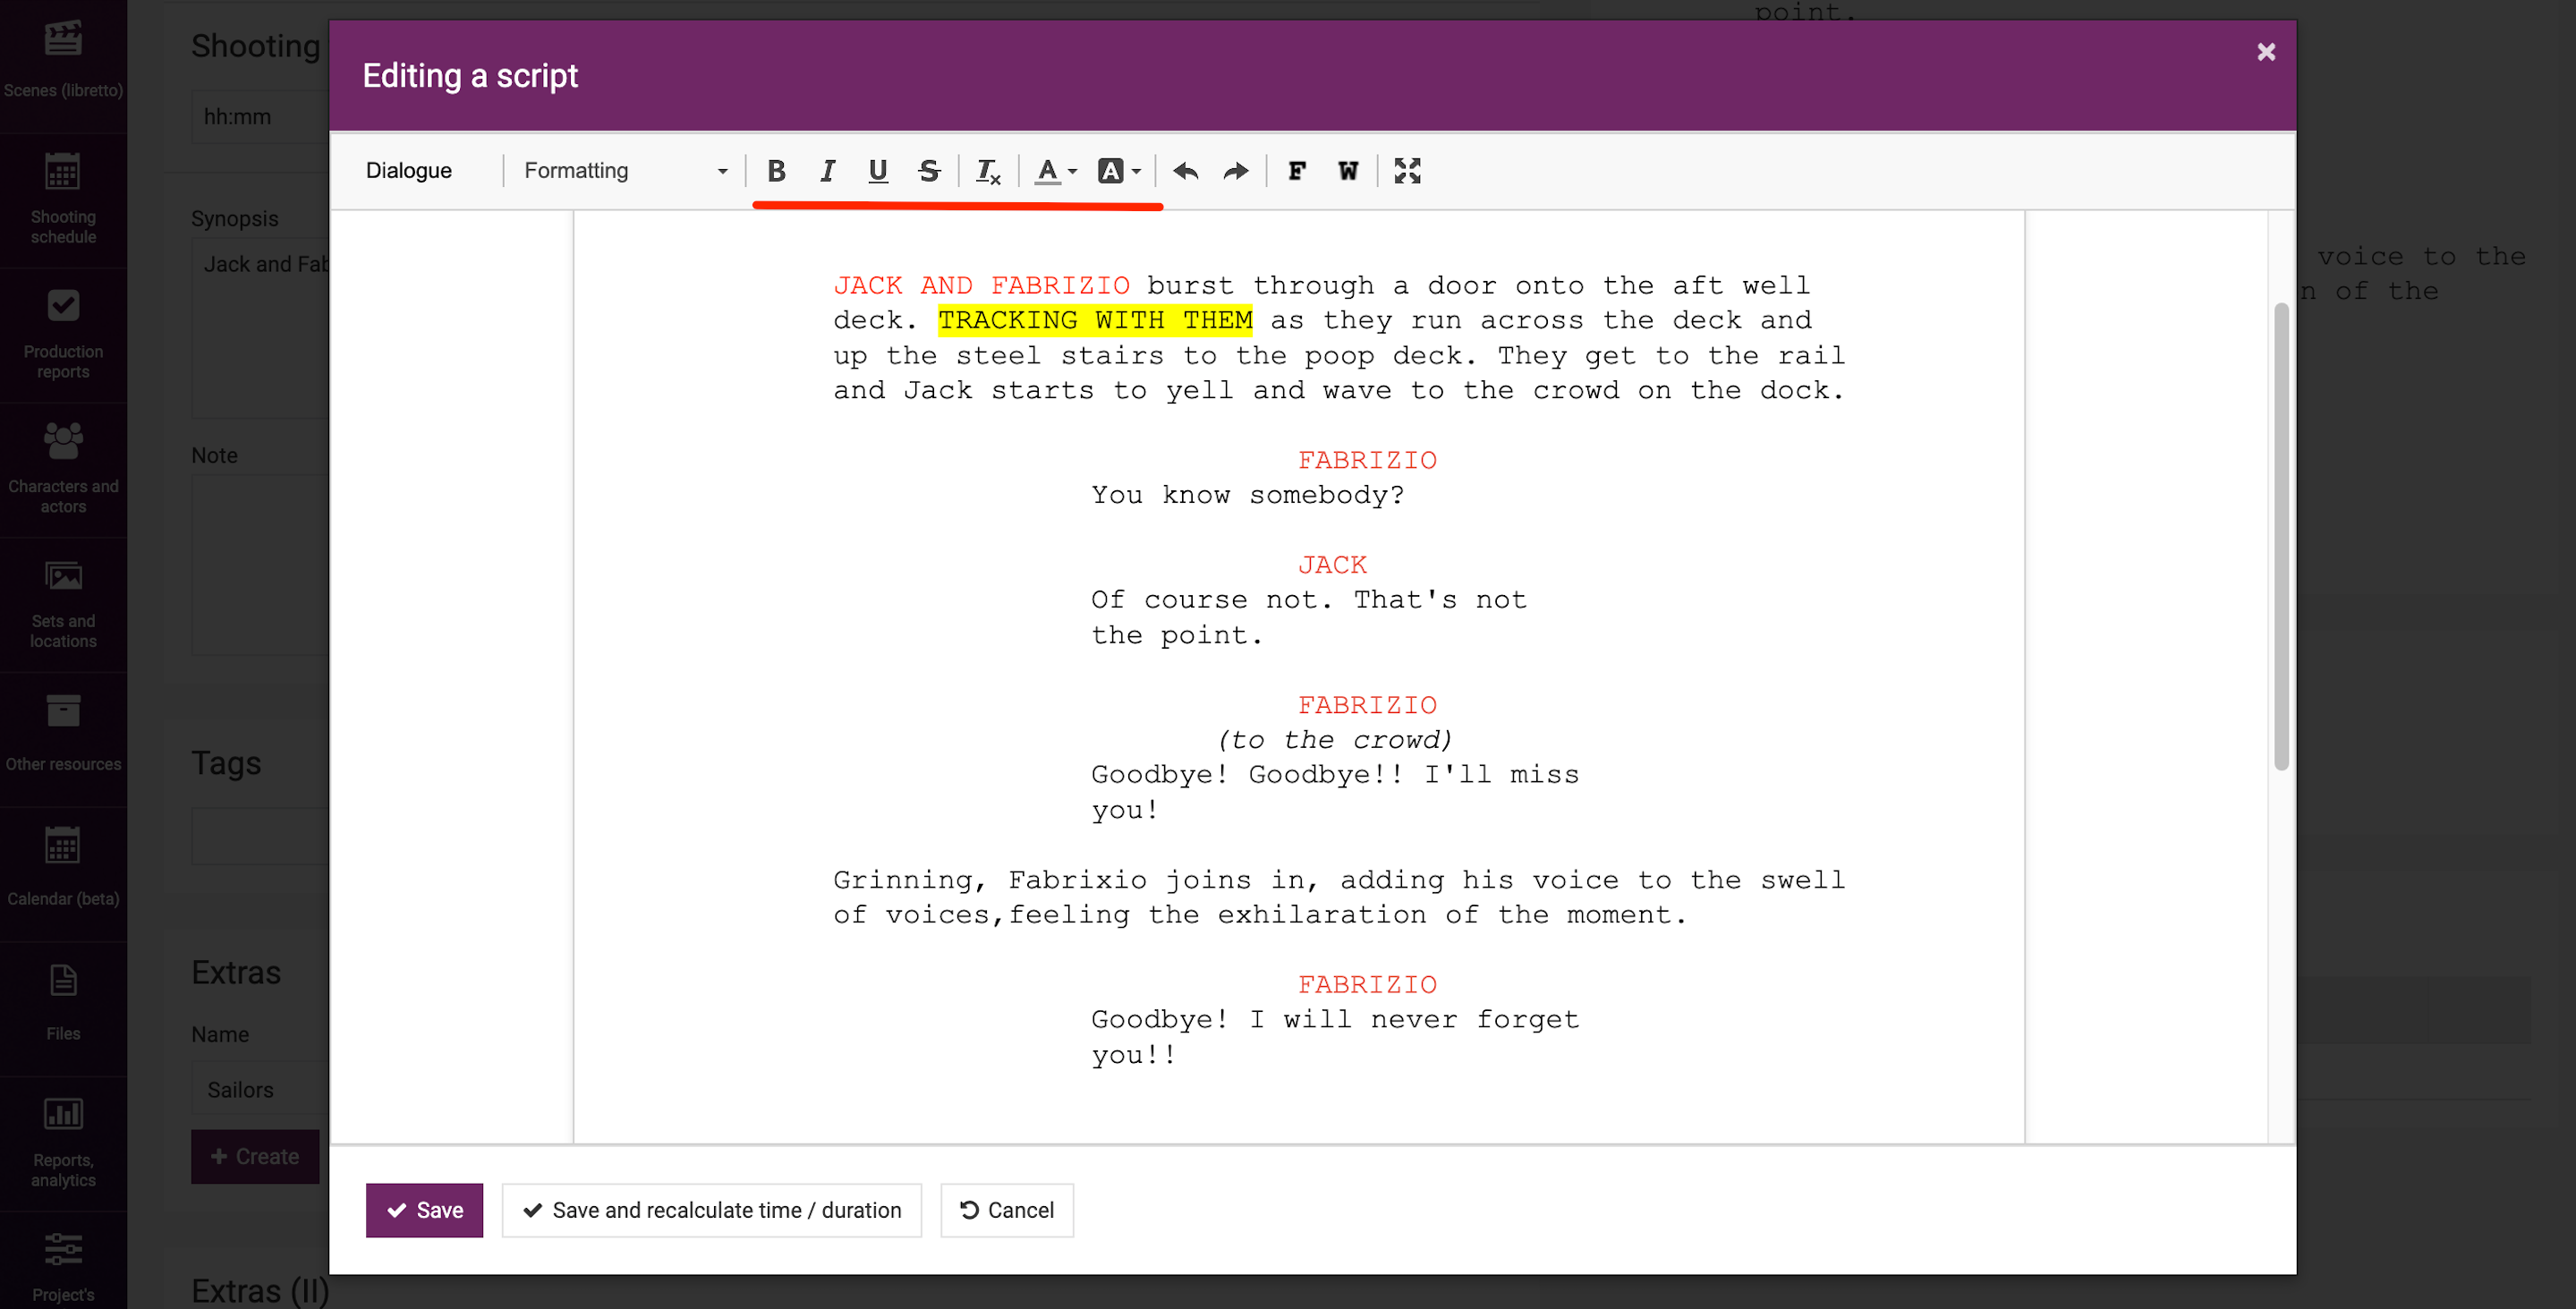
When importing a script from a Word file, the system will automatically clear the text of any unnecessary formatting and bring it in conformity with the international script layout standard. In this case, the Word formats (font color, font type, font style (bold, italic, underlined), font size) will be reset completely. Indents and margins that differ from the sizes established by international standards will be automatically reset to standard sizes.
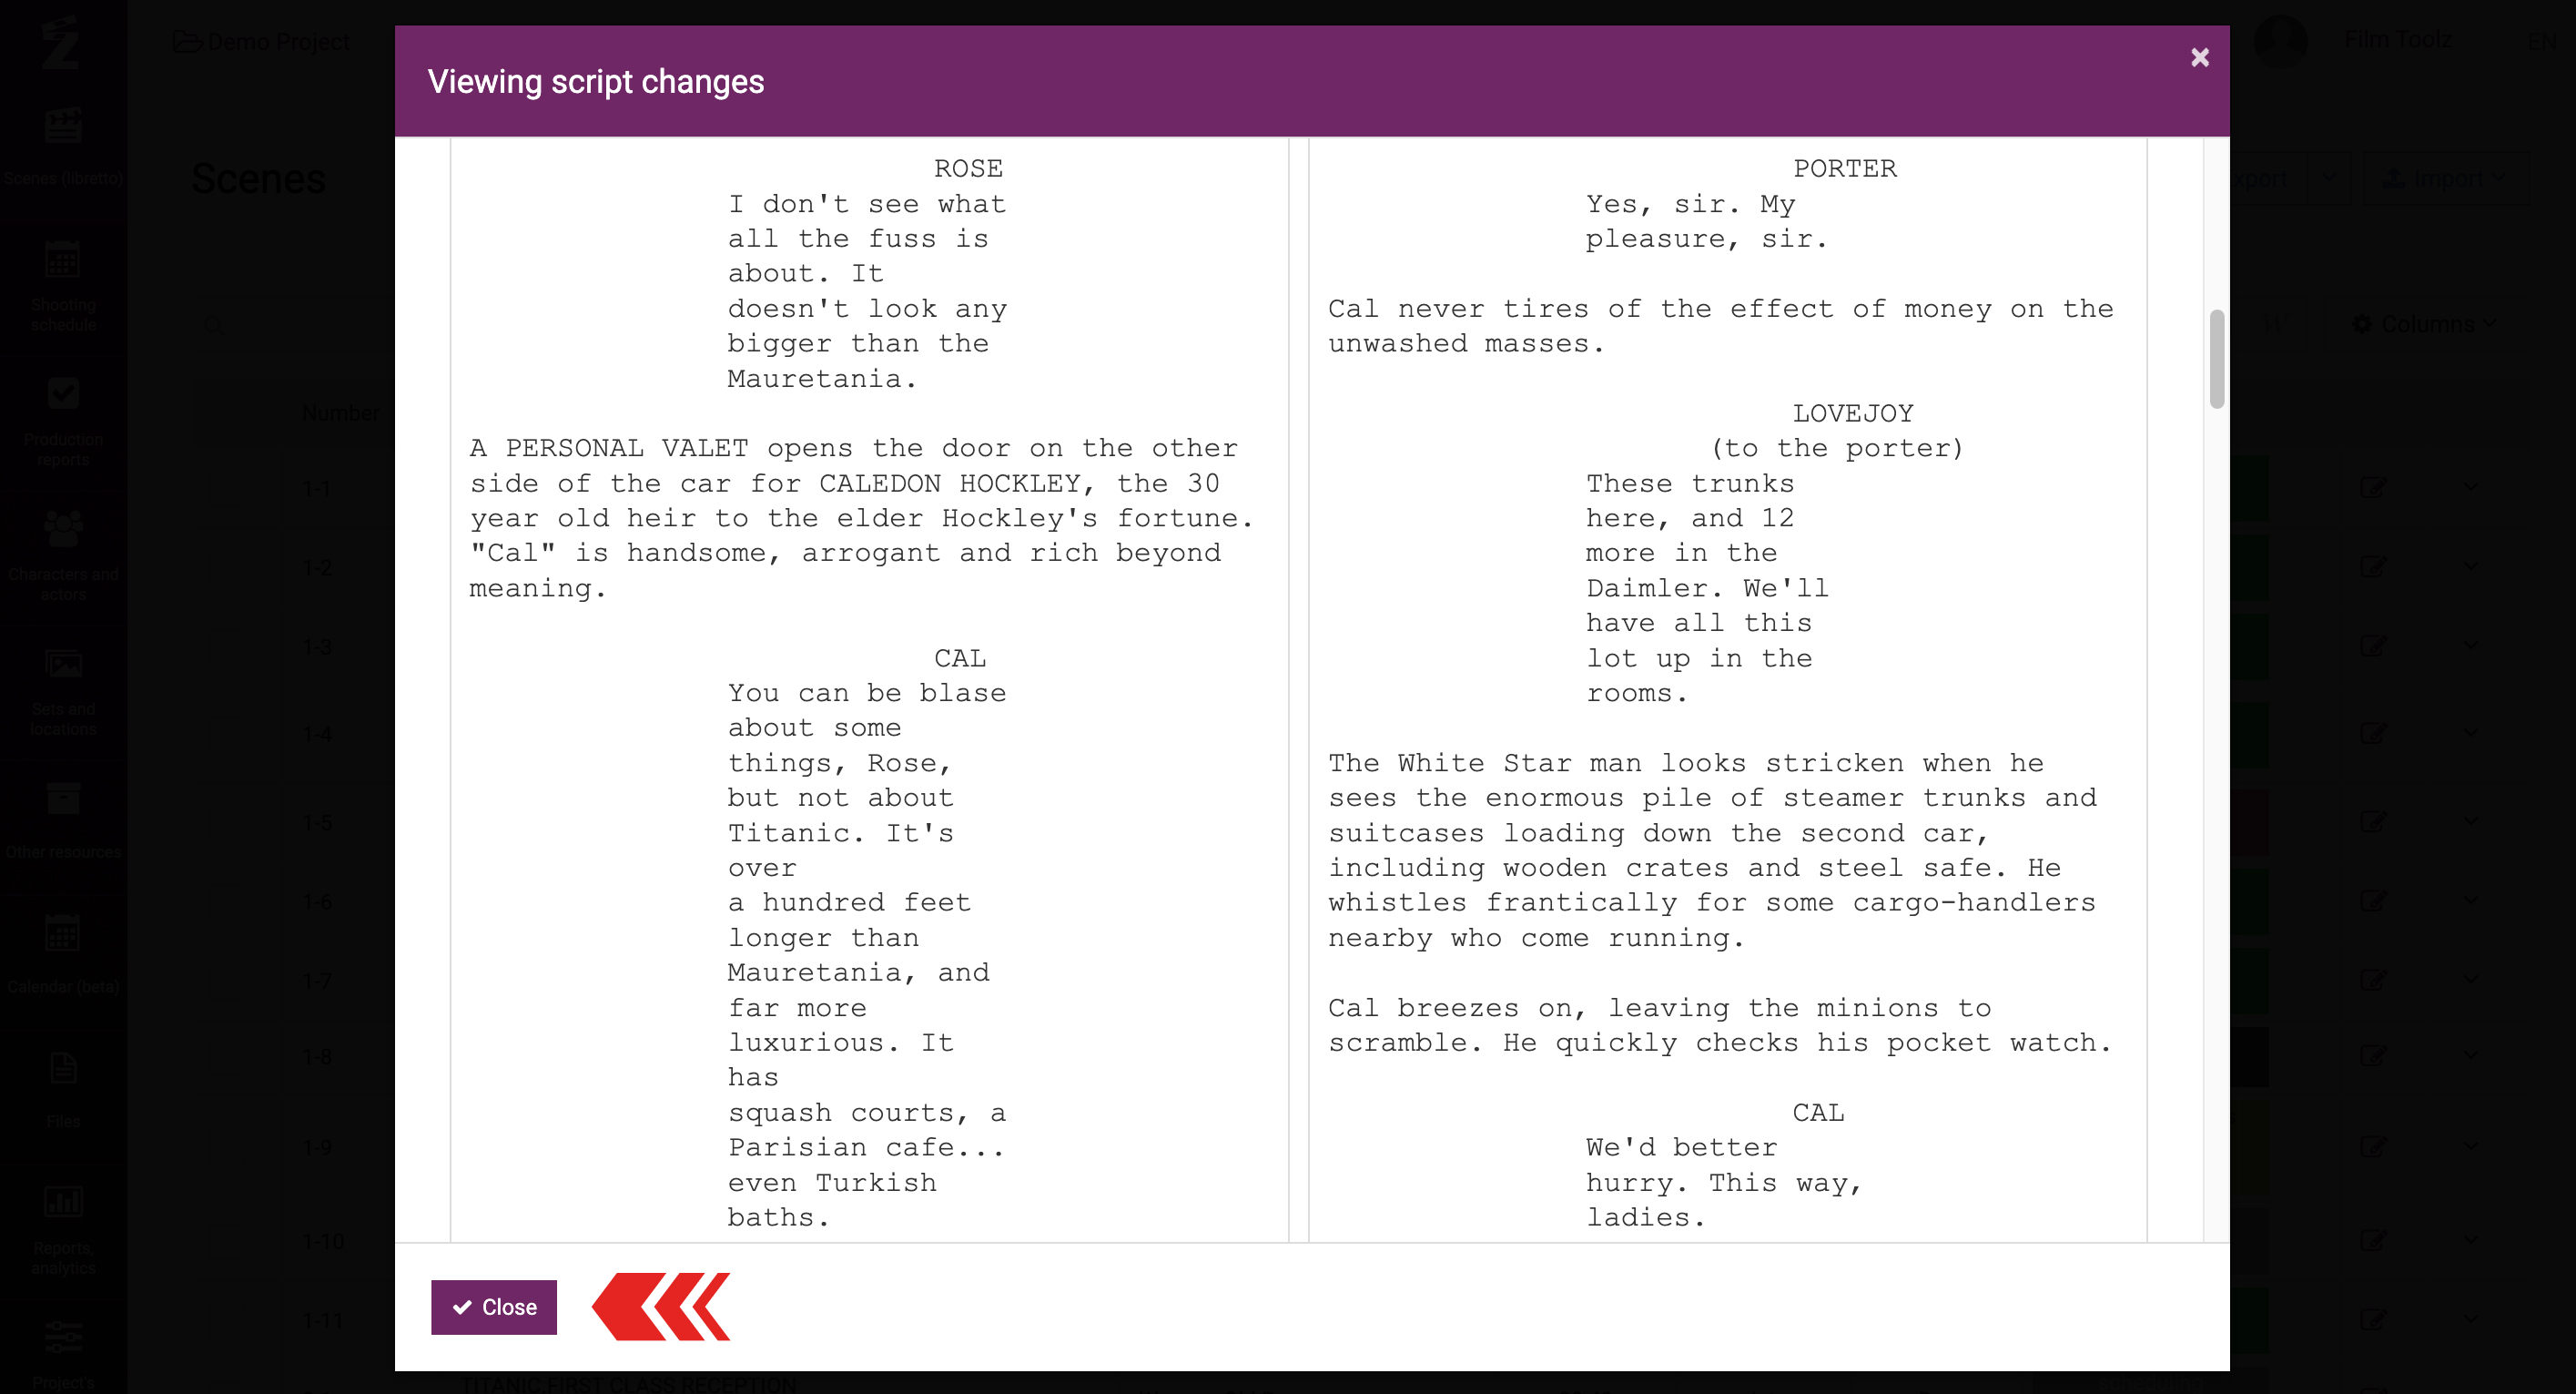
Example of a script in Word format: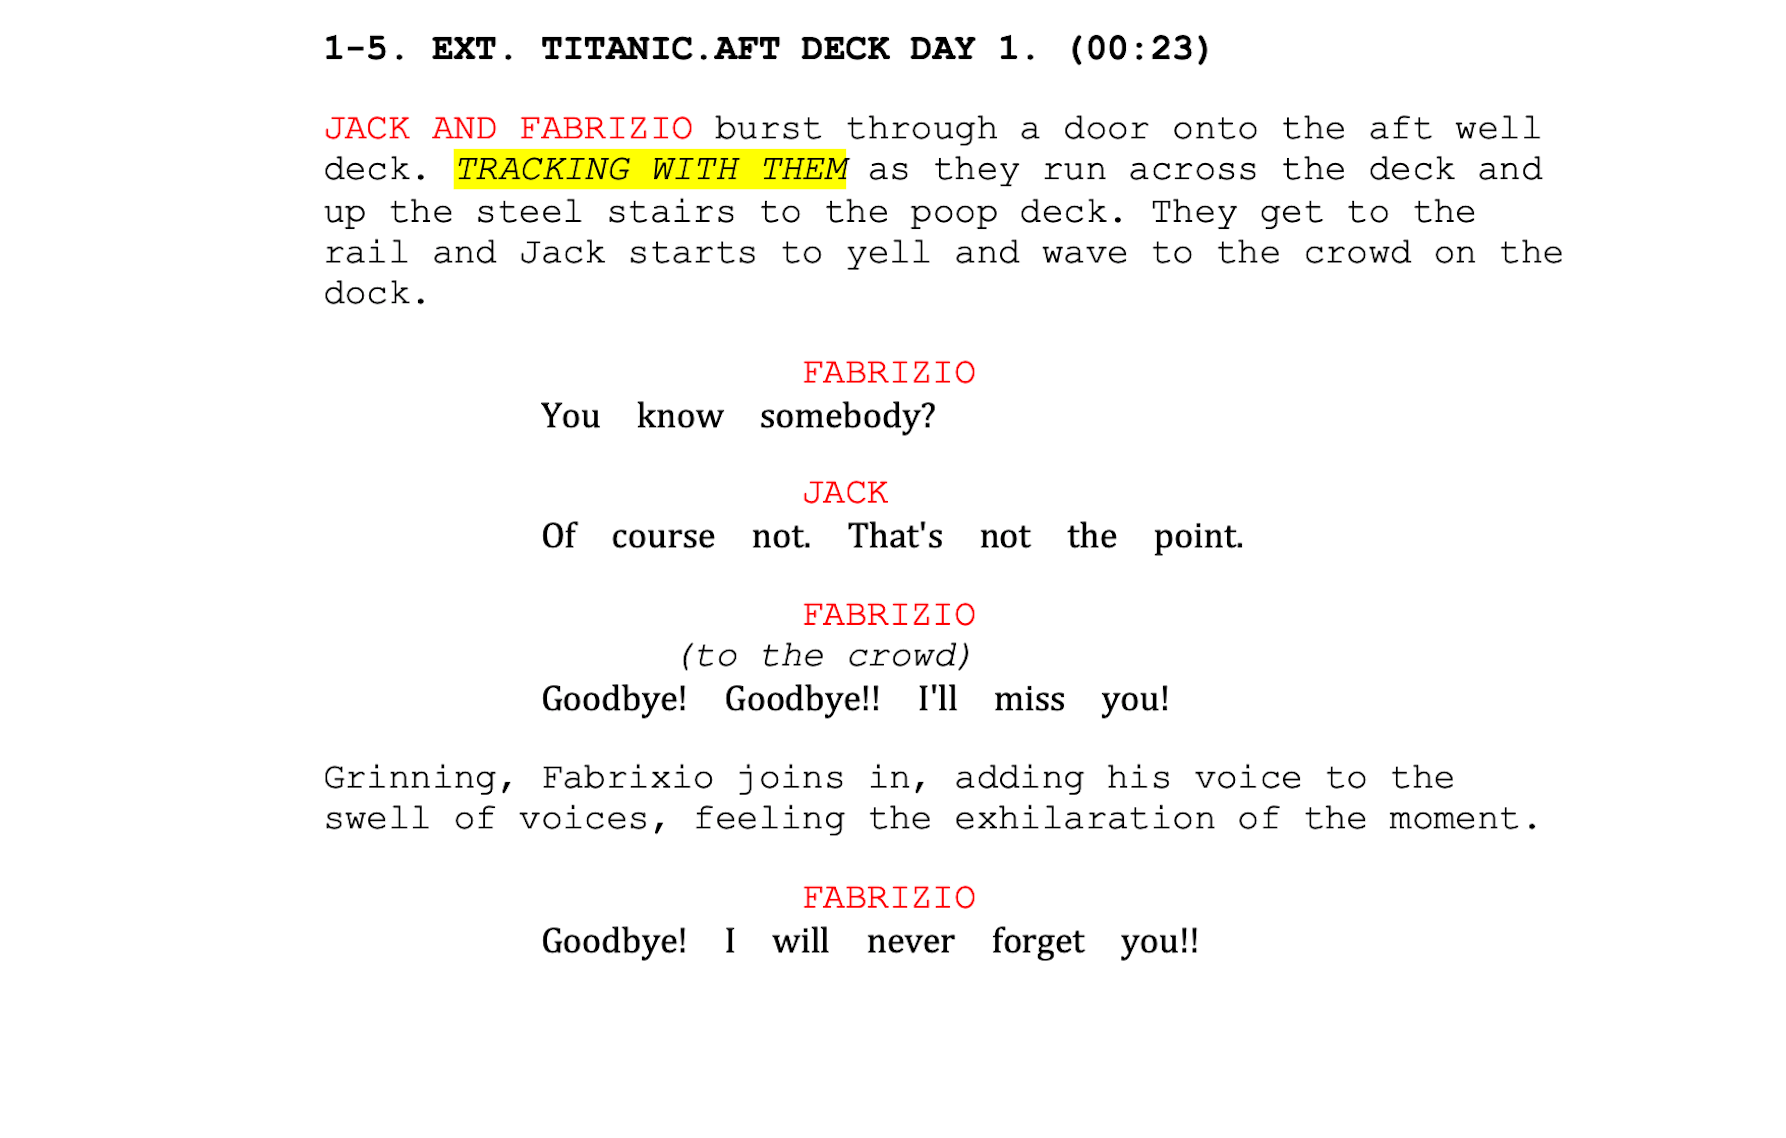
This is the script upon import:
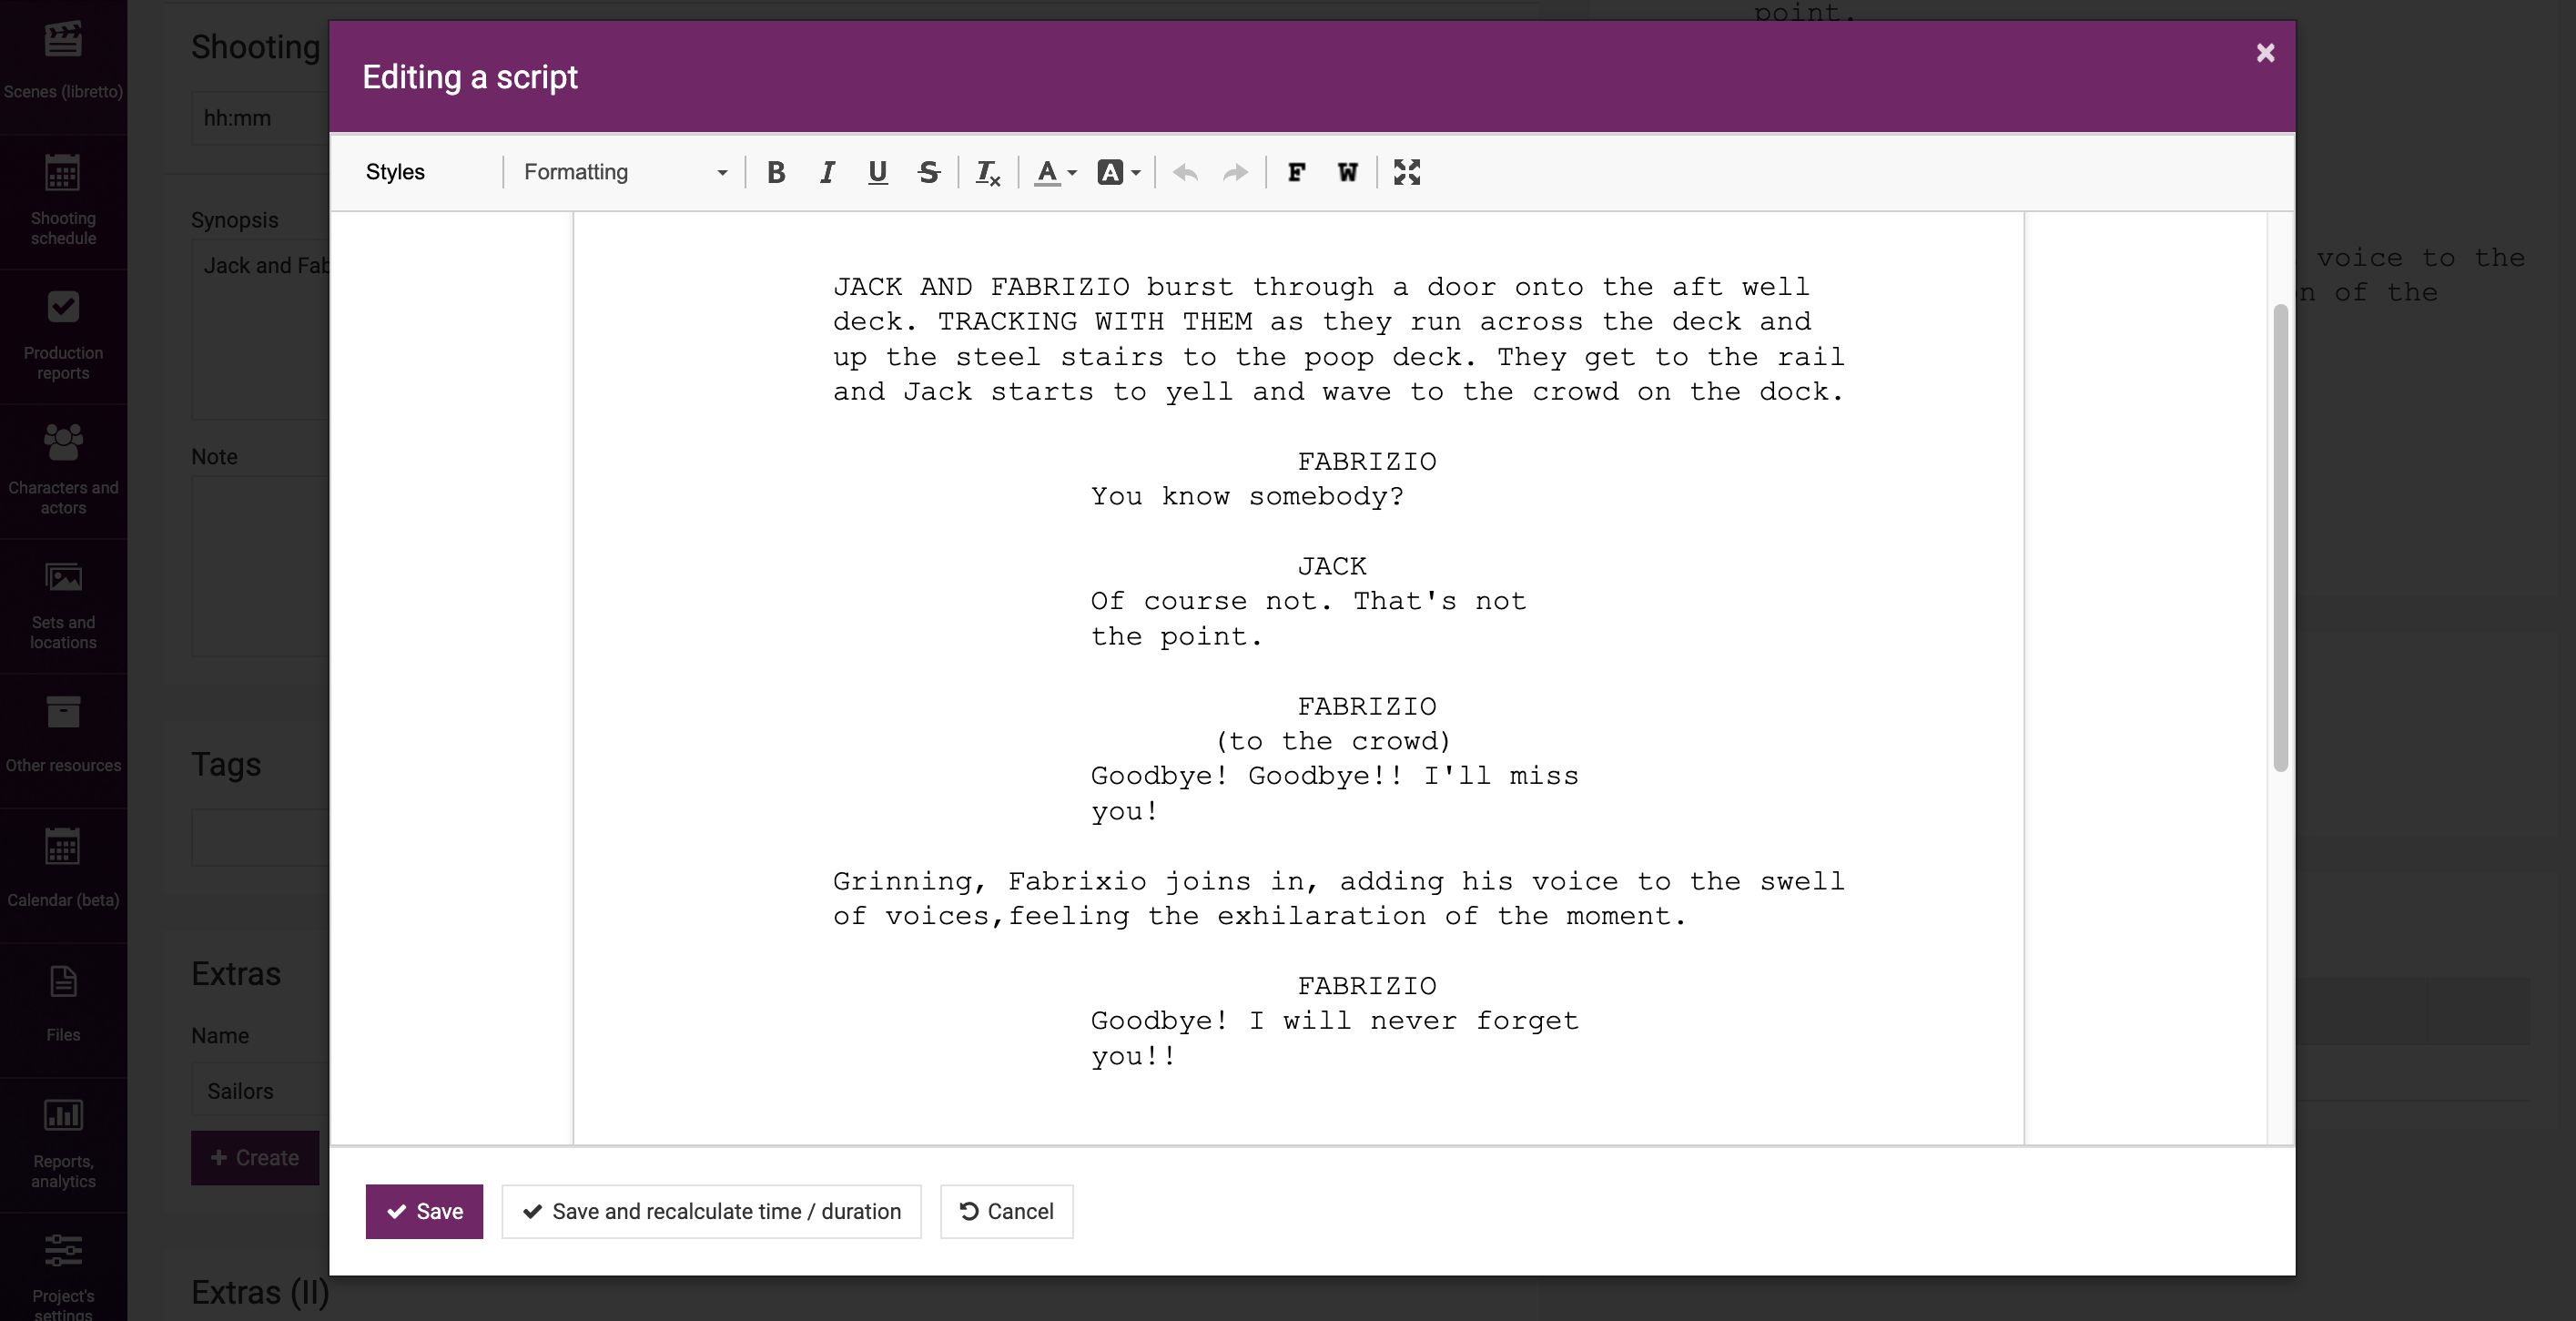
You can set the font color, background, font style (bold, italic, underlined) using the toolbar.
A more detailed review of requirements for the format of scene header in case of Word files is provided in a dedicated learning module.
As an illustration, we will try to import a script created in Final Draft software.
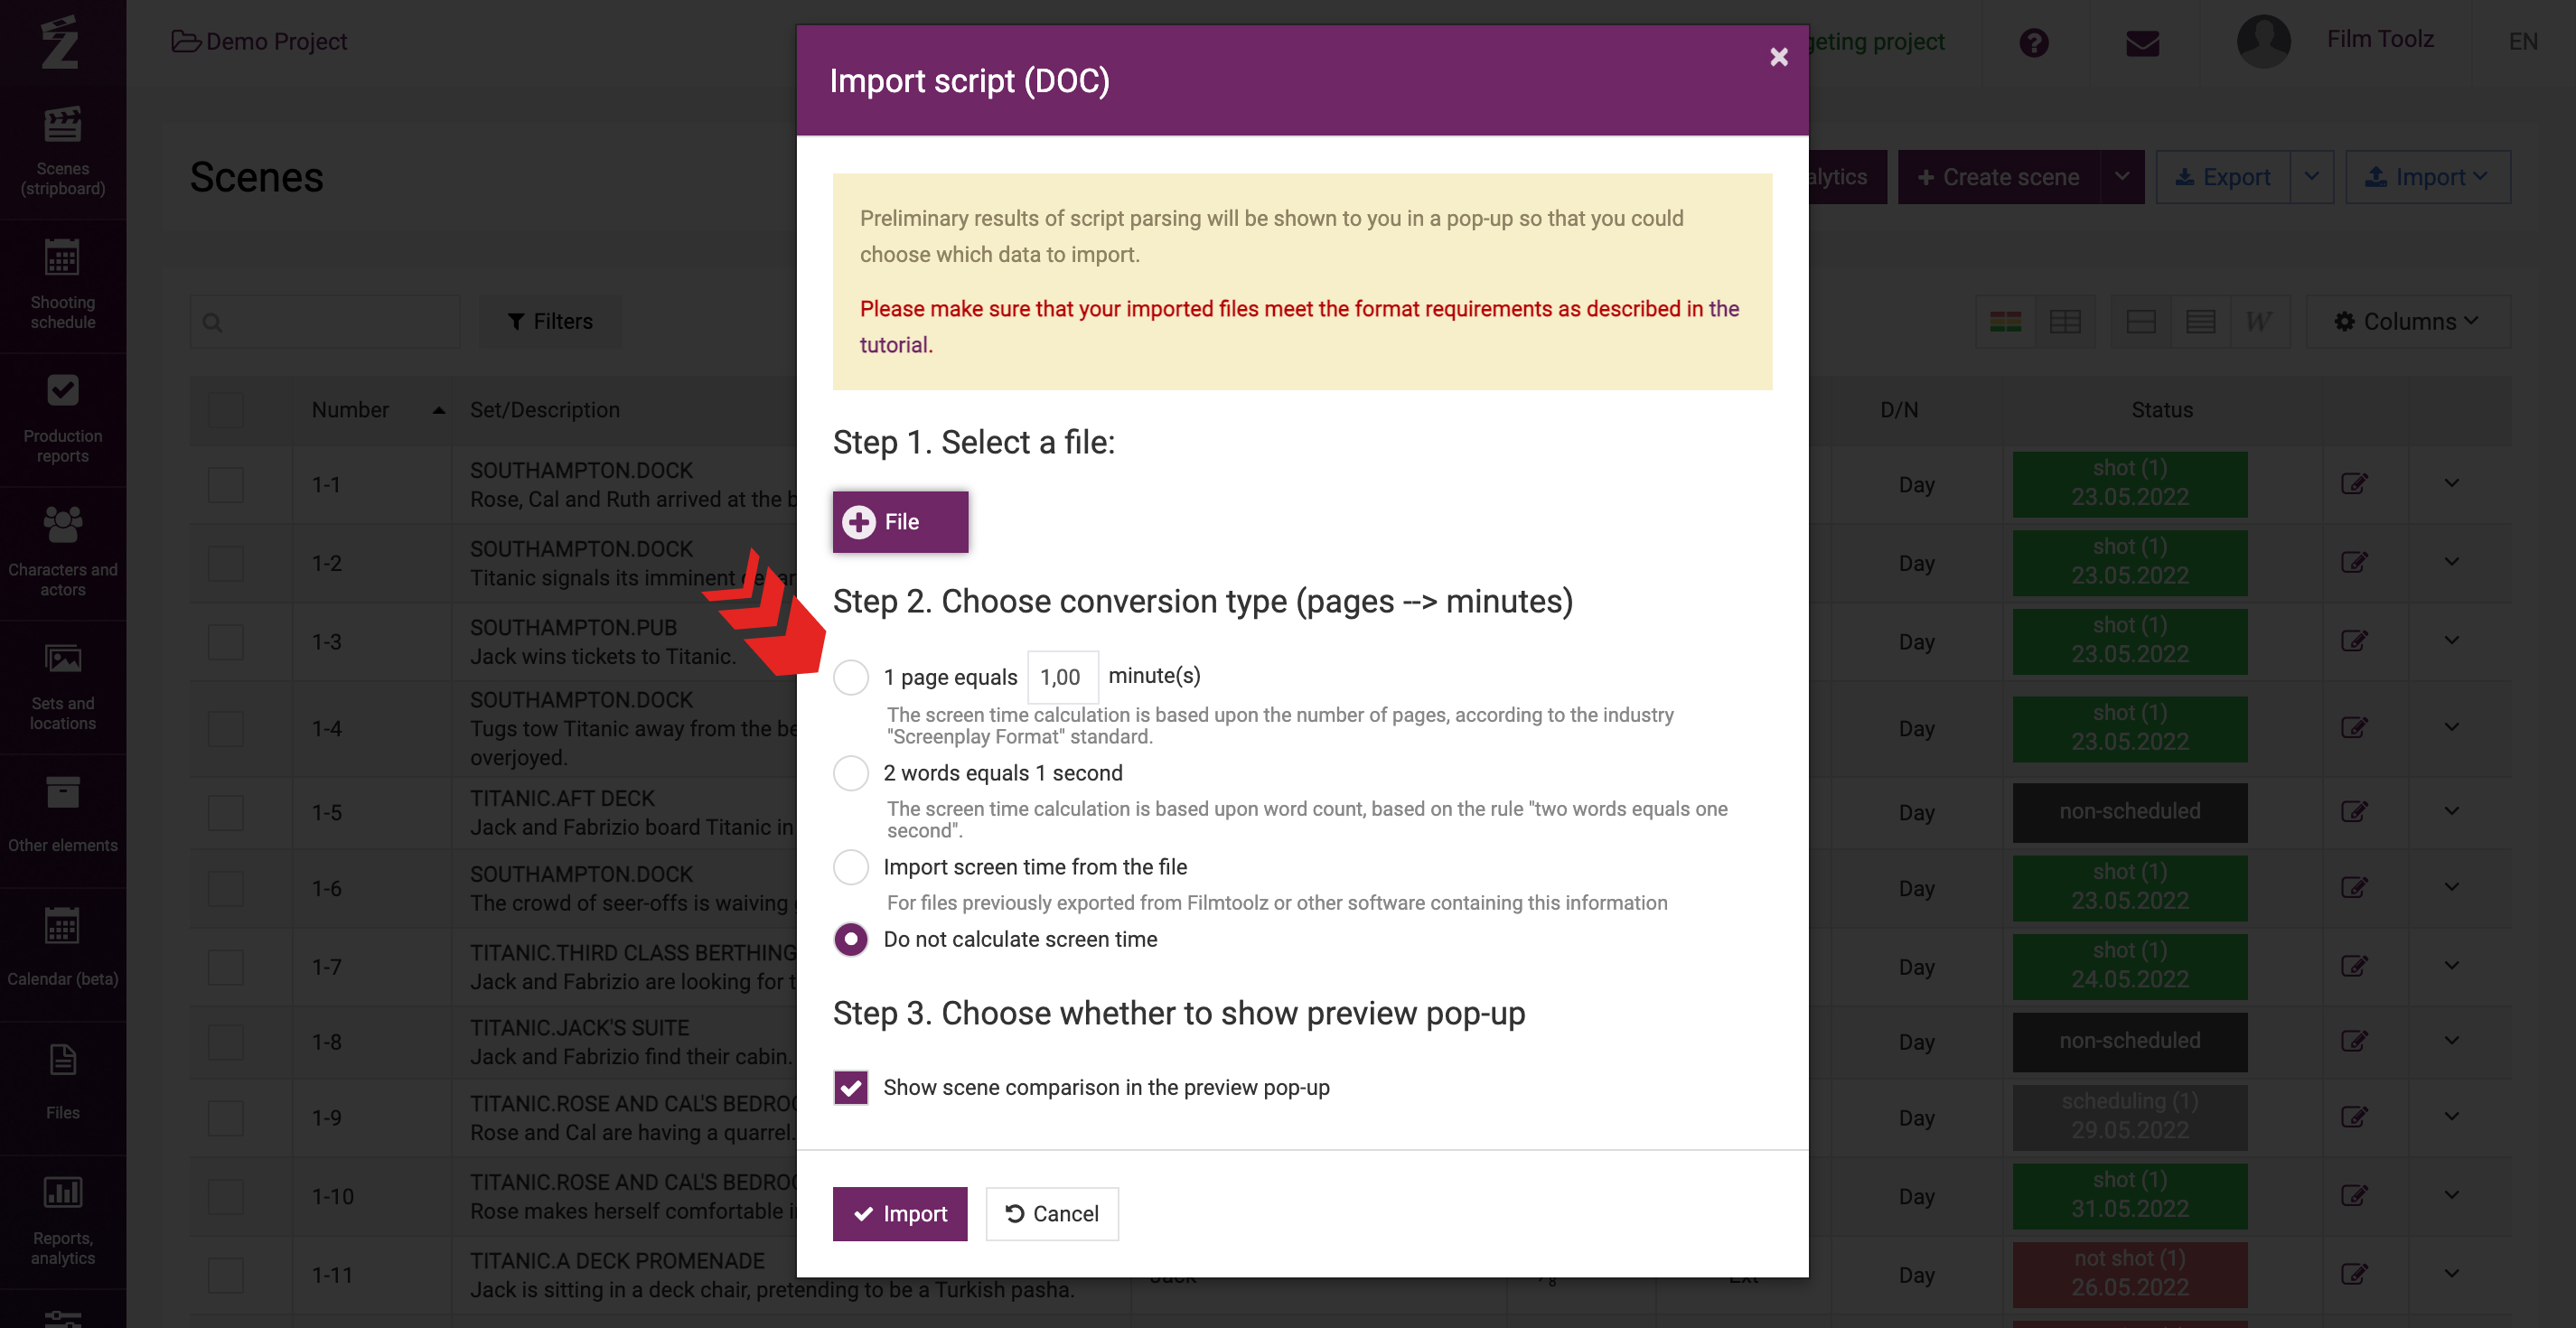
In the window displayed on the screen, click on “File” and select the file of the script on you PC. 
Then specify one of the methods to calculate the estimated screen time of the scenes:
- Calculate it based on the number of pages. You can set the calculation factor, however, by default, the most common calculation in the world is used according to the principle "1 page equals 1 minute of screen time".
- Calculate by words. In this case, the program will calculate the screen time on the basis of "2 words equals 1 second of screen time".
- Import screen time from a file, if it is specified in the name of the scenes or provided for by the scenario program format.
- Don't calculate screen time. In this case, the corresponding fields on the scenes page will remain blank.
Also, when importing a script, the program will automatically fill the screen time of the scenes calculated in the pages themselves, as is customary in the global film industry.
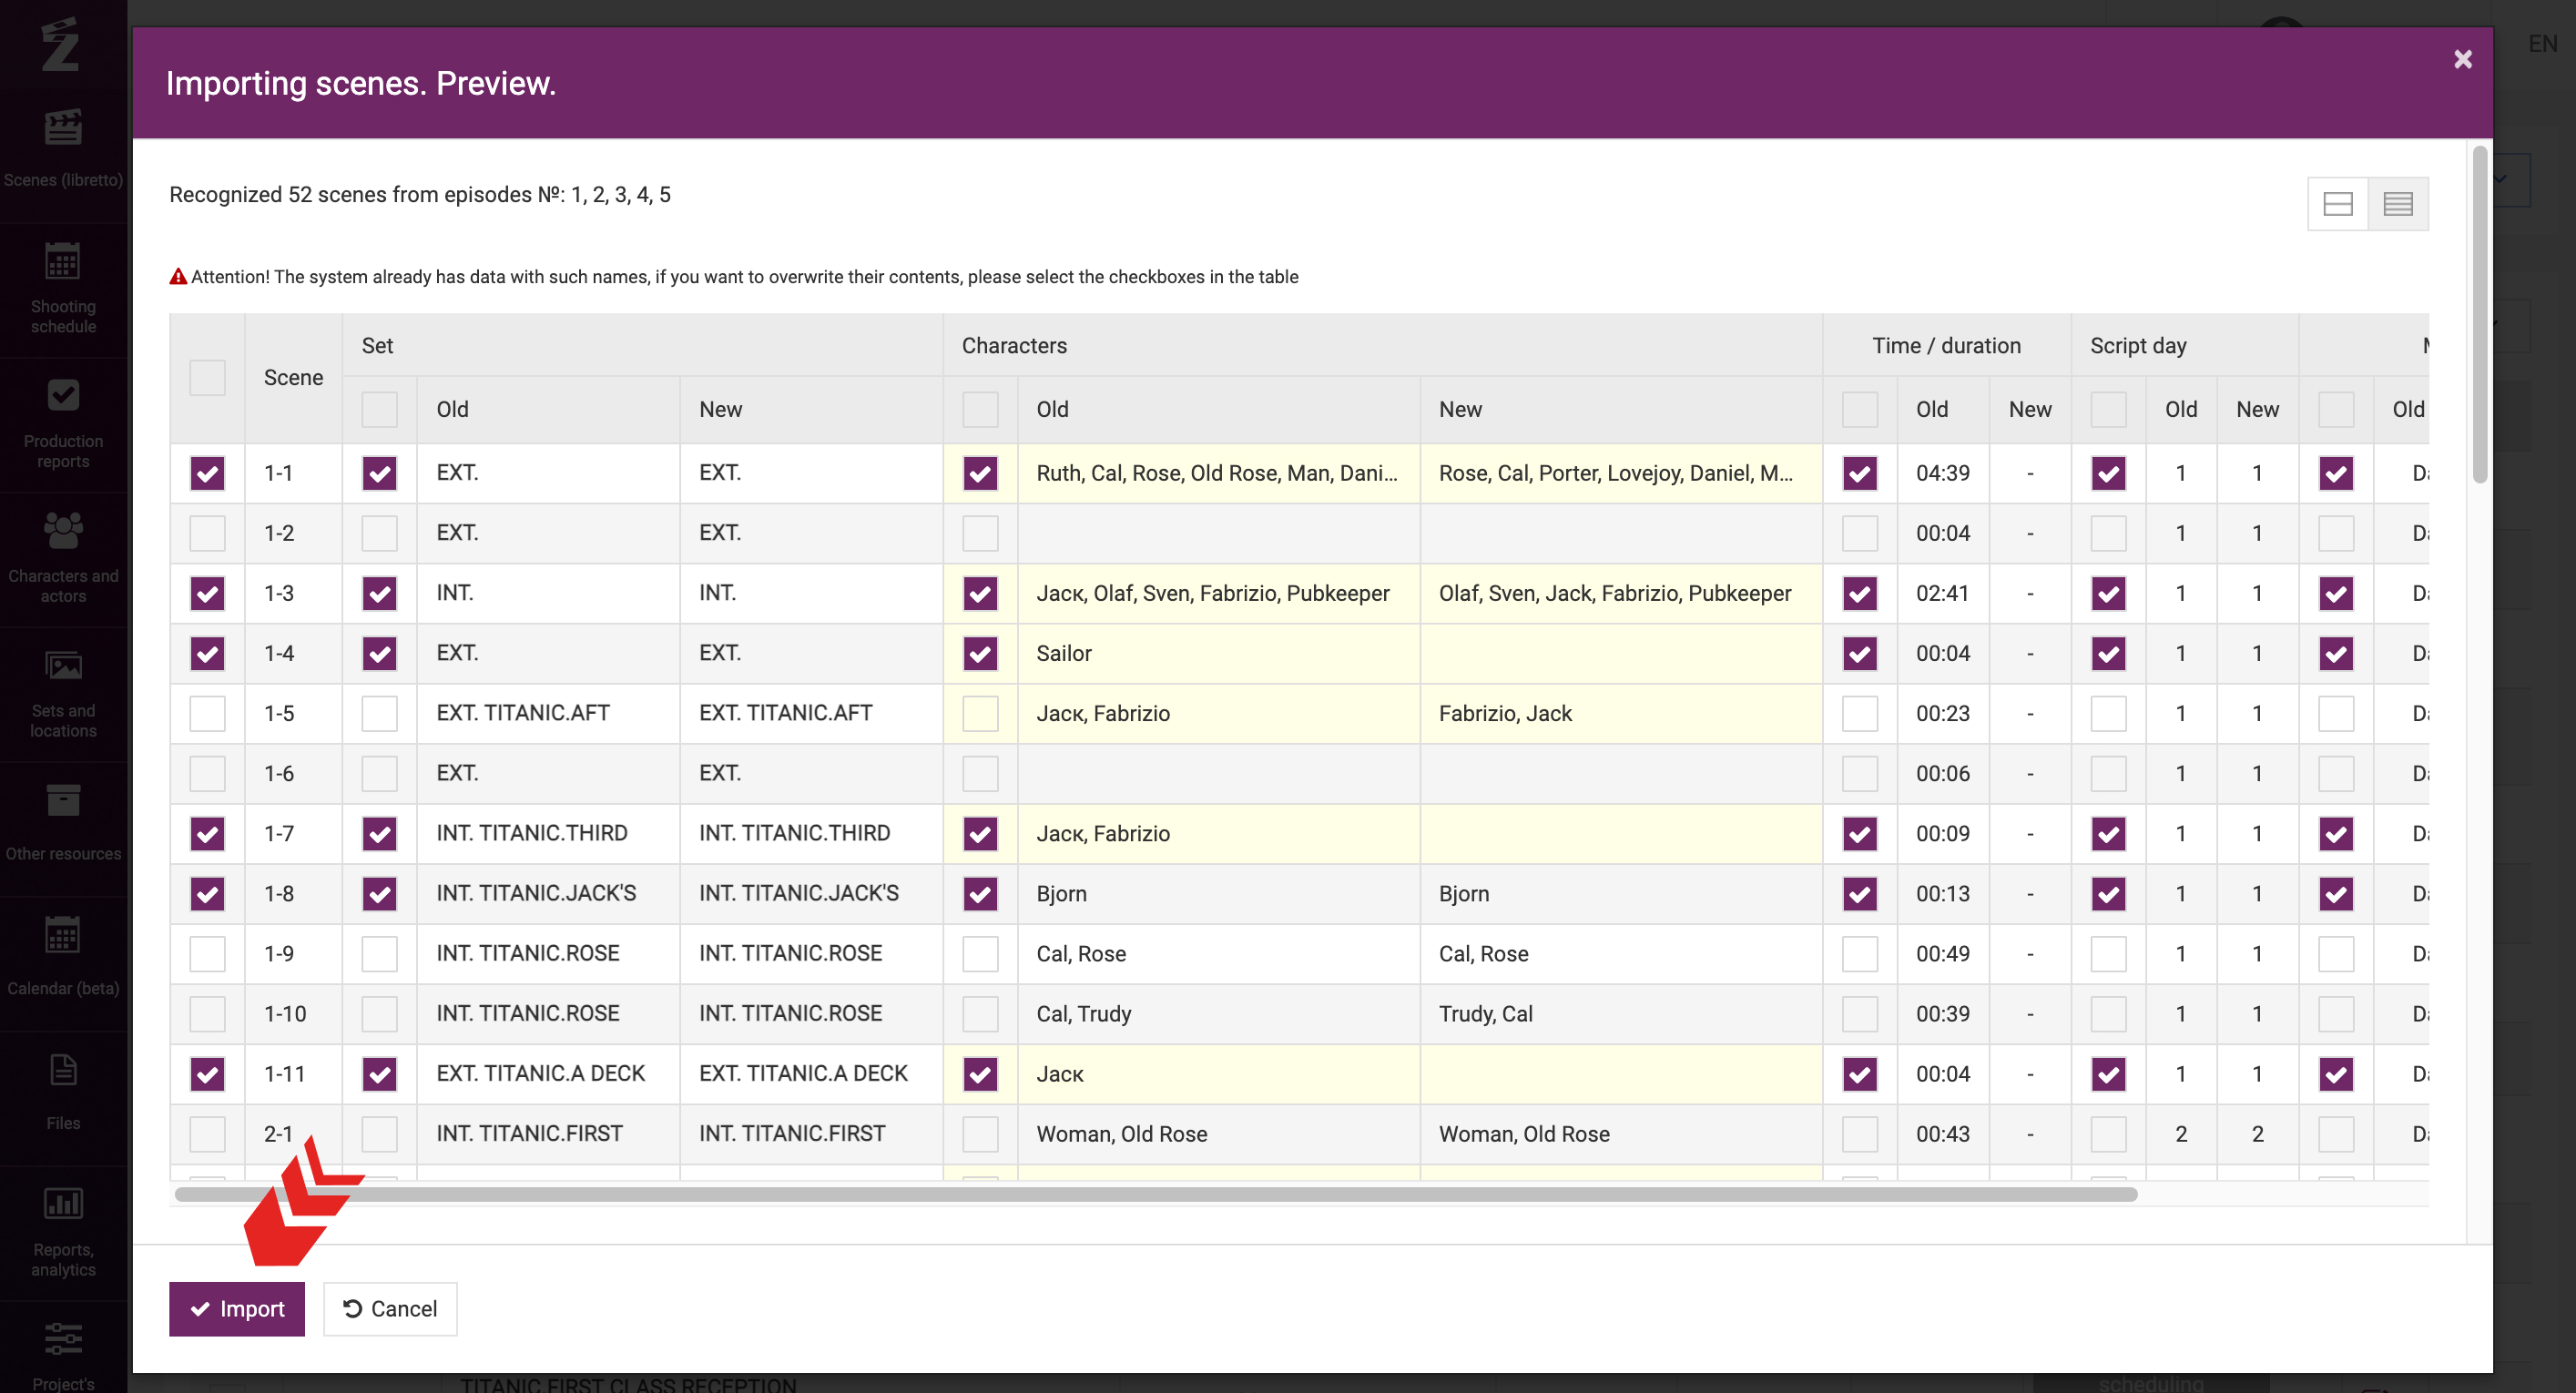
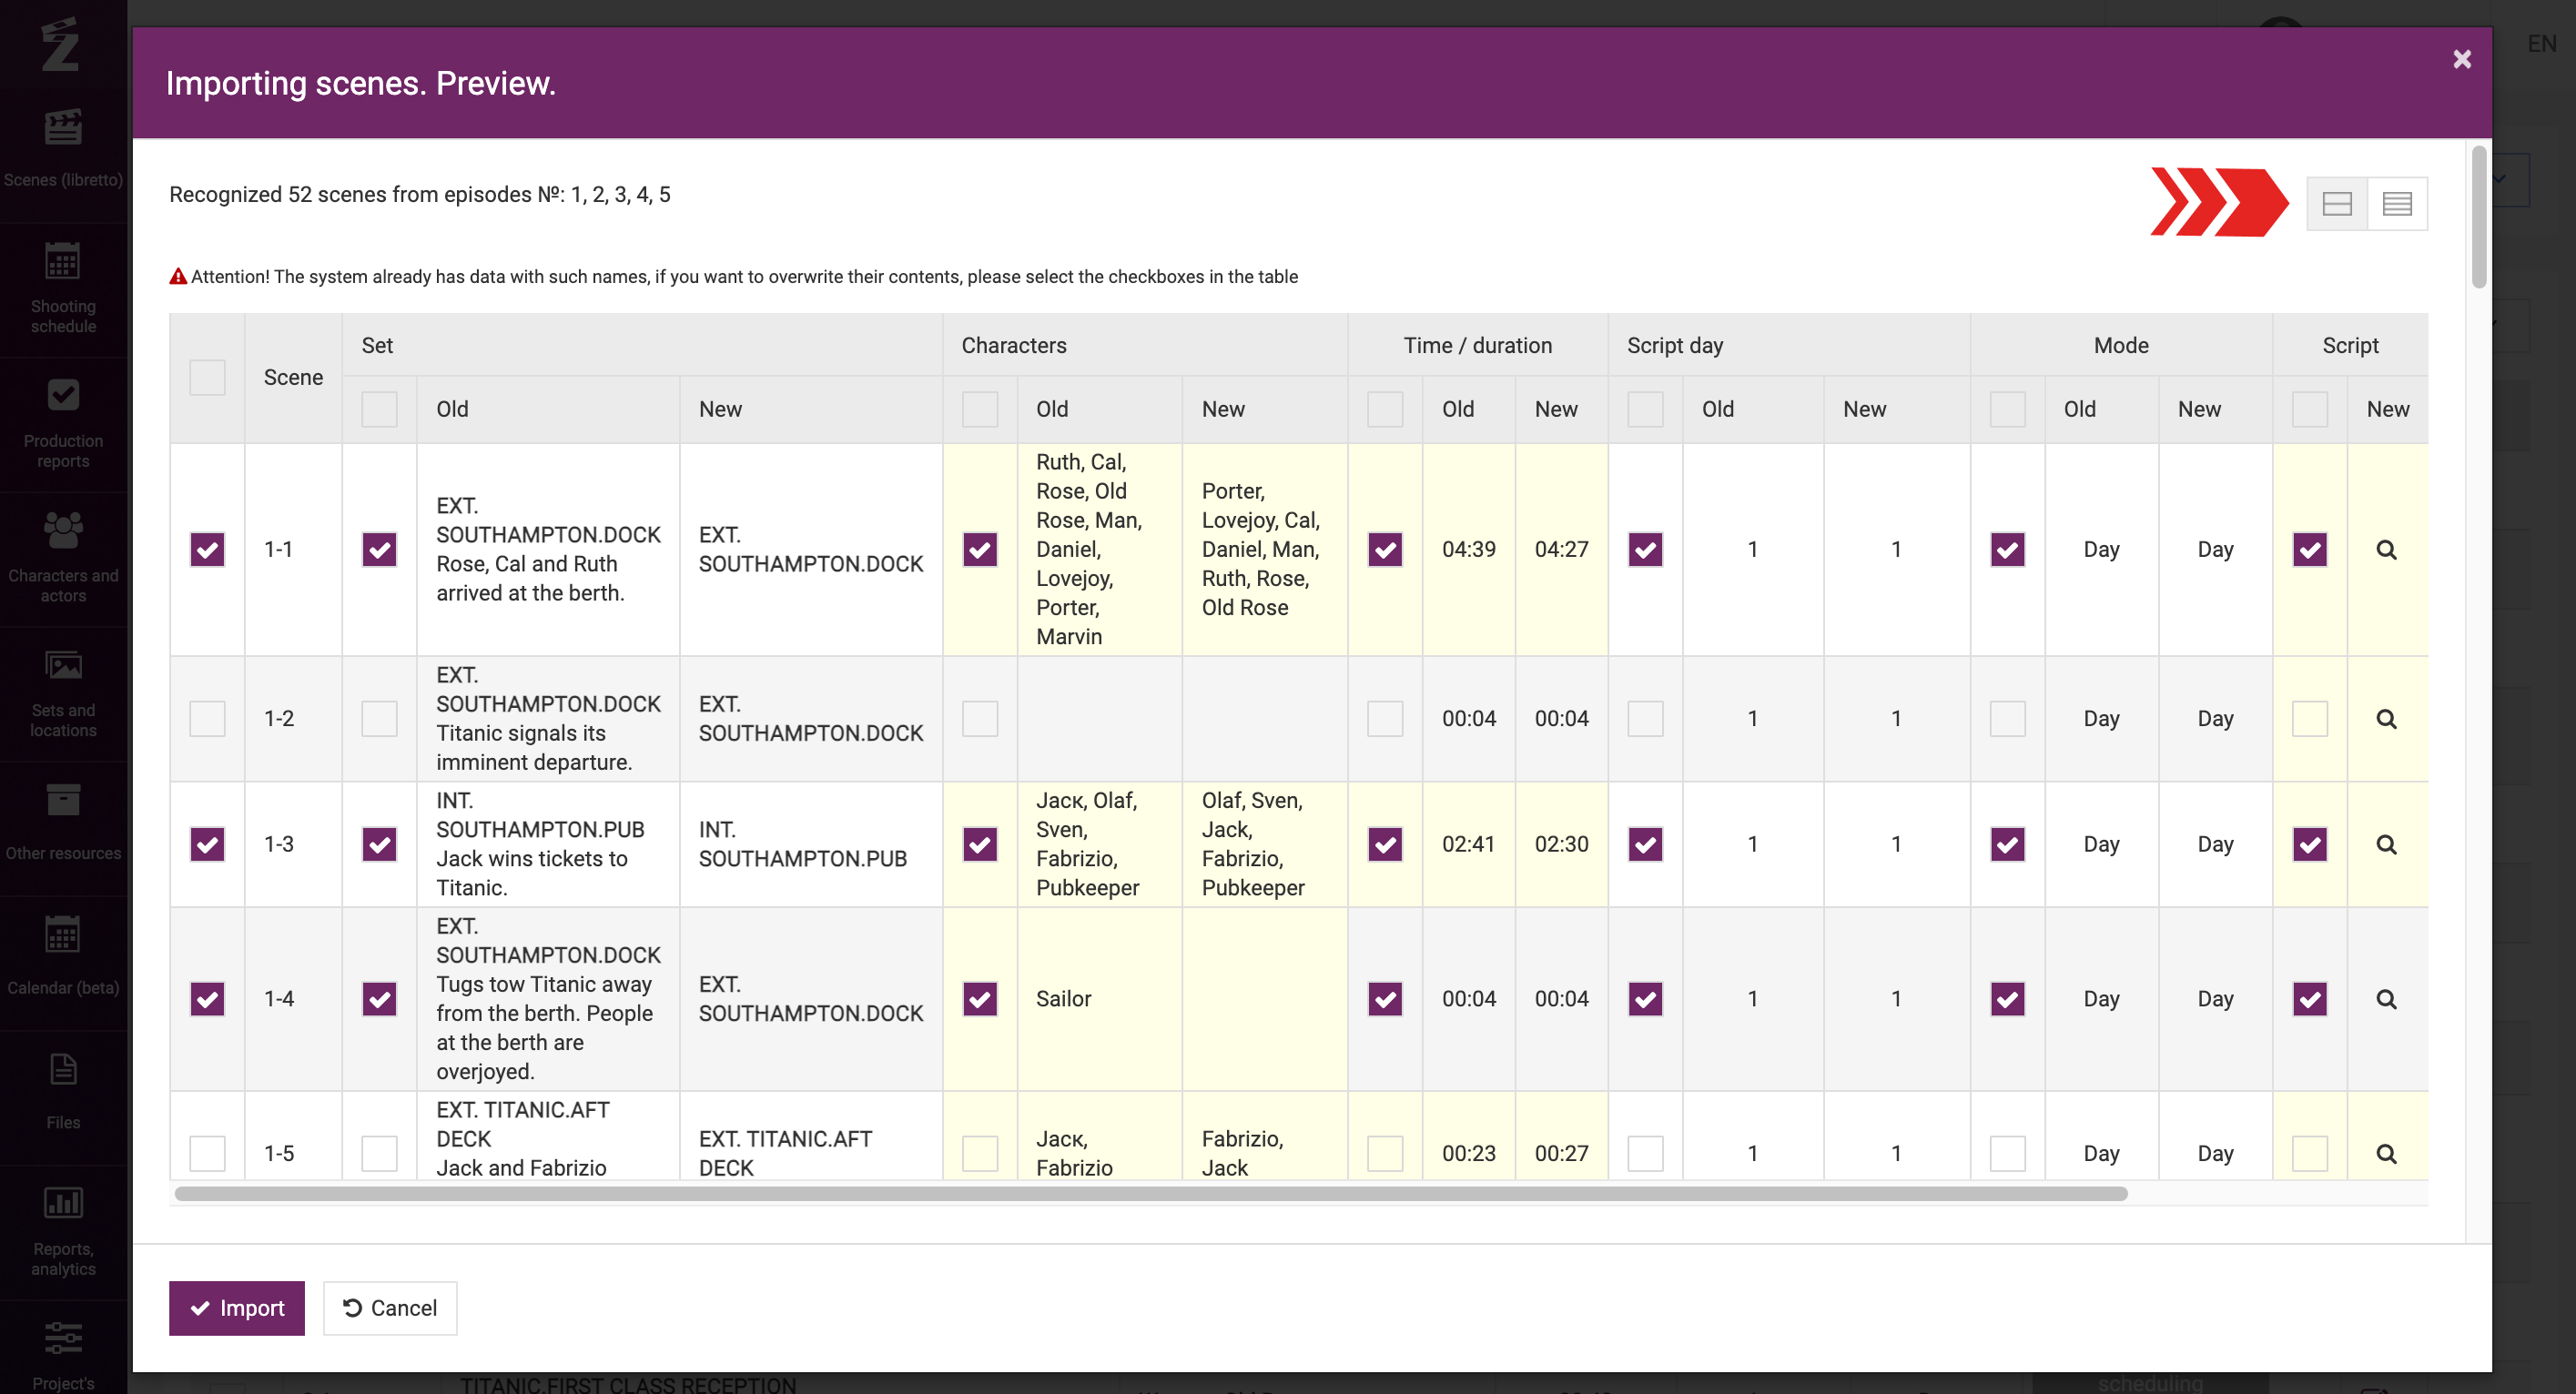
After you click on “Import”, the system will provide you with a preview of recognized elements:
- Scenes with indication of their numbers
- Sets
- Characters
And any other information specified in the script.
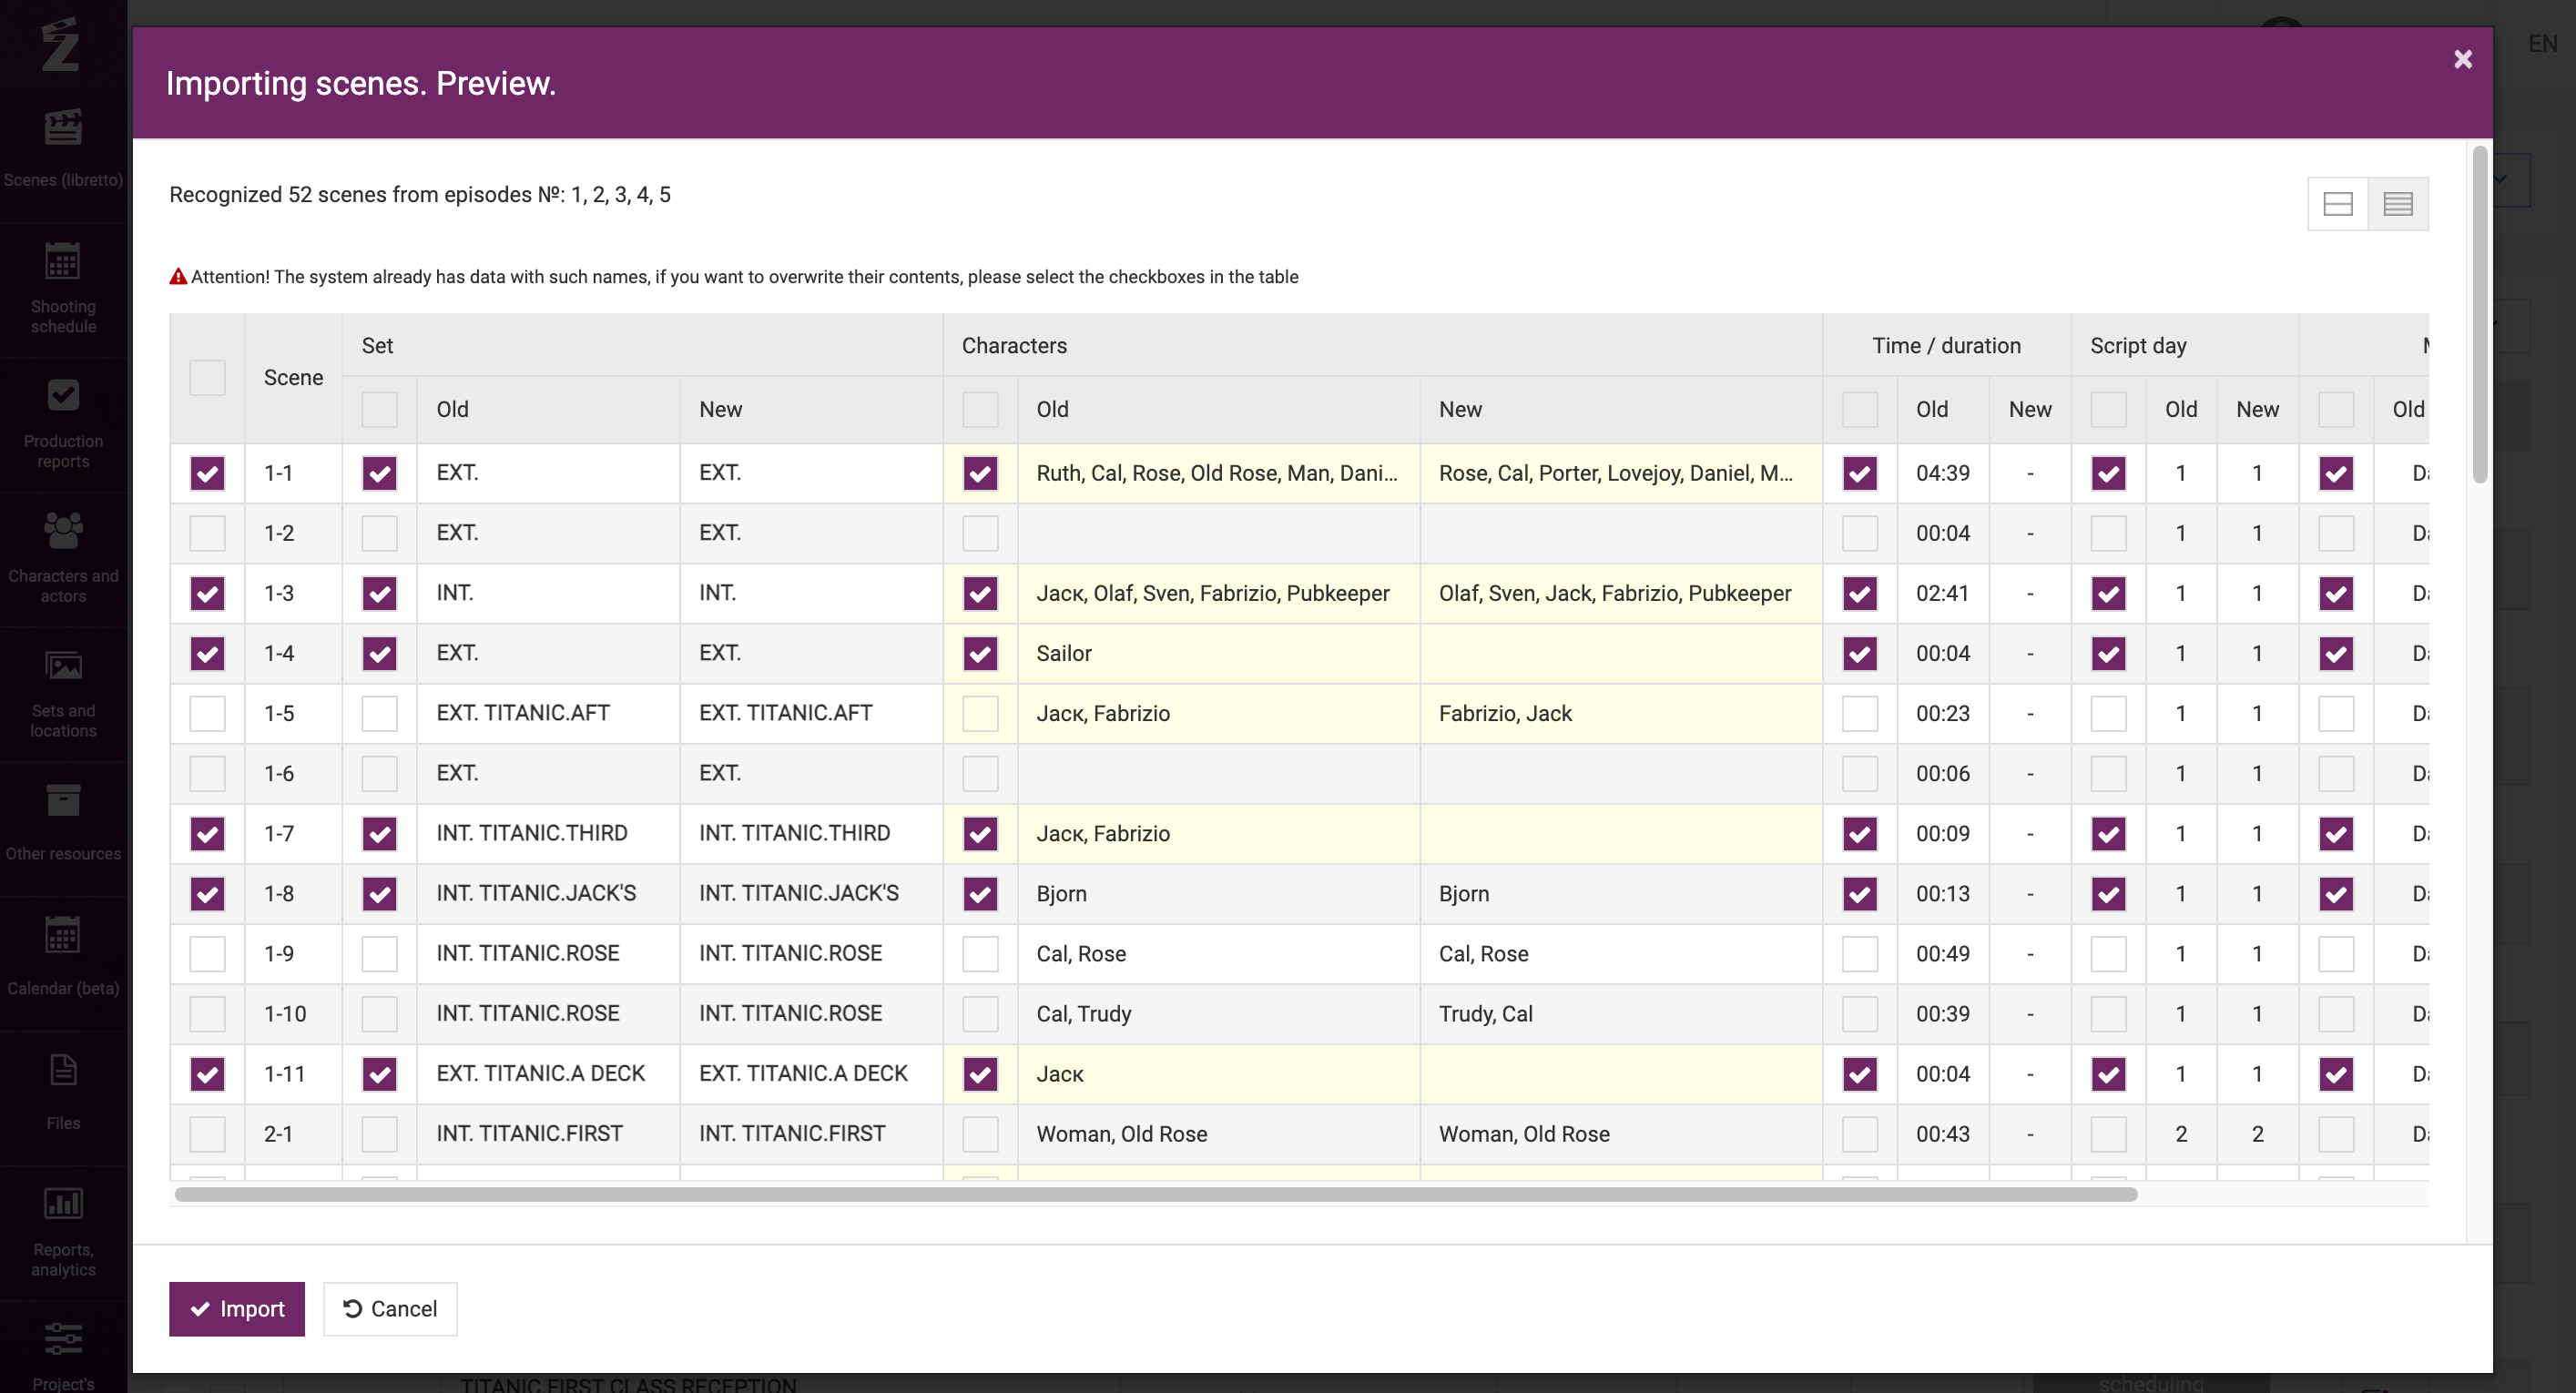
Please note that the information is displayed only for review at this time. No data will be added to the system until you confirm by clicking on “Import”.
You may tick the scenes or elements that you want to update. The elements differing from those that already exist in the project will be highlighted in yellow.
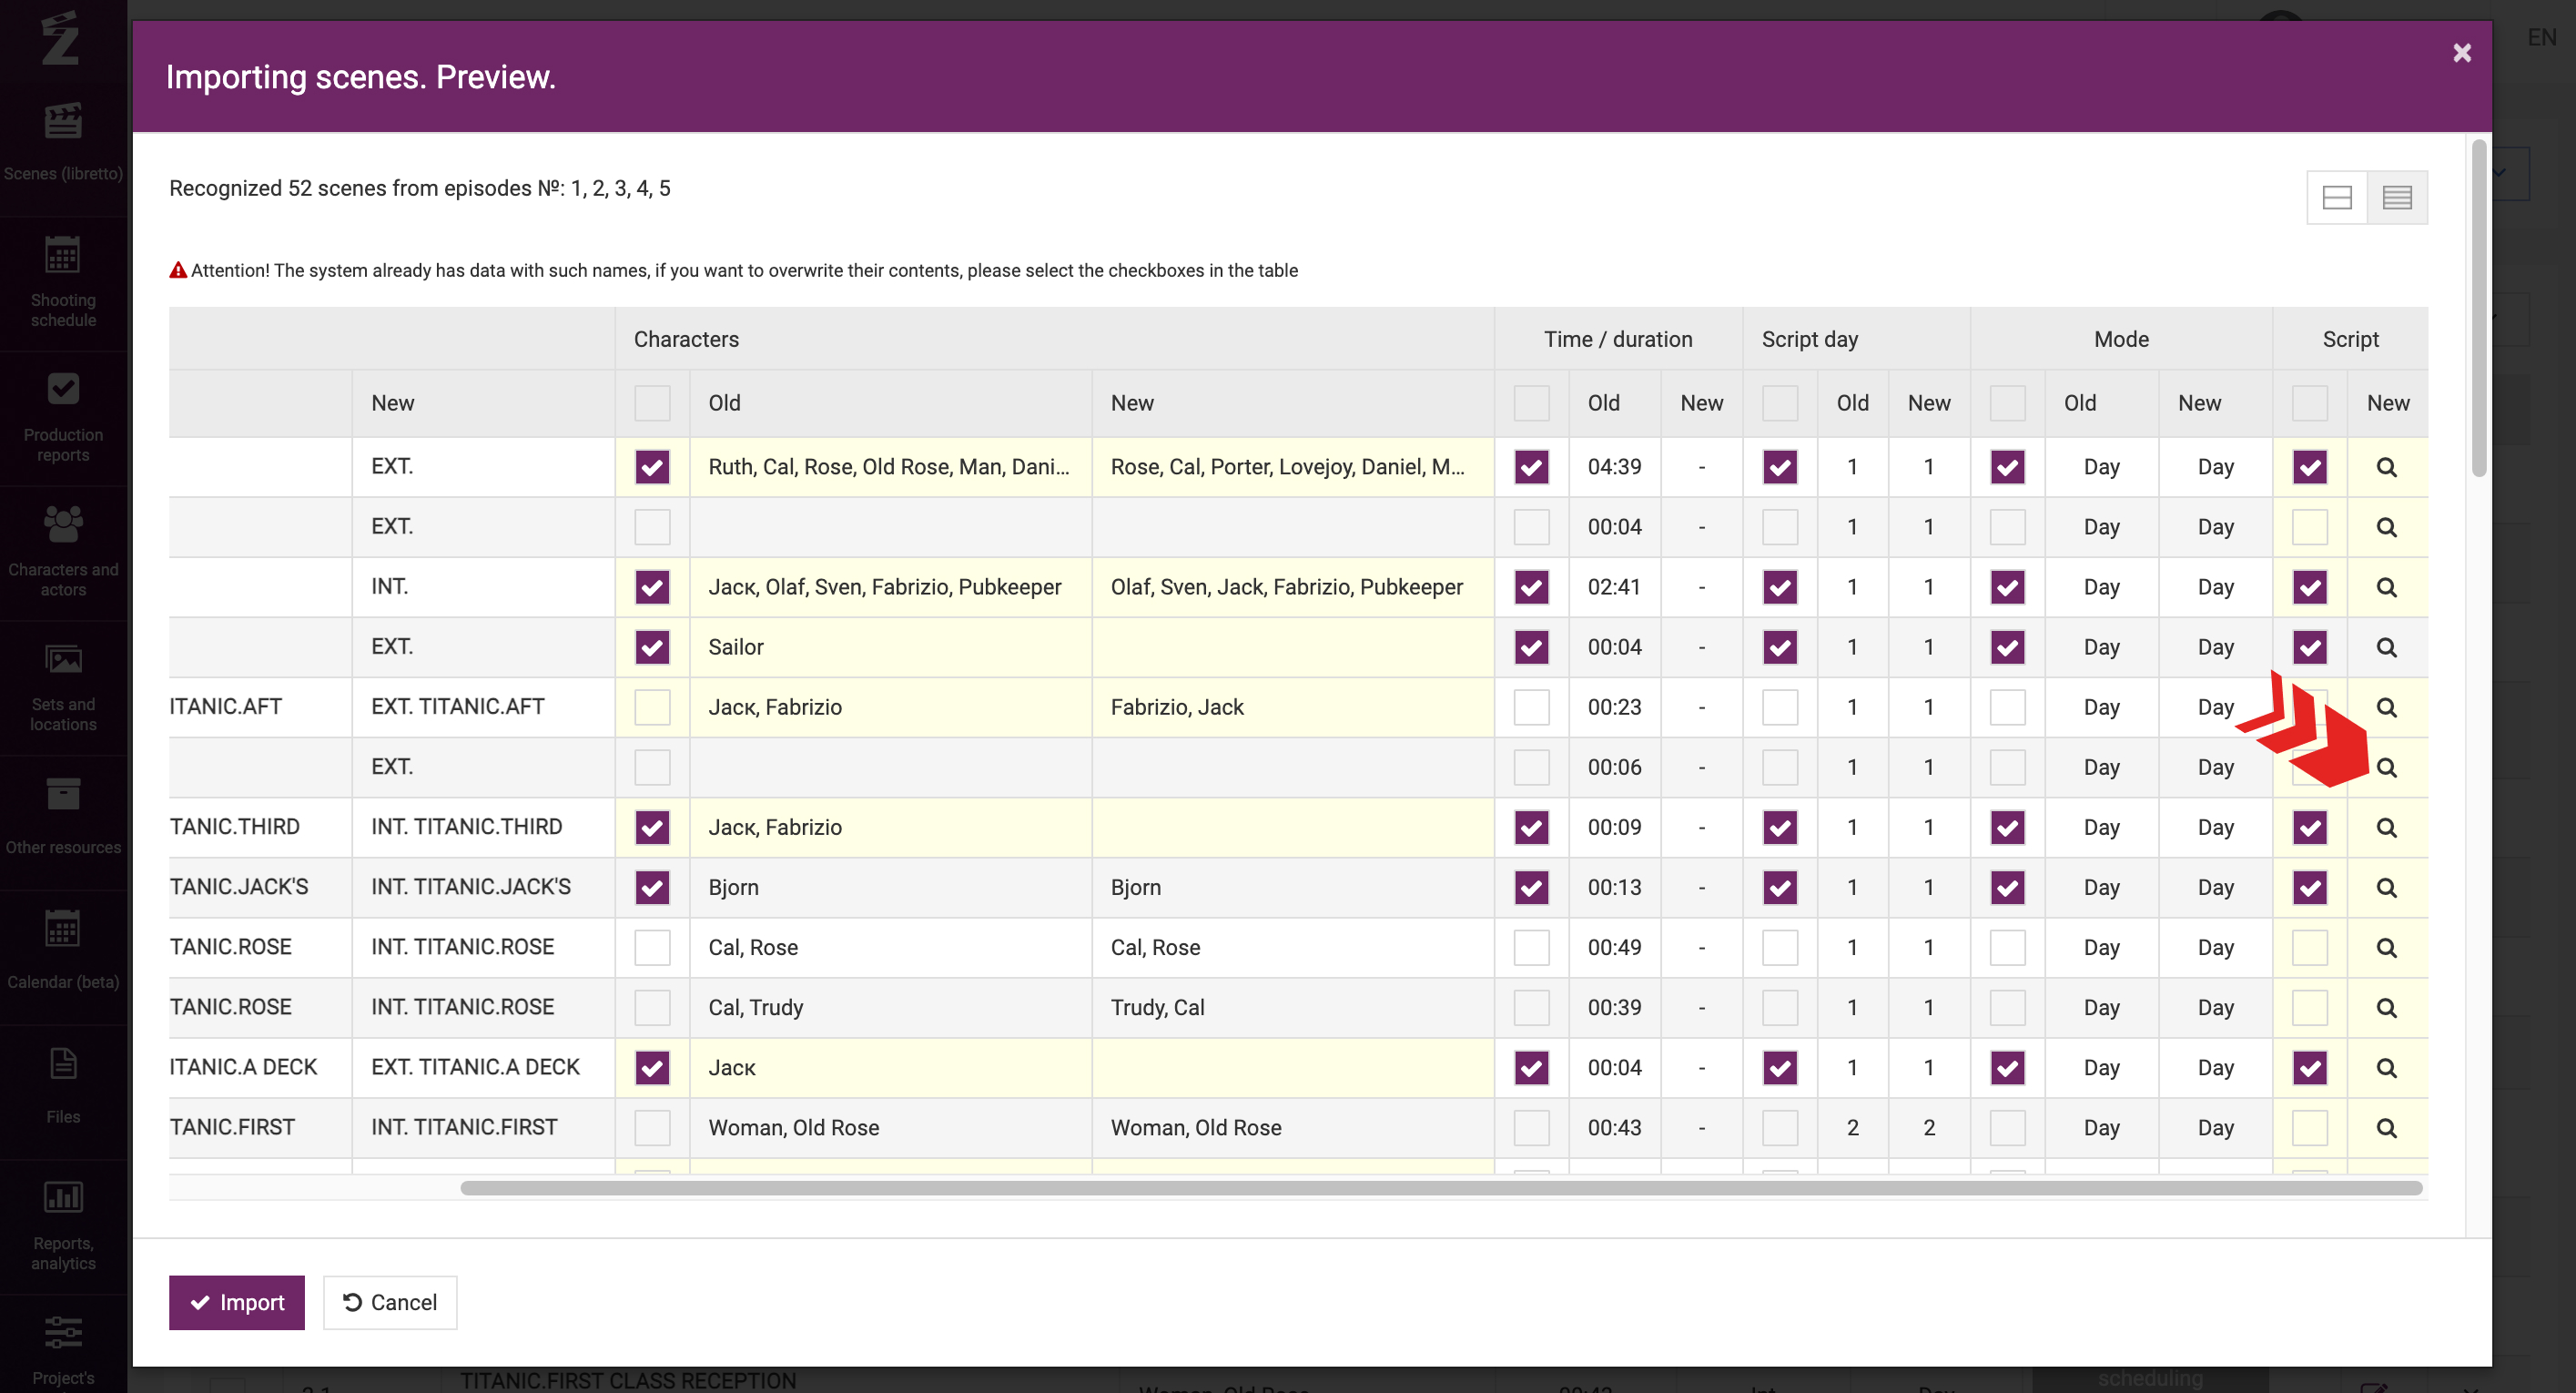
You may also use the zoom feature in the right-hand corner to review the script before and after the import.
To go back to the import window, click on “Close”.
Alongside with the scenes, the preview table displays the list of sets and characters to be created by the system following the upload. If the project already has sets/characters with the same names, then the system will attach the imported scenes to them.
In order to avoid duplication of any sets, please pay attention to the spelling of their names. The use of upper-case, lower-case, and Latin letters, spaces or periods in the names may result in the creation of sets with almost identical spelling, which will be treated by the system as different sets, which in turn will result in duplication of data and erroneous data in project reports and analytics.
If you wish to do so, you can switch to enhanced view in order to increase the size of the rows.
If you dislike the data comparison view or find it unnecessary, you can disable it when uploading the file. To do so, untick the box for “Show scene comparison in preview pop up” in the upload window.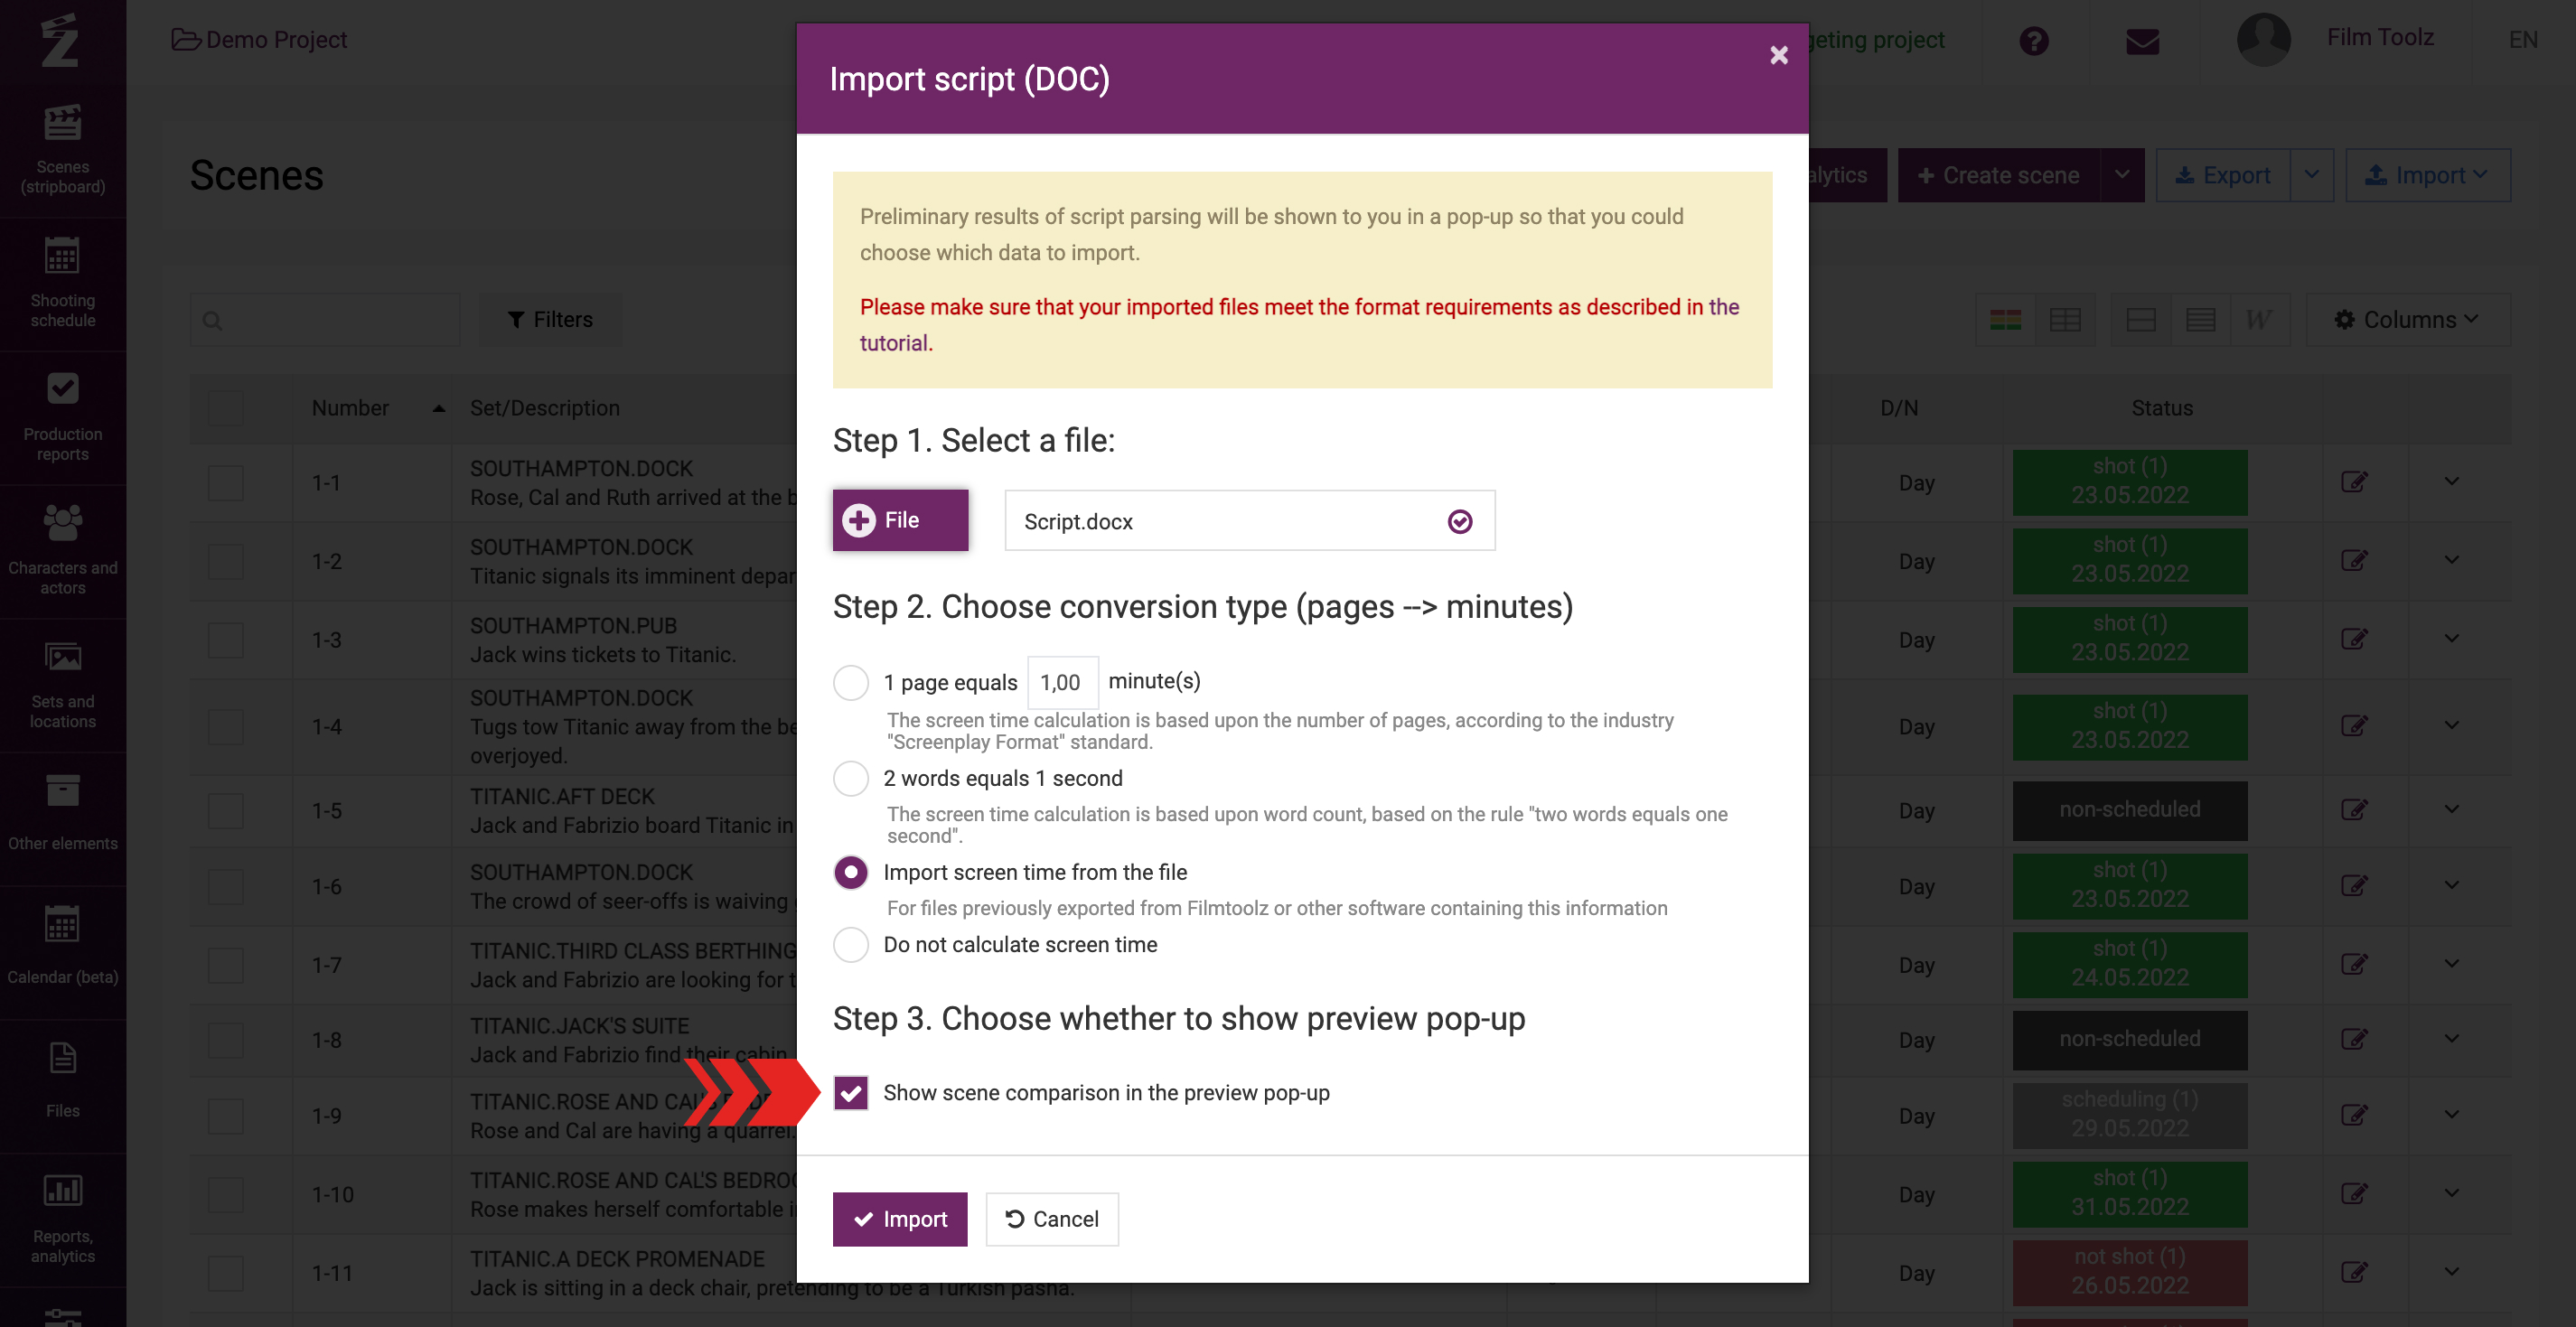
You will see a similar table, but it will display no comparison.
If the number of a scene from the file is identical to the number of a scene that already exists in your project, the system will display a red warning sign (triangular-shaped) above the table.
If the file contains any formatting errors, then the row of the error-containing scene will display an exclamation mark, and you will be unable to import this scene.

After all the aforementioned data are duly verified, you can import the file to the system by clicking on “Import”.