Обучение
Shooting Day Elements
FilmToolz divides all elements (element categories) into two basic types: scene-by-scene and shooting day elements.
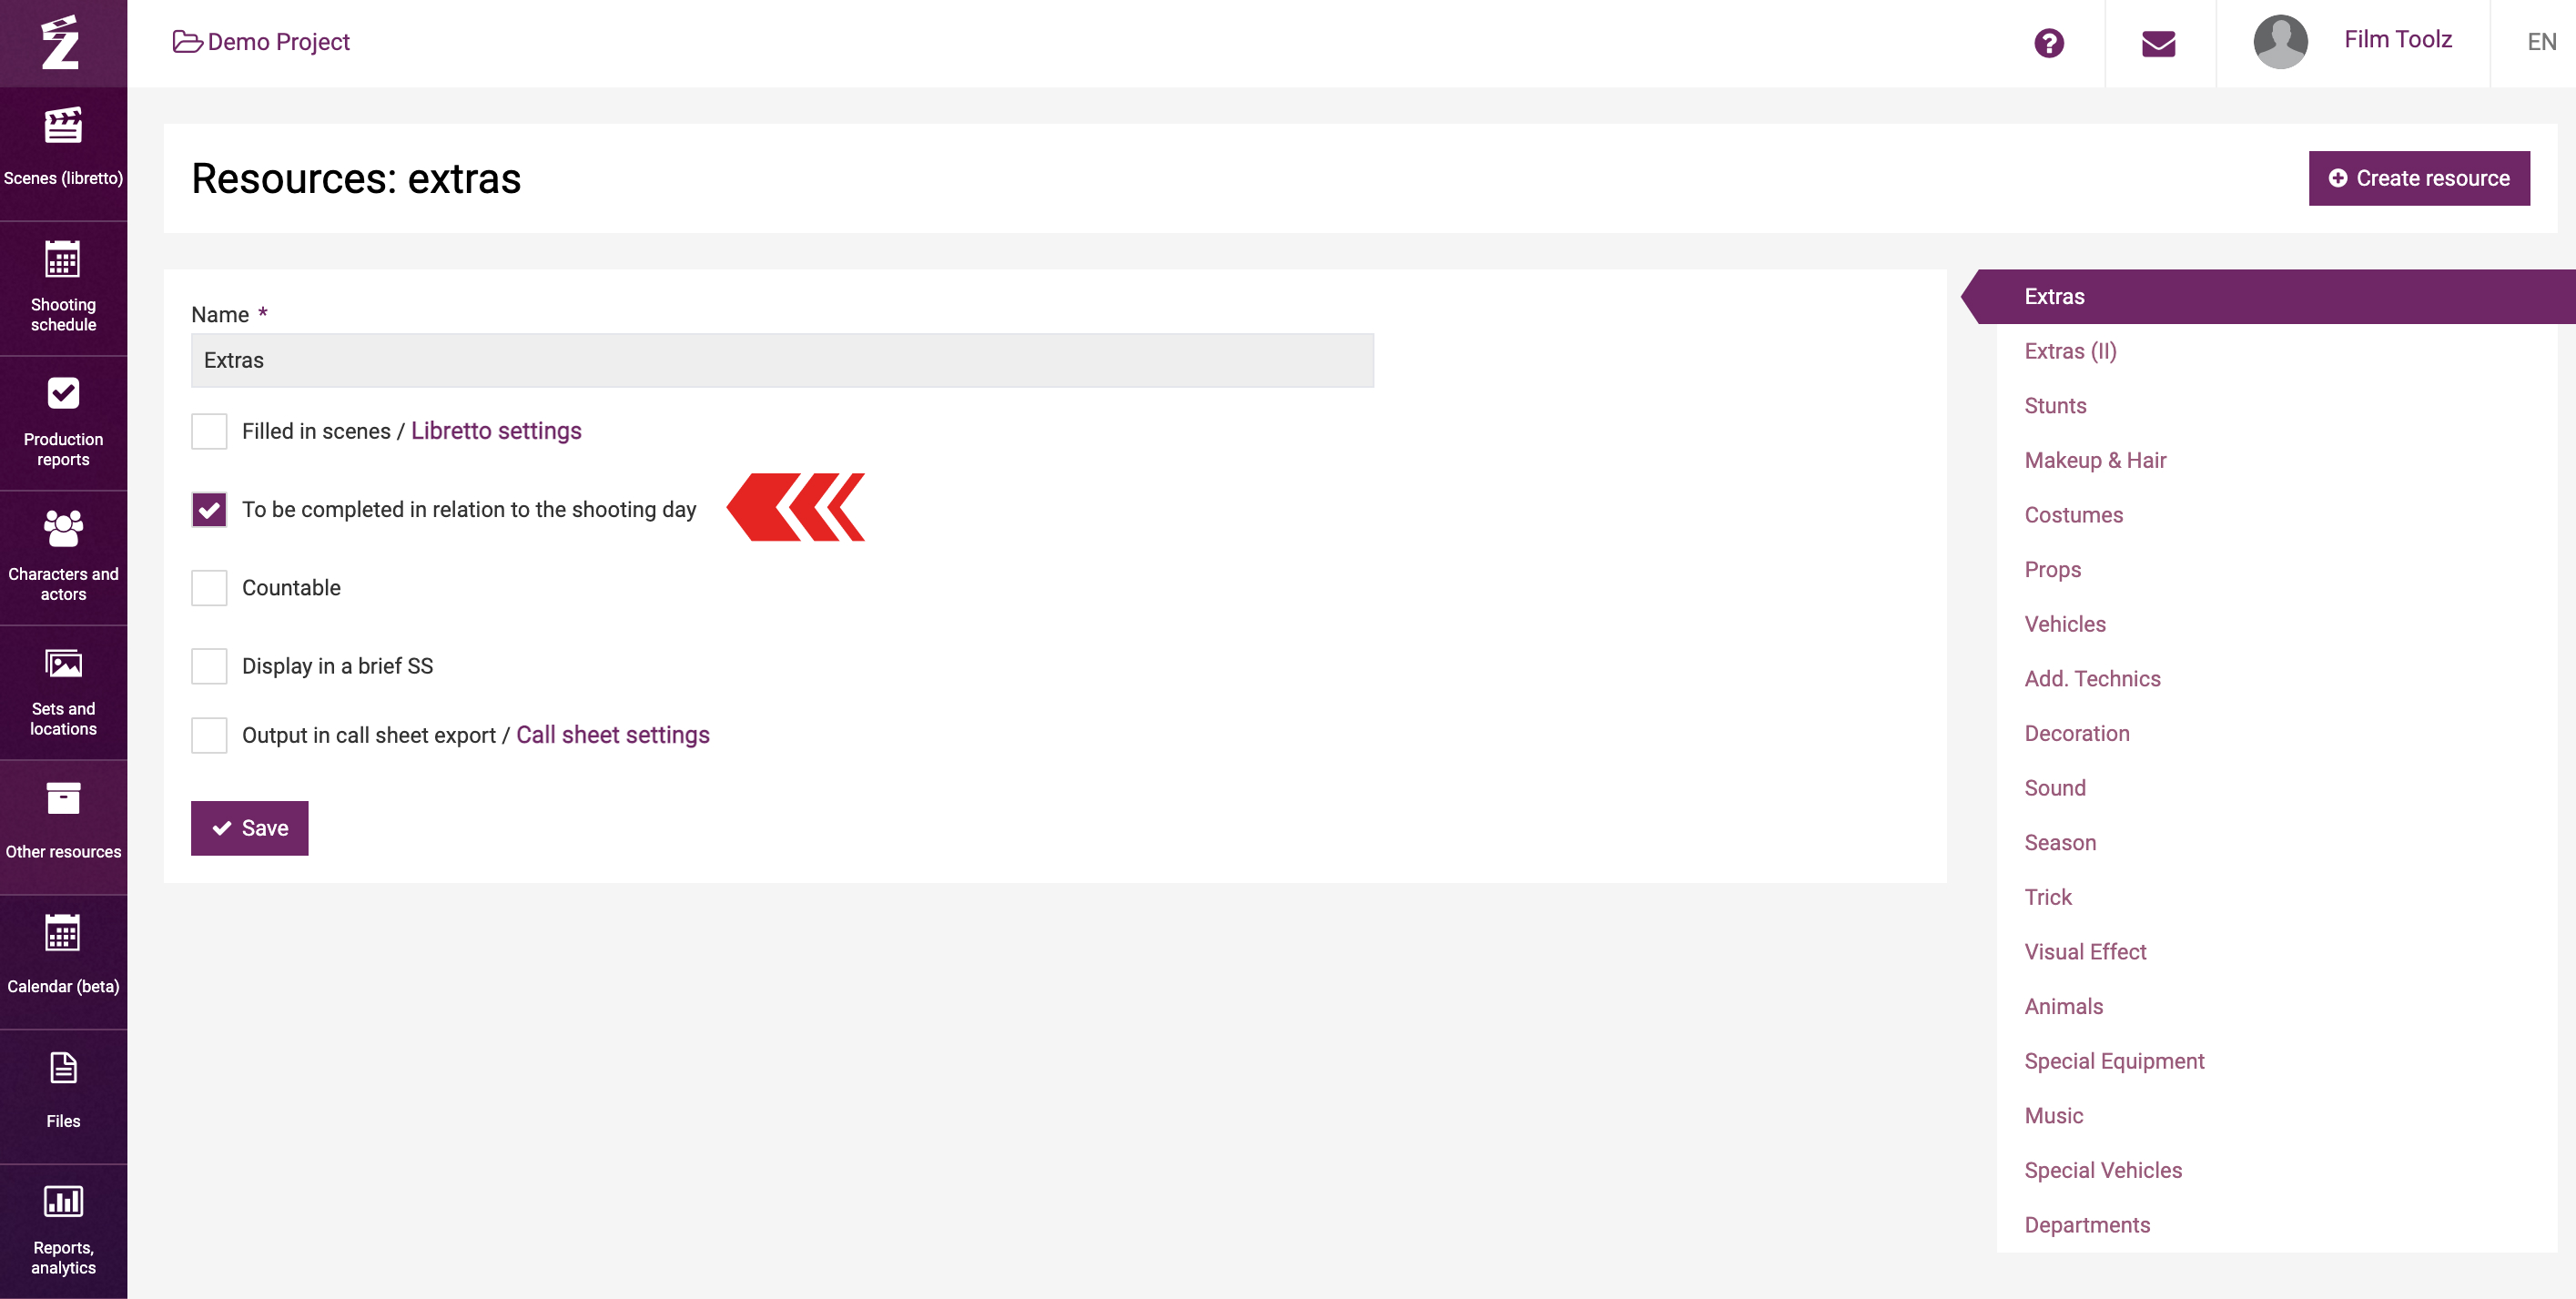
Scene-by-scene elements are the elements with the attribute “Scenes elements” ticked in the settings. These elements (e.g., “props”, “costume”, etc.) will be attached to certain scenes and displayed in the call sheets only on the days when the scenes employing these elements are being shot.
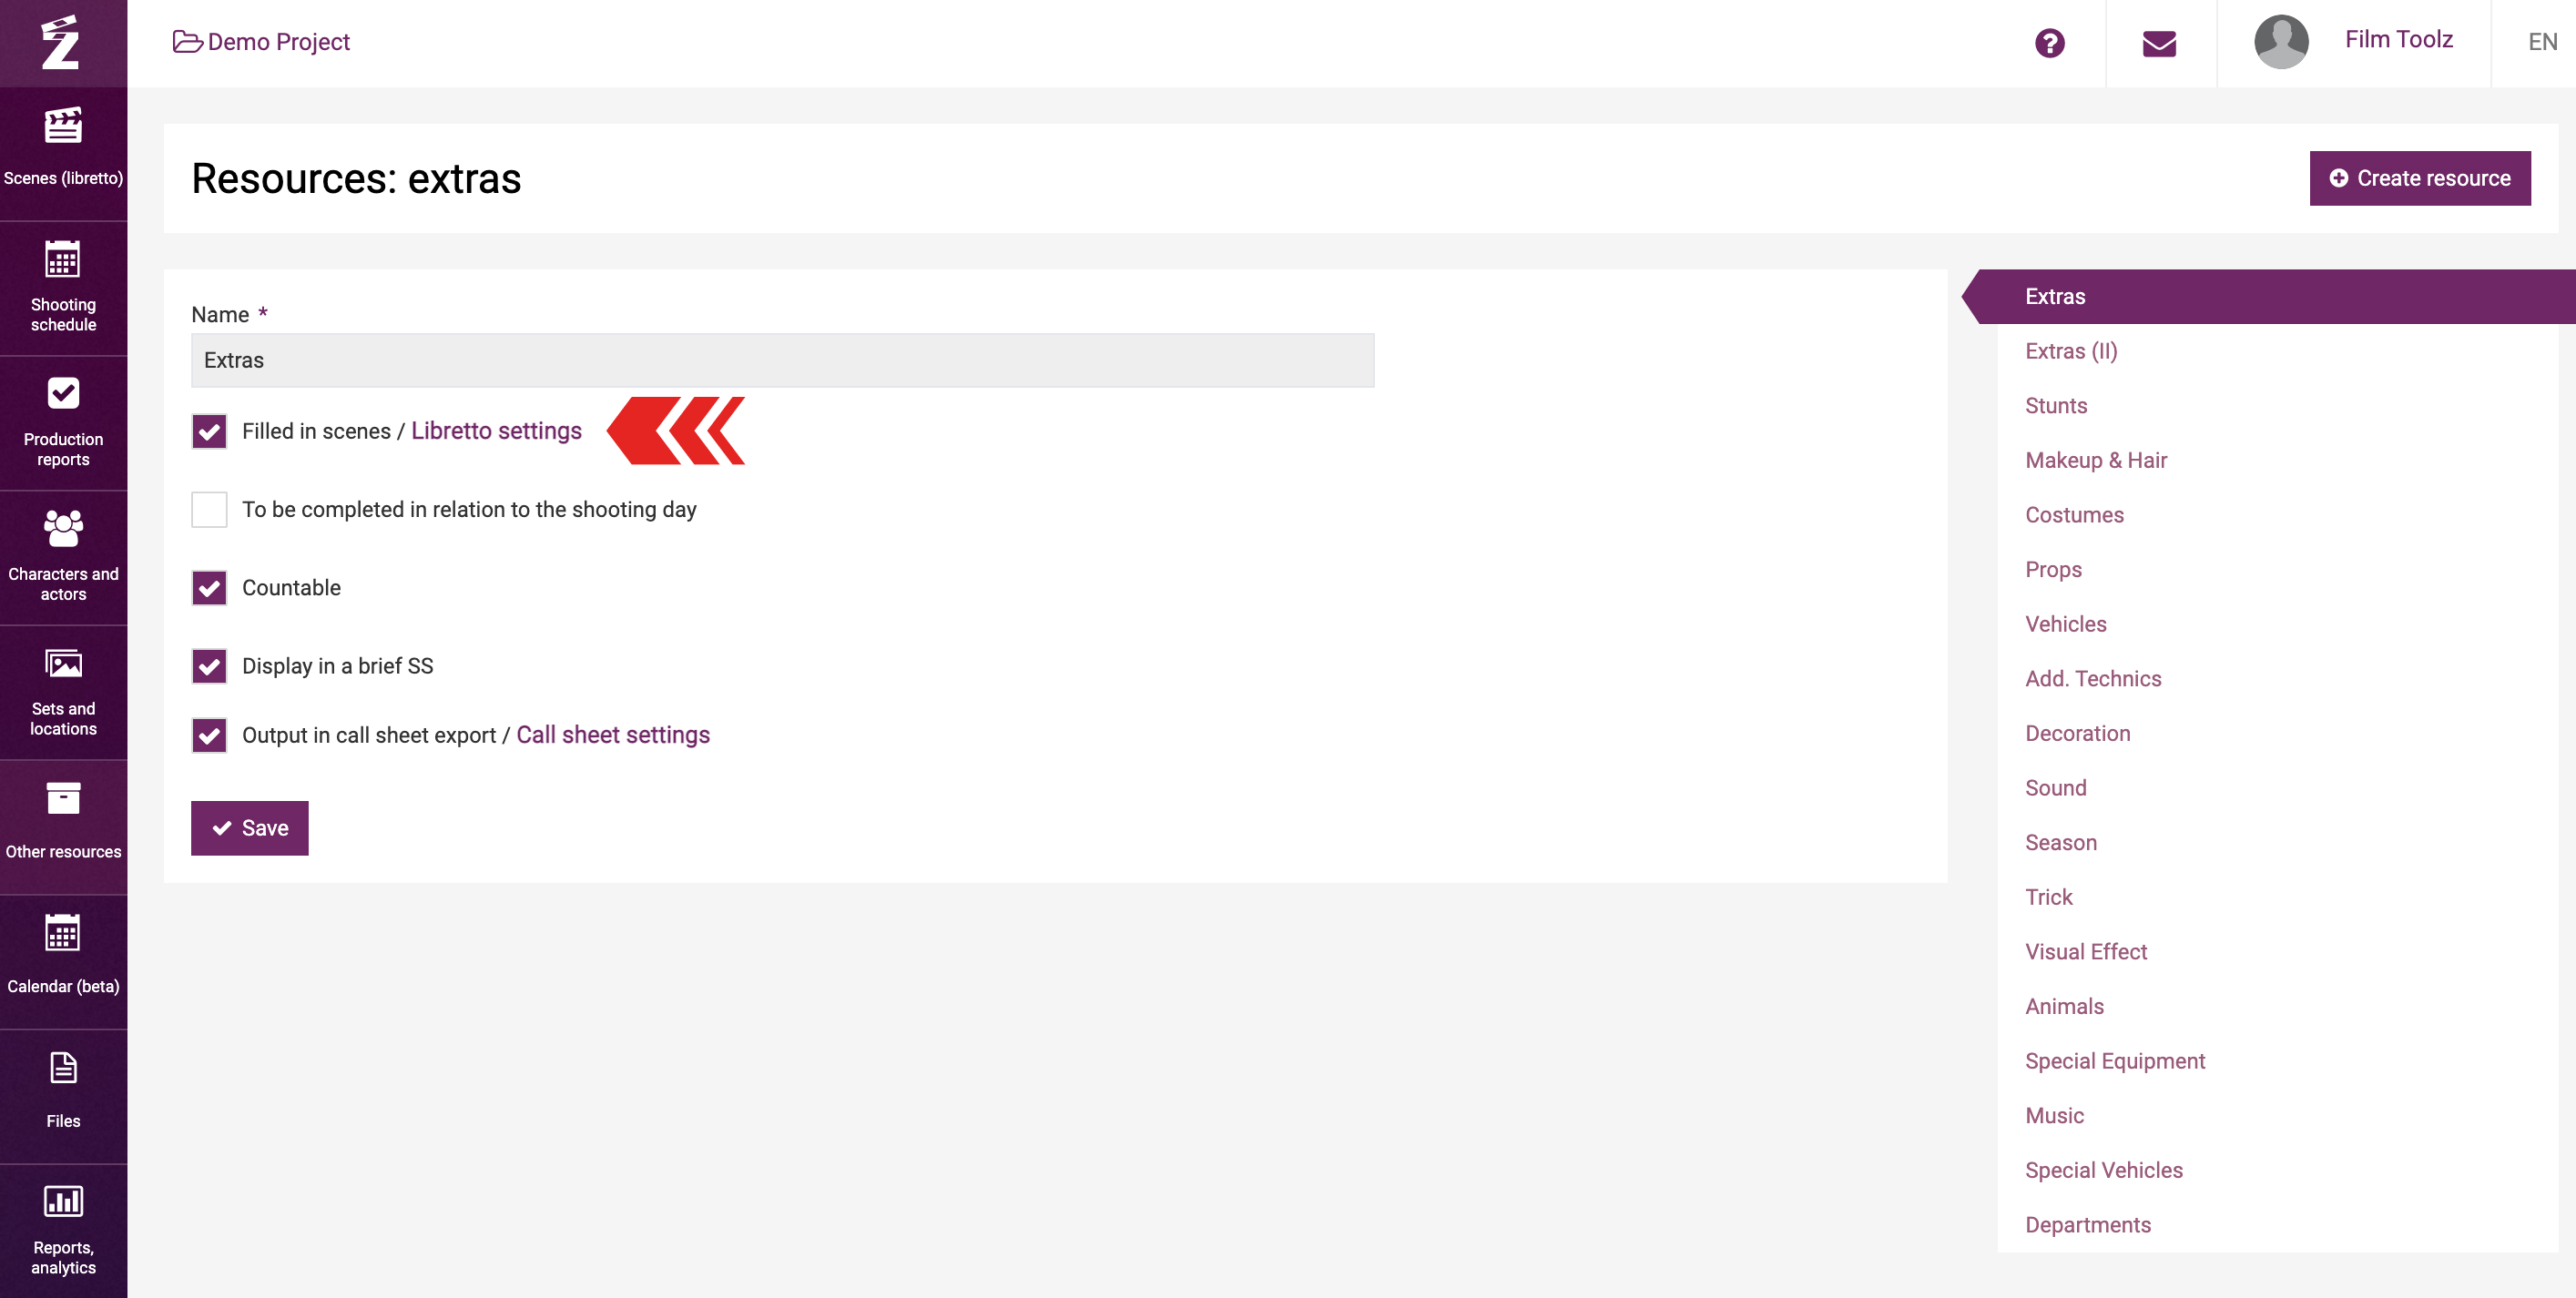
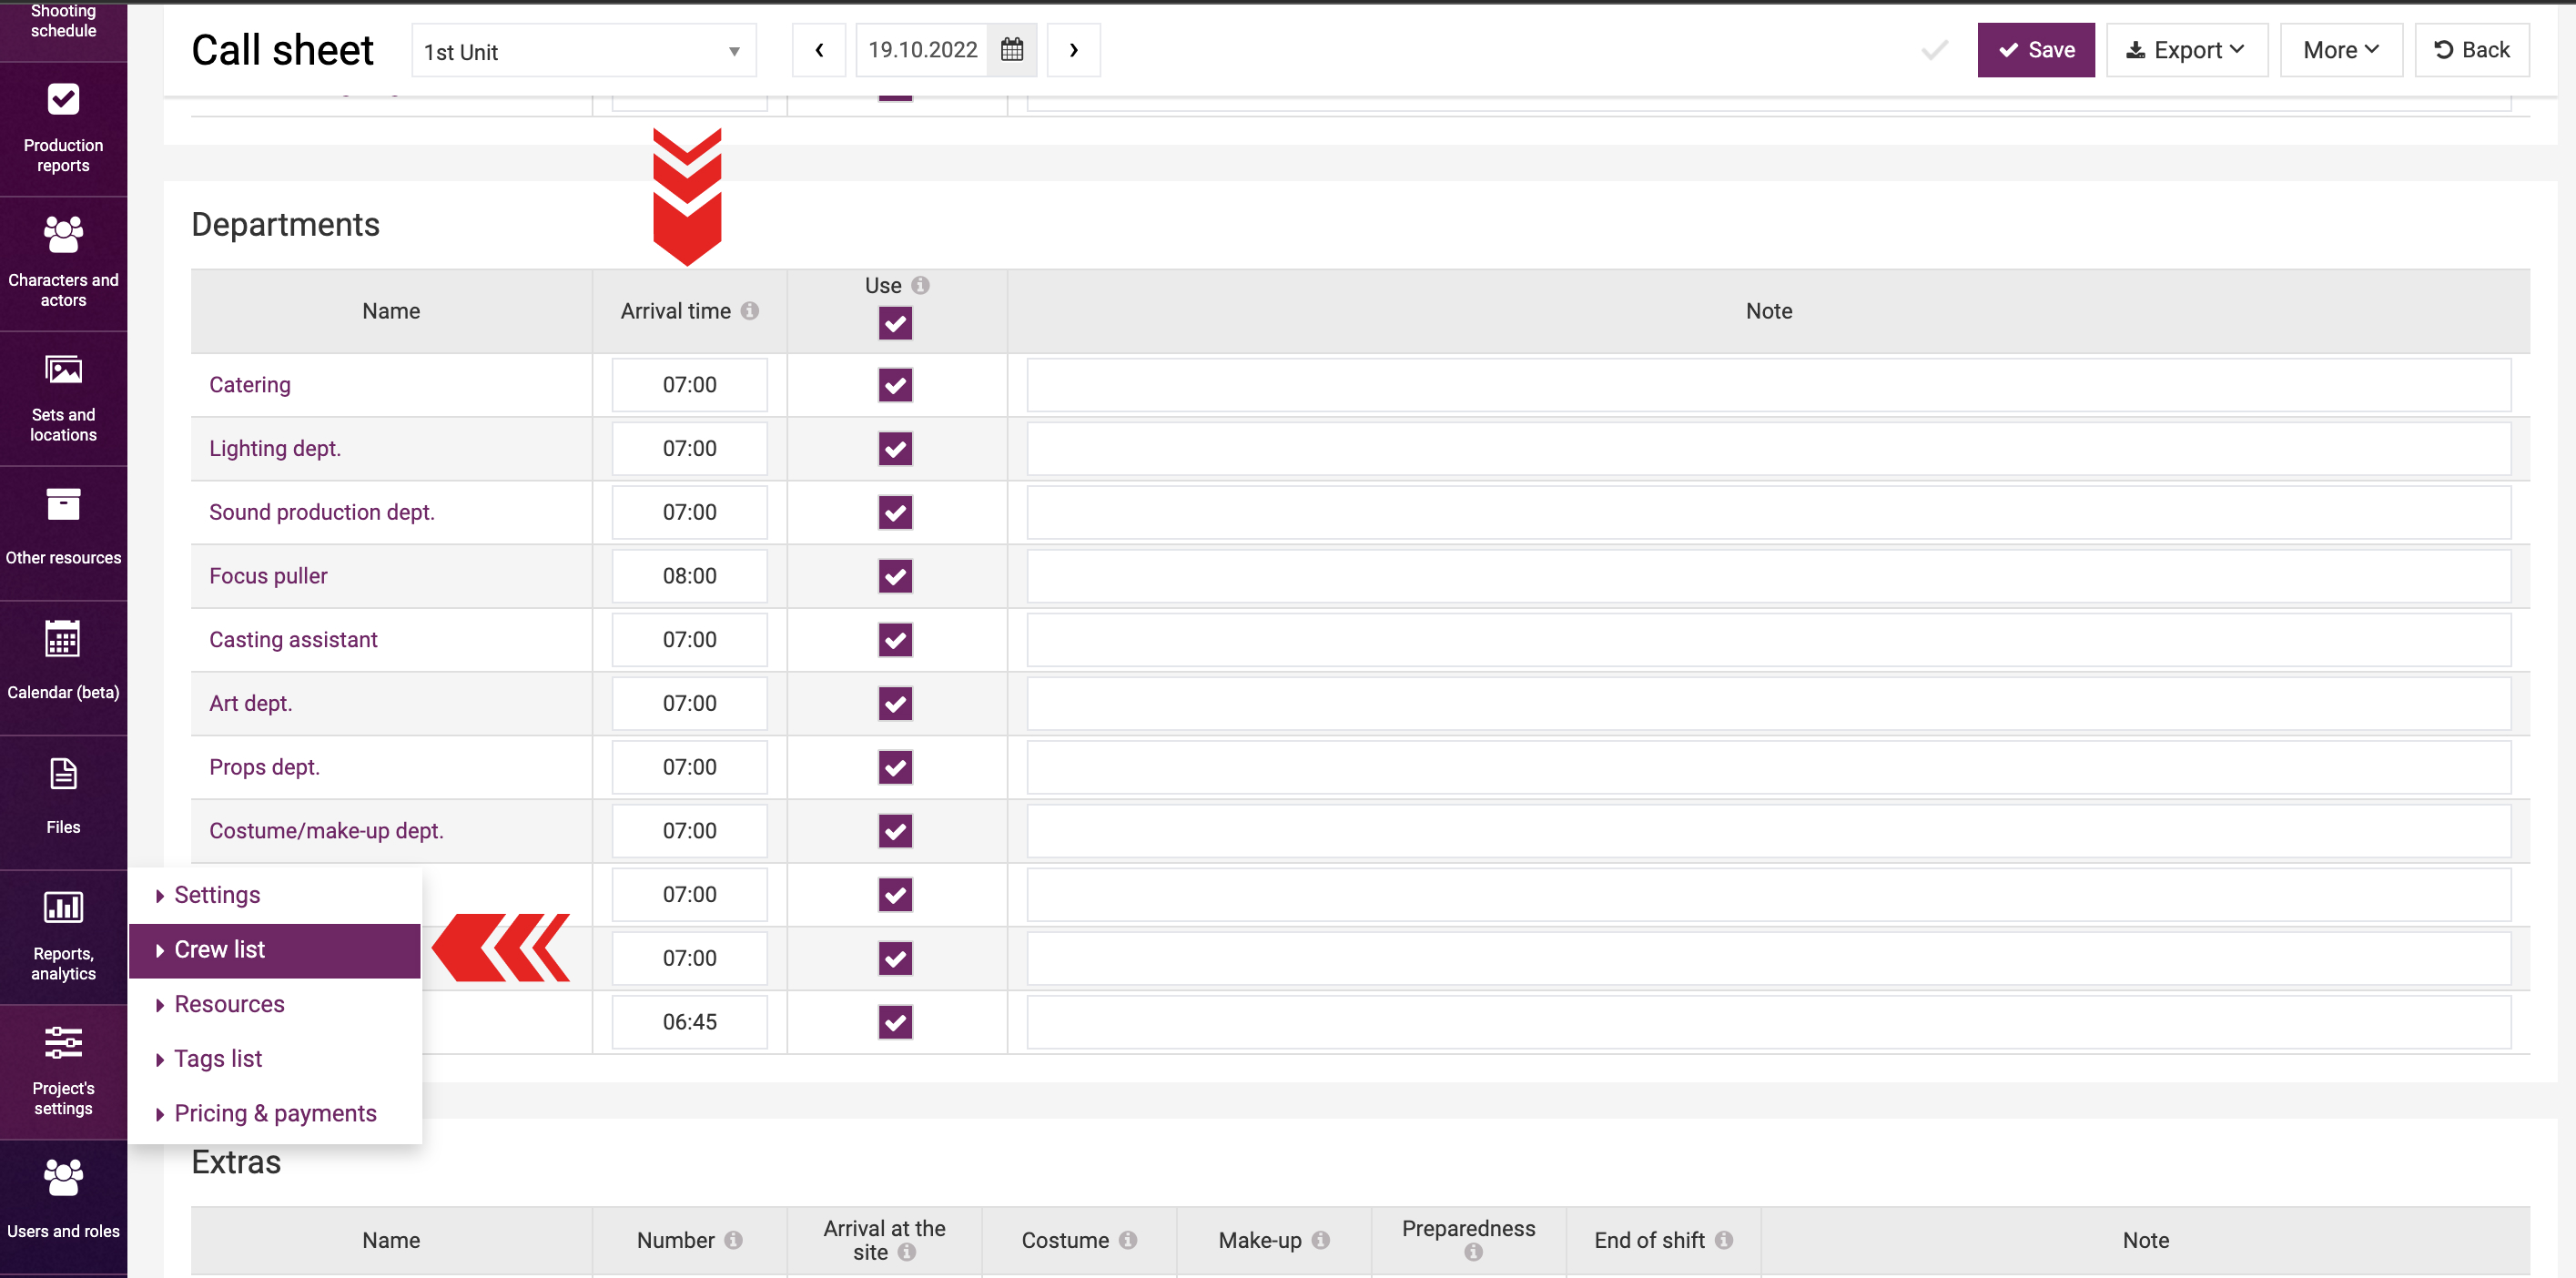
Shooting day elements are the elements with the attribute “Daily elements connected to shooting day” ticked in the settings. This means that the element you add will by default be shown in each call sheet, whether employed in the scenes to be shot on the relevant day or not.
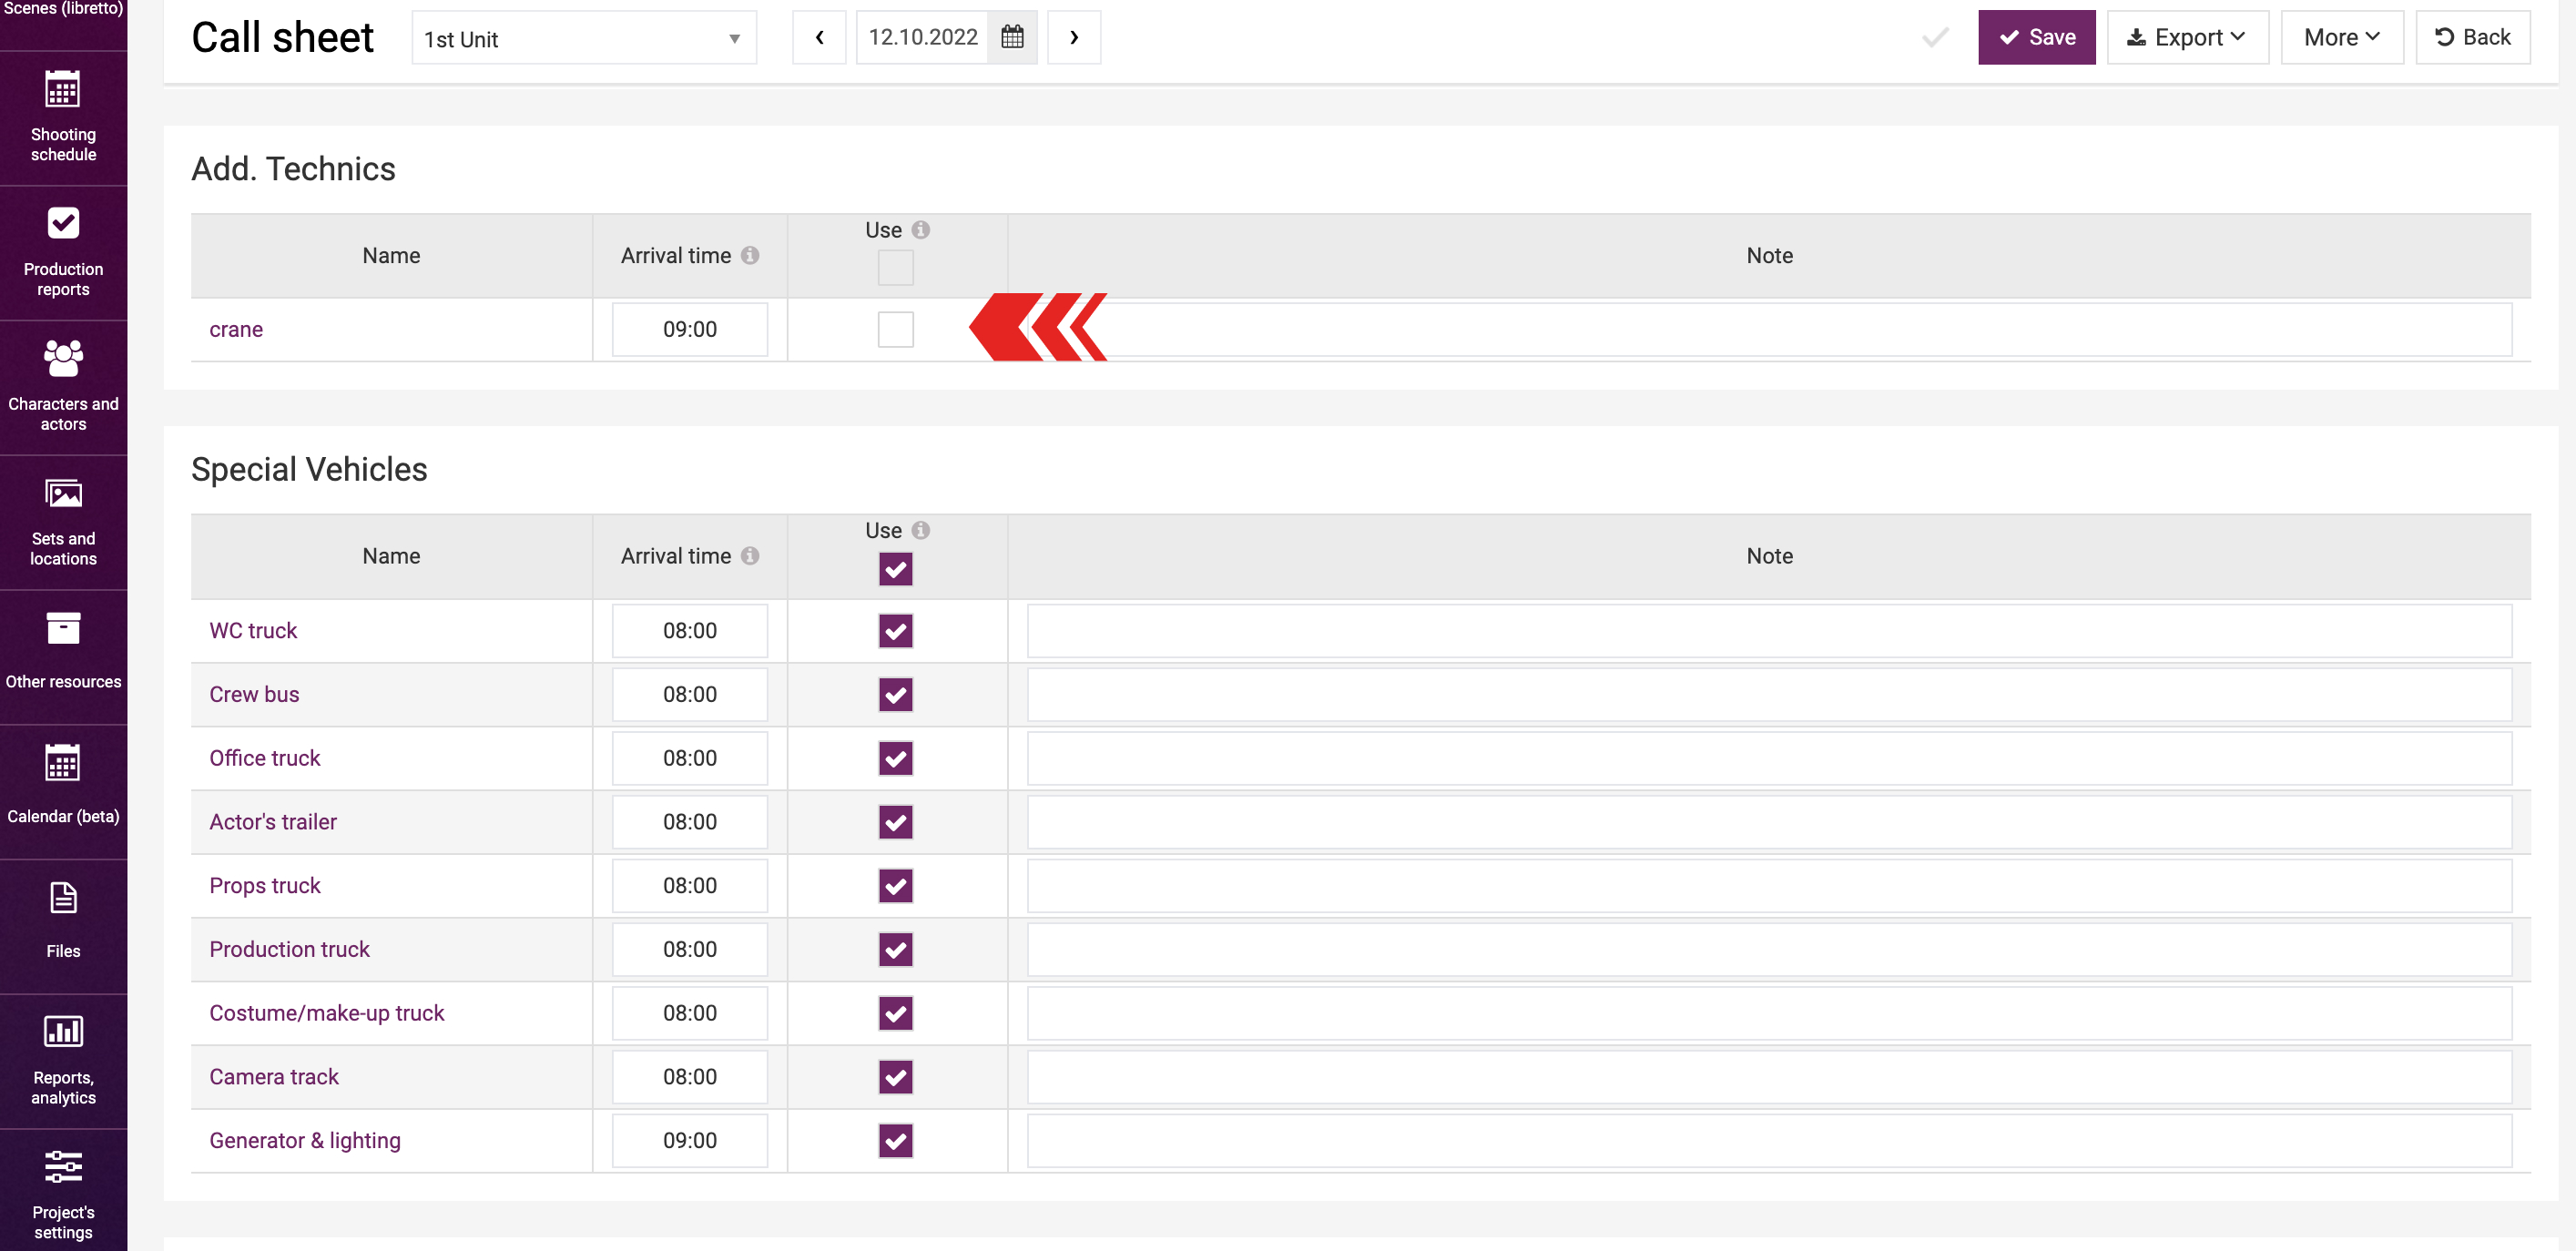
The “Use” box is ticked next to each shooting day element item in the call sheet. If the element item is not required for a certain shooting day, you can untick this box and save the call sheet. If you do so, this element item will be displayed in the exported call sheet, production report, and the elements usage report.
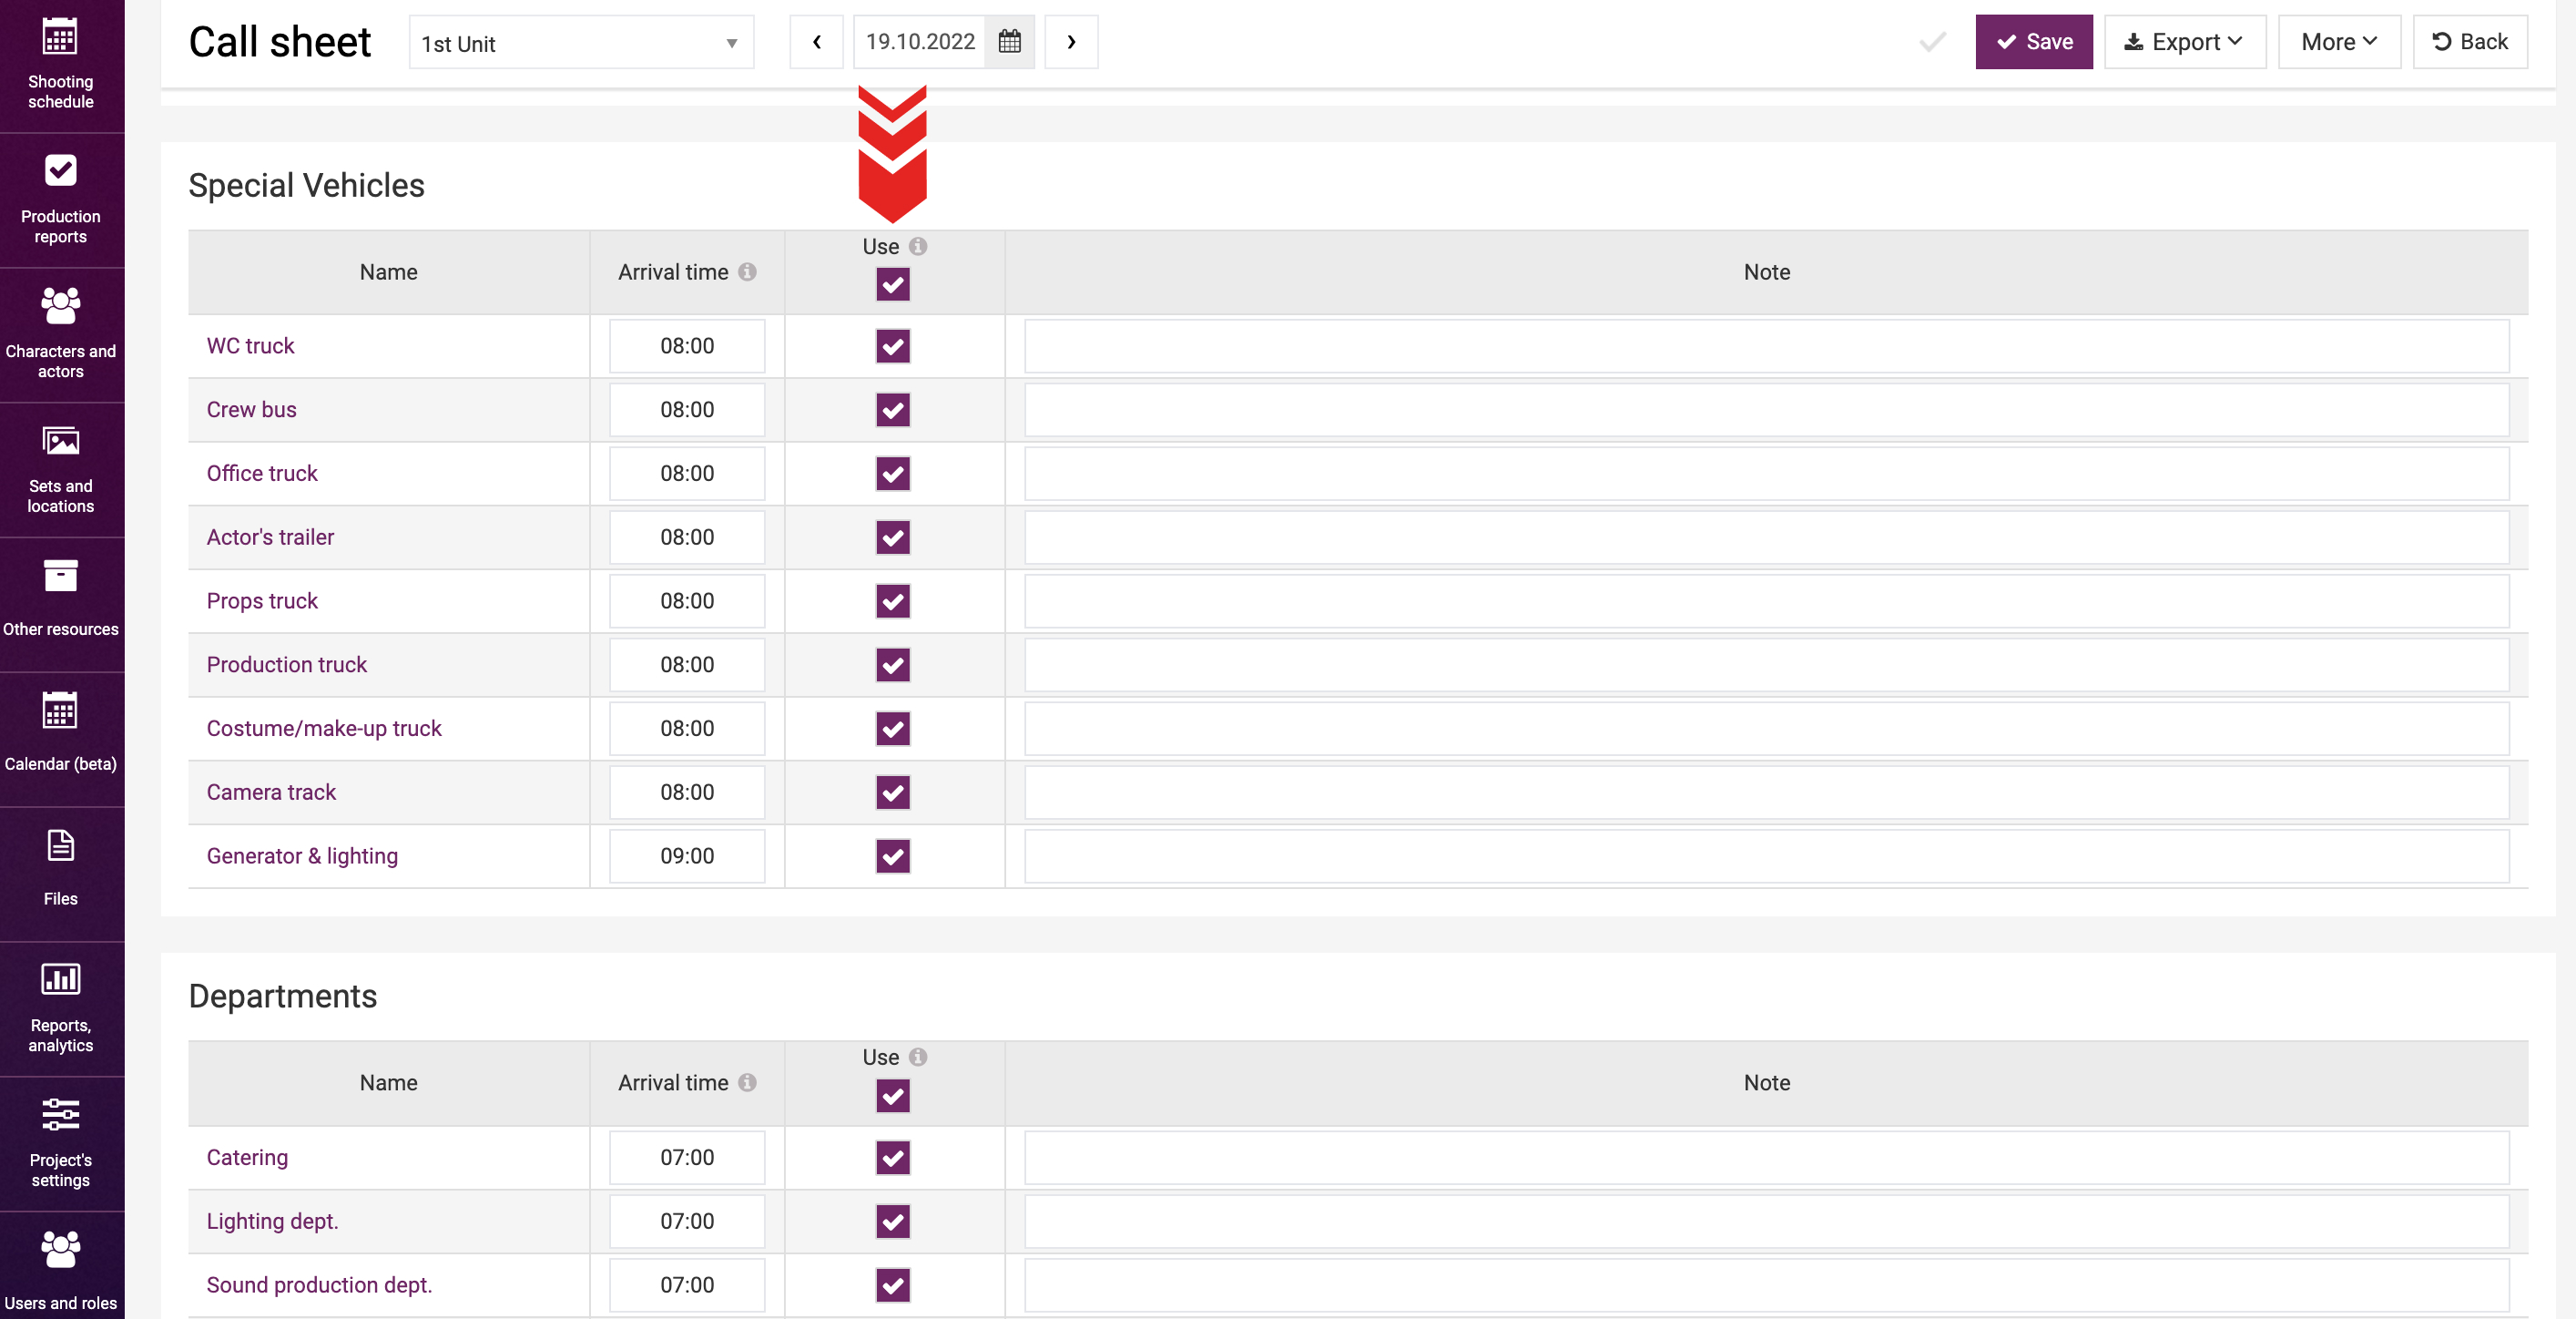
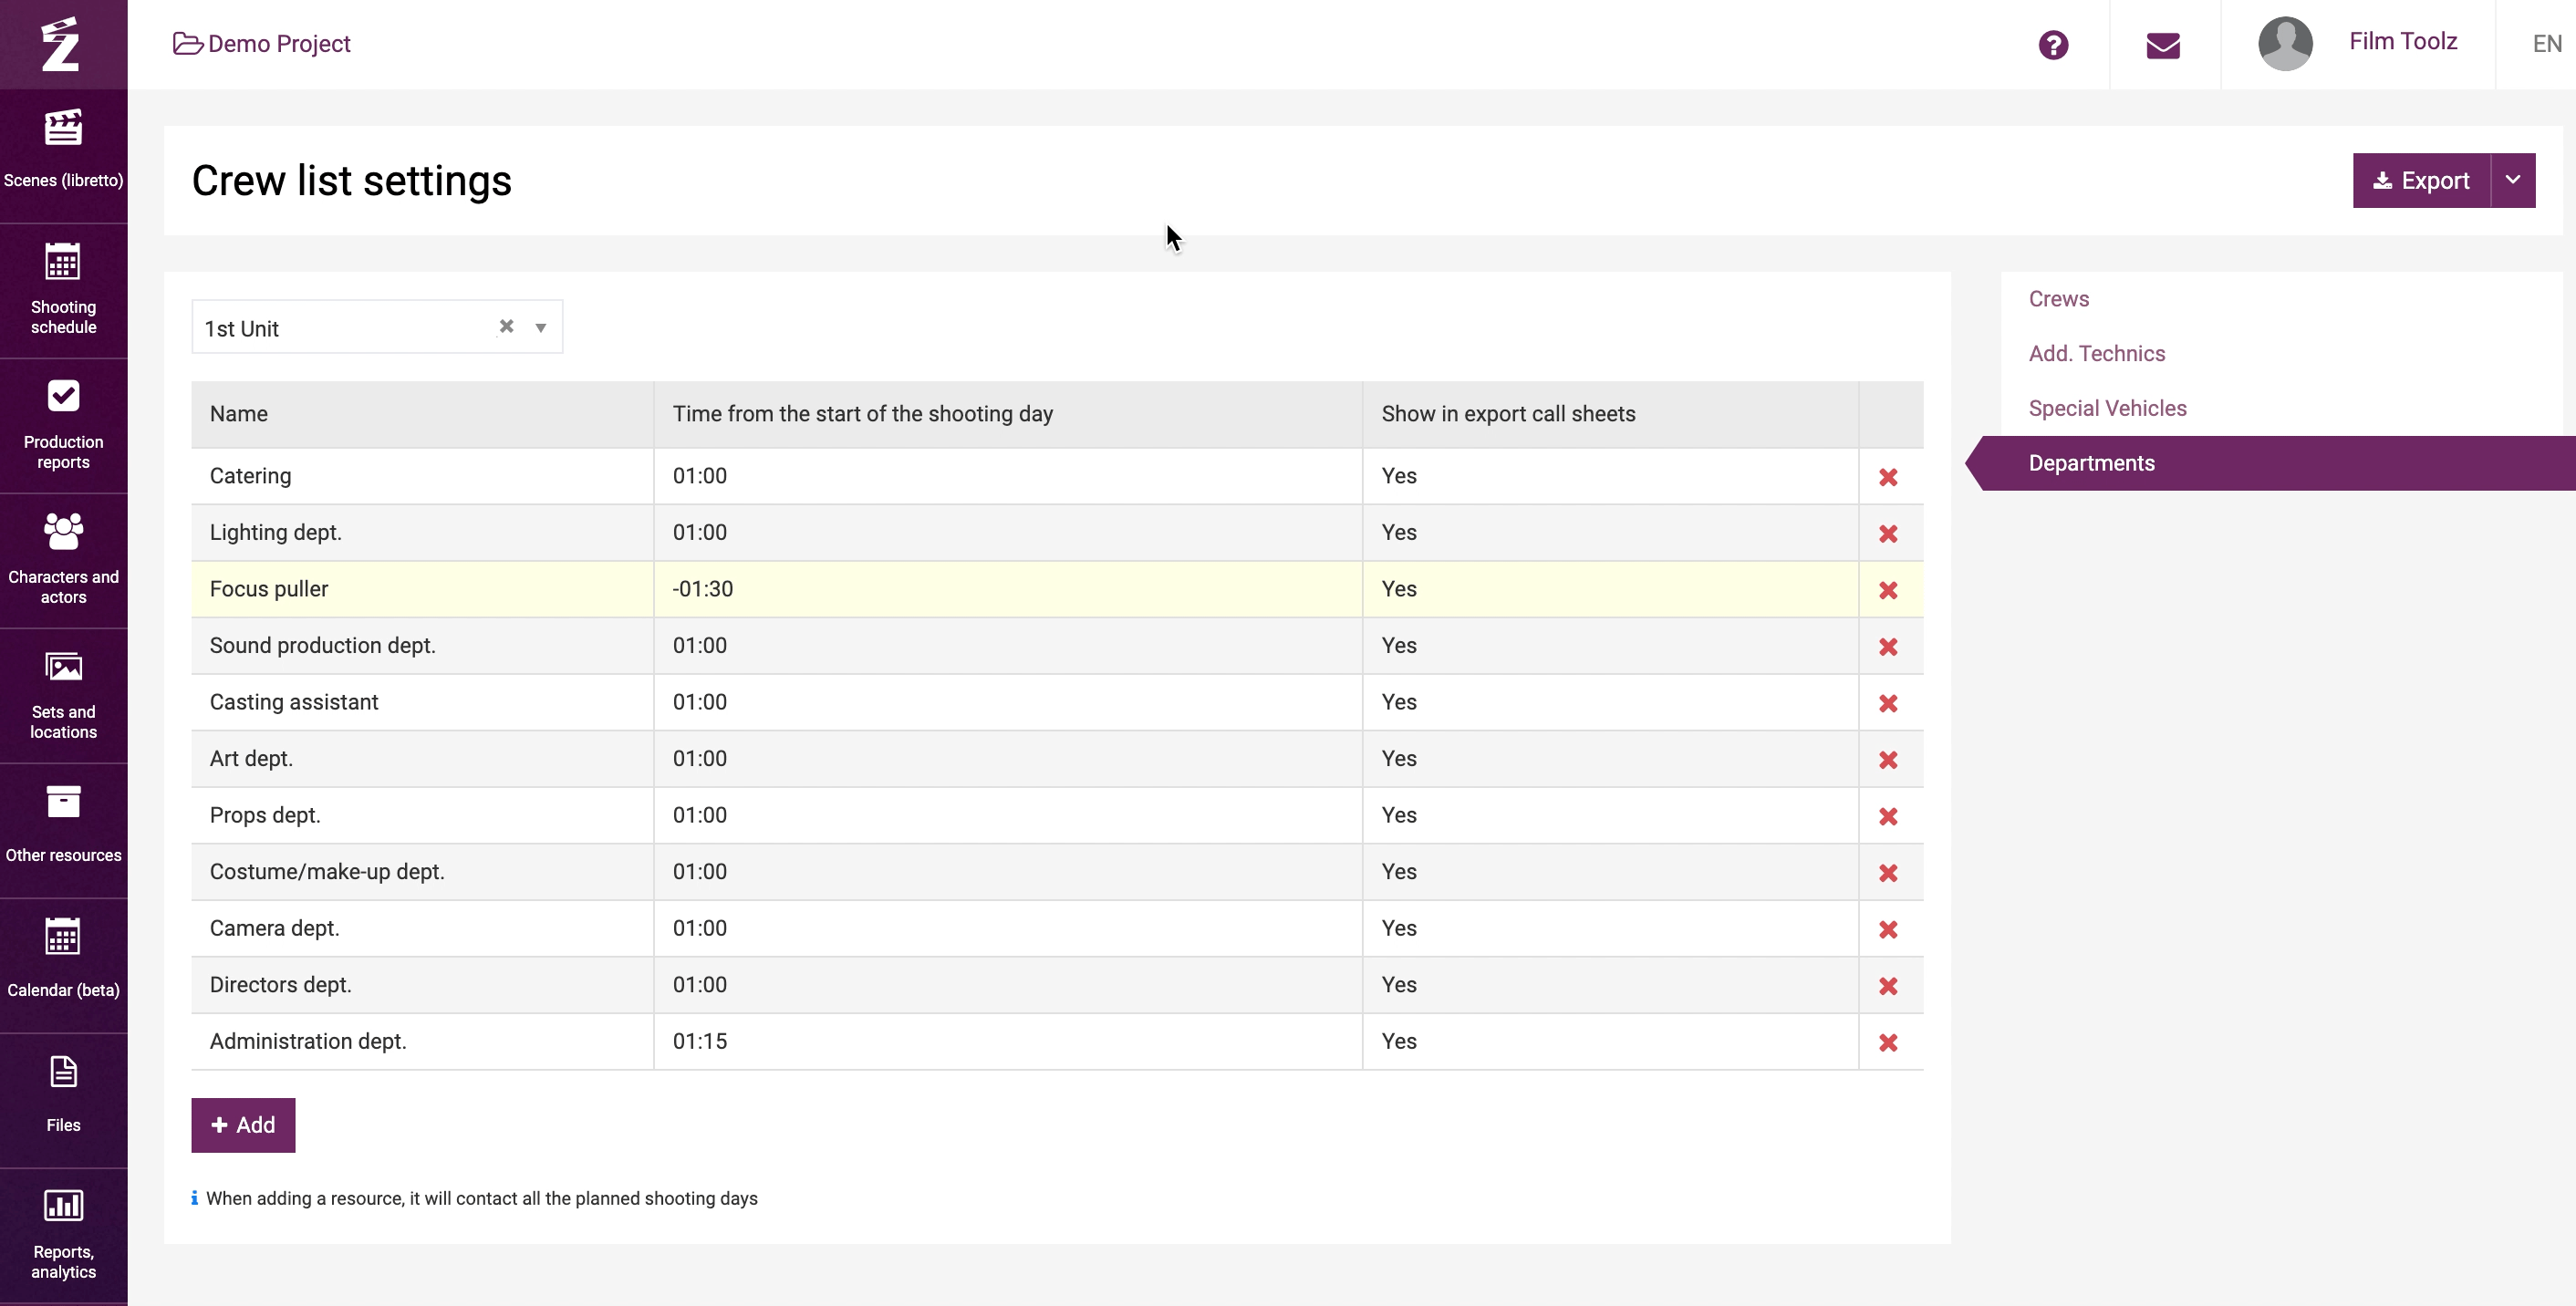
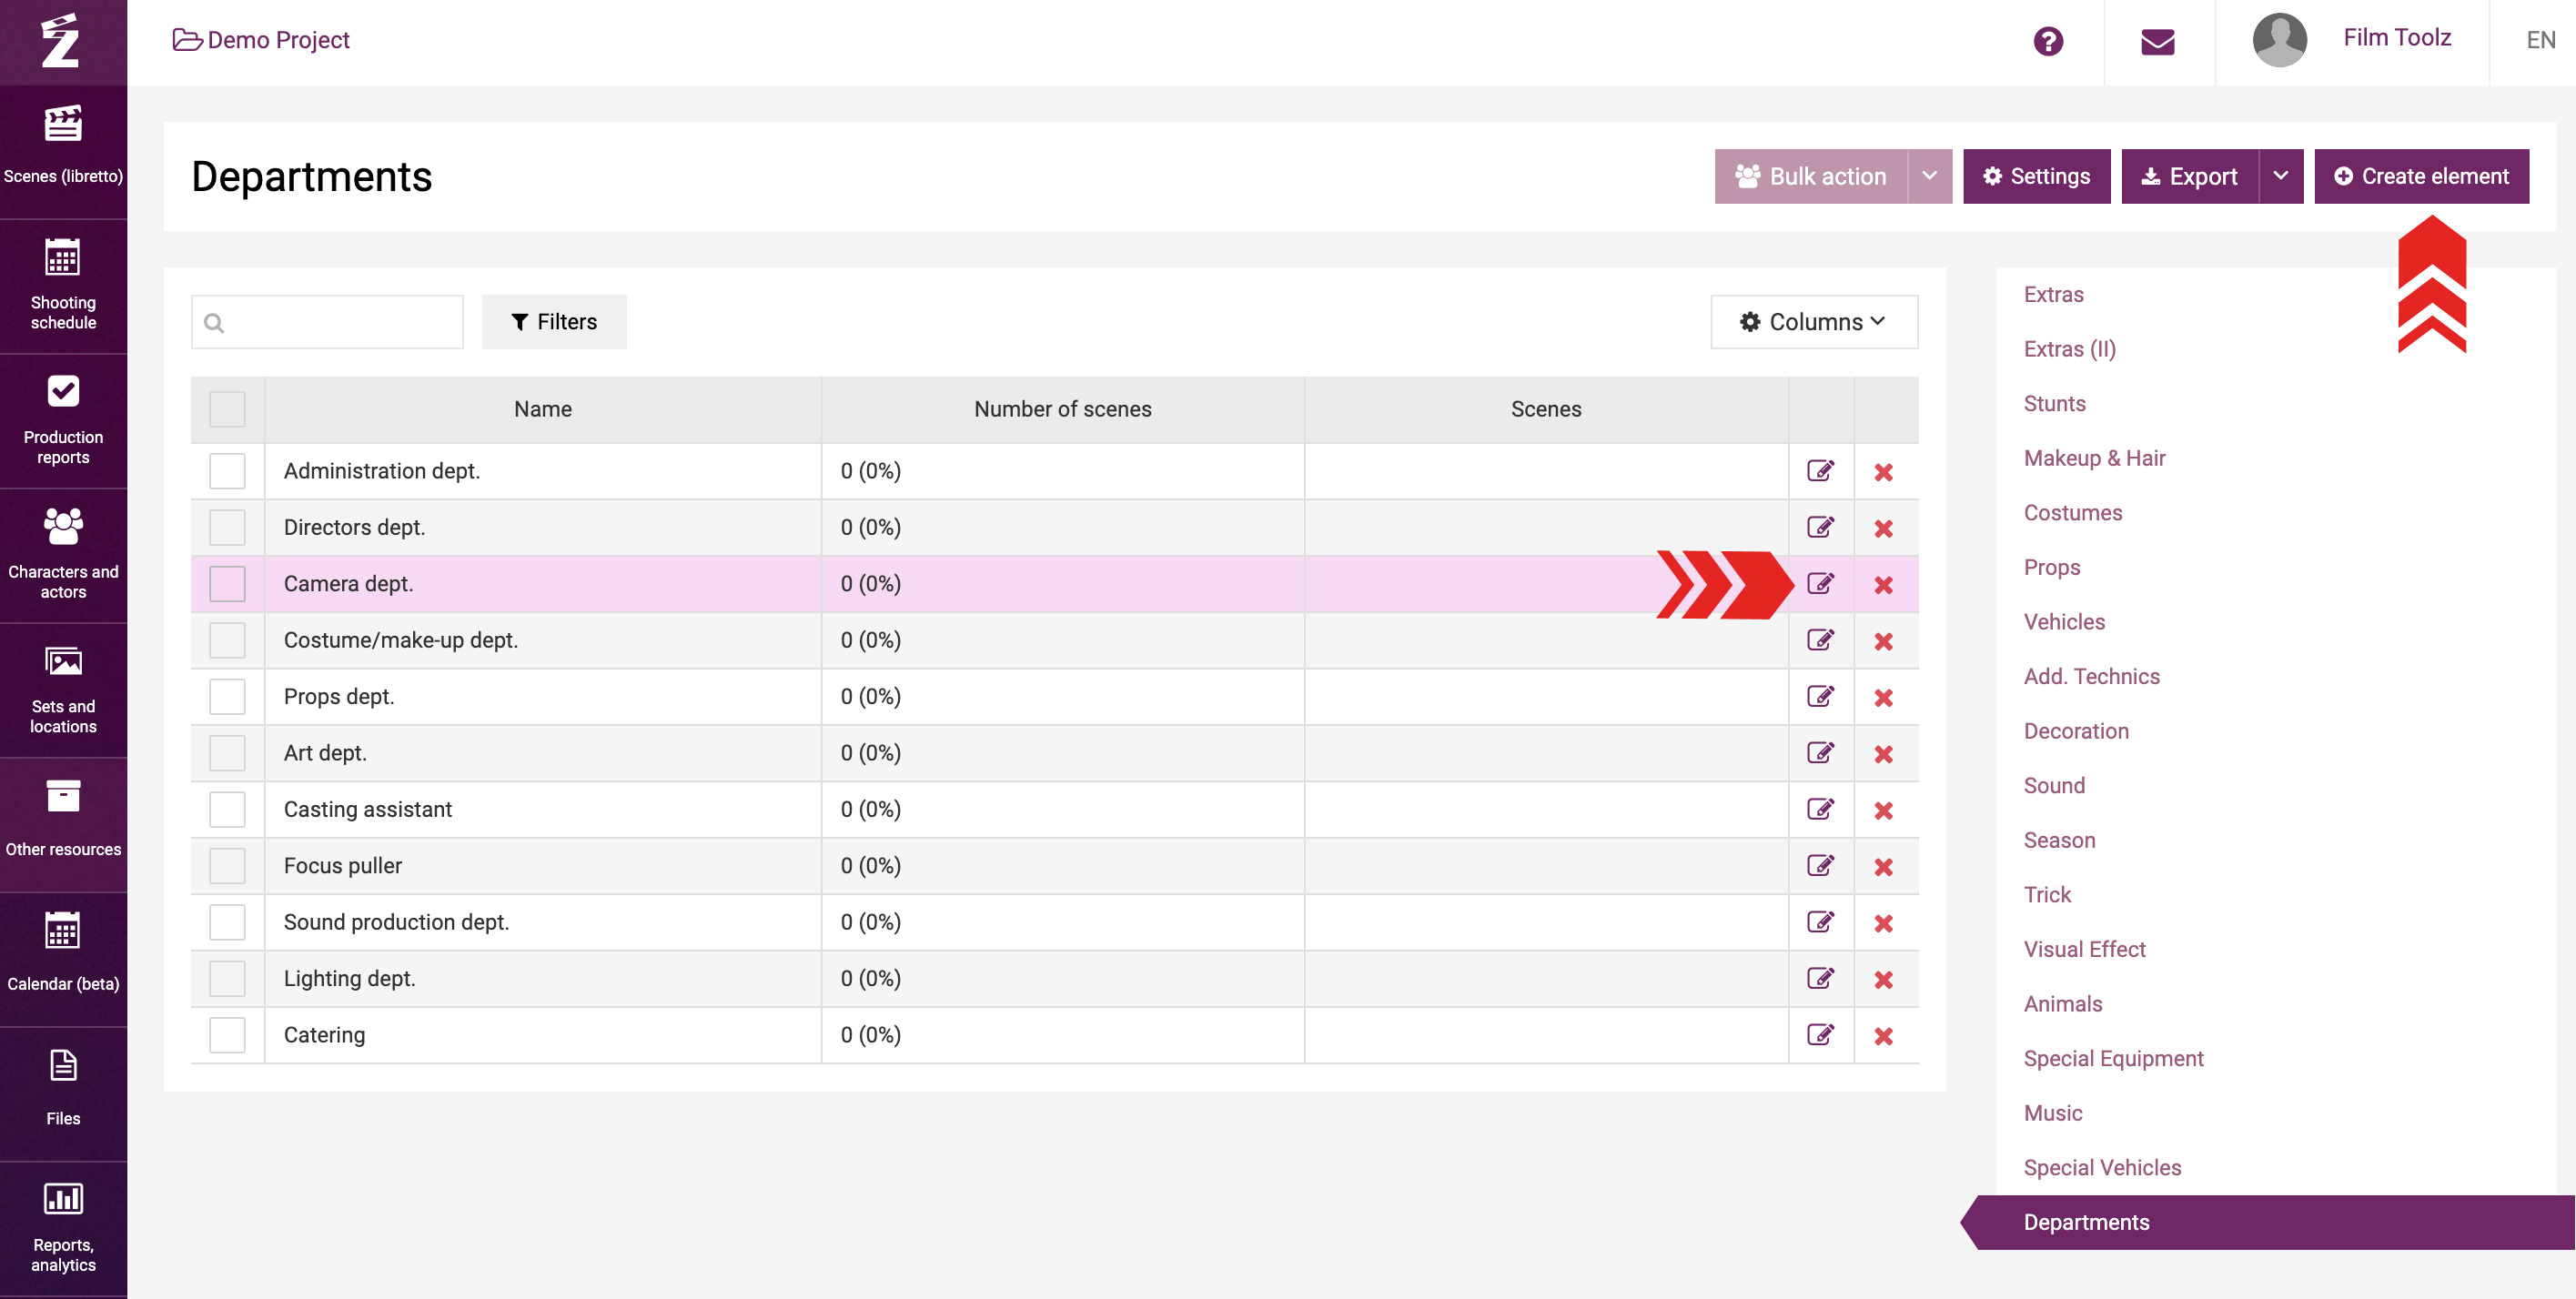
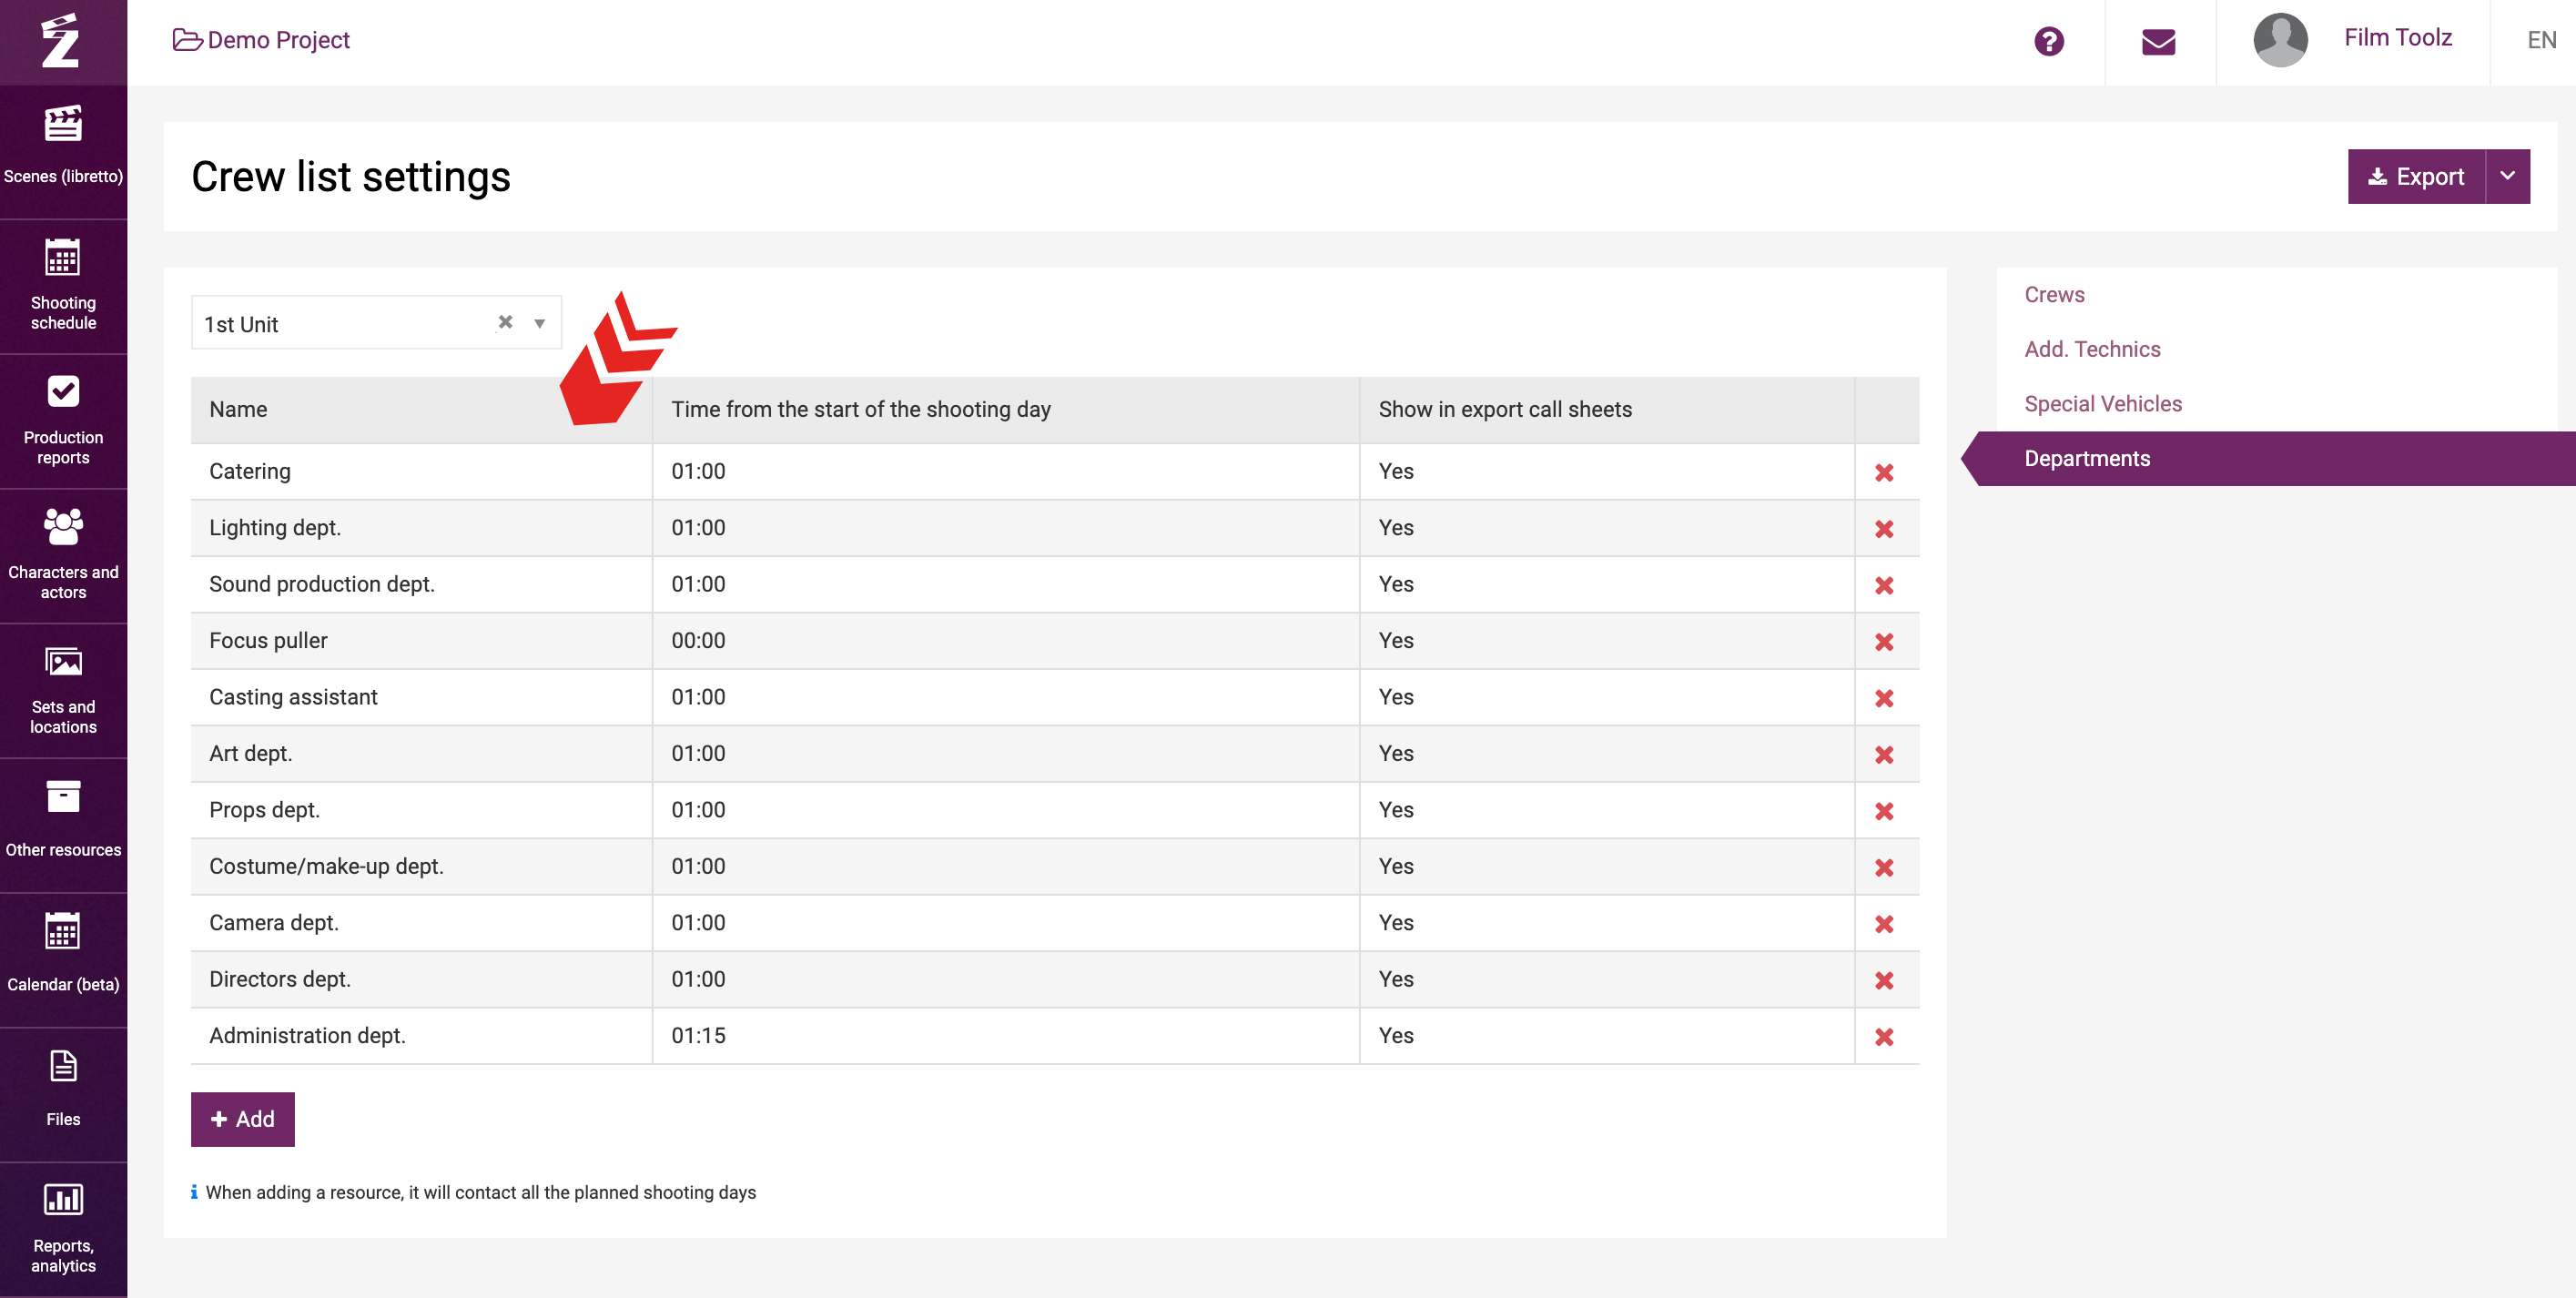
Two shooting day elements will be created in new projects by default: Departments and Special Vehicles.
These elements have already been filled out with element items and added to the call sheets. You can rename the existing element items or add new element items anytime.
Adding a new shooting day element
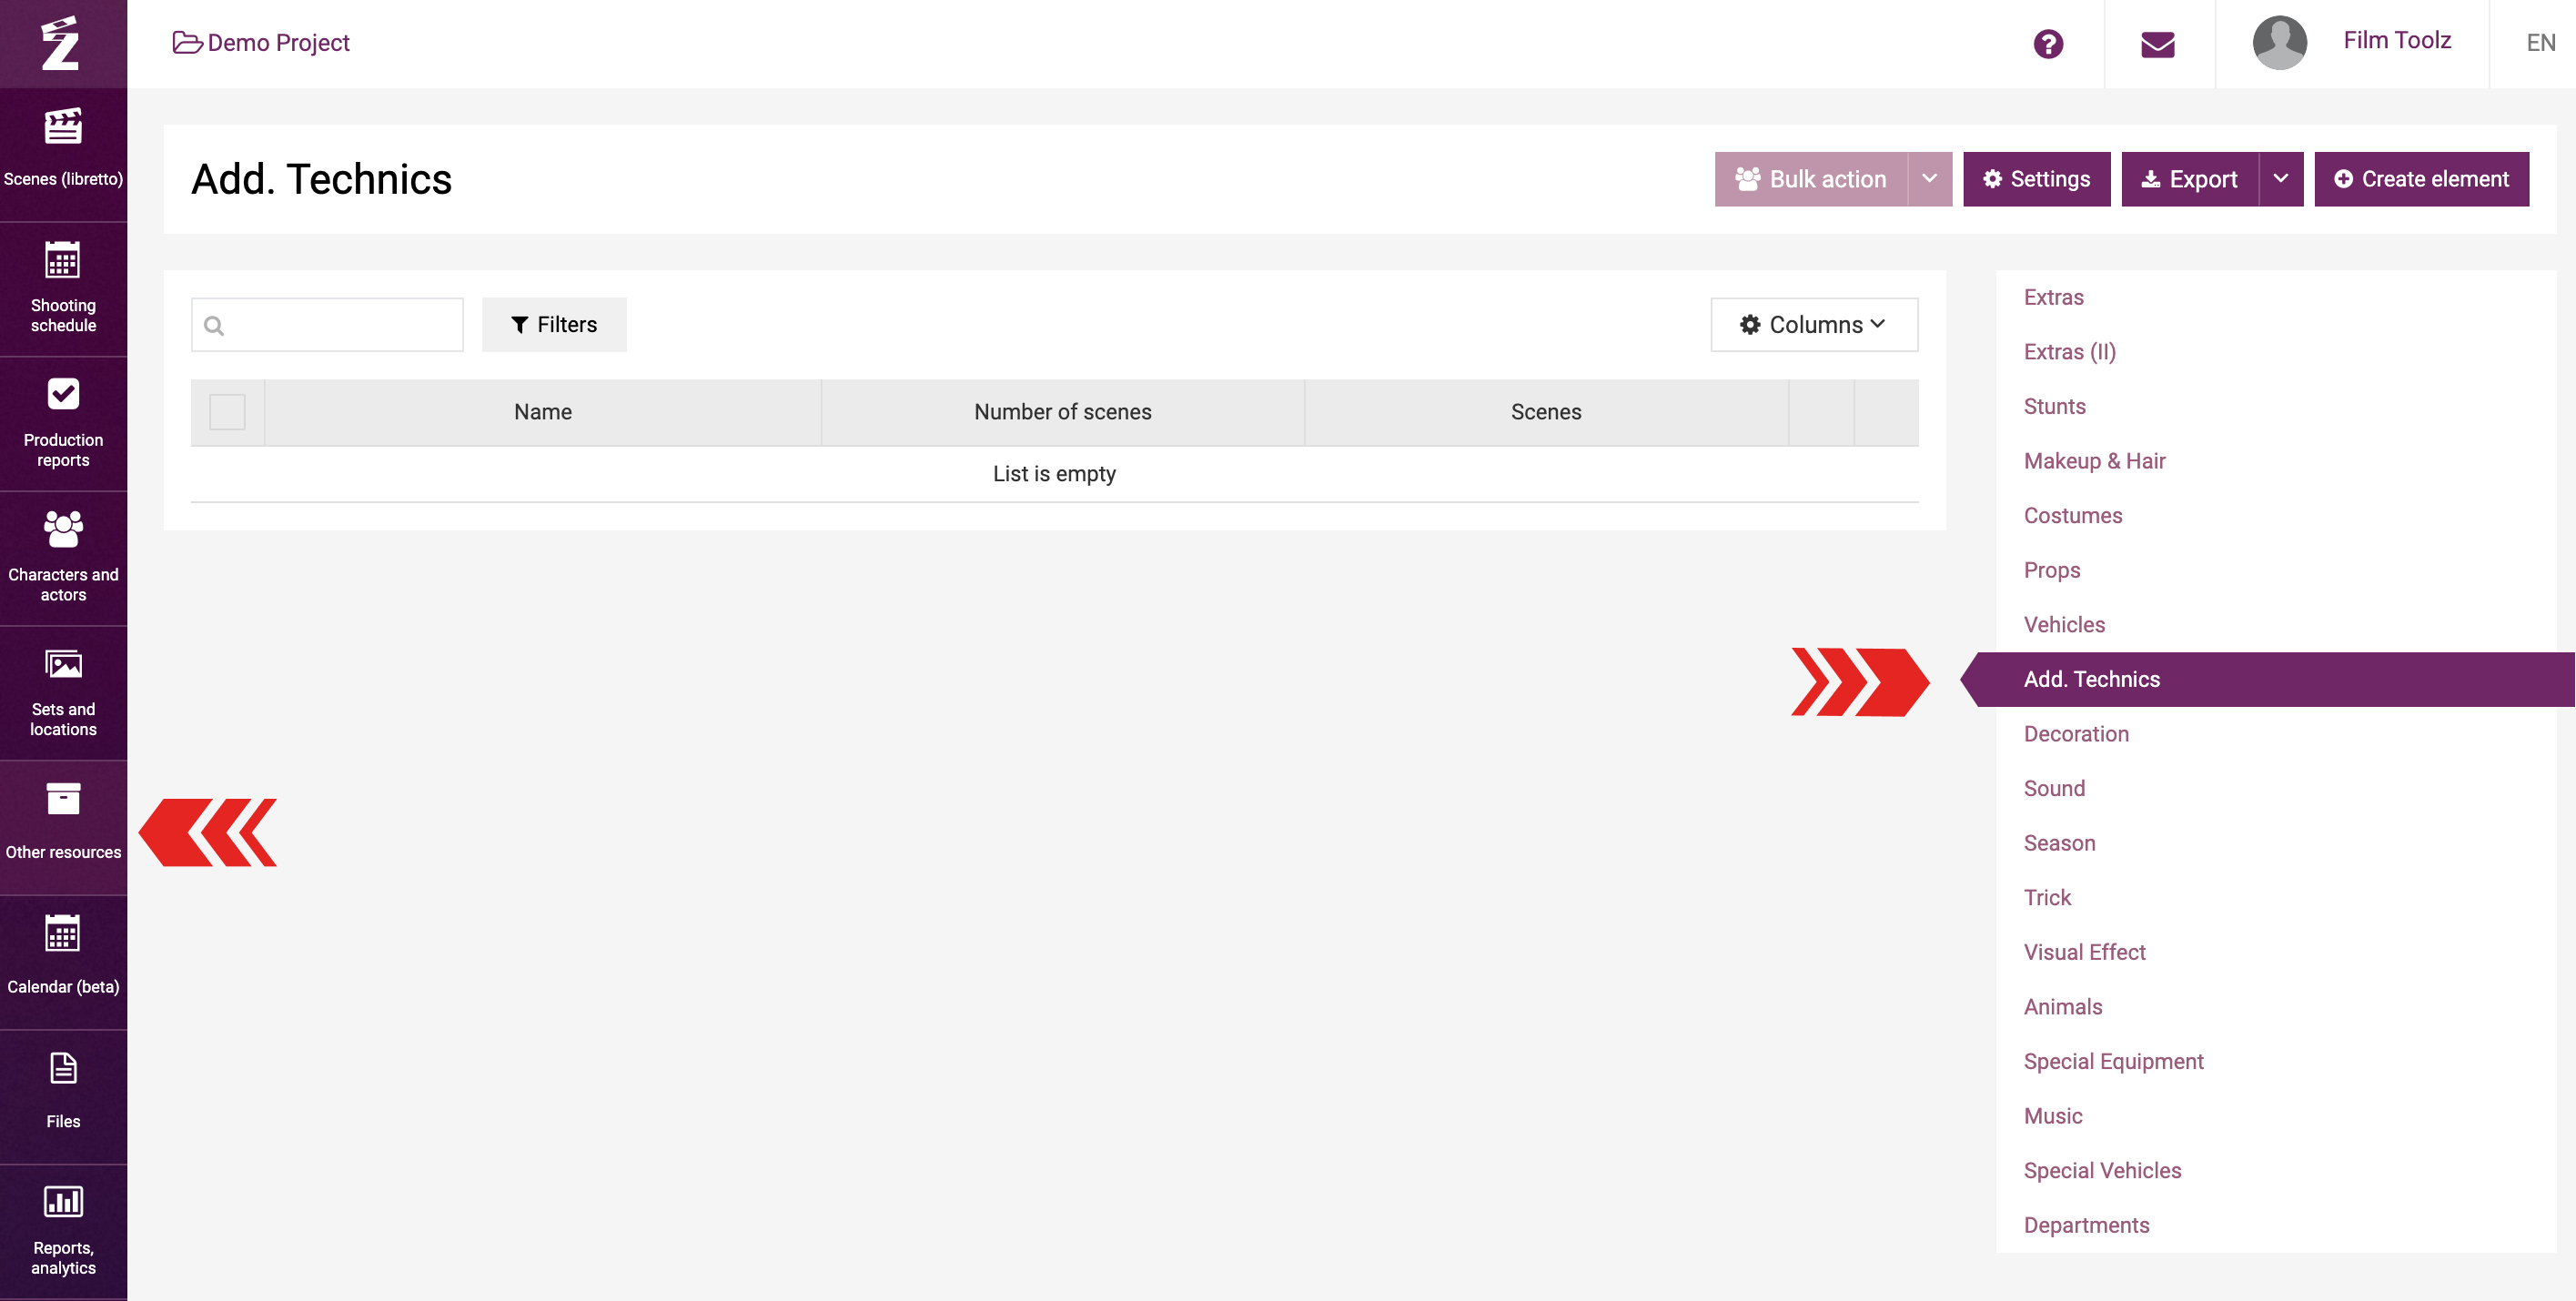
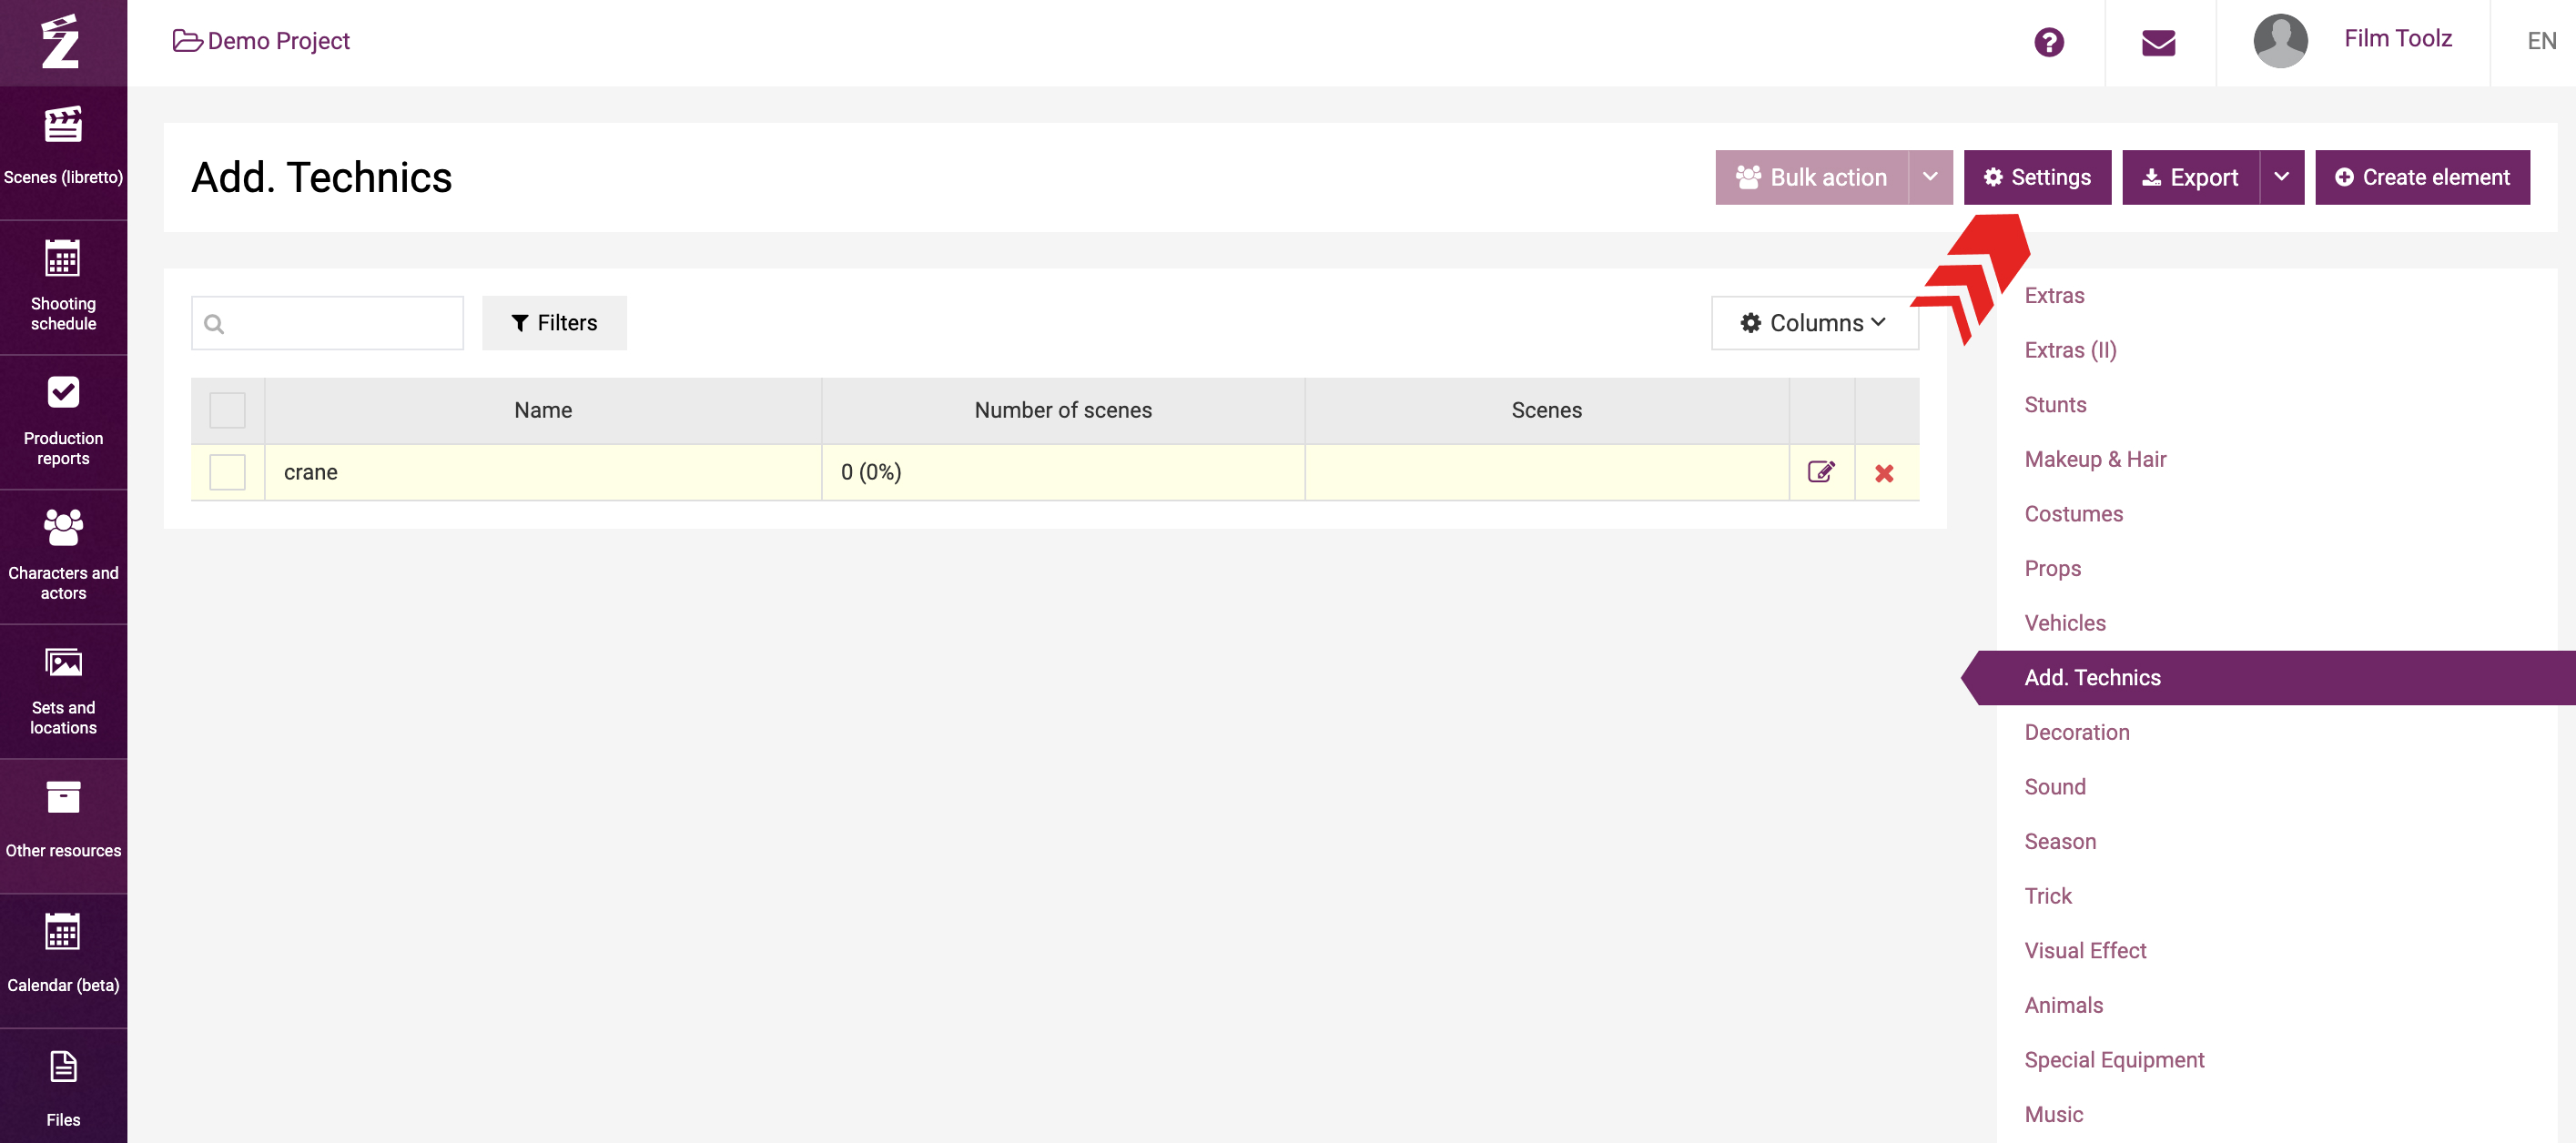
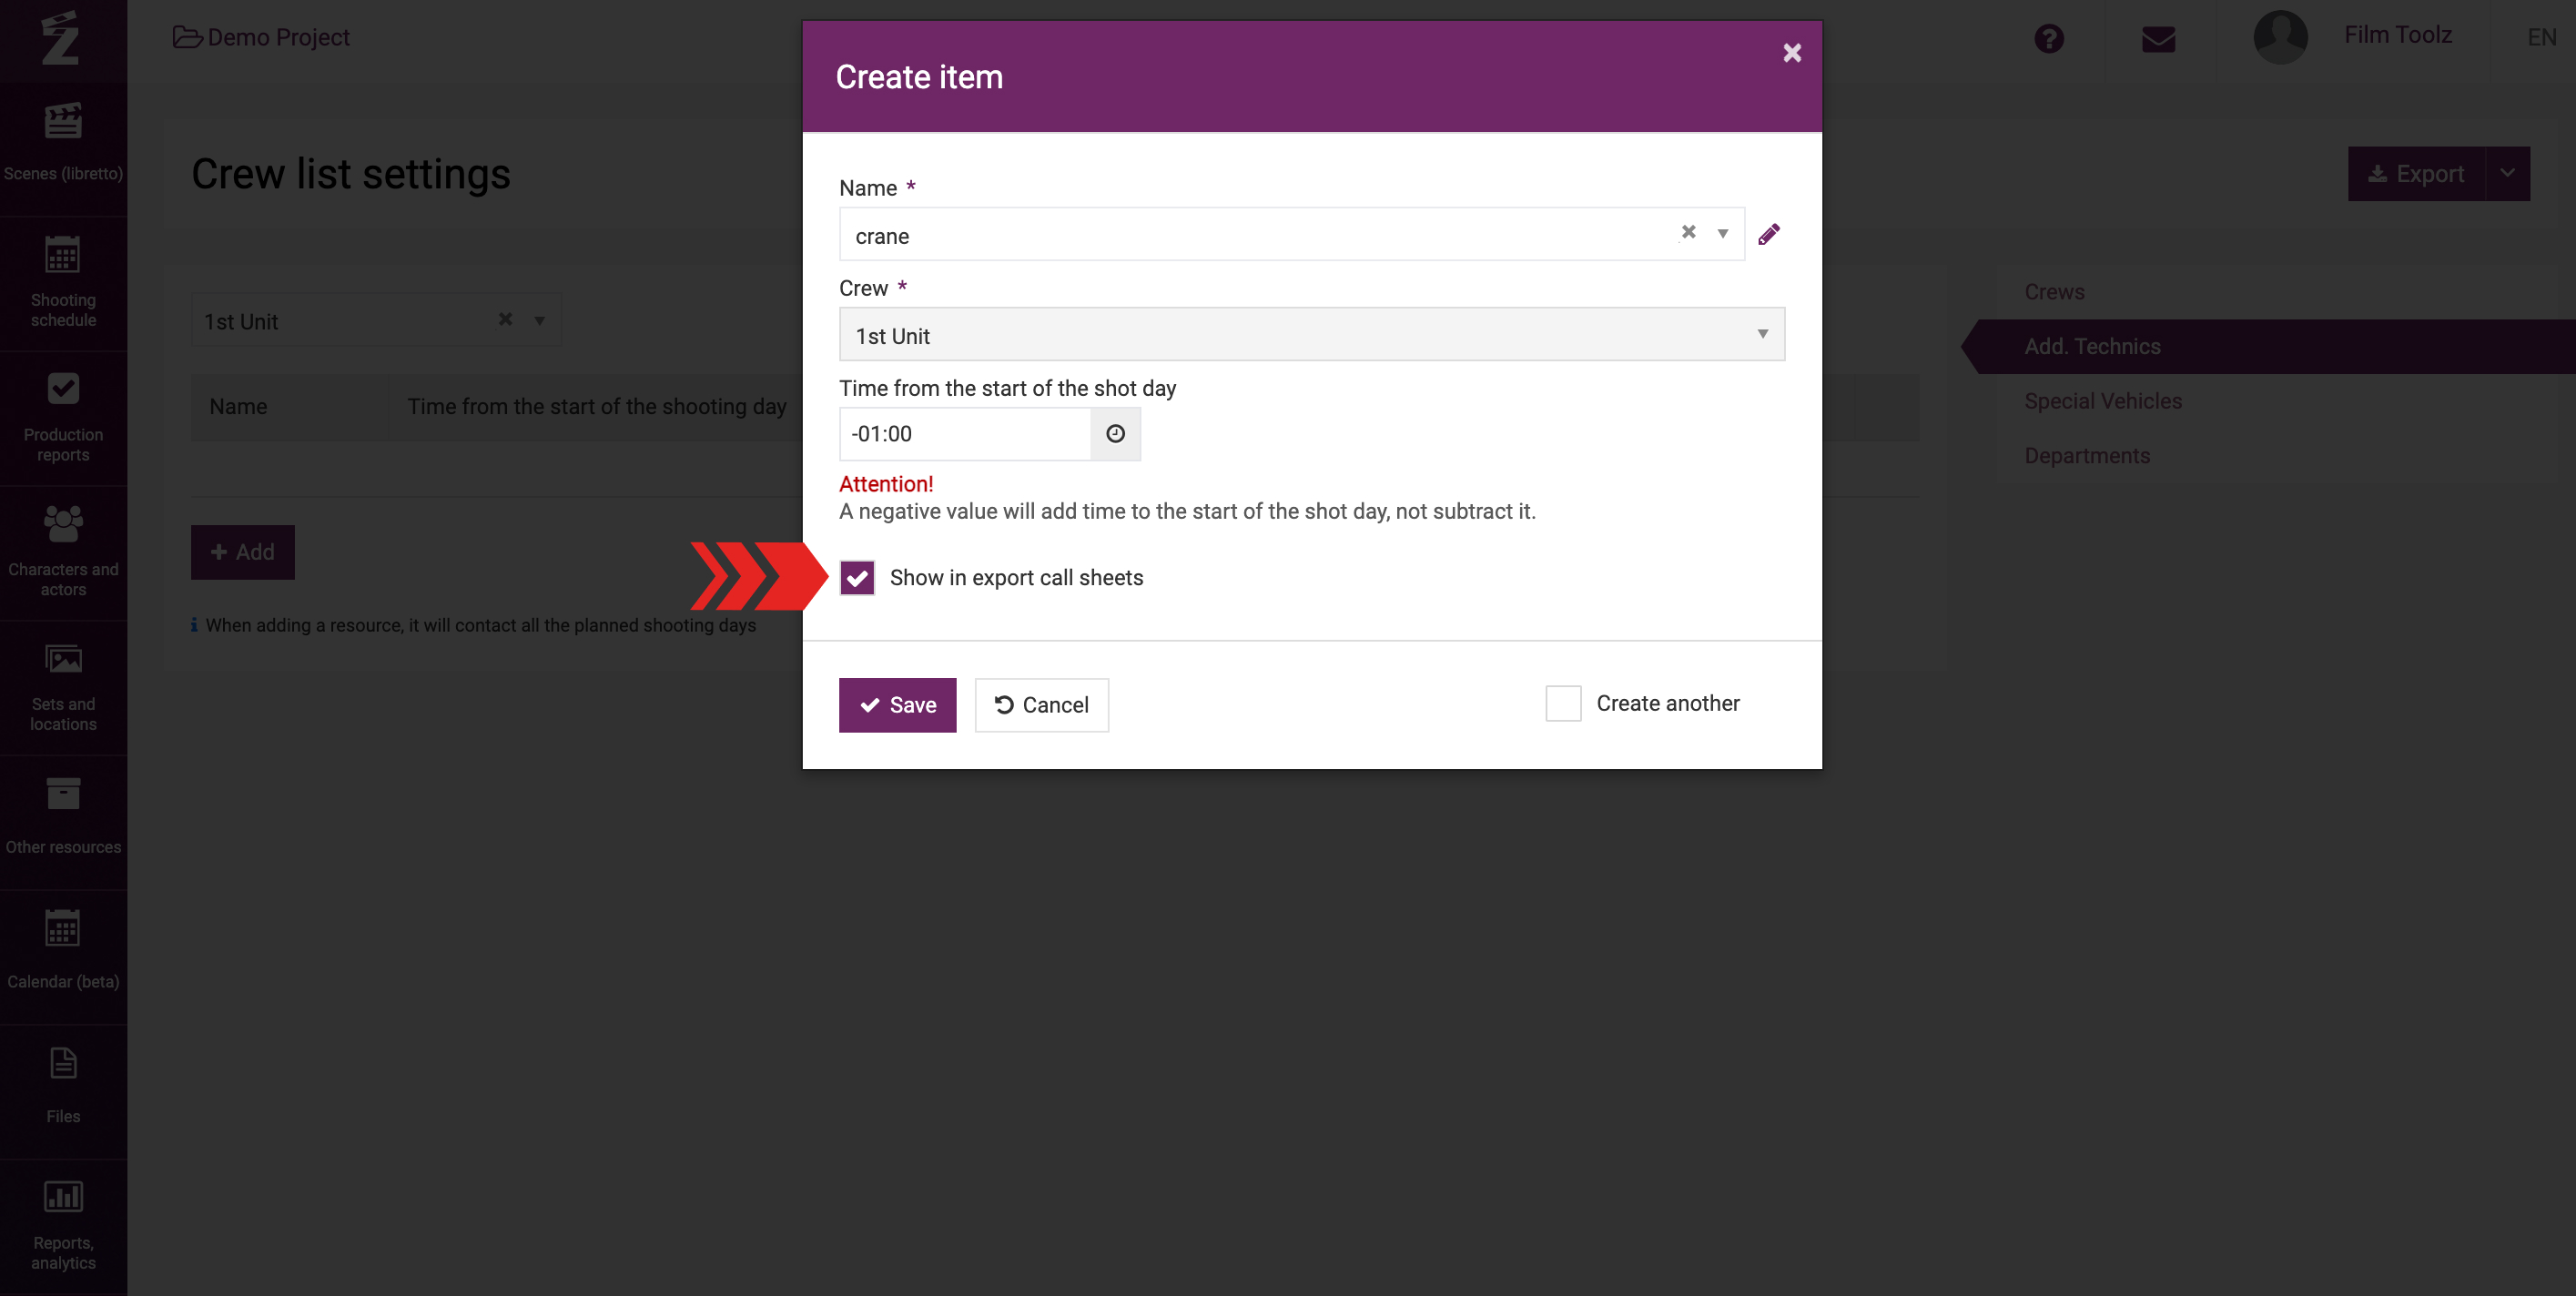
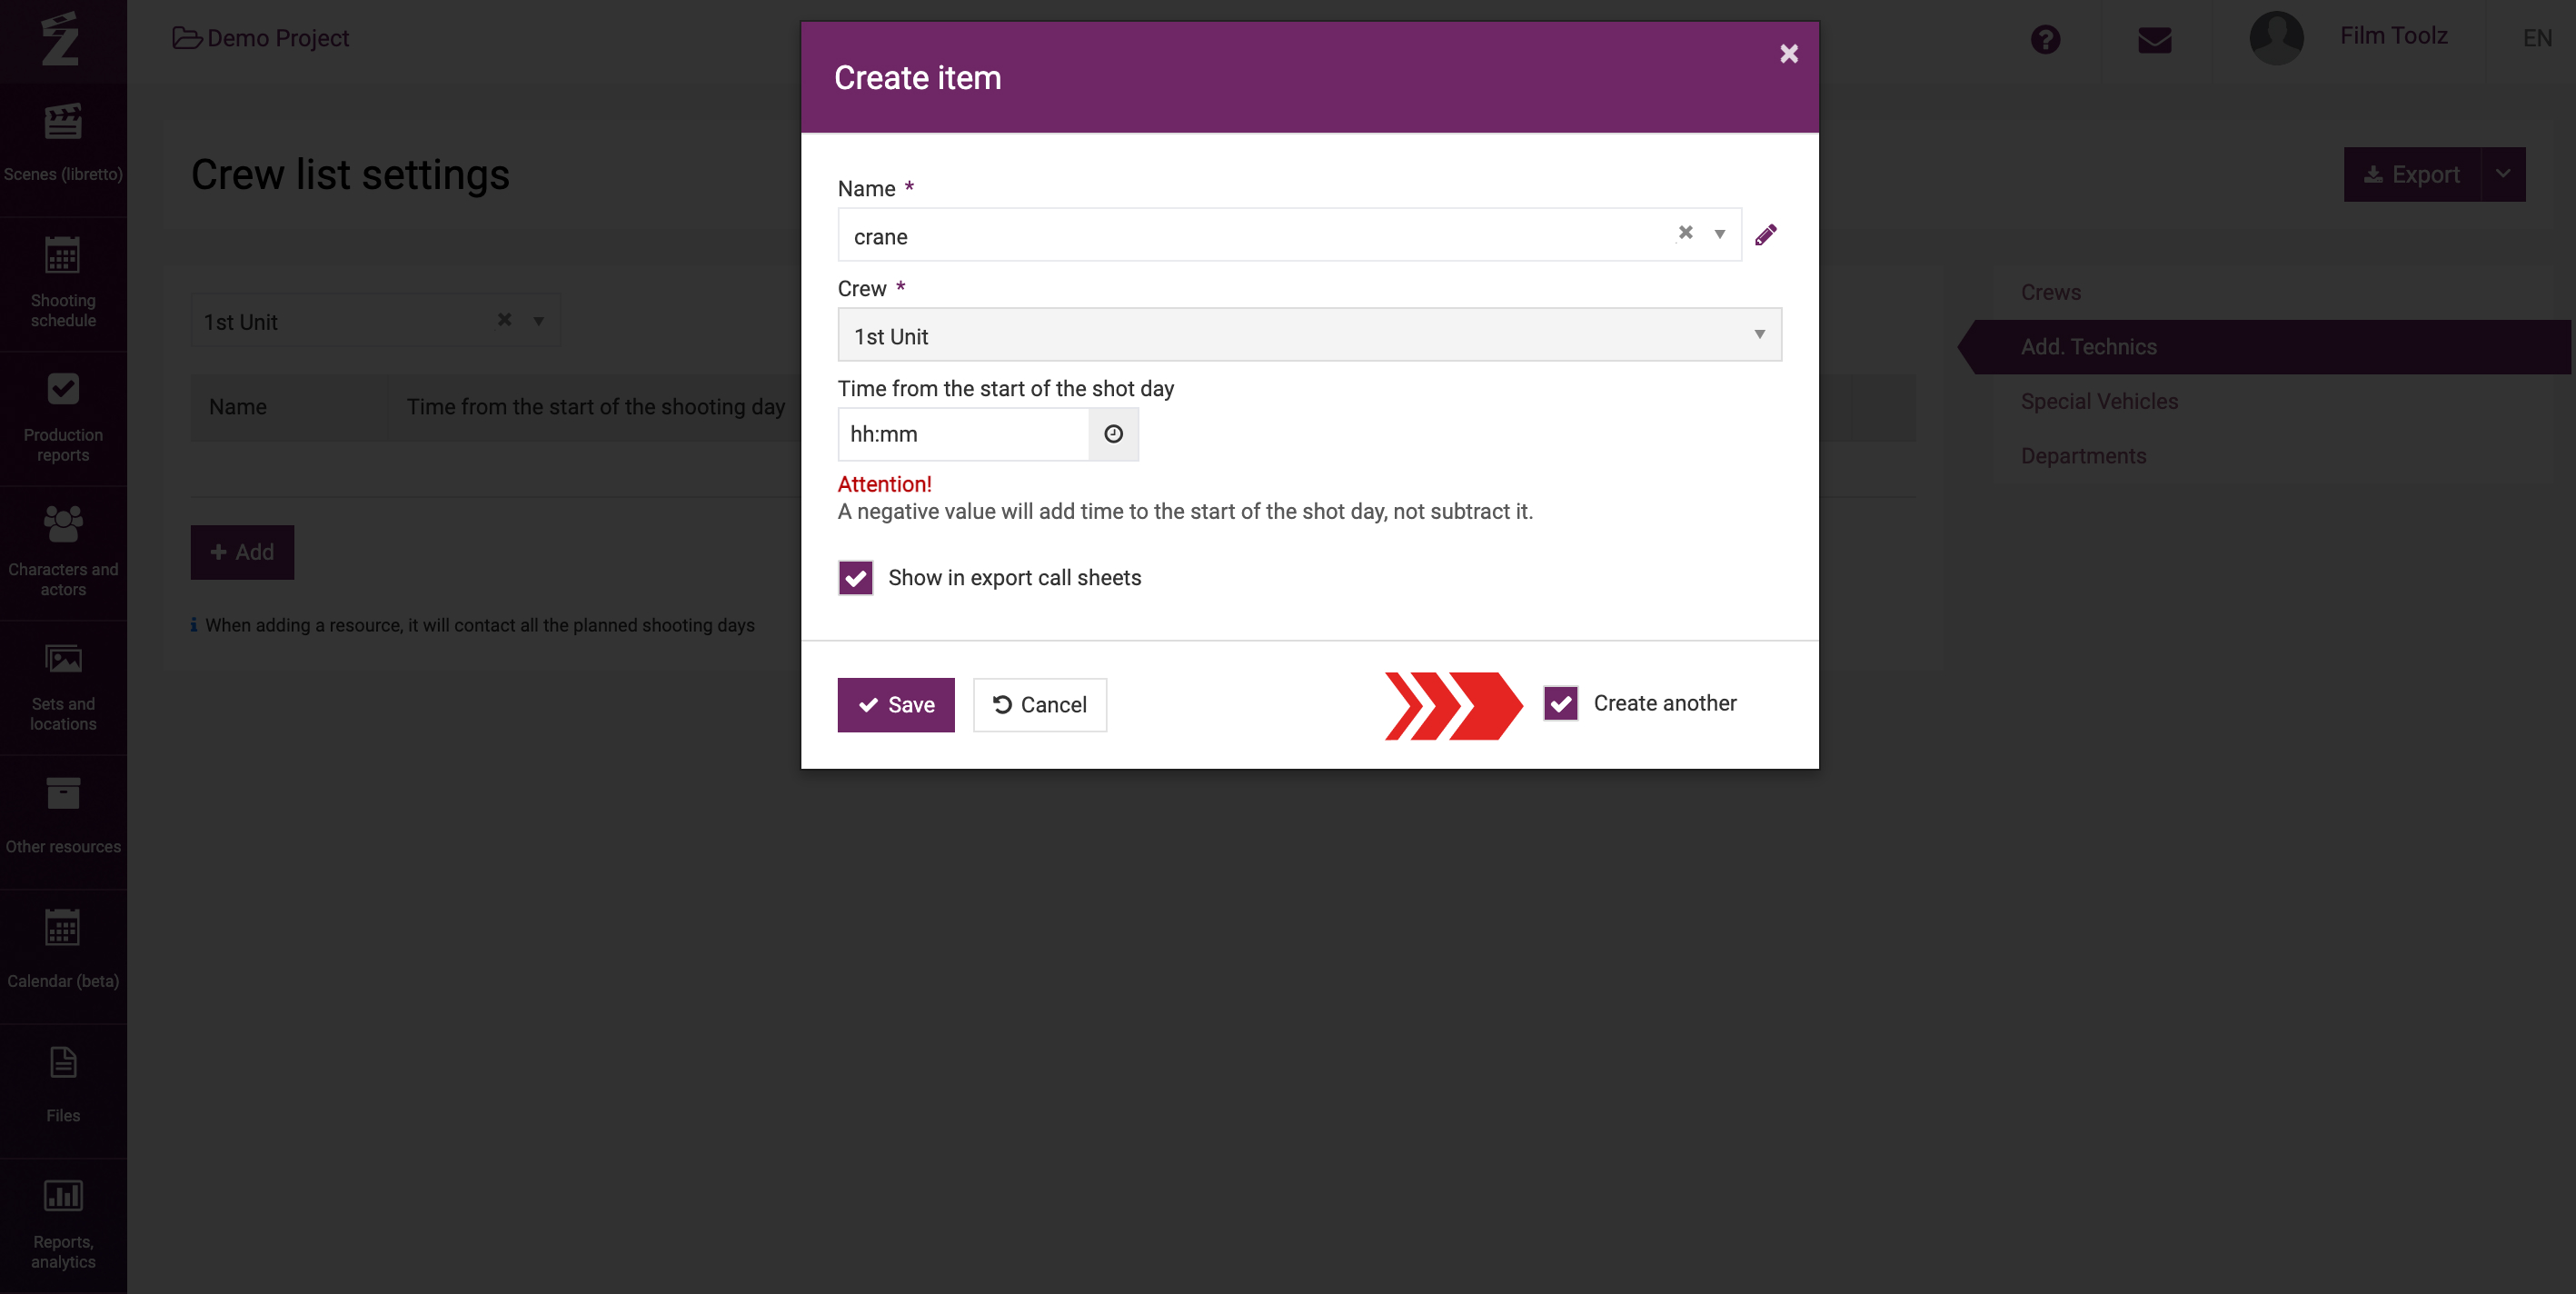
We will analize the “Additional Technics” elements as an example (presume that we want each shooting day to have a new element item of add. technics – a “crane”).
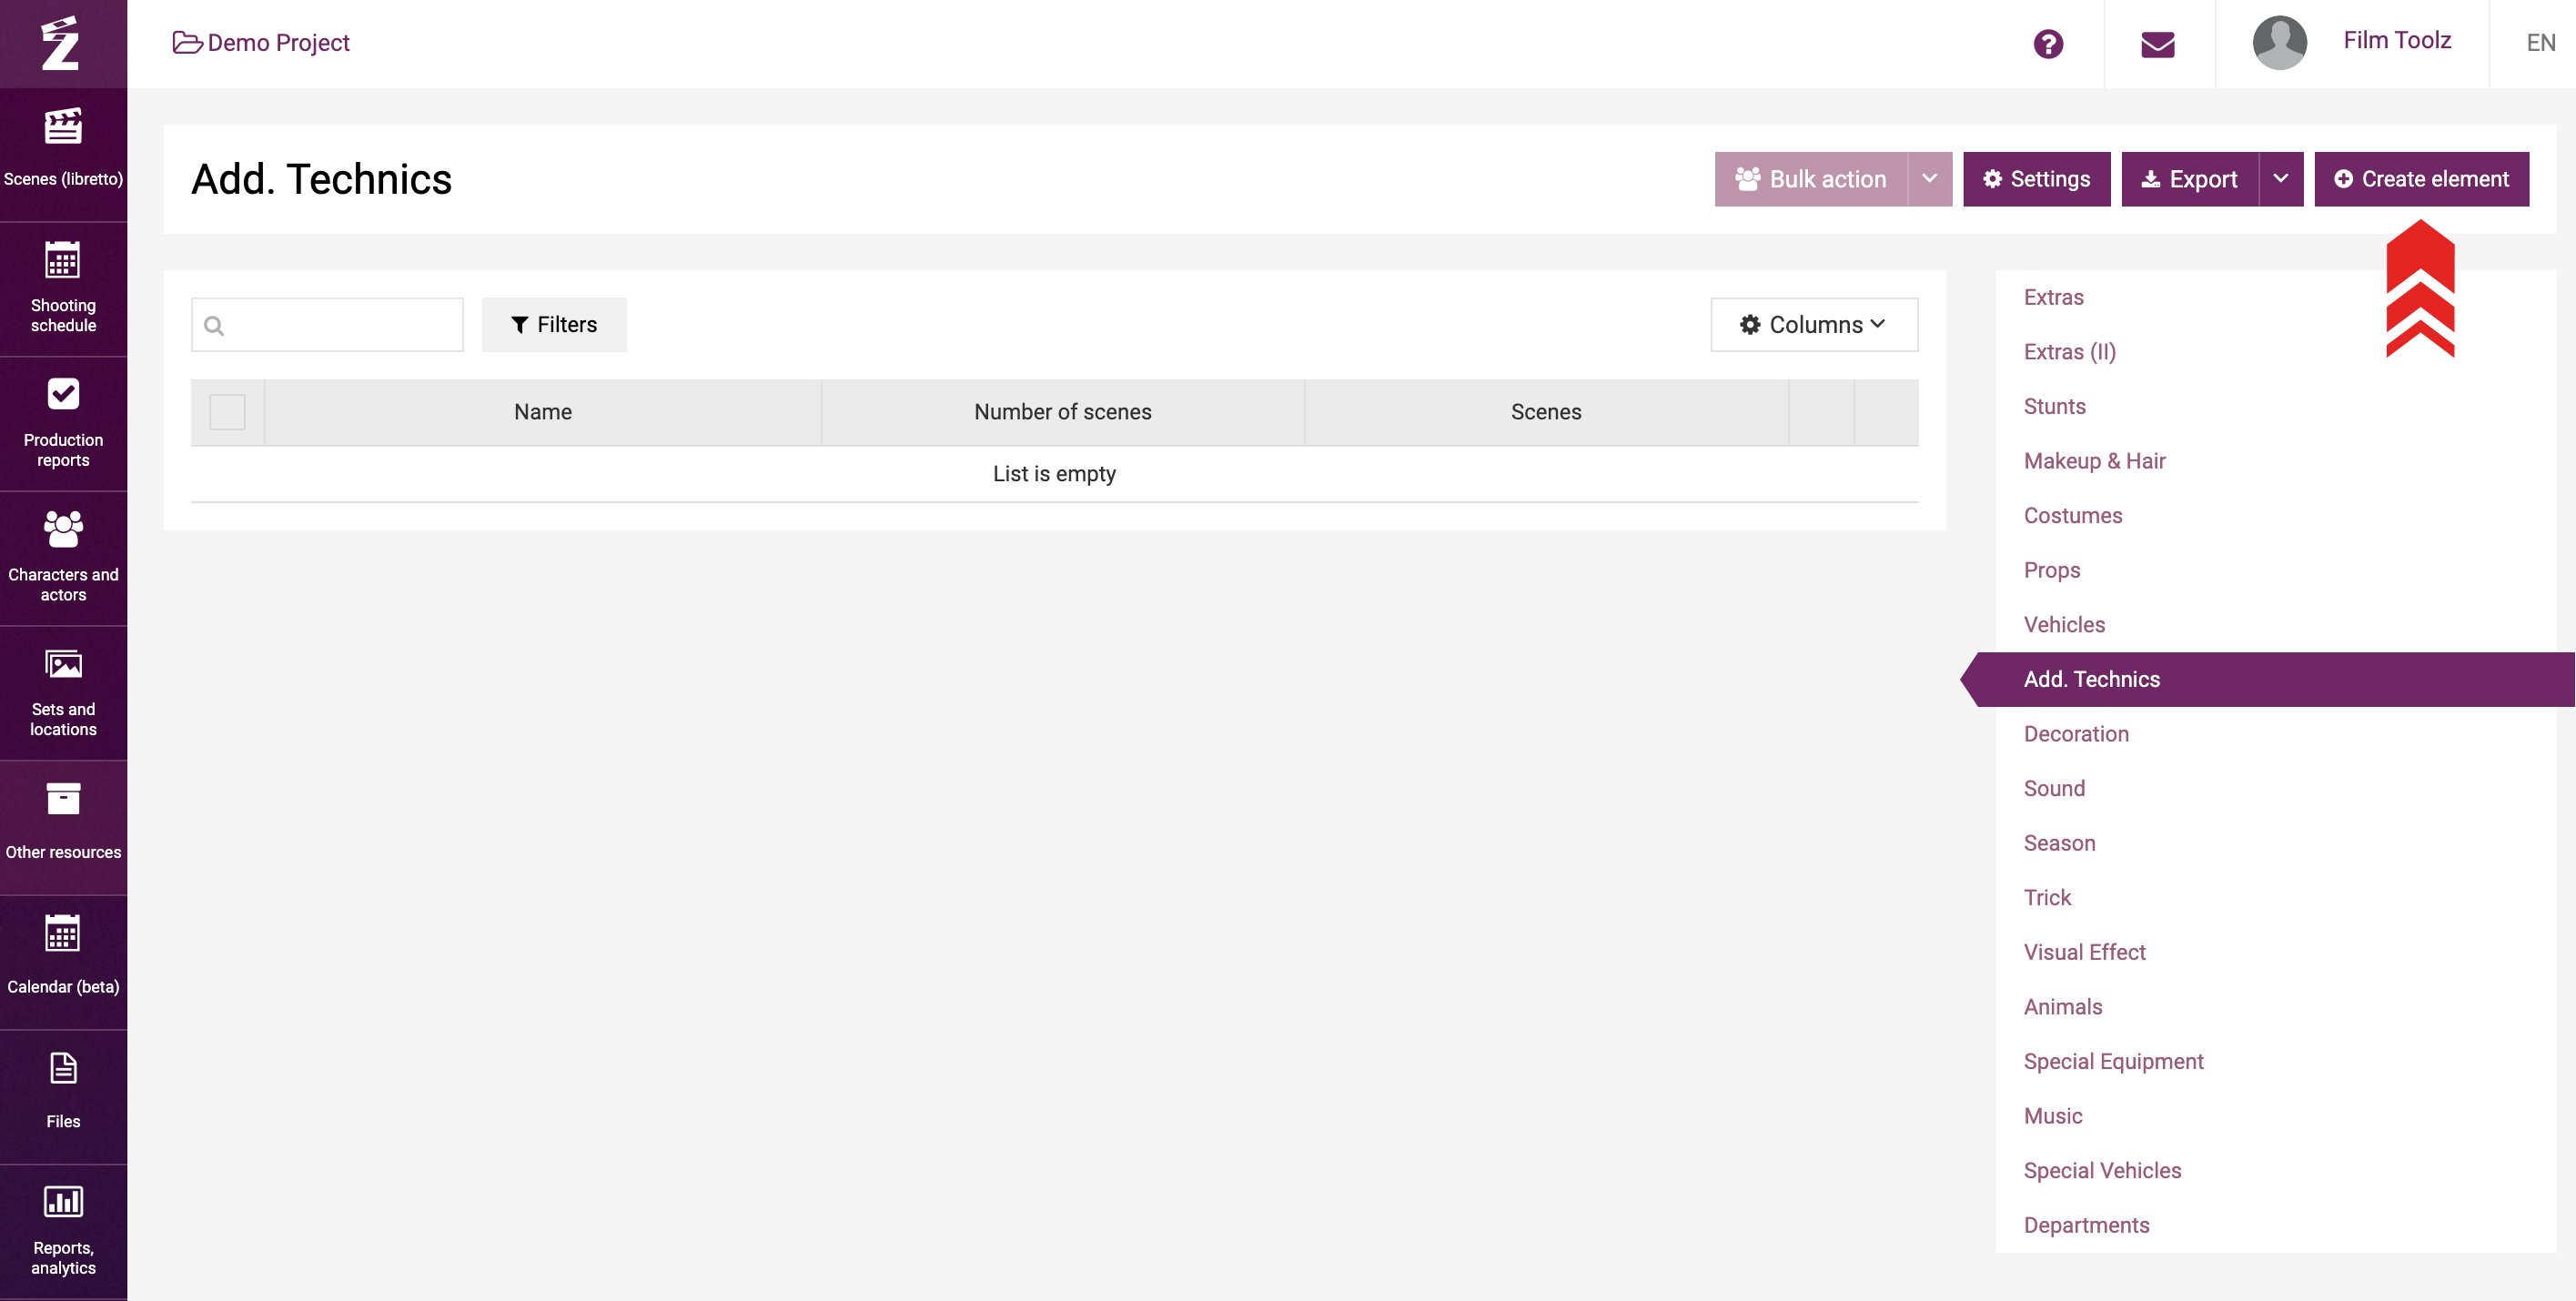
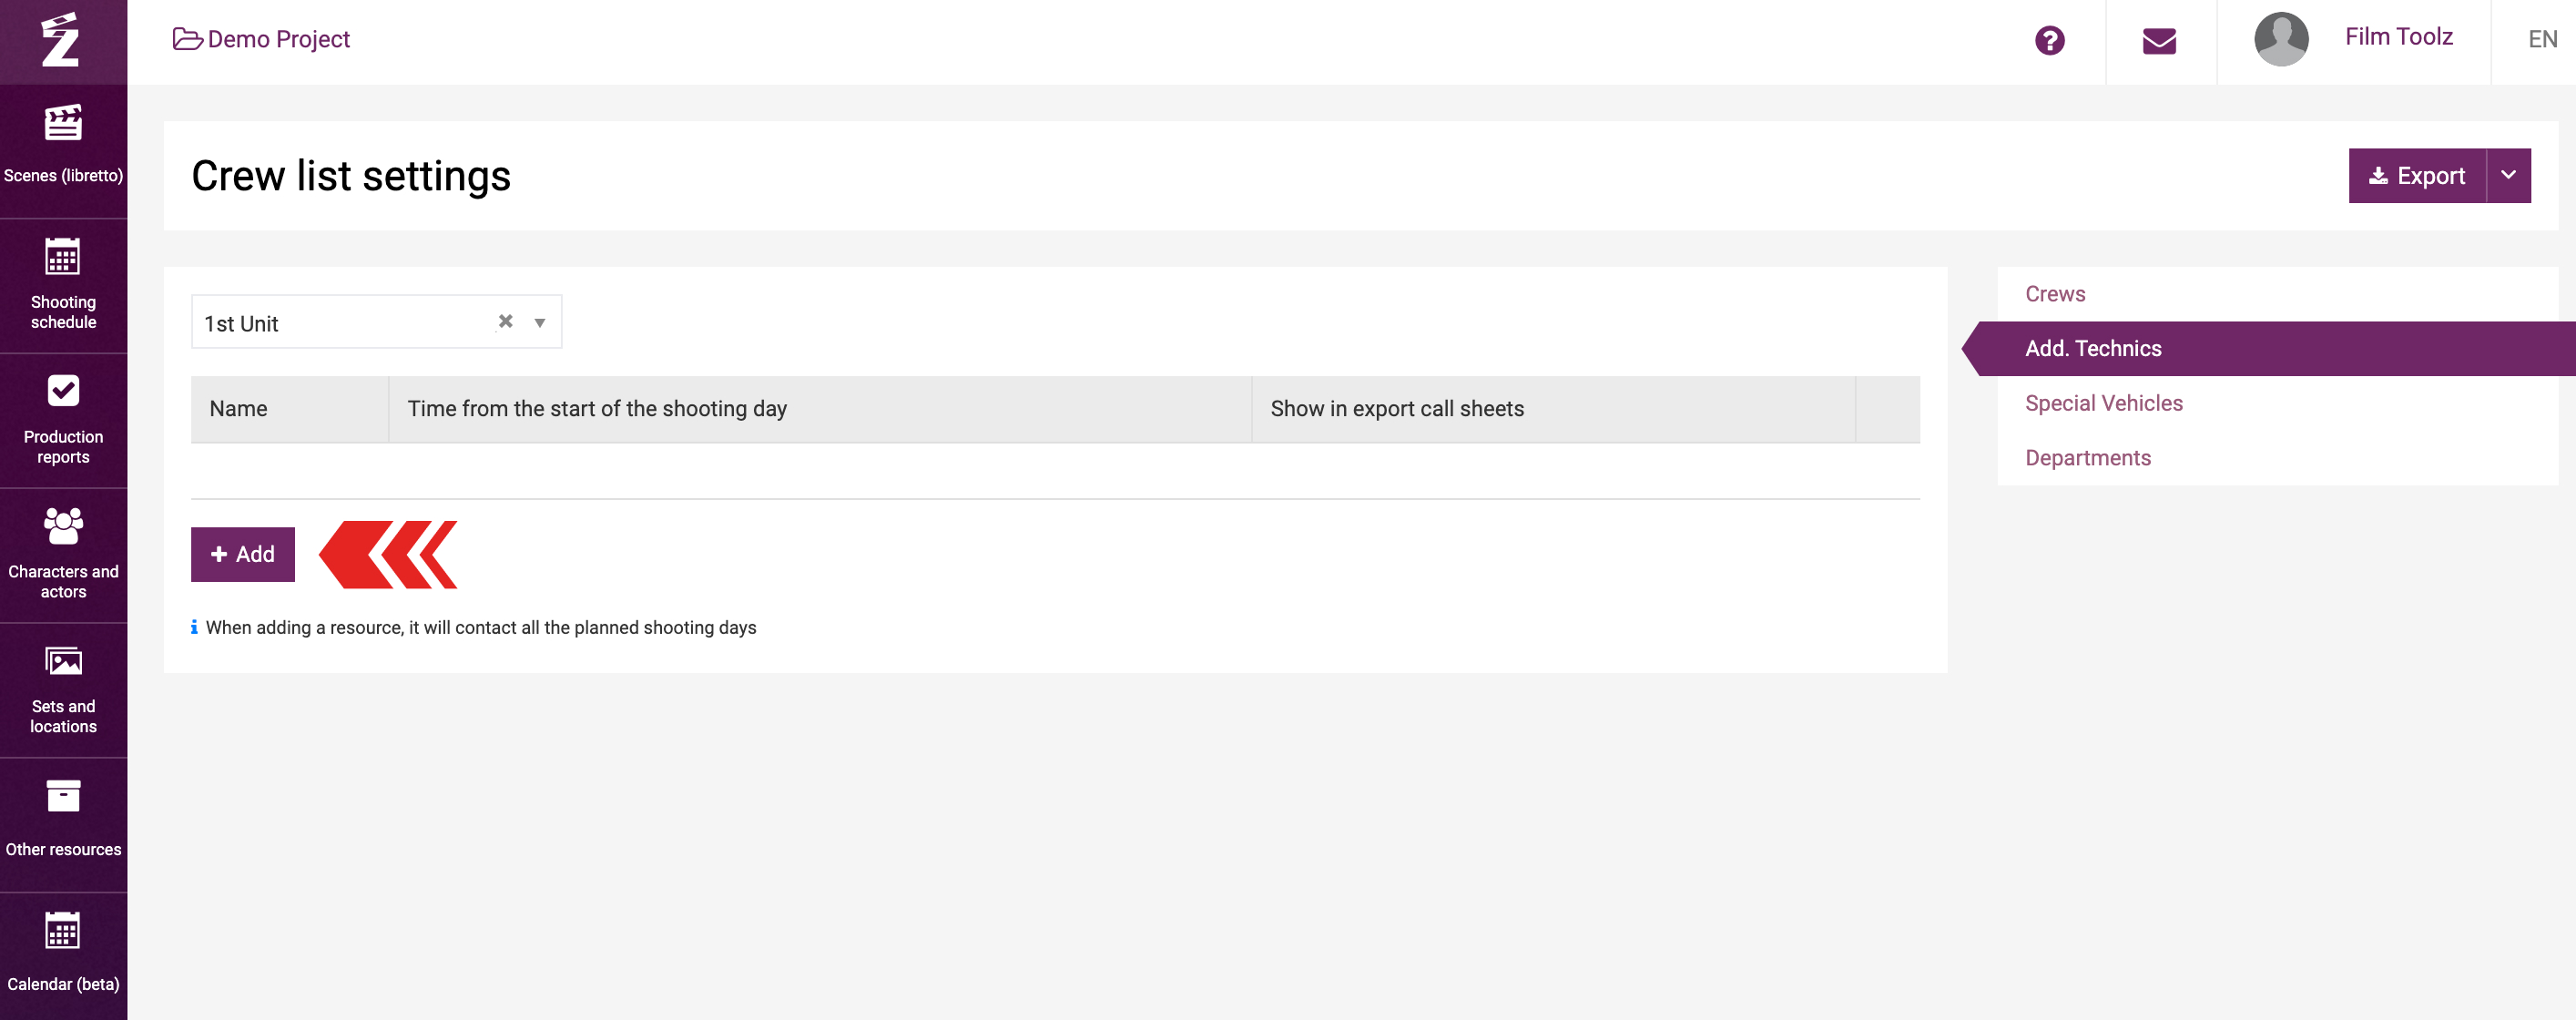
Go to the “Other elements” item and select “Add. Technics” in the column.
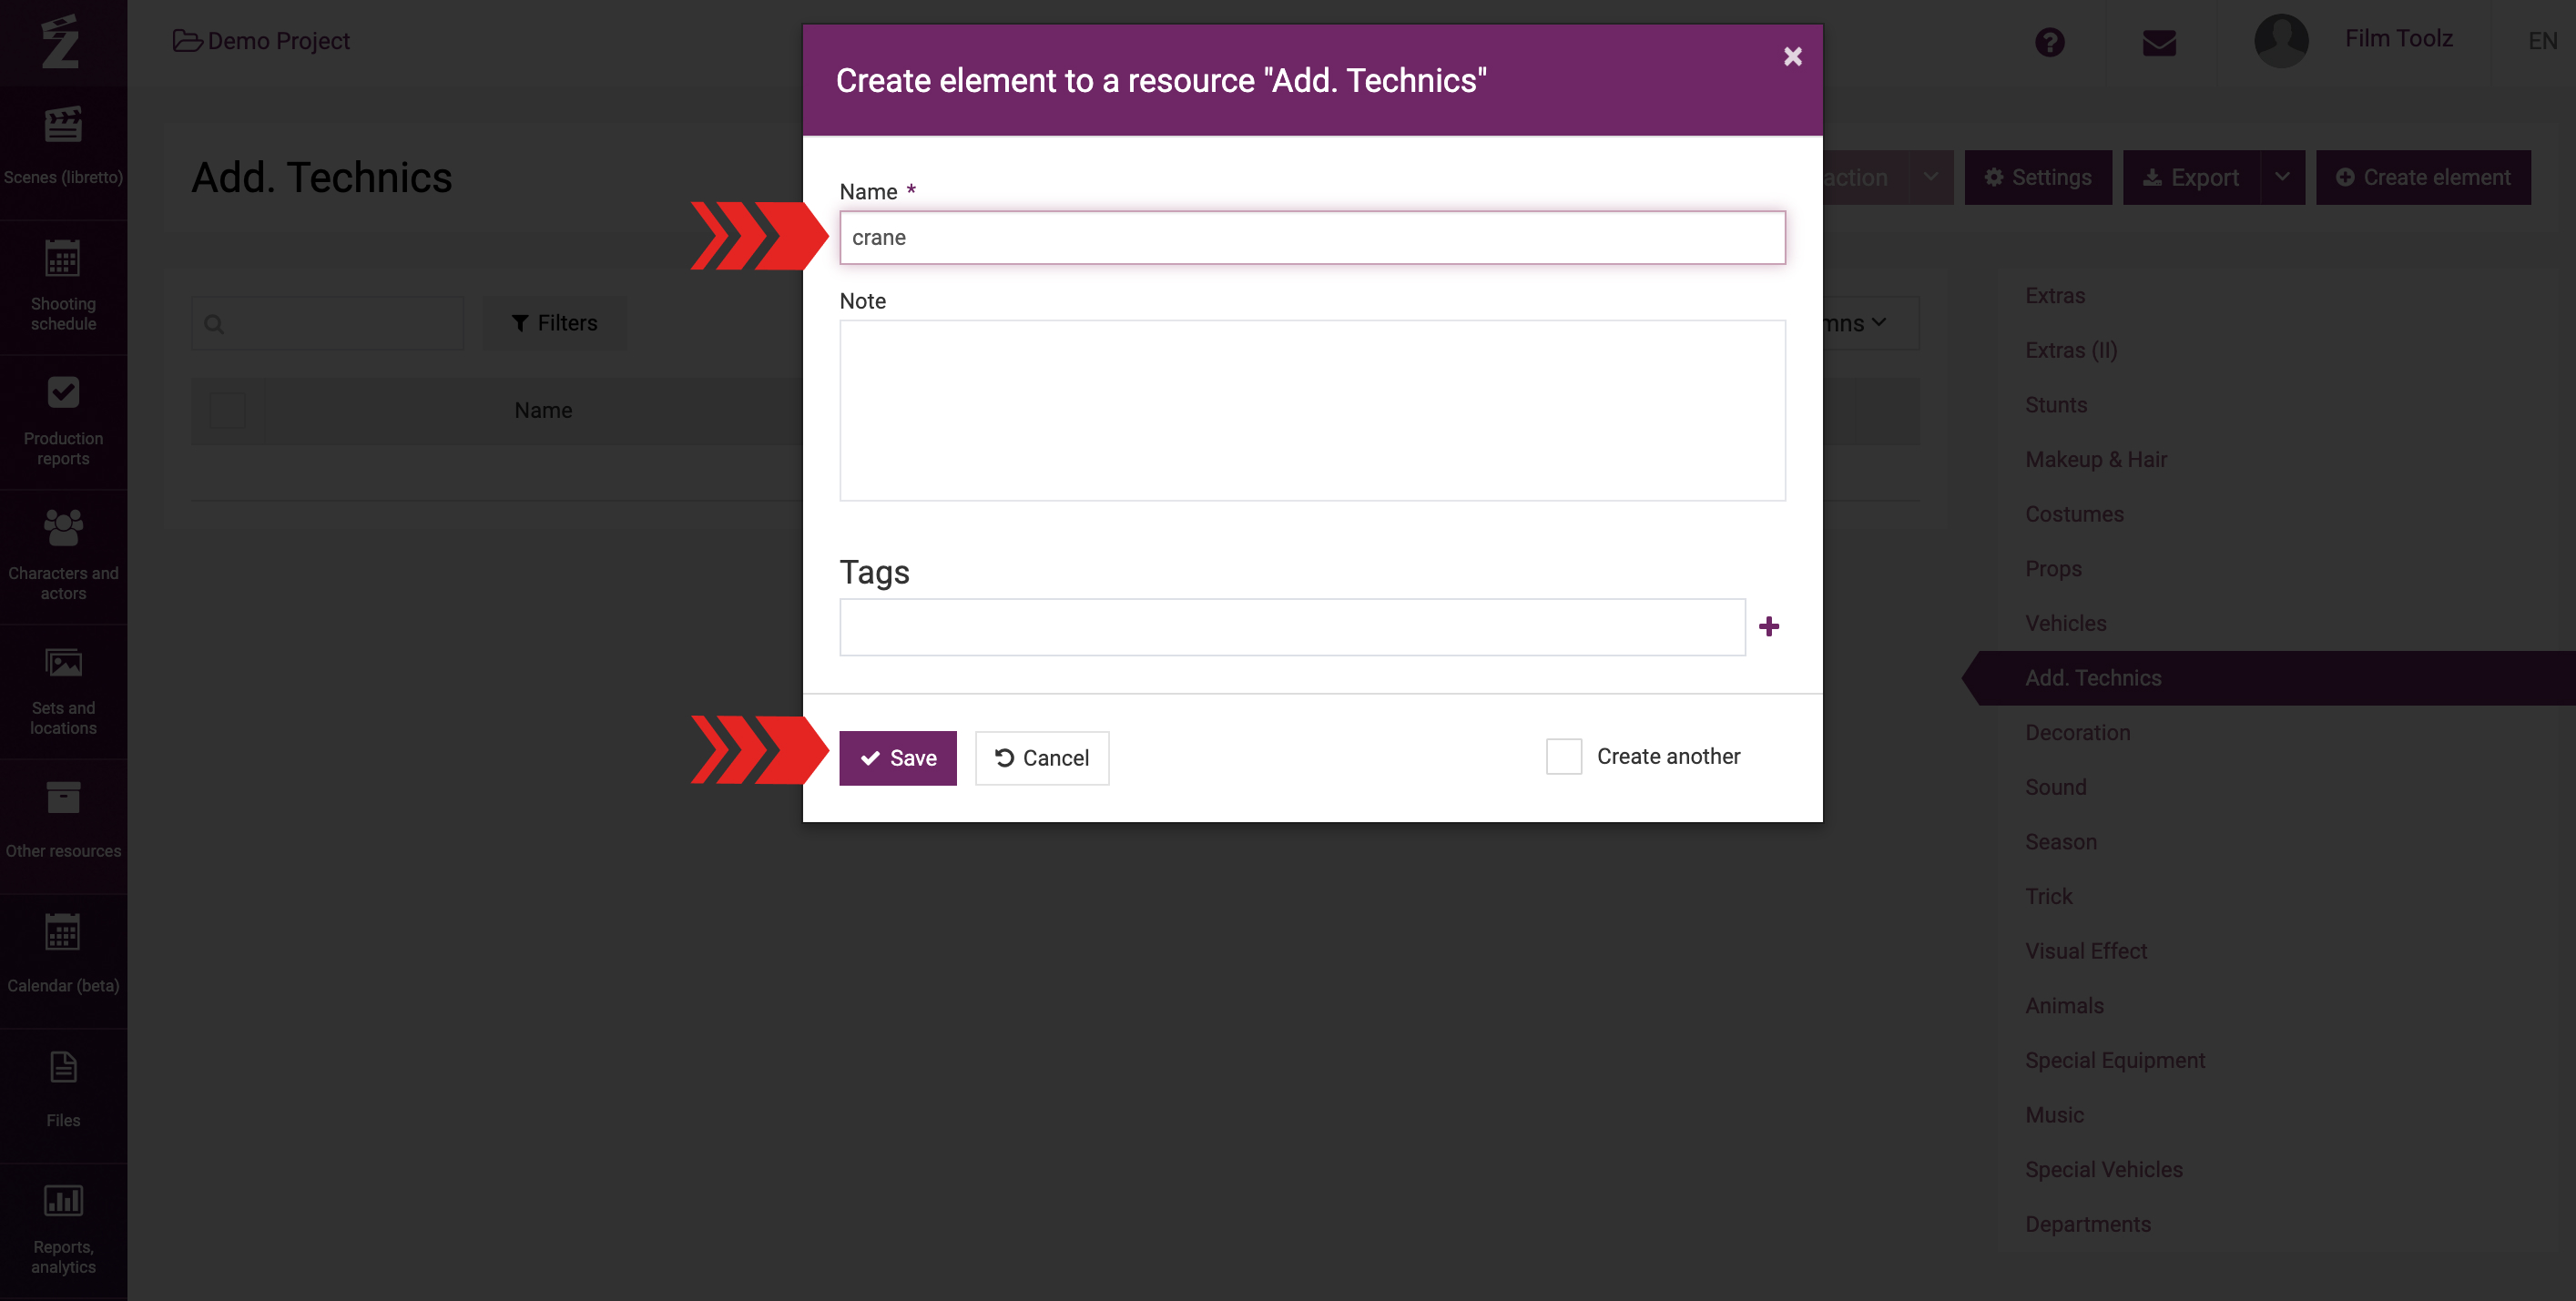
Create a new element item named “Crane” in the “Add. Technics” element.
To turn the “Add. Technics” element into a shooting day element and have it displayed in all shooting days, you need to do two things:
1) Go to the settings...
... and tick the “Daily elements connected to shooting day” attribute for the “Add. Technics” element.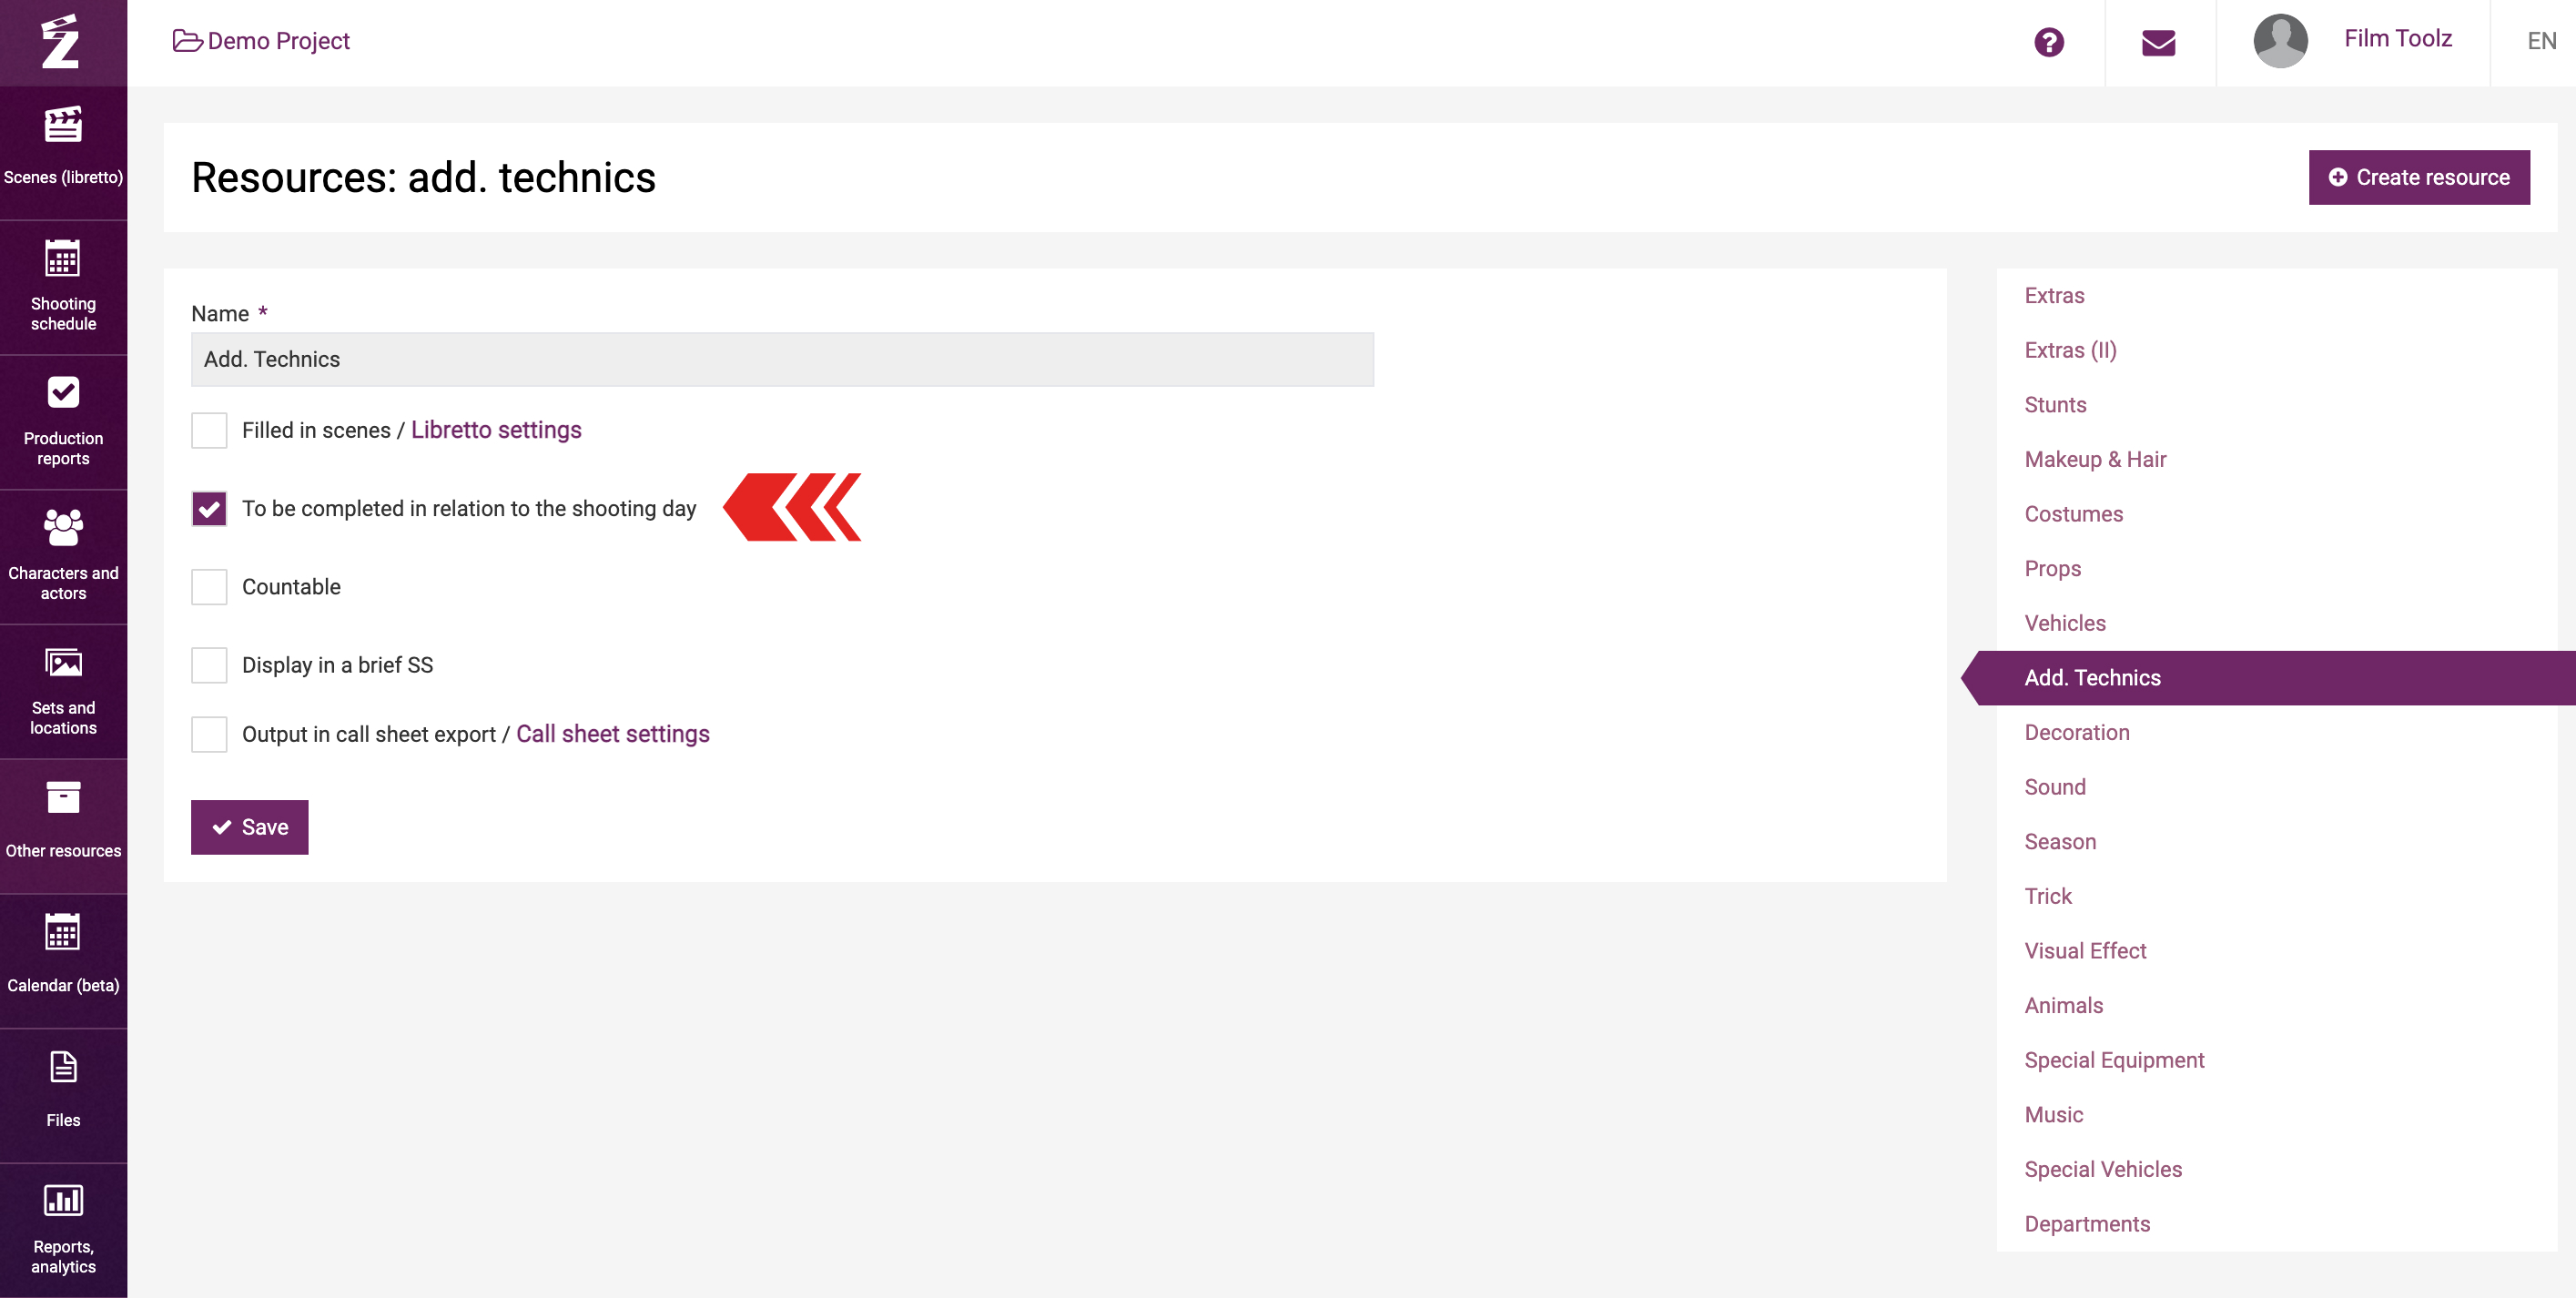
2) Then configure the call sheets so as to specify the unit (since there may be 2 or 3 units, or more) where the “Add. Technics” element will be shown. To do so, go to the crew settings.

The menu to the right lists the elements with “Daily elements connected to shooting day” attribute ticked.
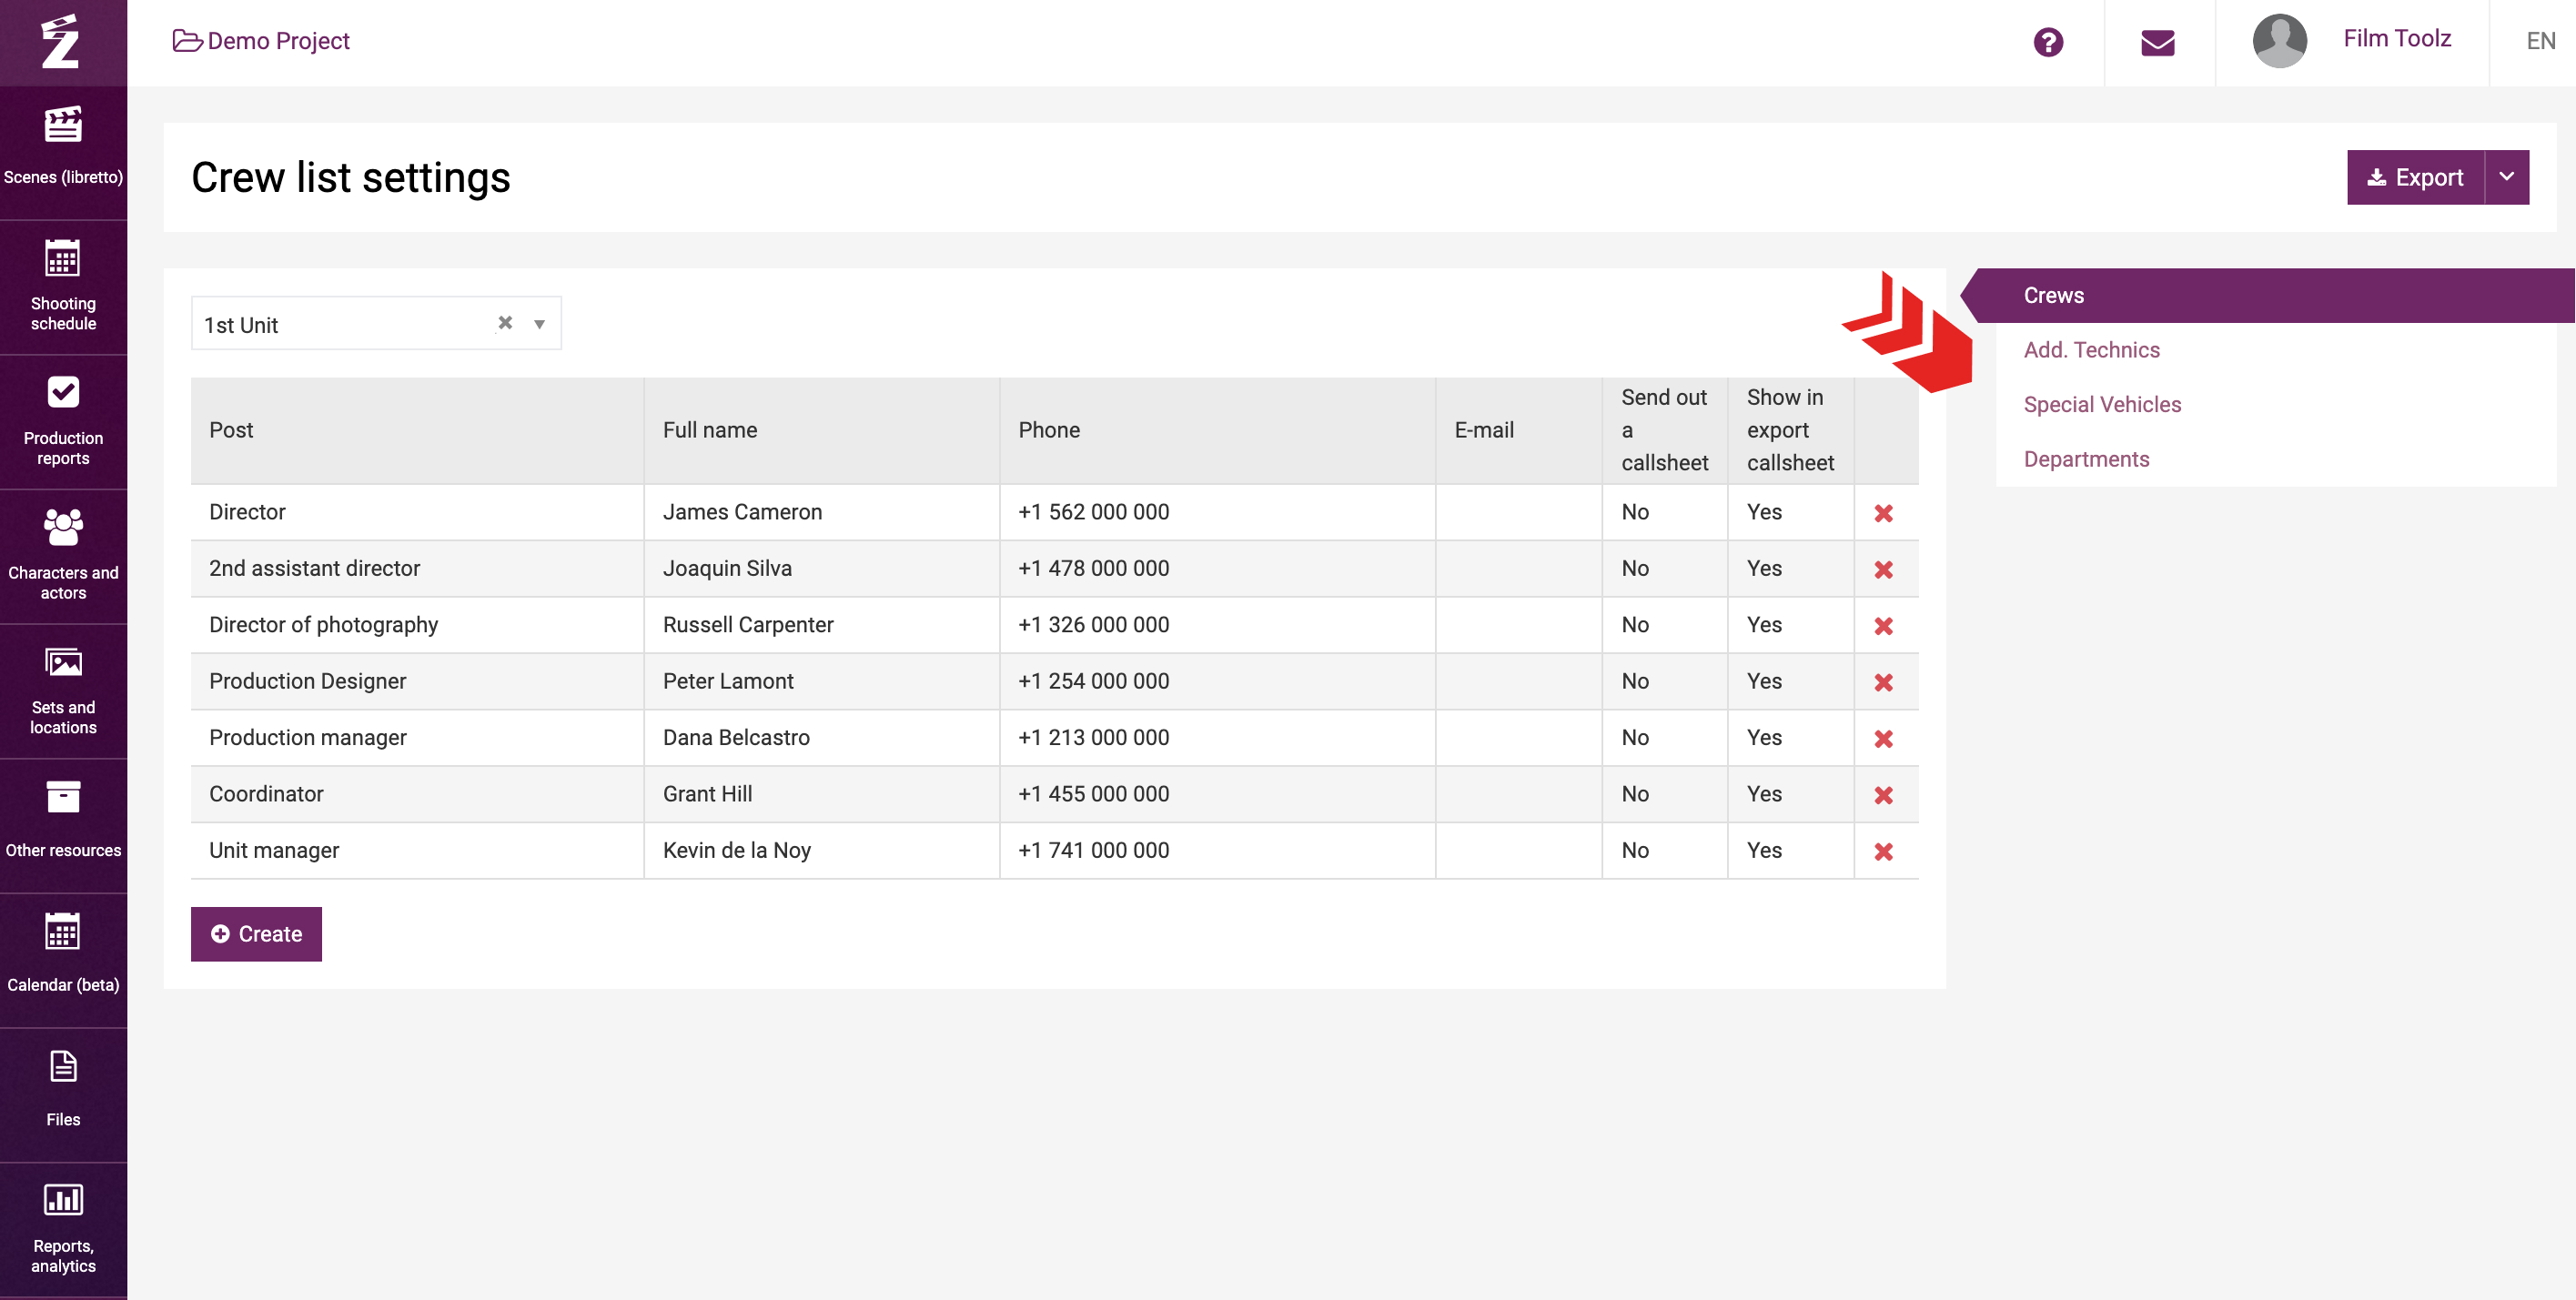
The tabs of the “Special vehicles” and “Departments” elements have already been filled out with the element items created by default.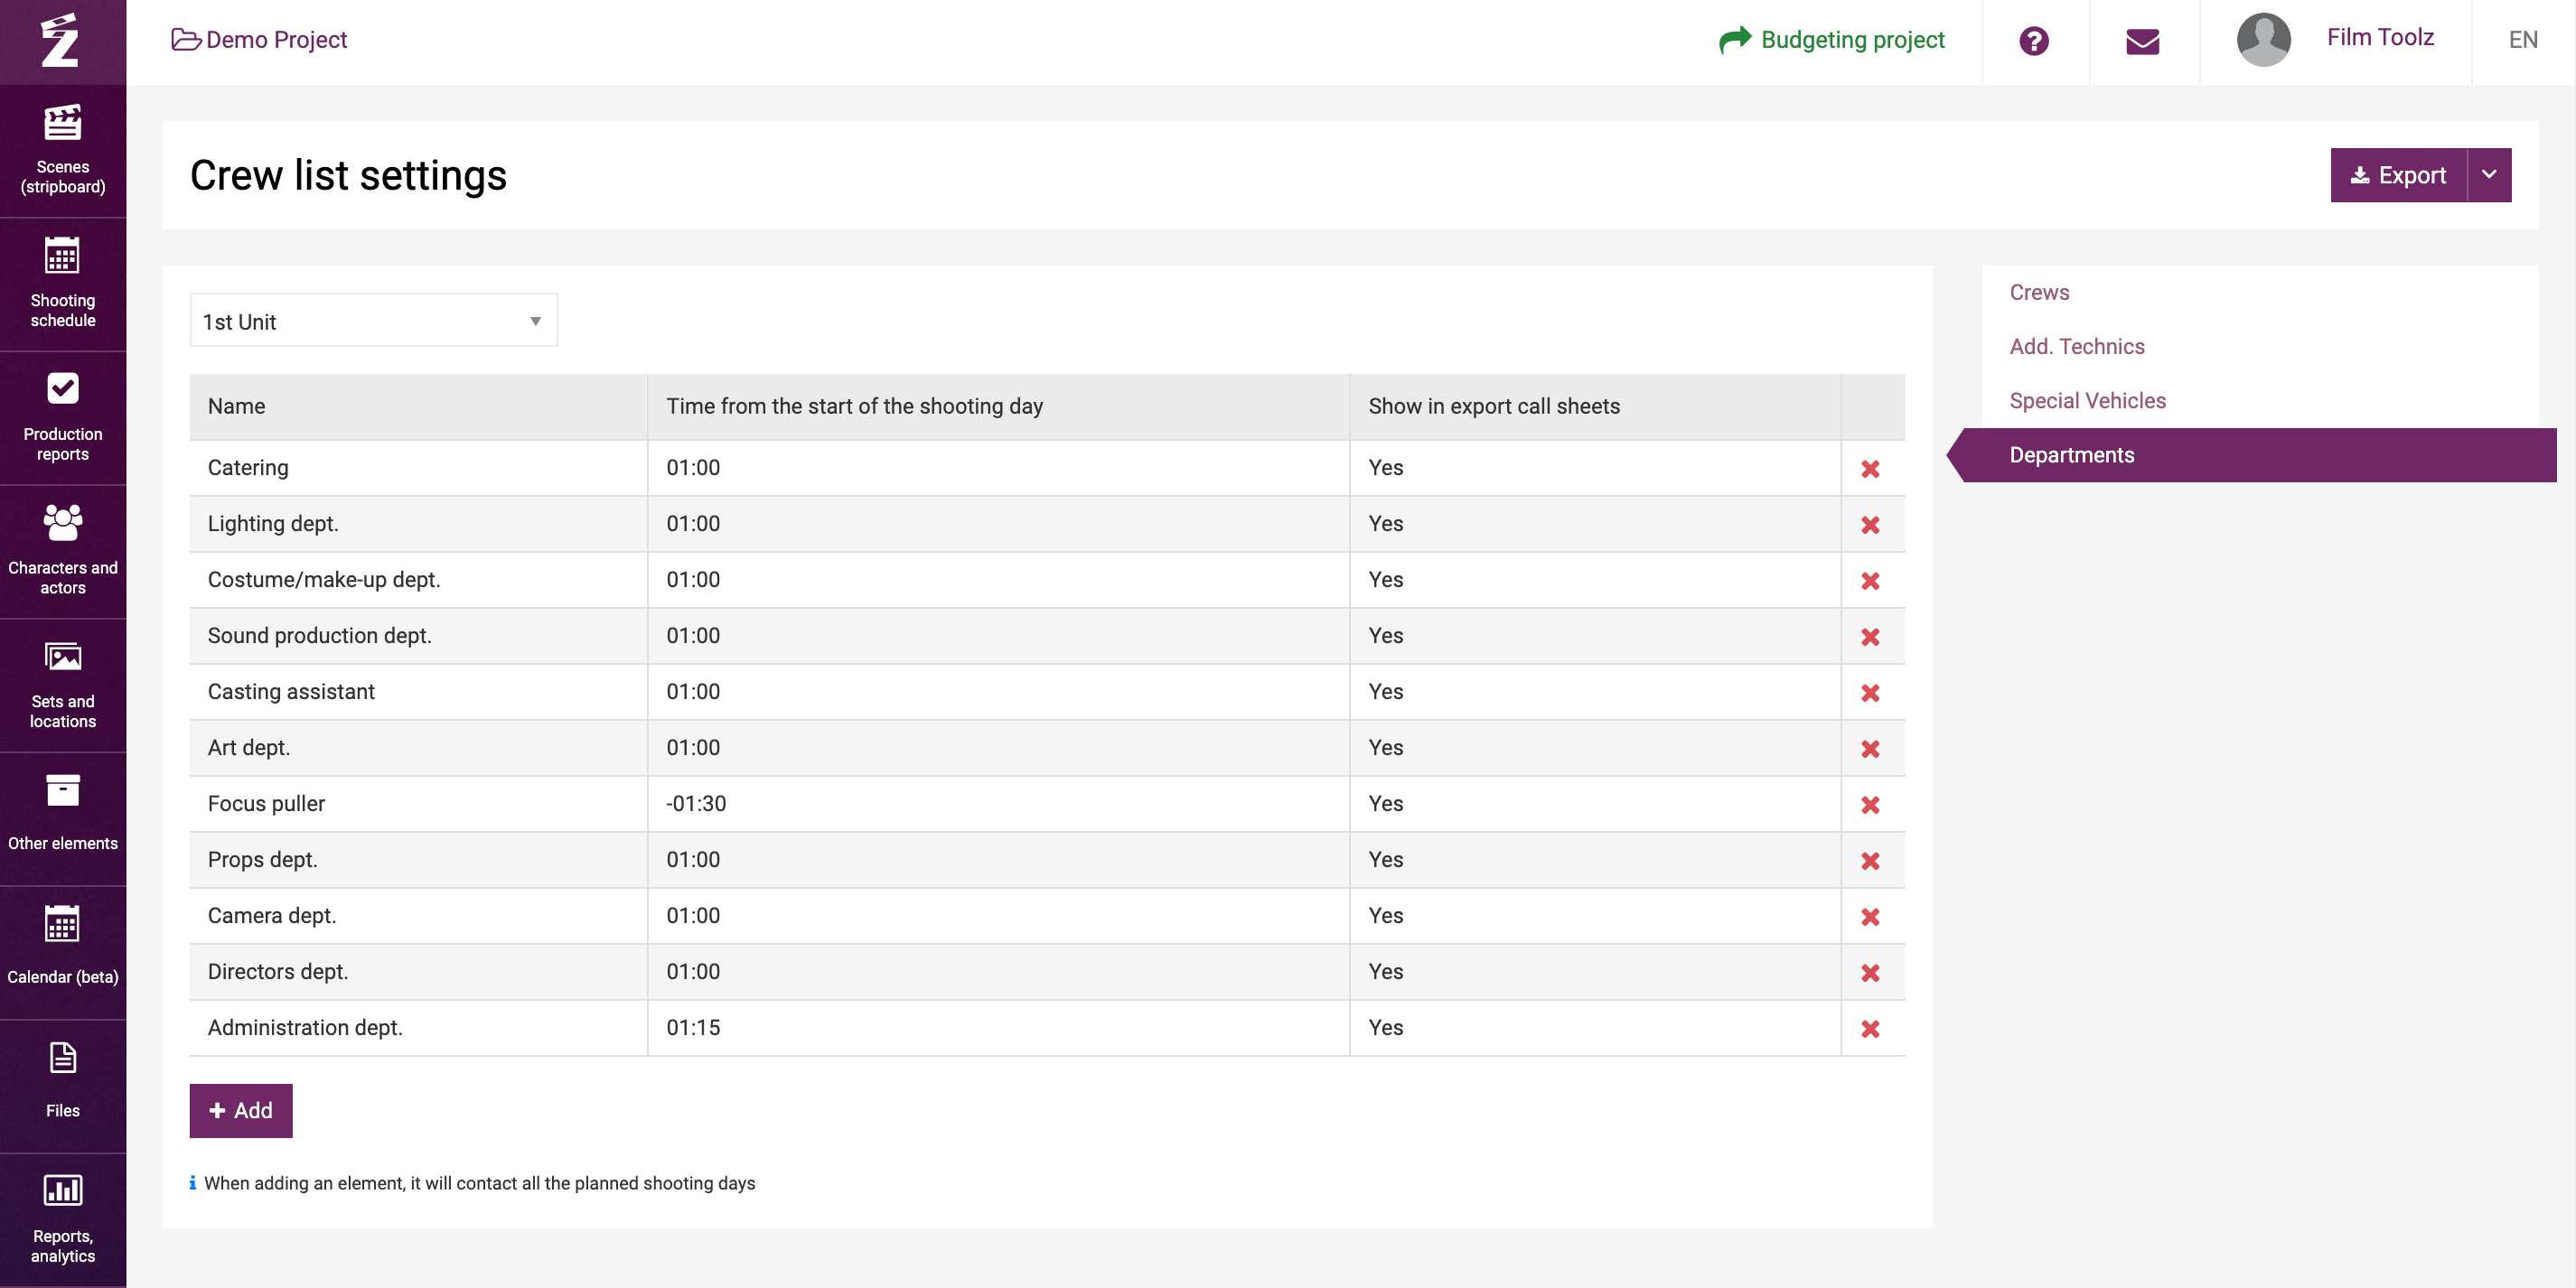
By contrast, the new elements tabs (including “Add. Technics”) will be blank. You have to fill them out with the required element items on your own. To do so, click on “Add”.
You will see a window where you can select the existing element items from the drop-down list (e.g., “crane”).
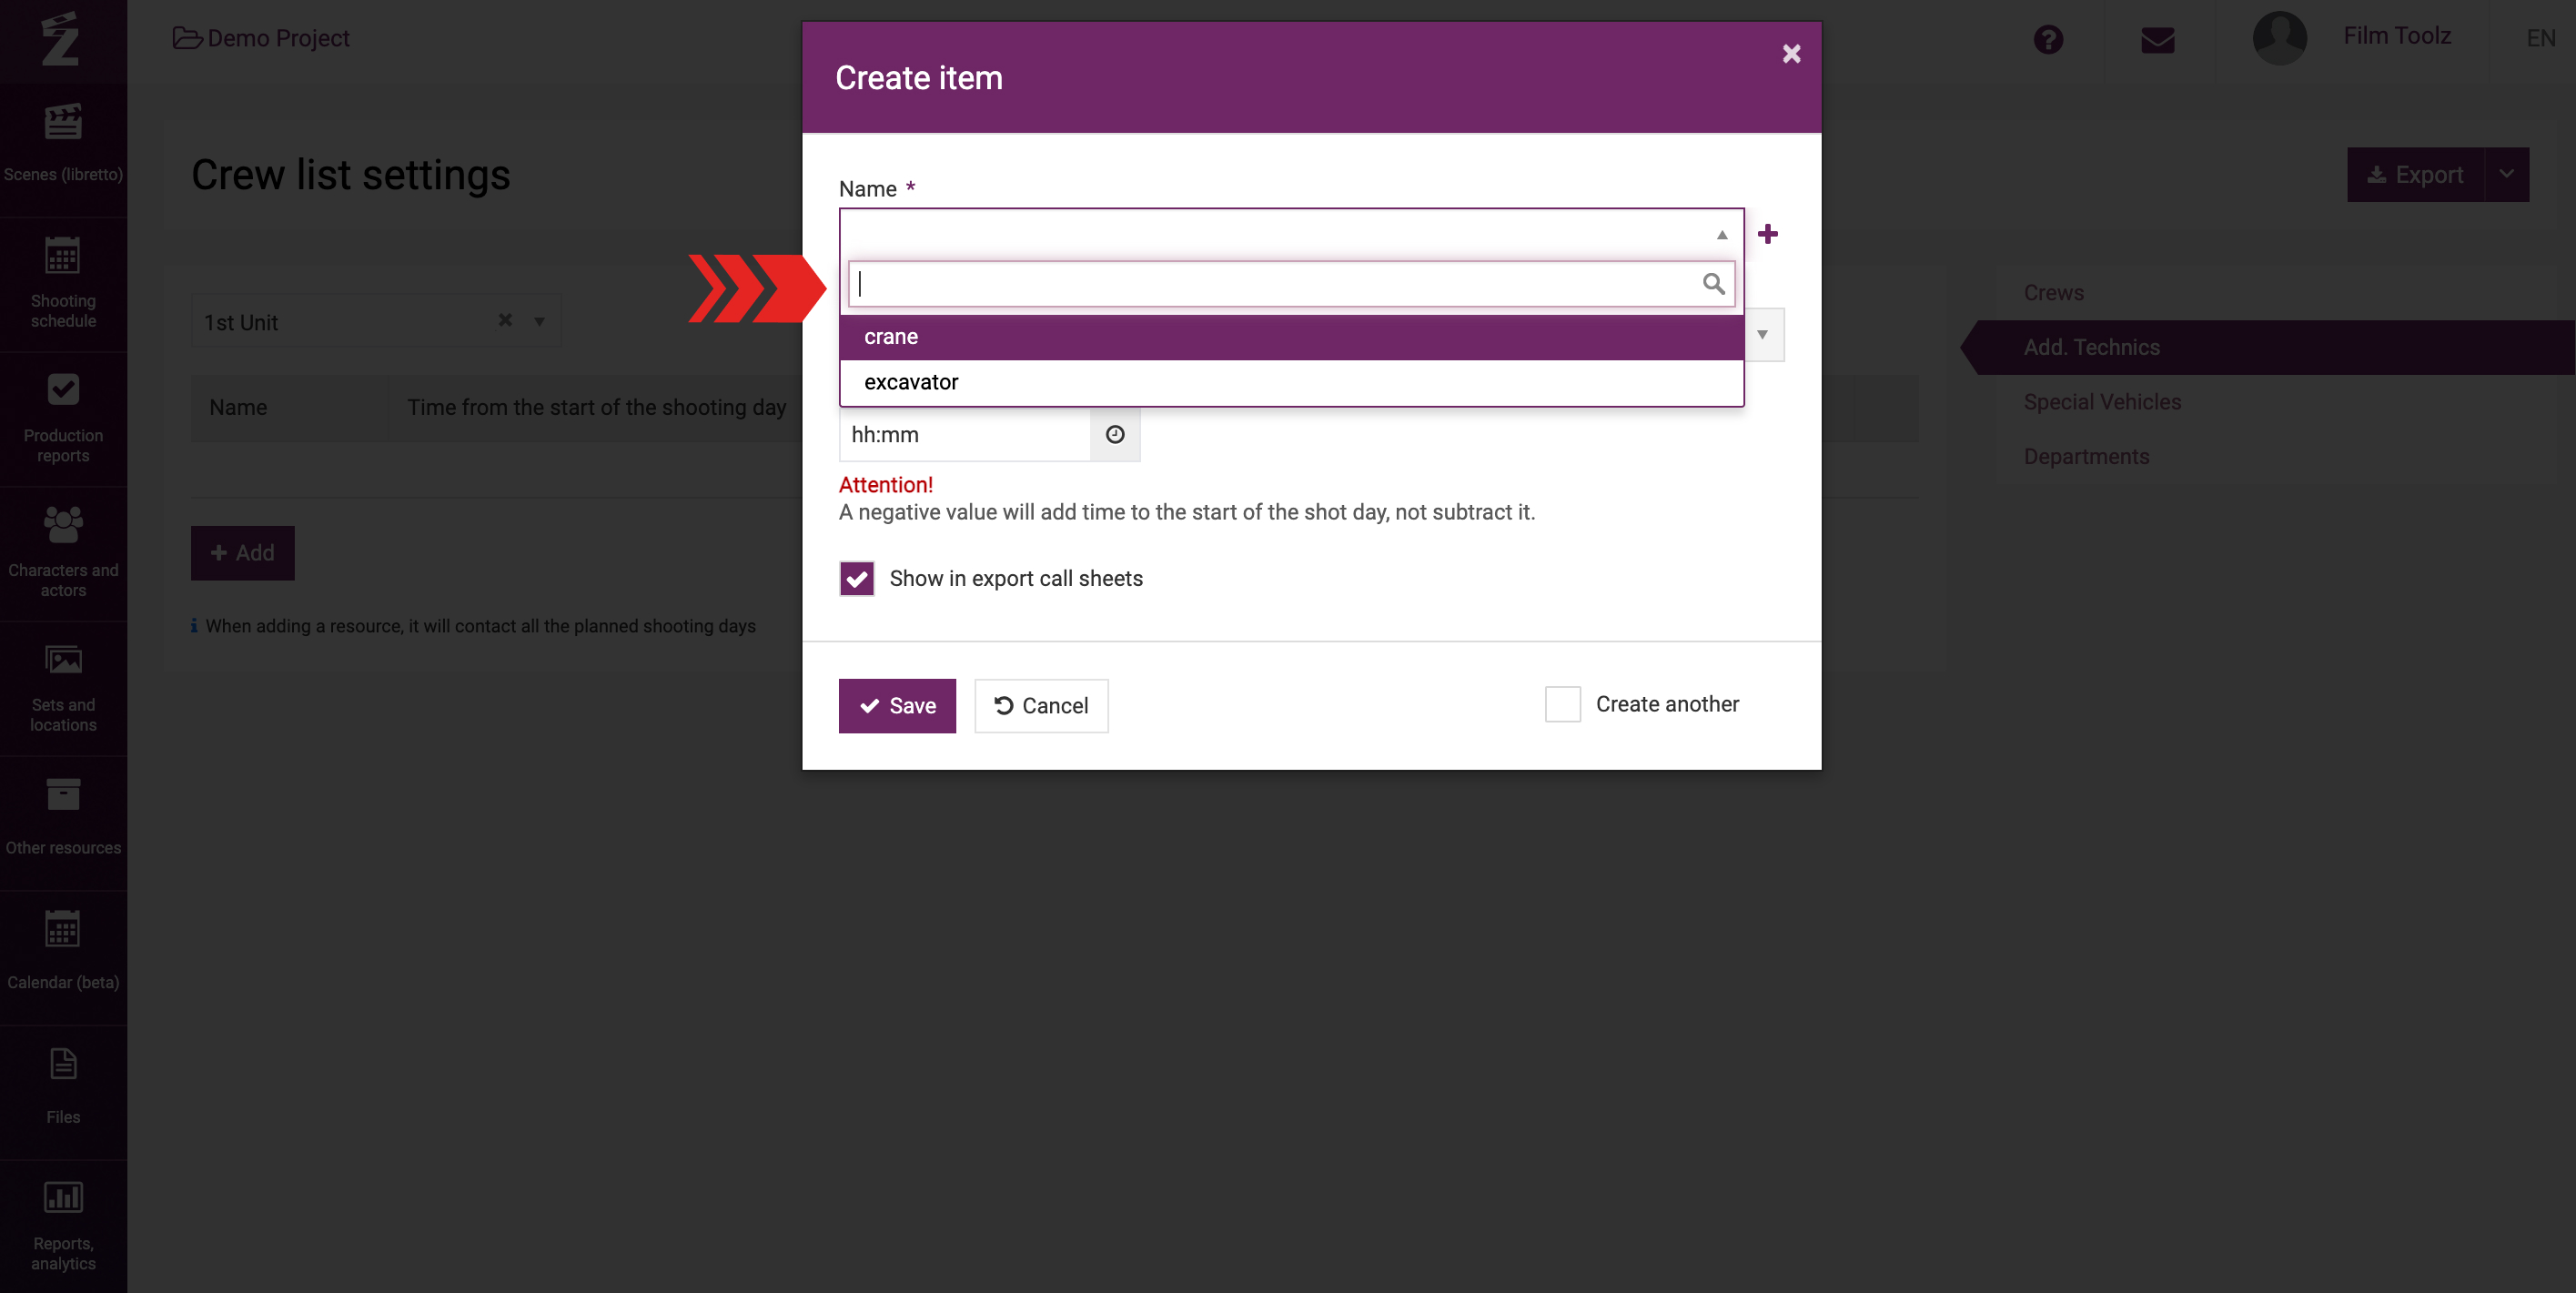
Alternatively, you can create a new element item (it will be added to the list of element items of “Add. Technics” and attached to the selected unit straight away).
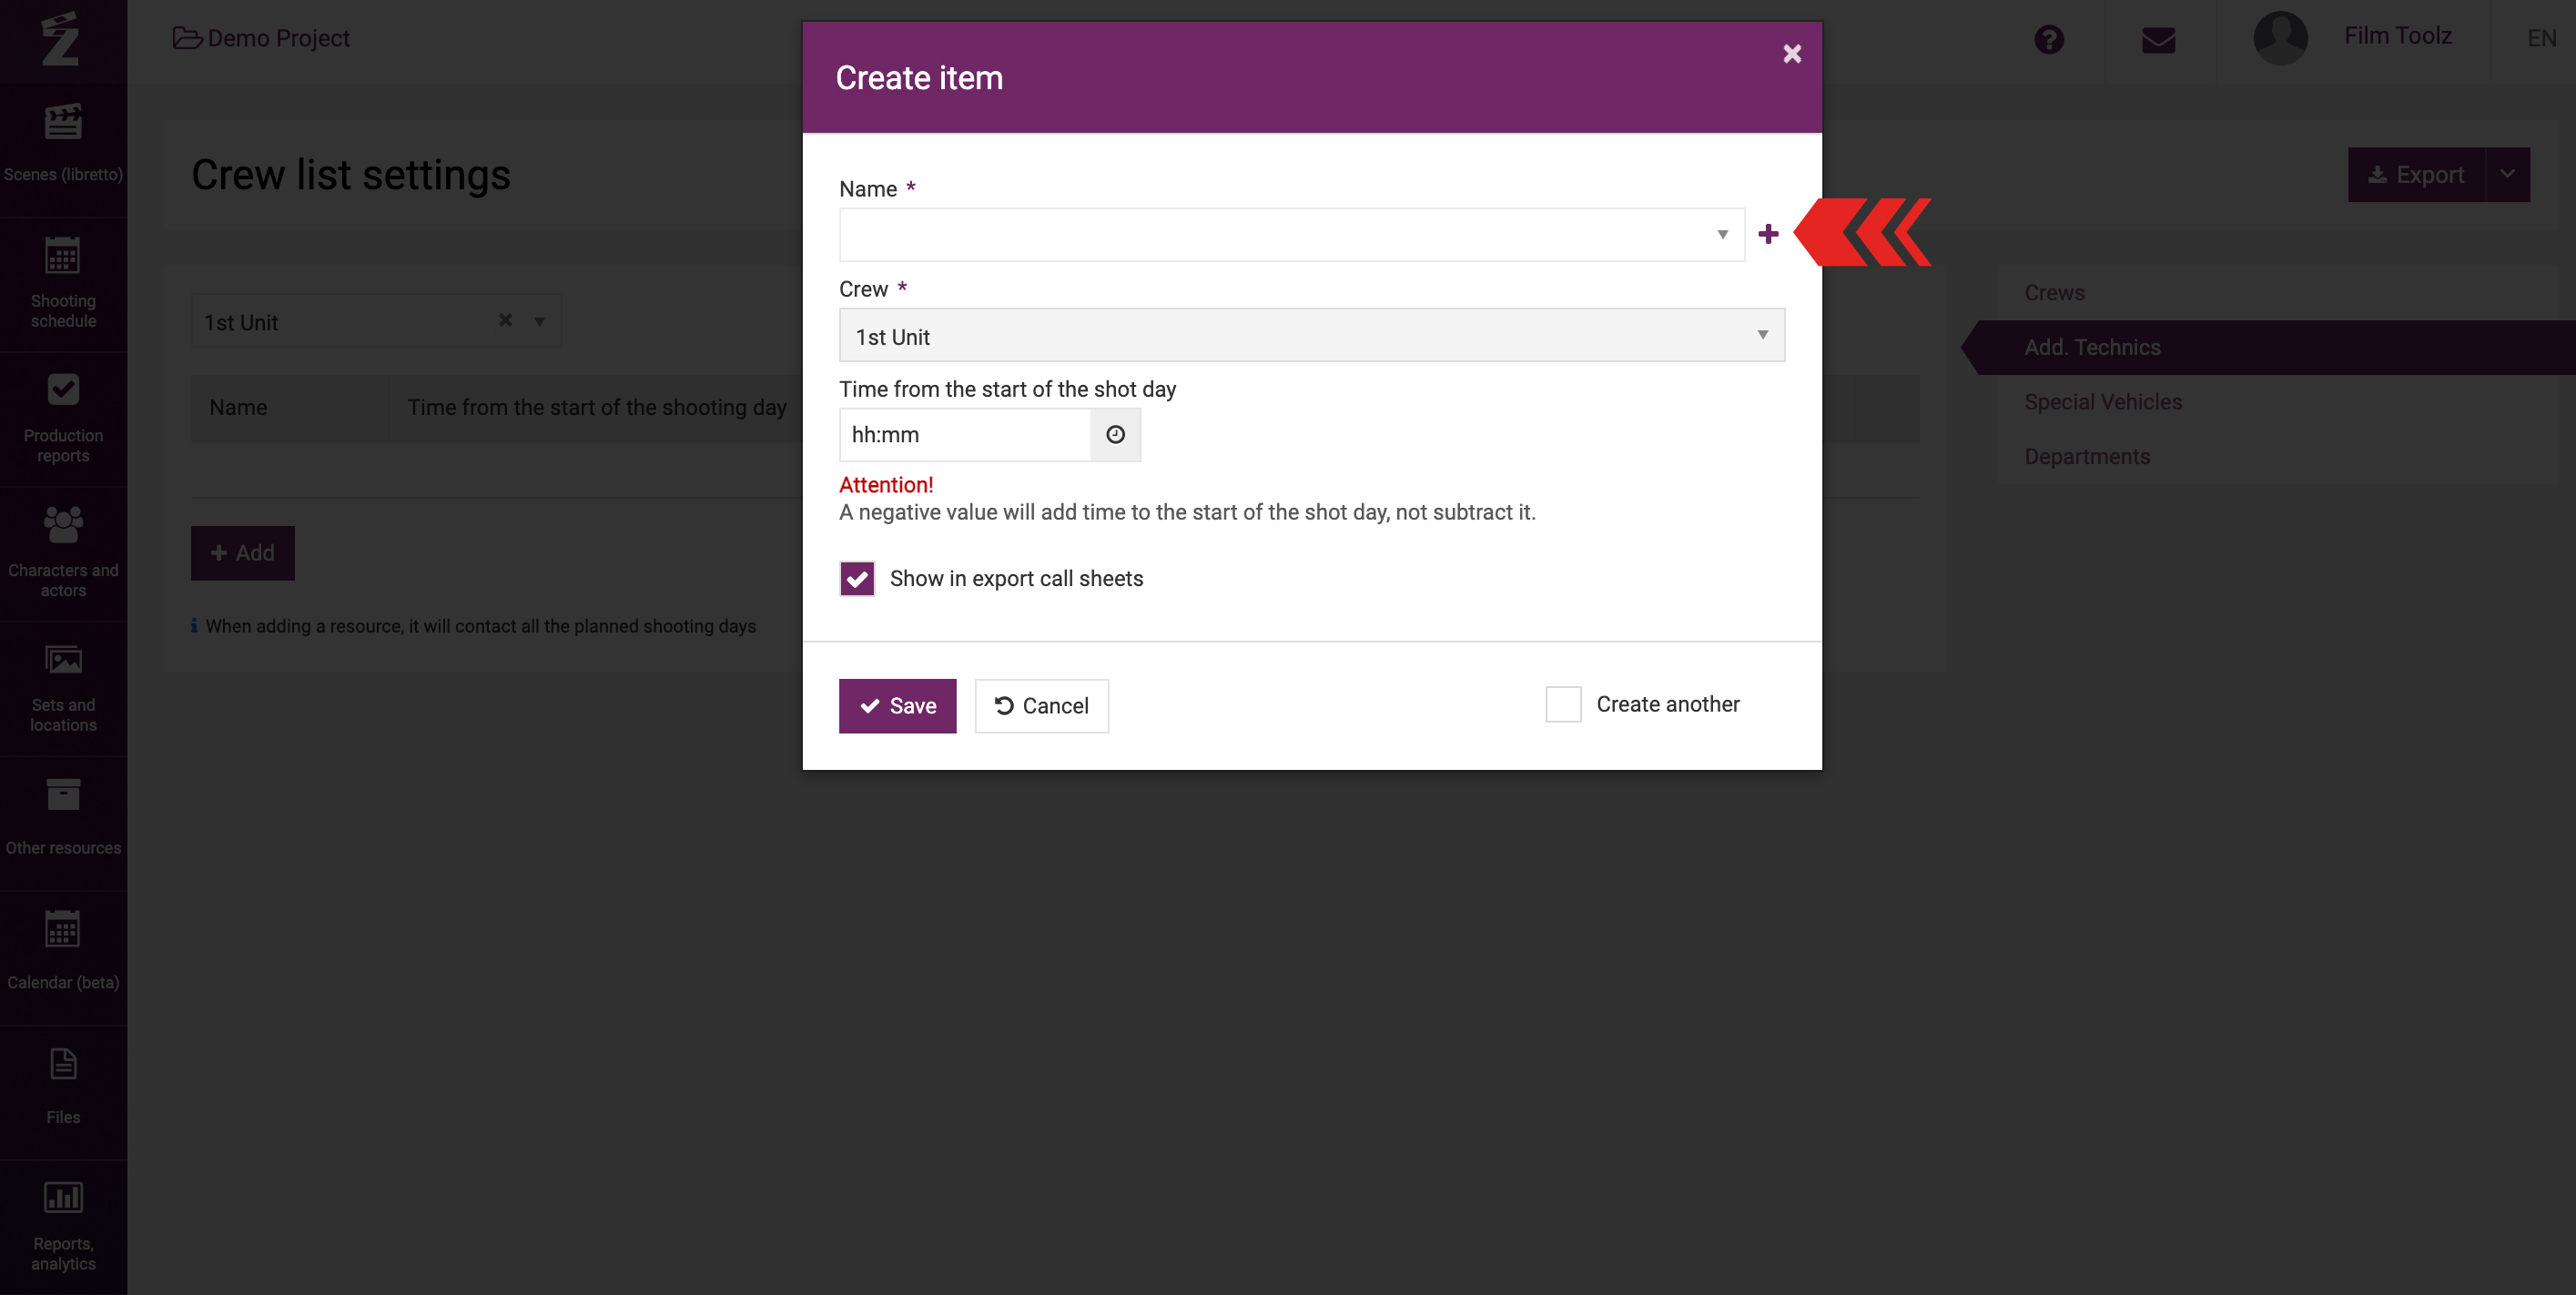
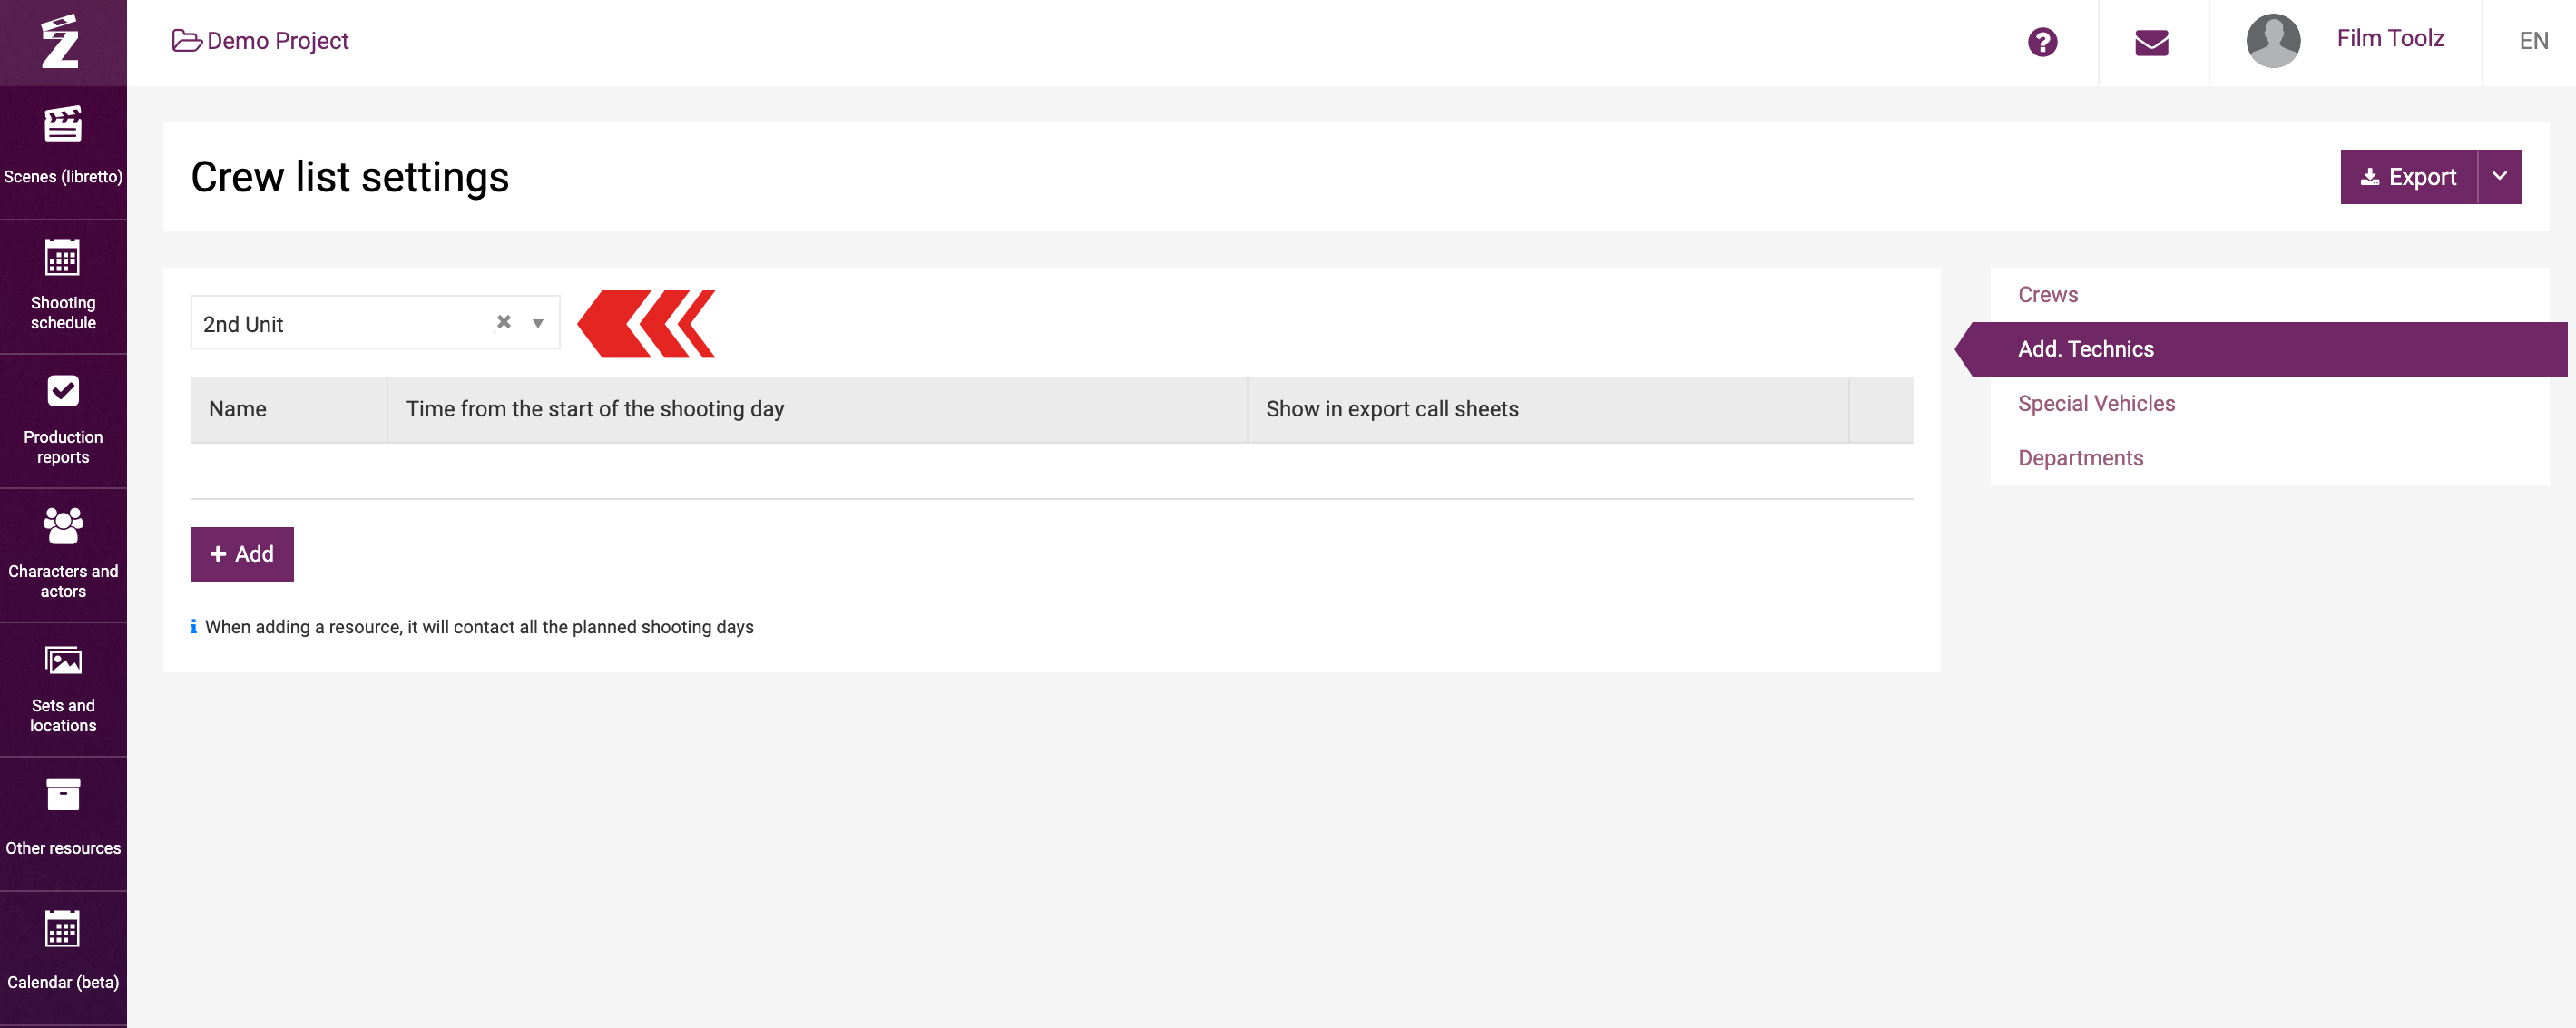
If the project is being shot by multiple units, you have to add individual element items for each unit. I.e., if you need a crane to end up in the call sheets both for the first and for the second unit, add crane to both units.
Configuring time
As you add an element item, you can specify the element item arrival time in relation to the shooting day start time. For instance, if you need a element item to arrive hour and a half before the start time, you will set the time to “01:30”. By contrast, if you need a element item to arrive hour and a half after the shooting day time, set the time preceded by a minus: “-01:30”.
Displaying element items in the call sheets
In case of new element items, the “Display in call sheet export” box is ticked by default. This attribute affects the appearance of the element item in the exported call sheet file. Should you untick this box, the element item will be displayed on the call sheet page, but it will not be shown in the export settings and will not be exported.
Showing future and past shooting days
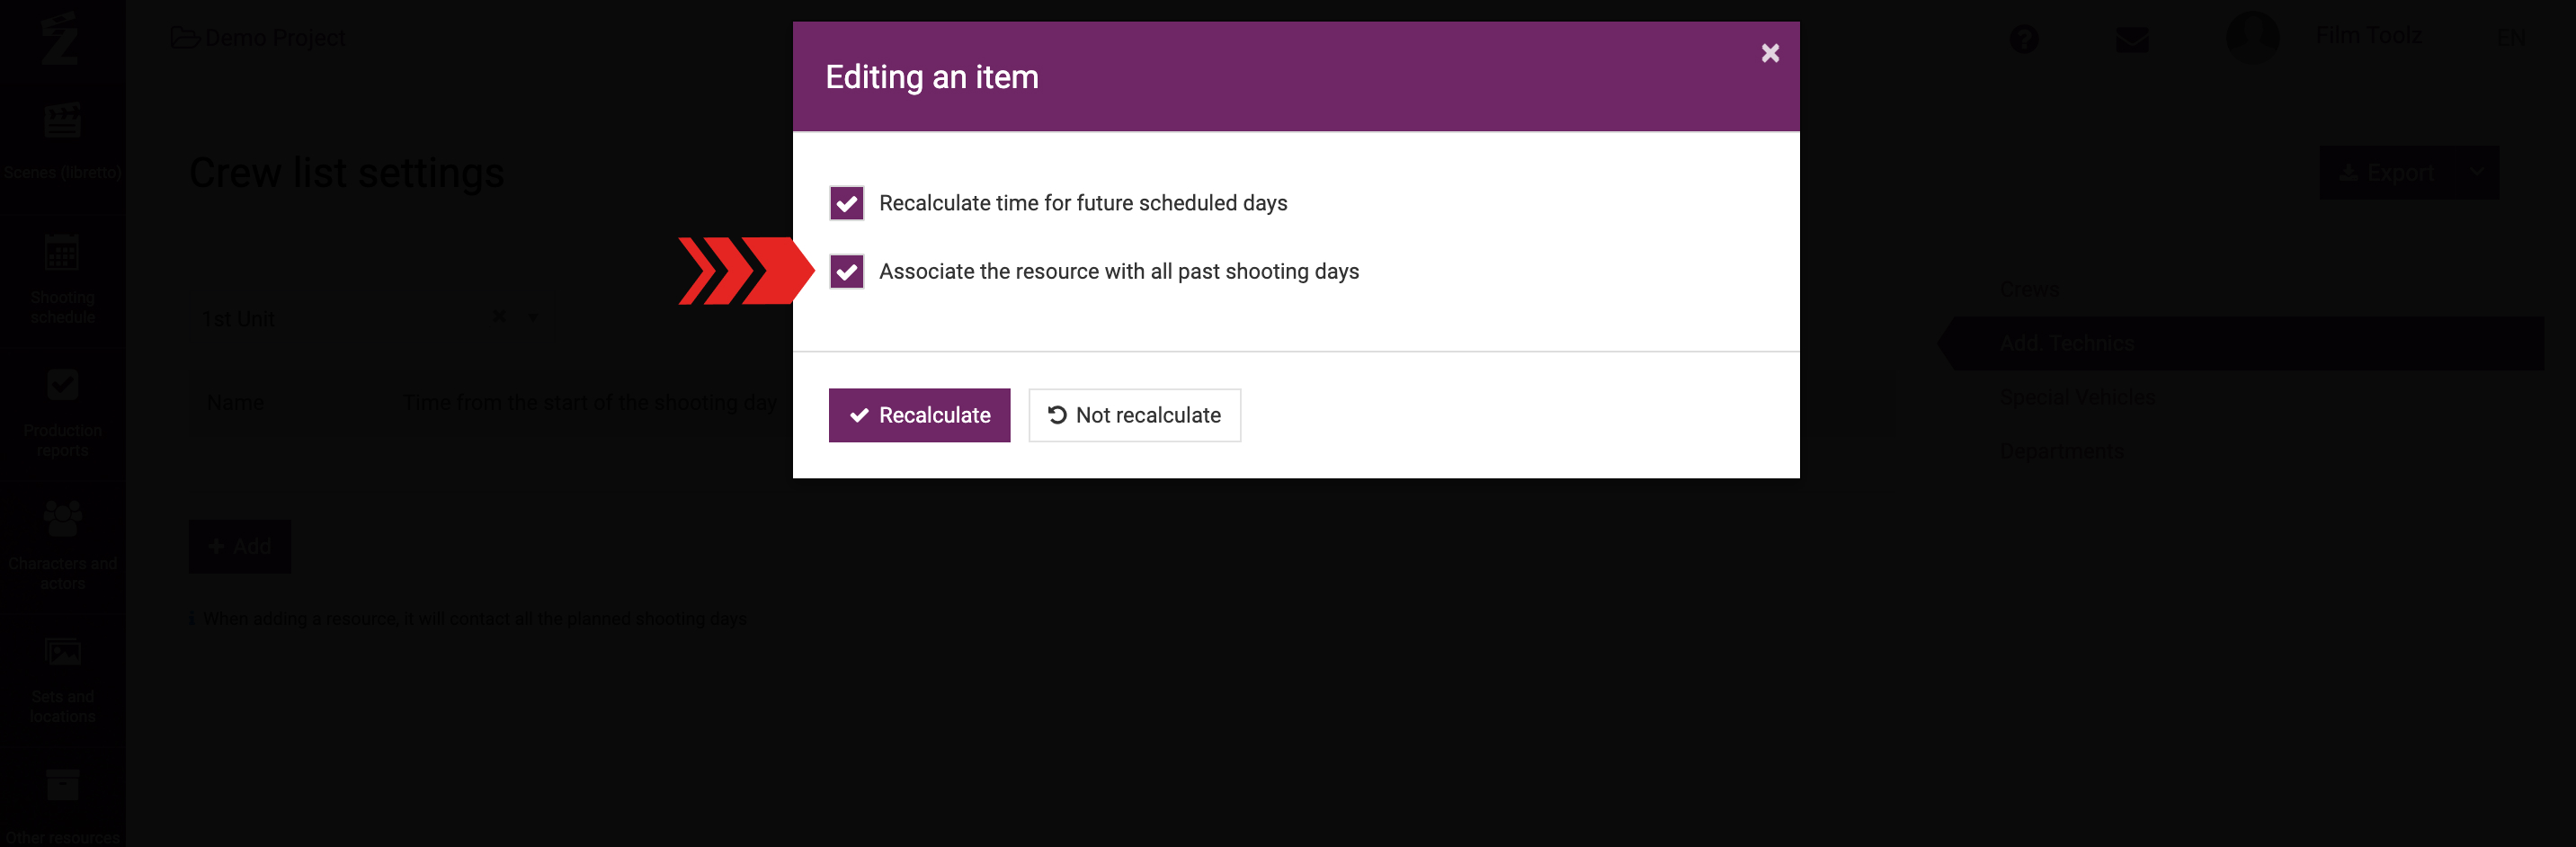
Please note that whenever you create a new shooting day element item, it will end up with a tick in the “Use” box in future shooting days, and without a tick in past shooting days, i.e. it will not be employed in past shooting days.
If you need to attach a new element item to past shooting days (for instance, a week after the shoots, you recall that you used a crane on every single day), you can do so in the same pop-up (for adding a element item to a unit).
To add new element items to the list, you can tick the “Create another” box before creating the element item. Then the saved element item will be displayed in the table, and you will see a blank window intended to add the element item to the list.
Editing existing elements
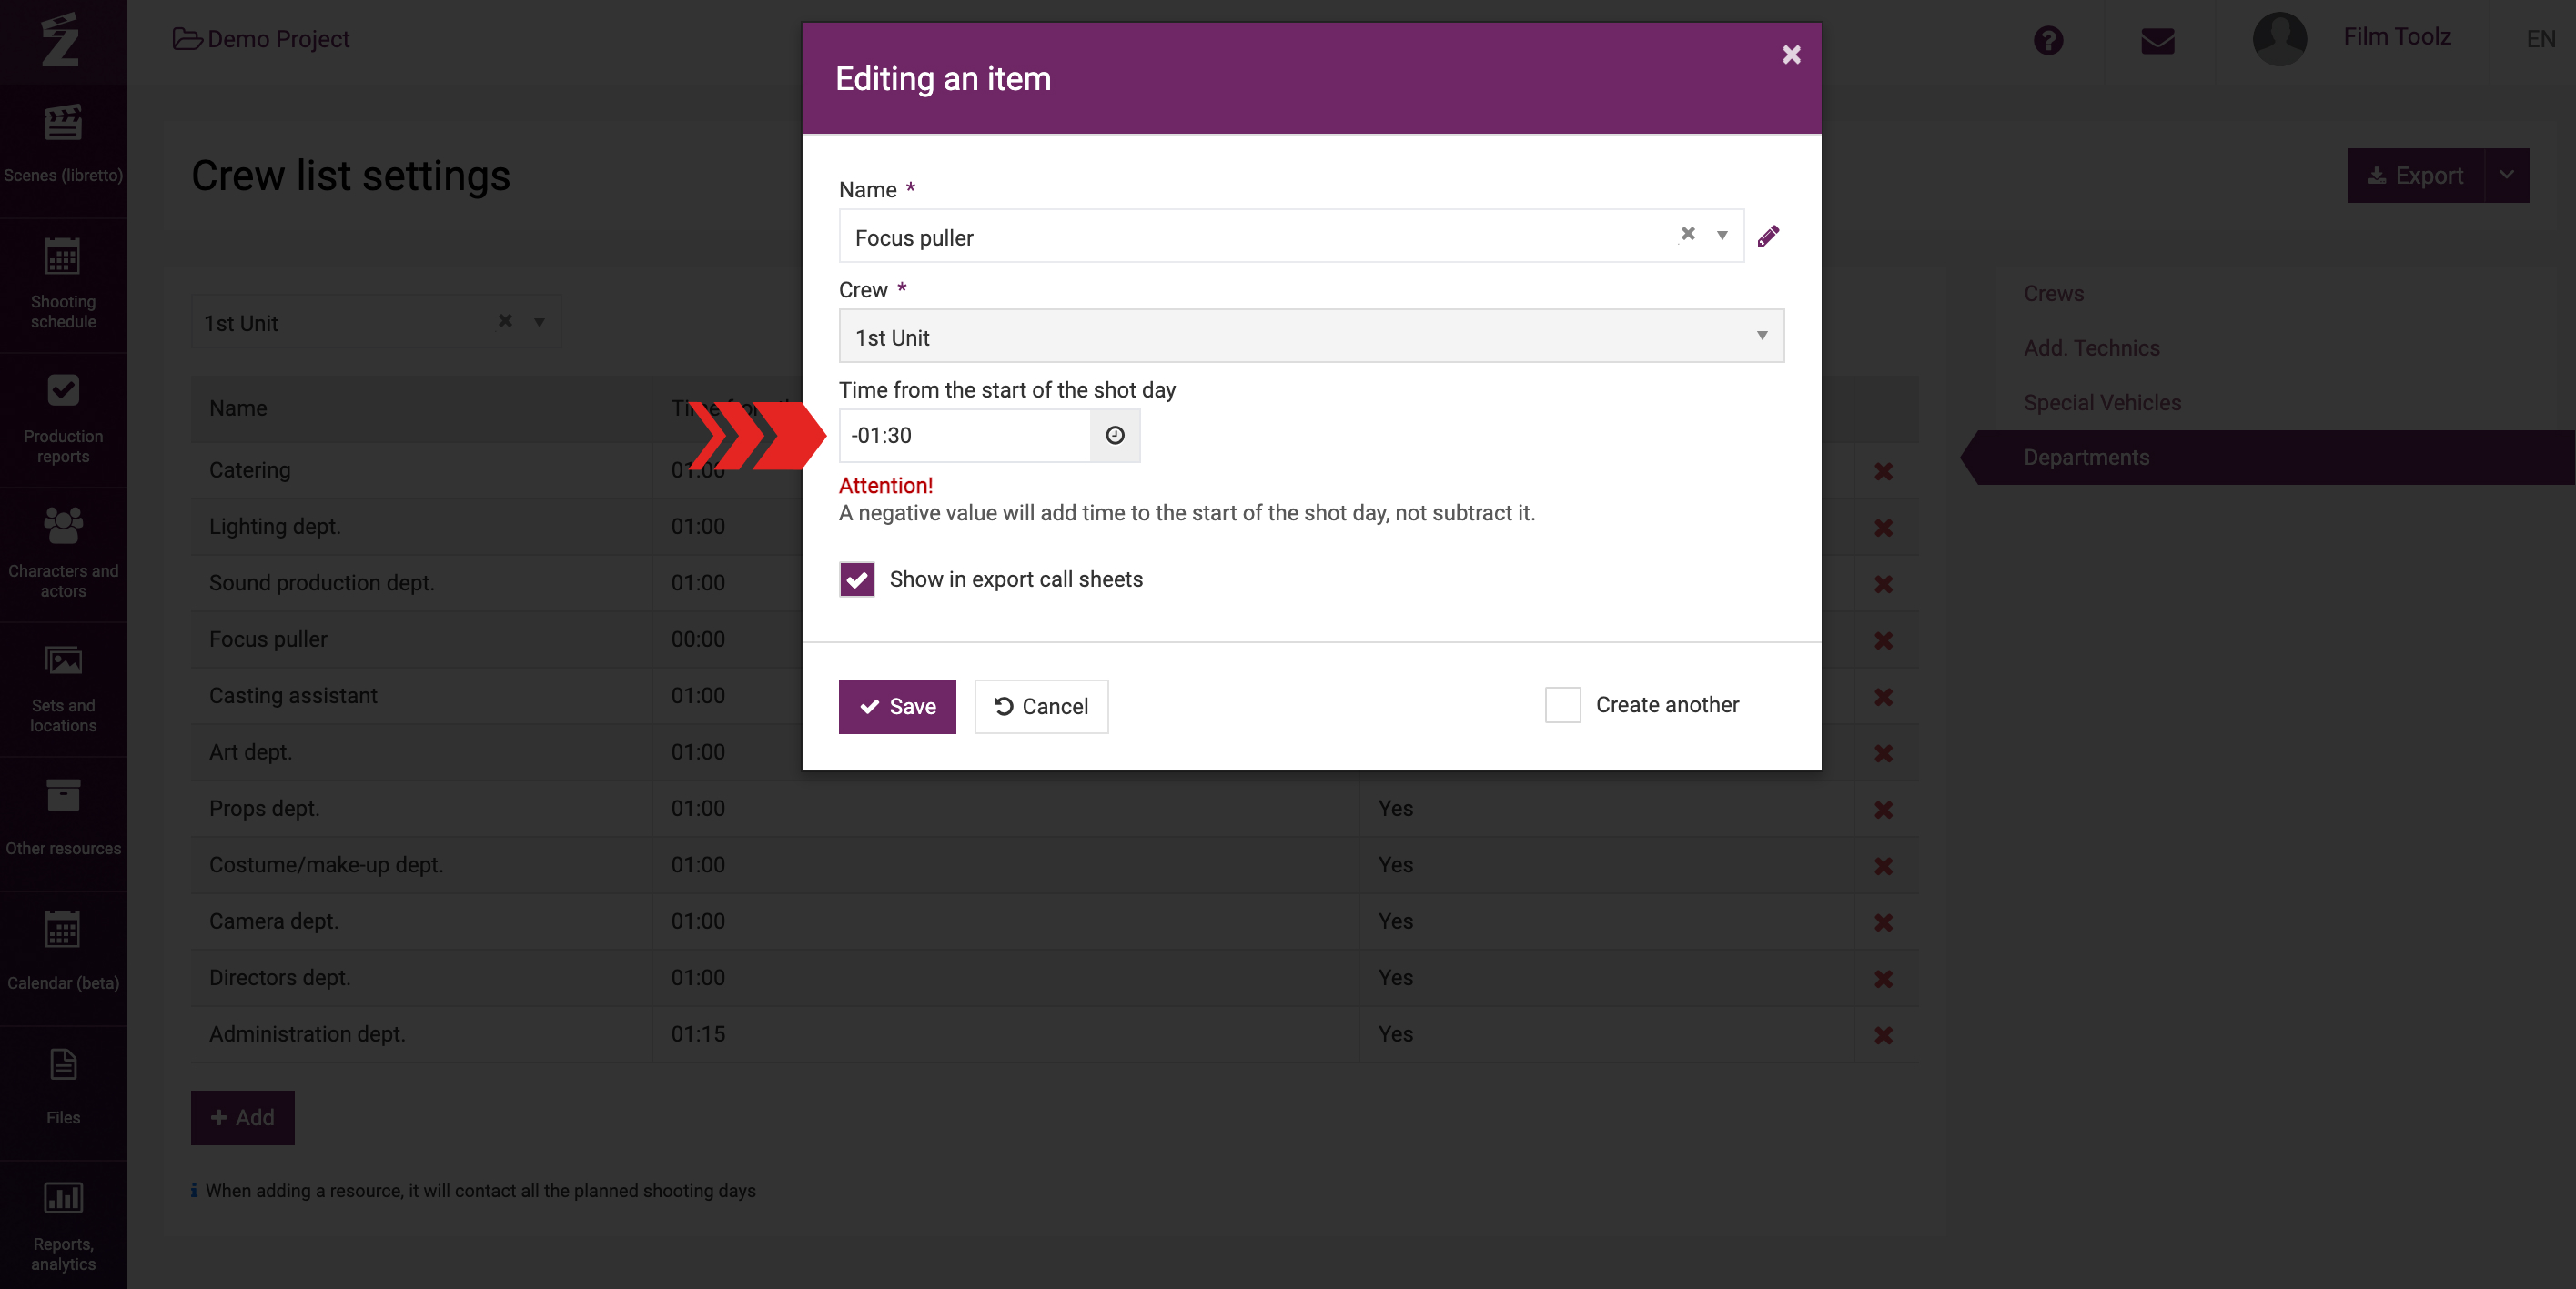
Now we will outline the things to do if you need to edit anything in existing elements. We will use the “Departments – Focus puller” element item as an illustration.
The call sheet by default contains the arrival time for Departments. To adjust this time, go to the “Project`s settings – Crew list” item of the menu.
Select the appropriate element item and open editing window.
Put the correct time in the relevant field.
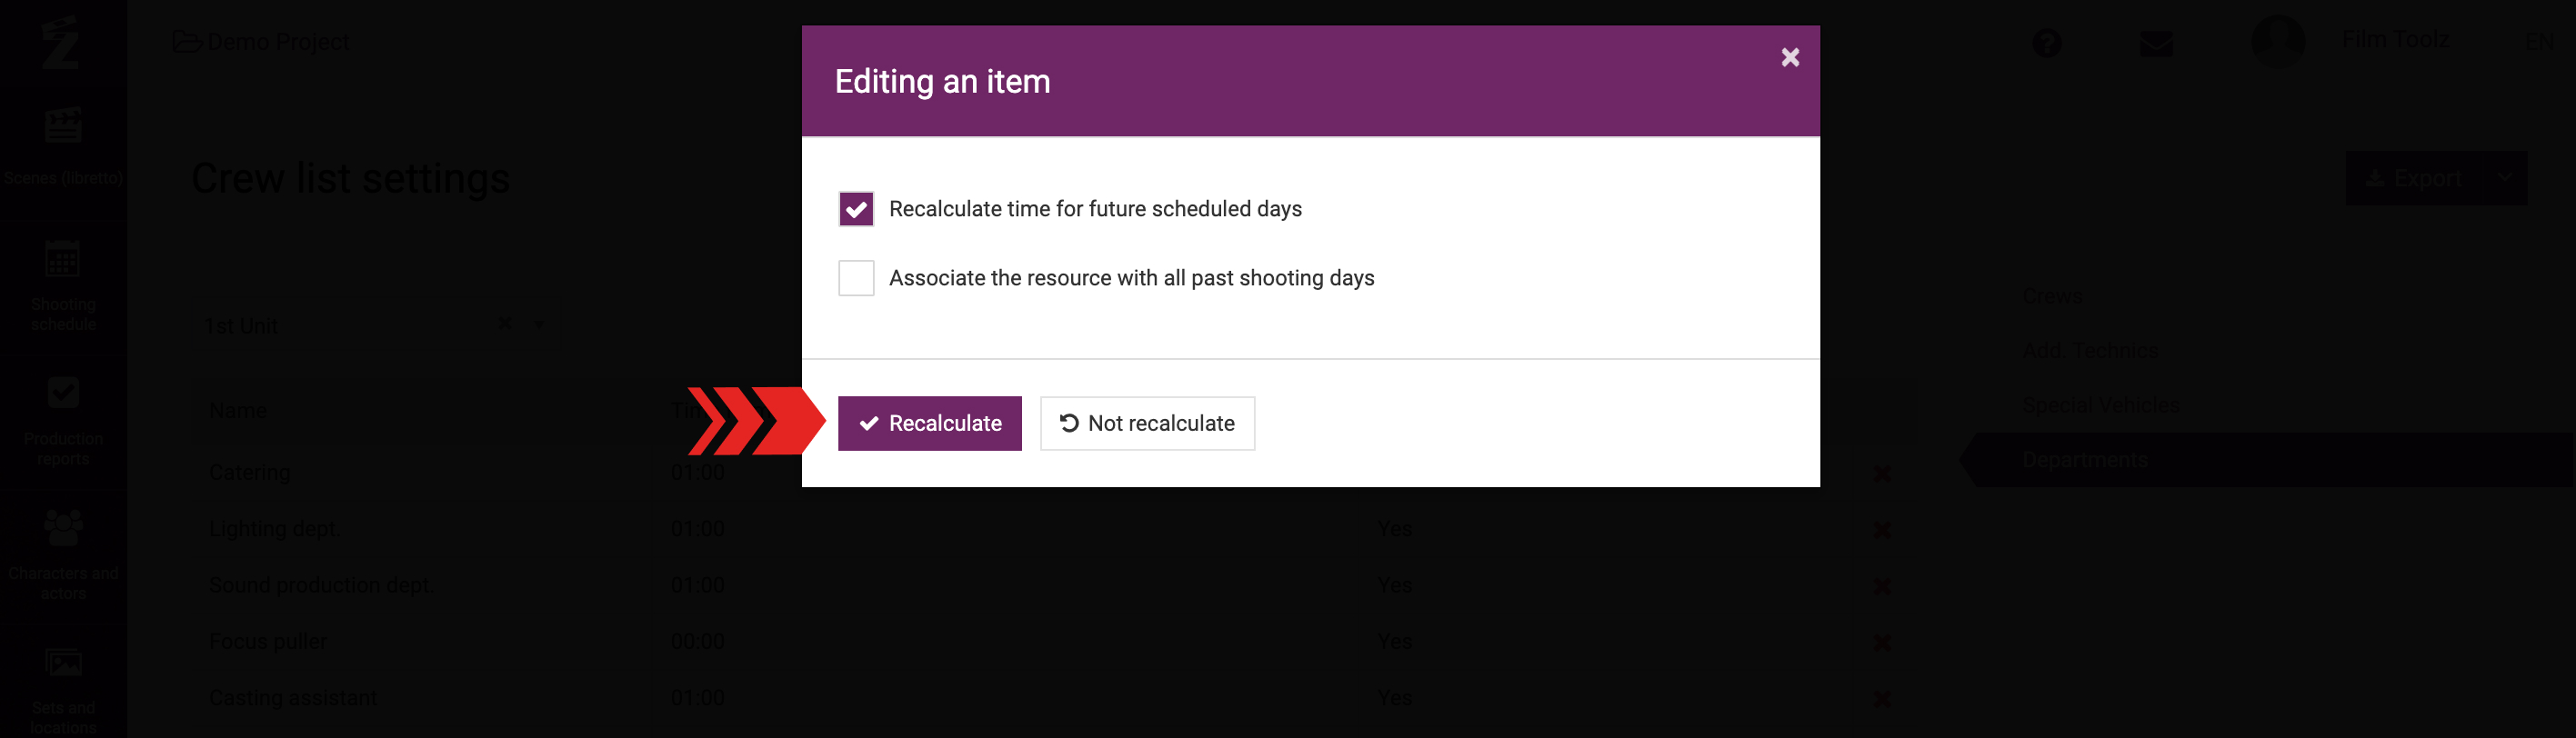
To change the call time in the call sheets, tick “Recalculate time for future scheduled days”. In this case, the element item arrival time will be recalculated in all future call sheets, including those that have already been saved.
If you want to save changes without ordering a recalculation, the element item will have the time updated only in newly built call sheets.
Similar to the list of the crew, element item may be swapped to put them in the correct order in the call sheet.