Обучение
Basic Operations with a Call Sheet
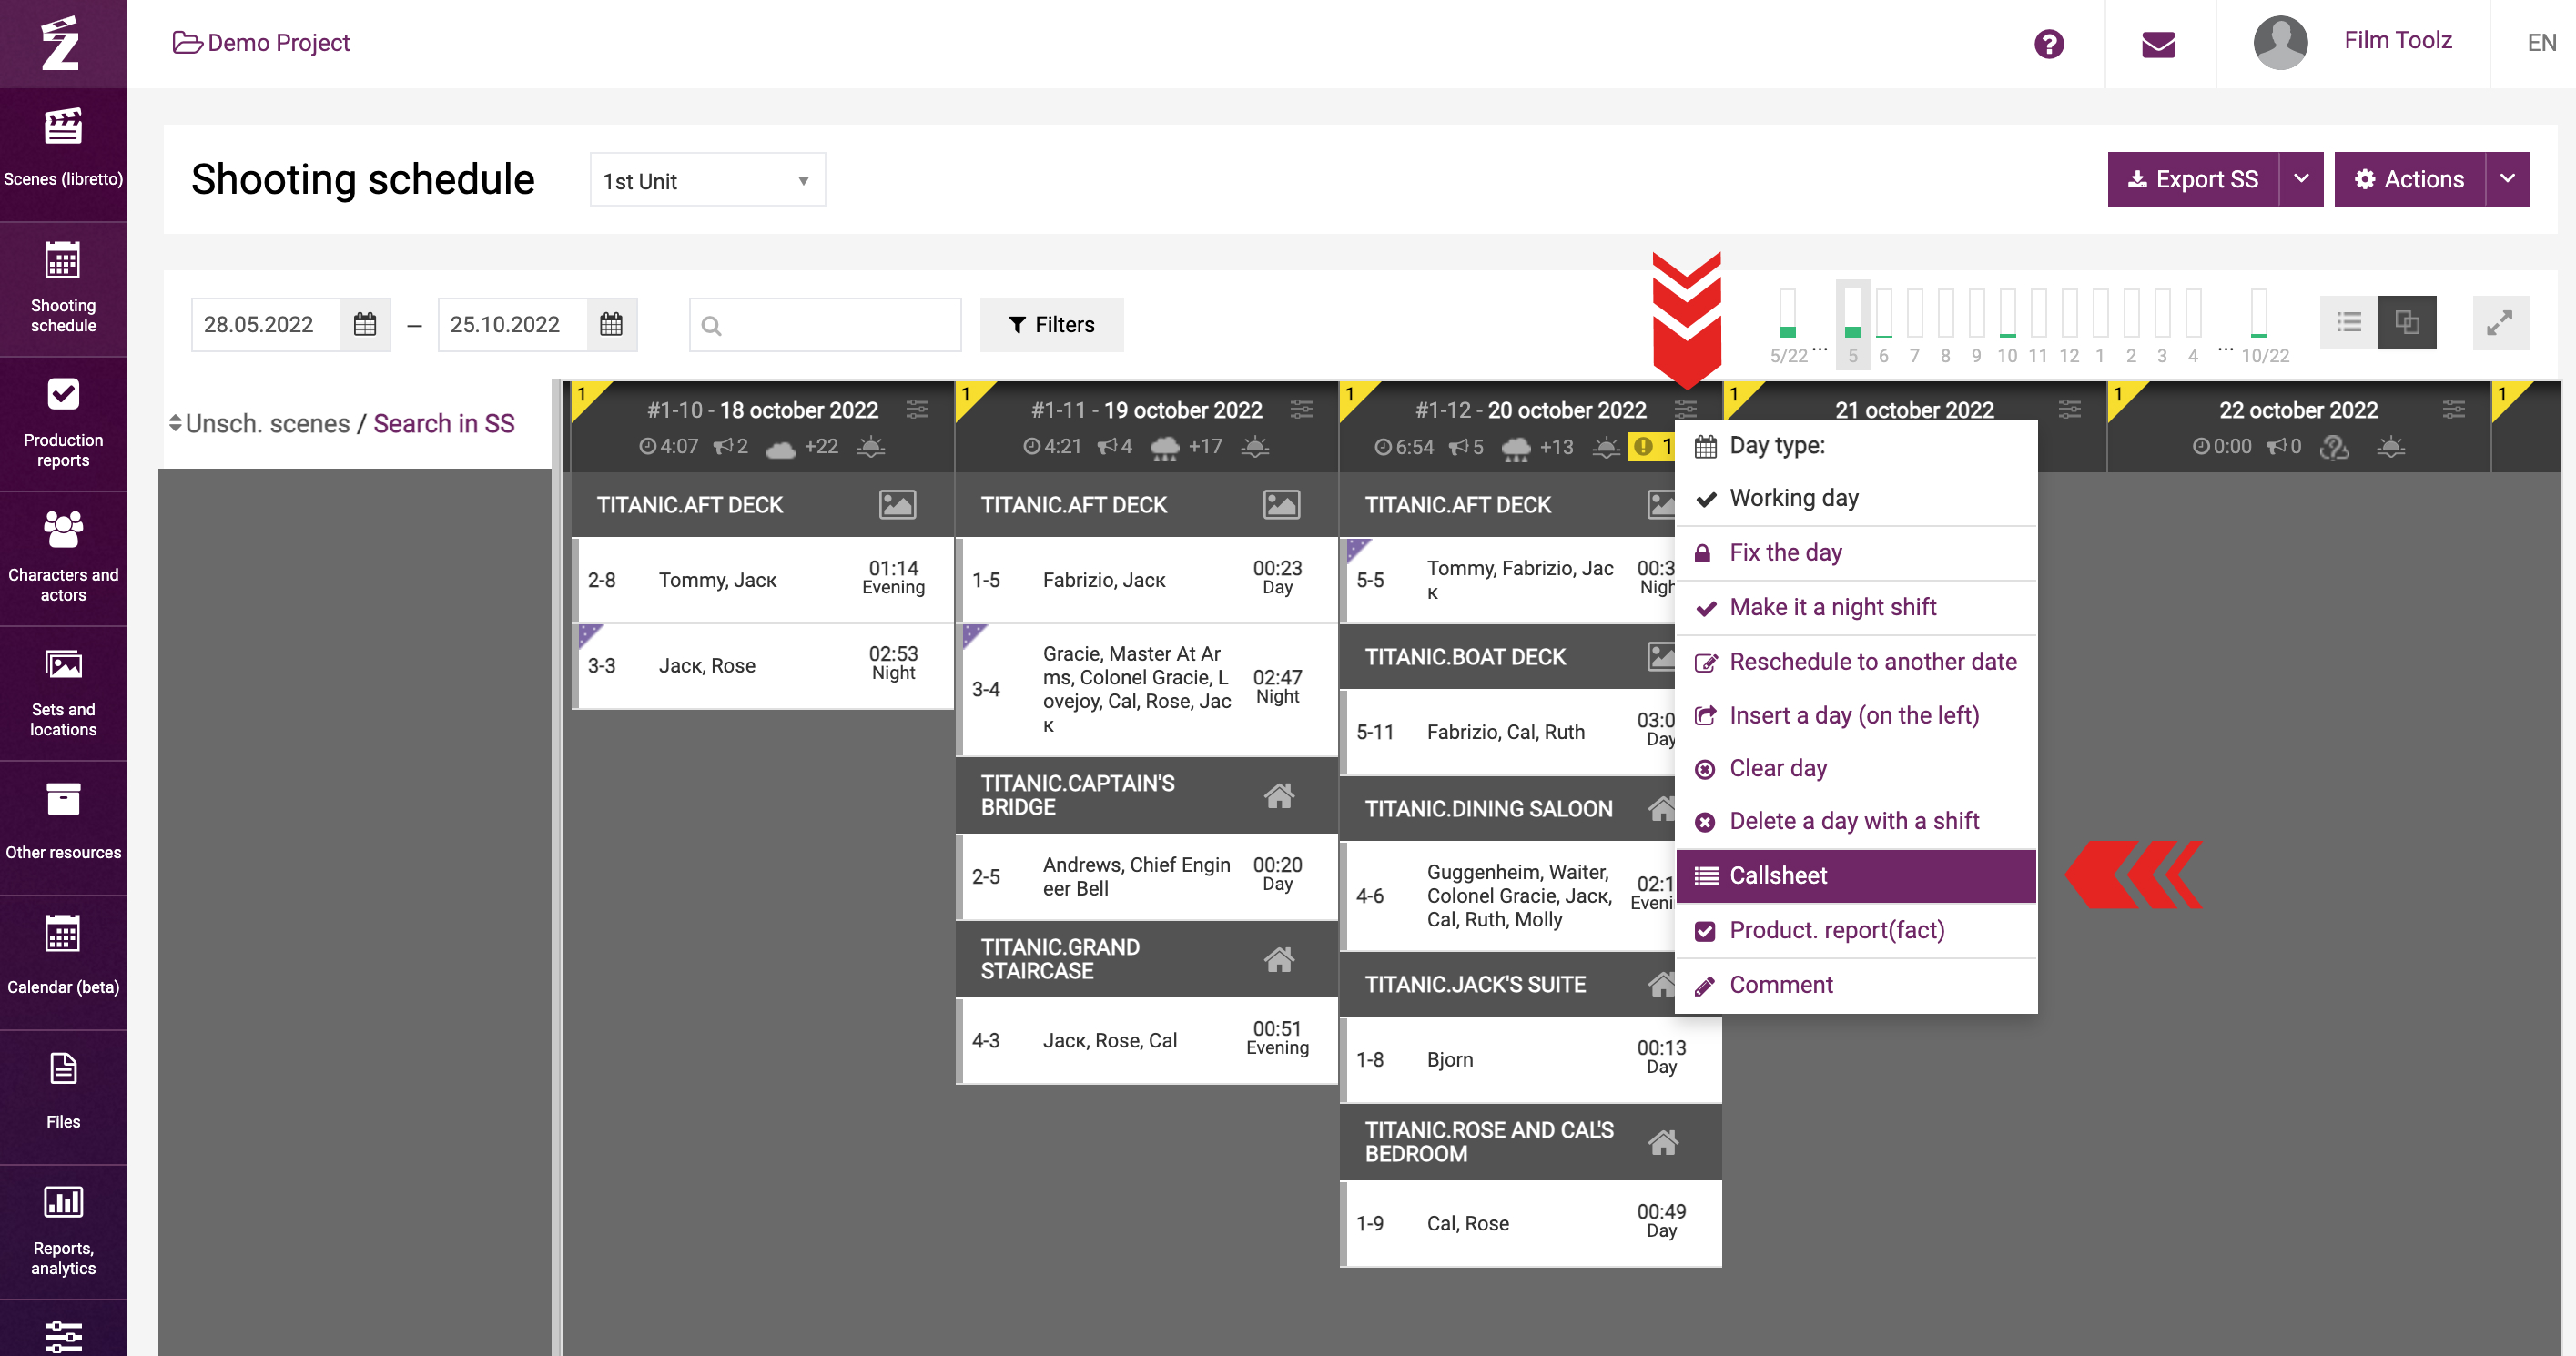
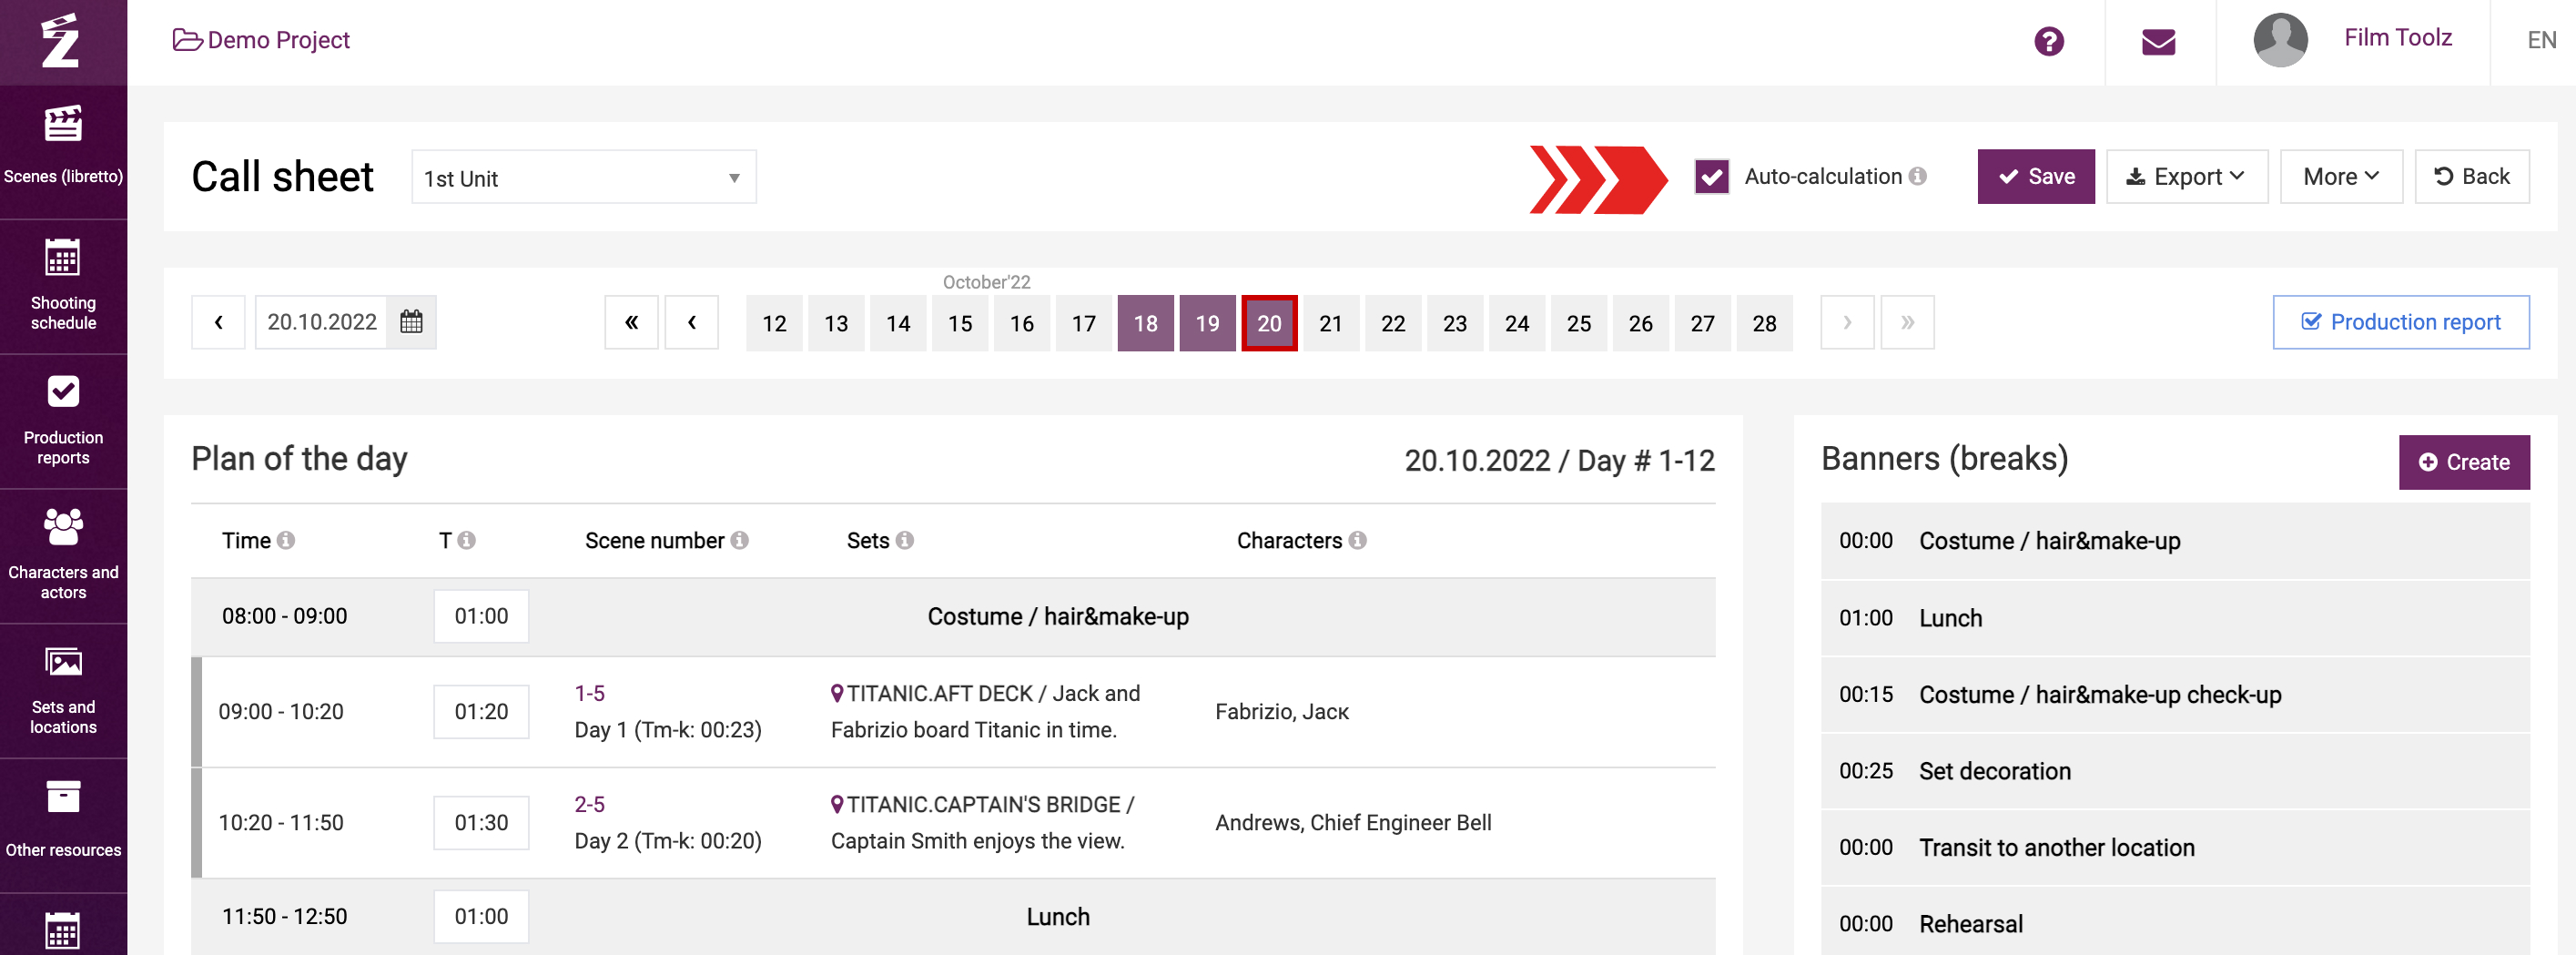
Once you build the shooting schedule of project, you can start build the call sheets for individual days. To do so, open the menu of a specific day in the shooting schedule scheduling form and go to the “Call sheet” section. You will see a form for building a call sheet for the day.
The scenes scheduled for the day are displayed in the table on the left, titled “Plan of the day.”
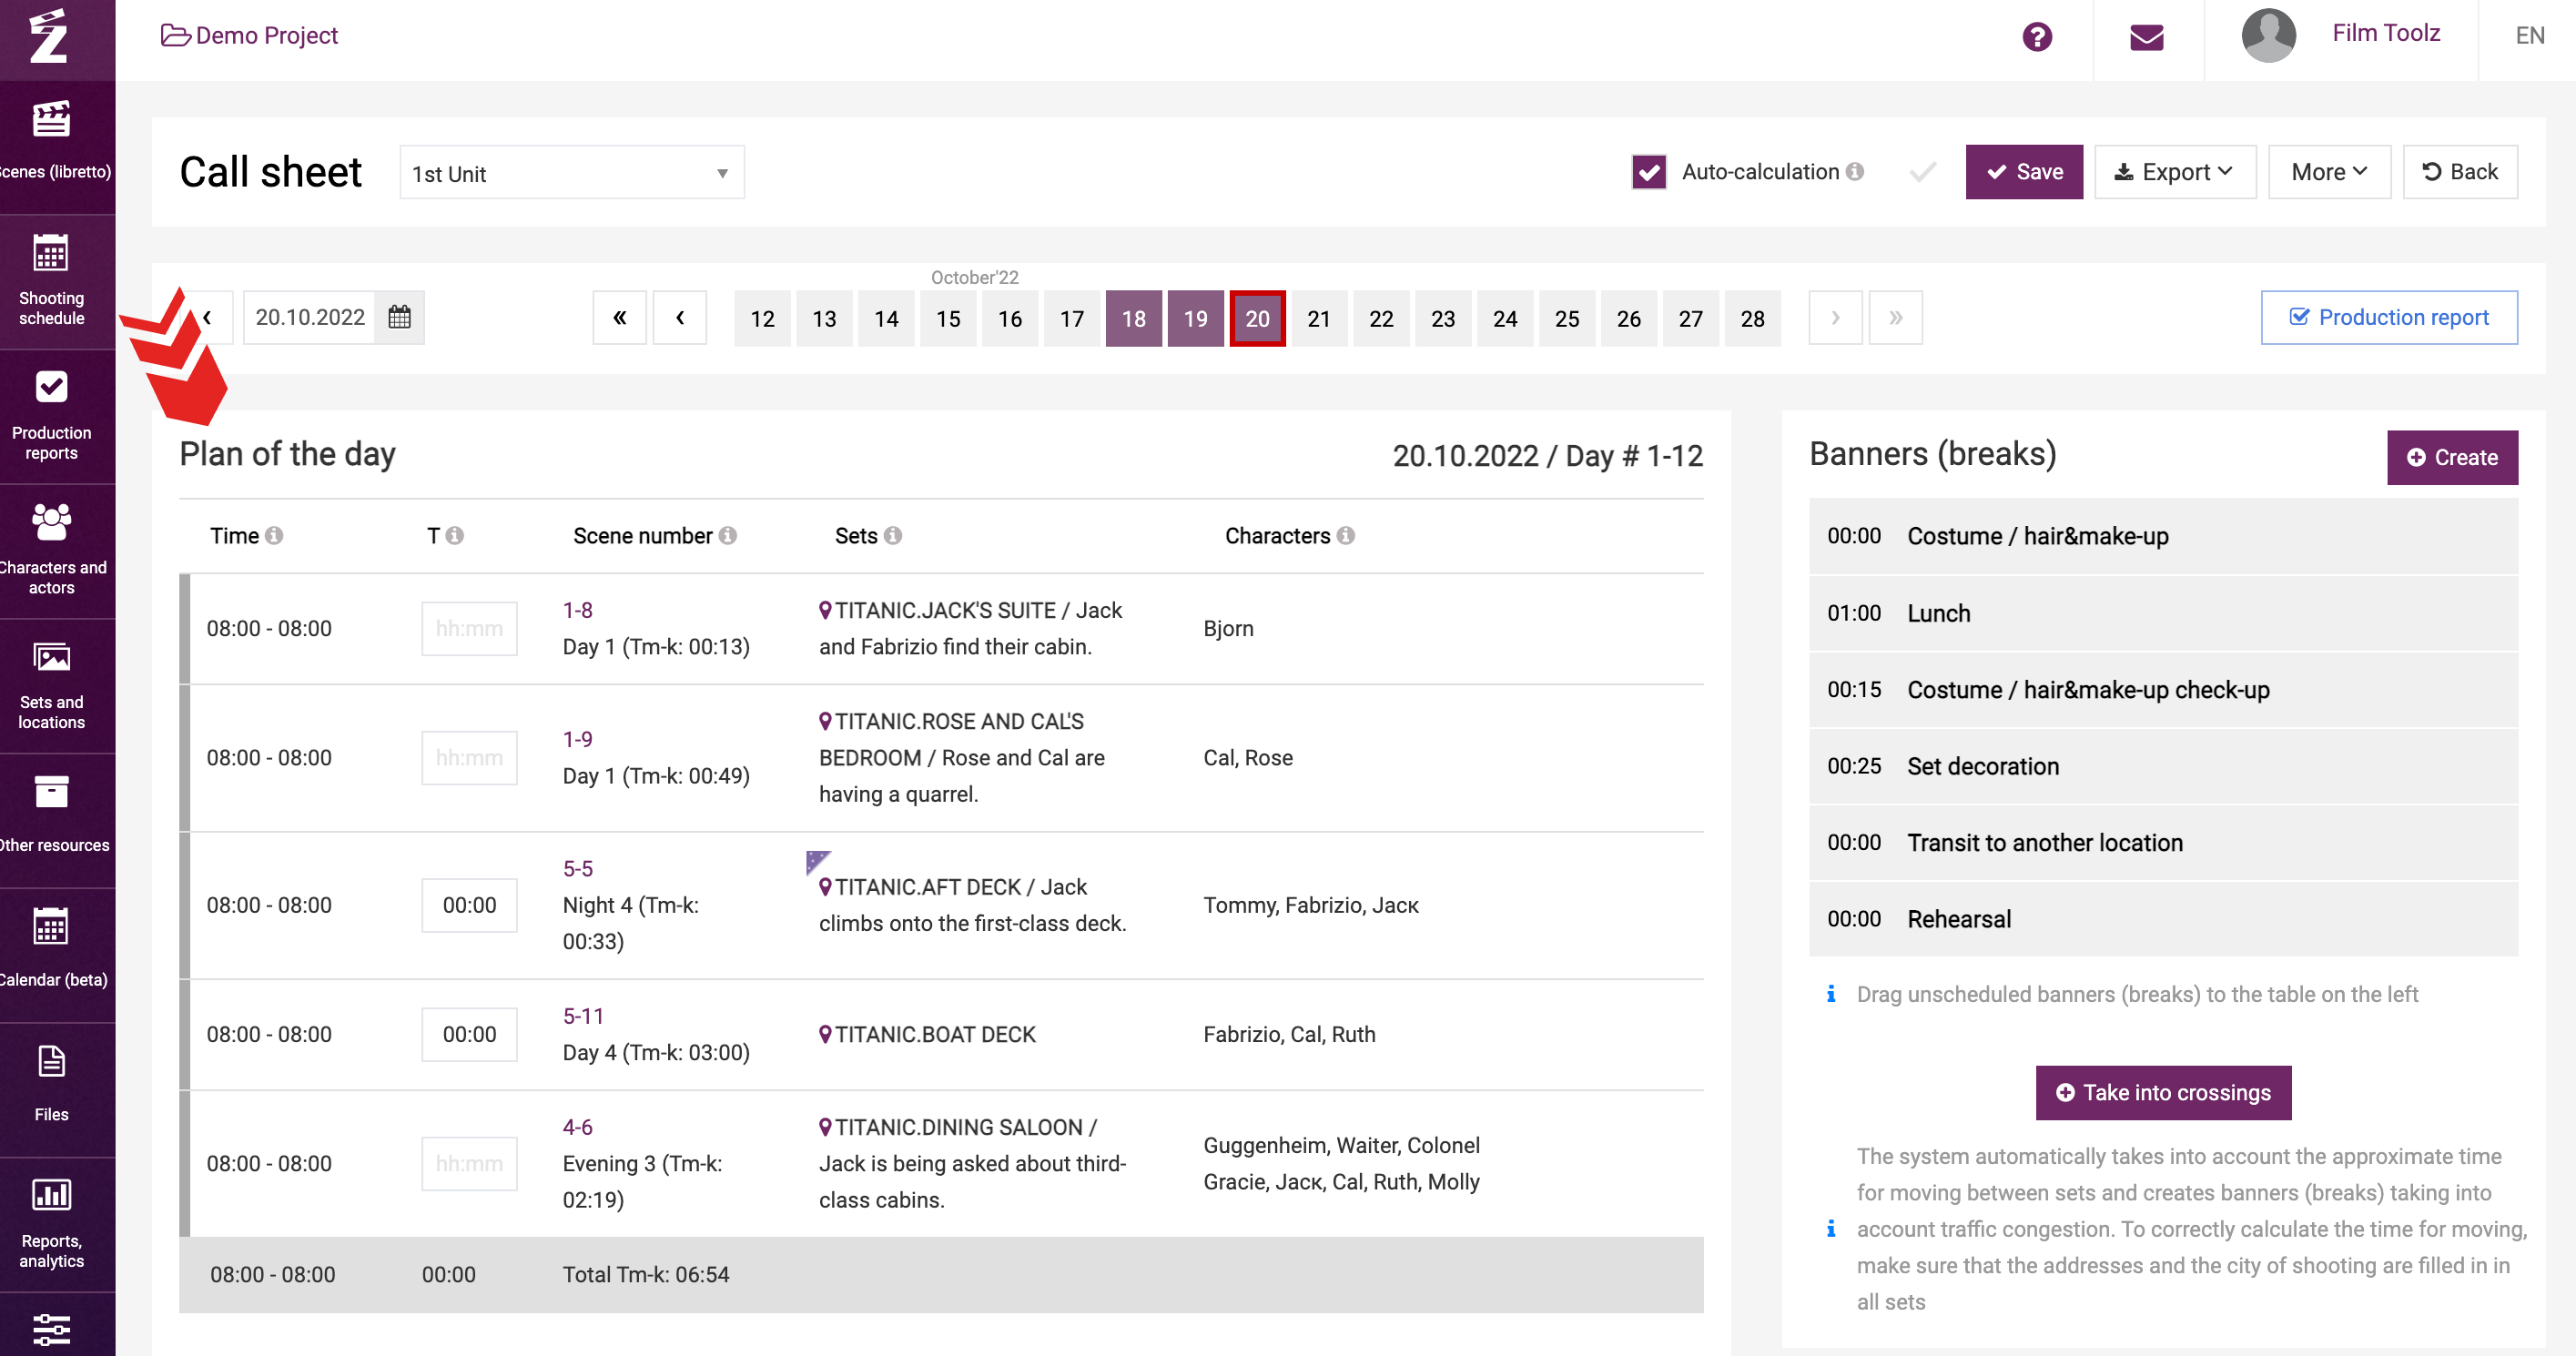
To the right, you'll find the list of service breaks.

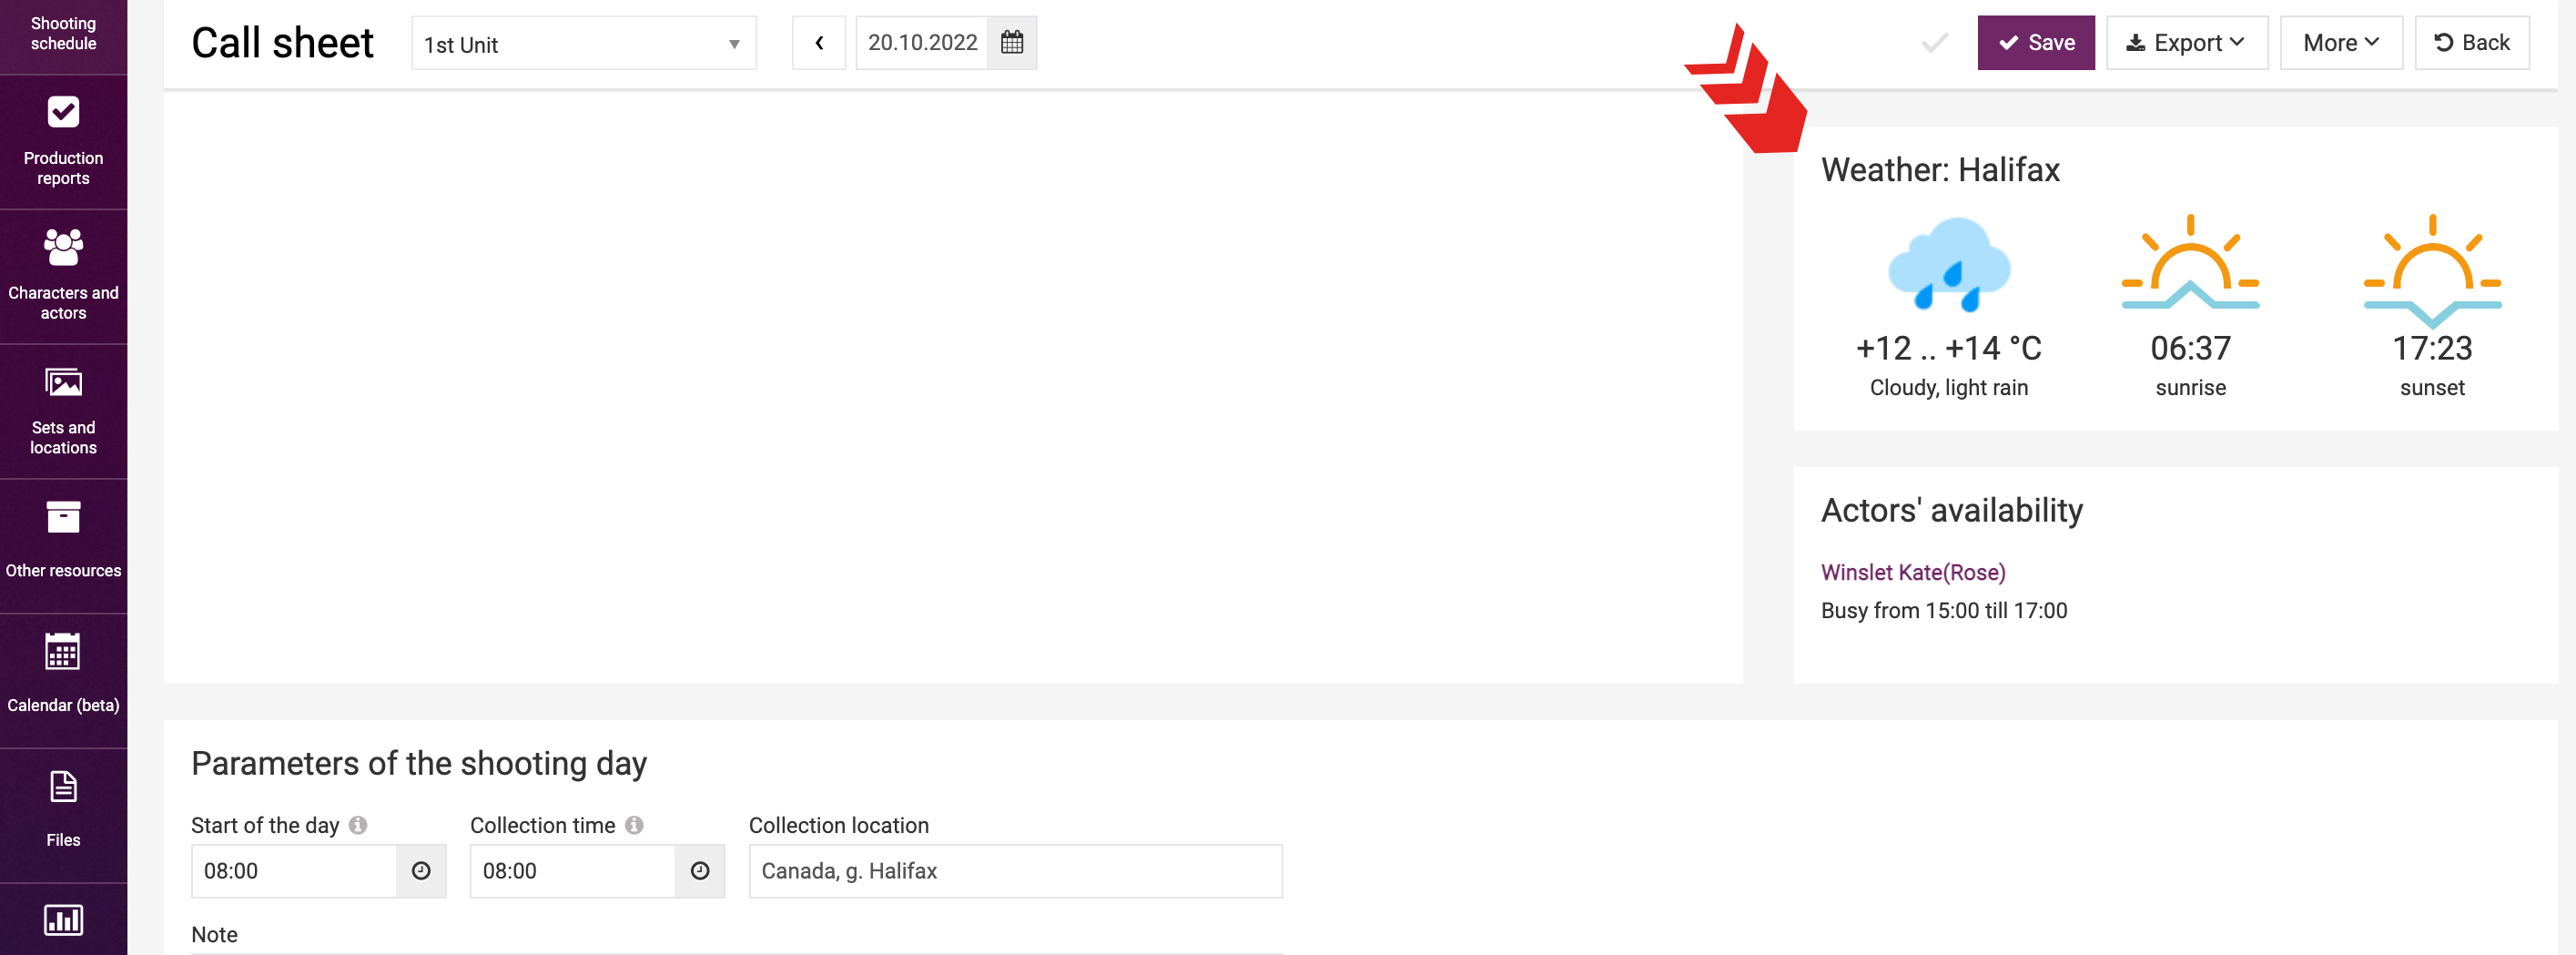
Below this list, there are sections for weather data and information about the actors’ availability.
Order of Scenes and Scheduled Duration
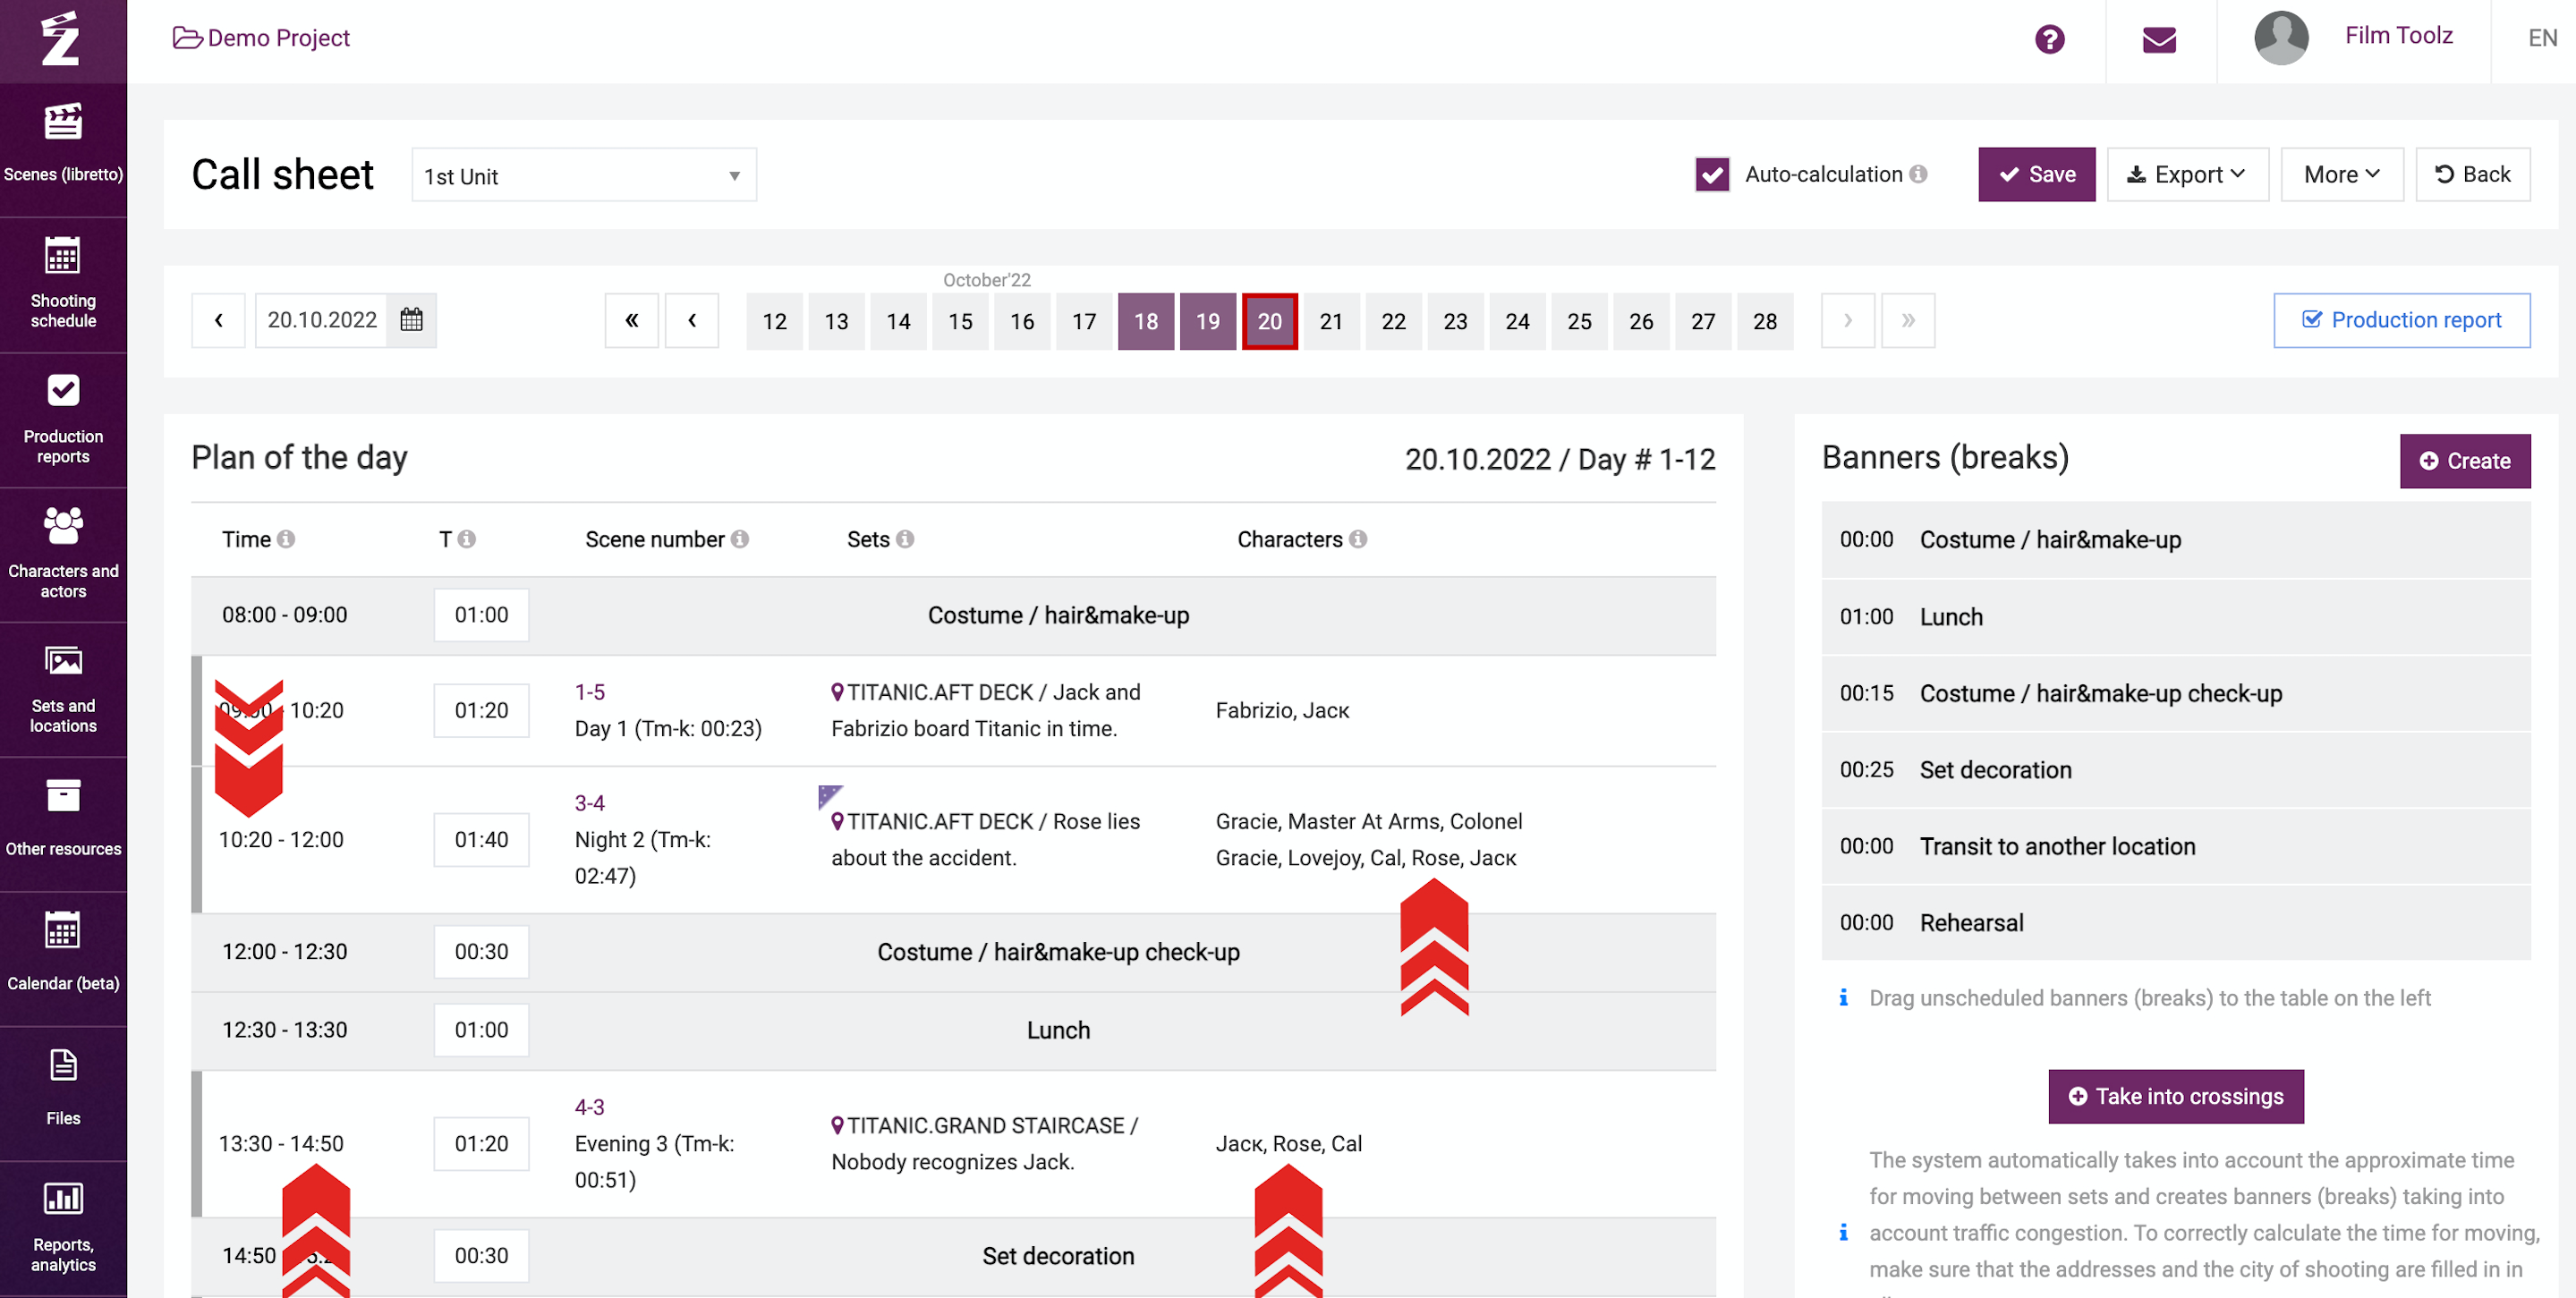
You can rearrange the order of scenes by dragging them with the mouse.
Once you have arranged the scenes, fill in the estimated shooting time for each scene. The system will automatically calculate the scheduled duration for the entire day.
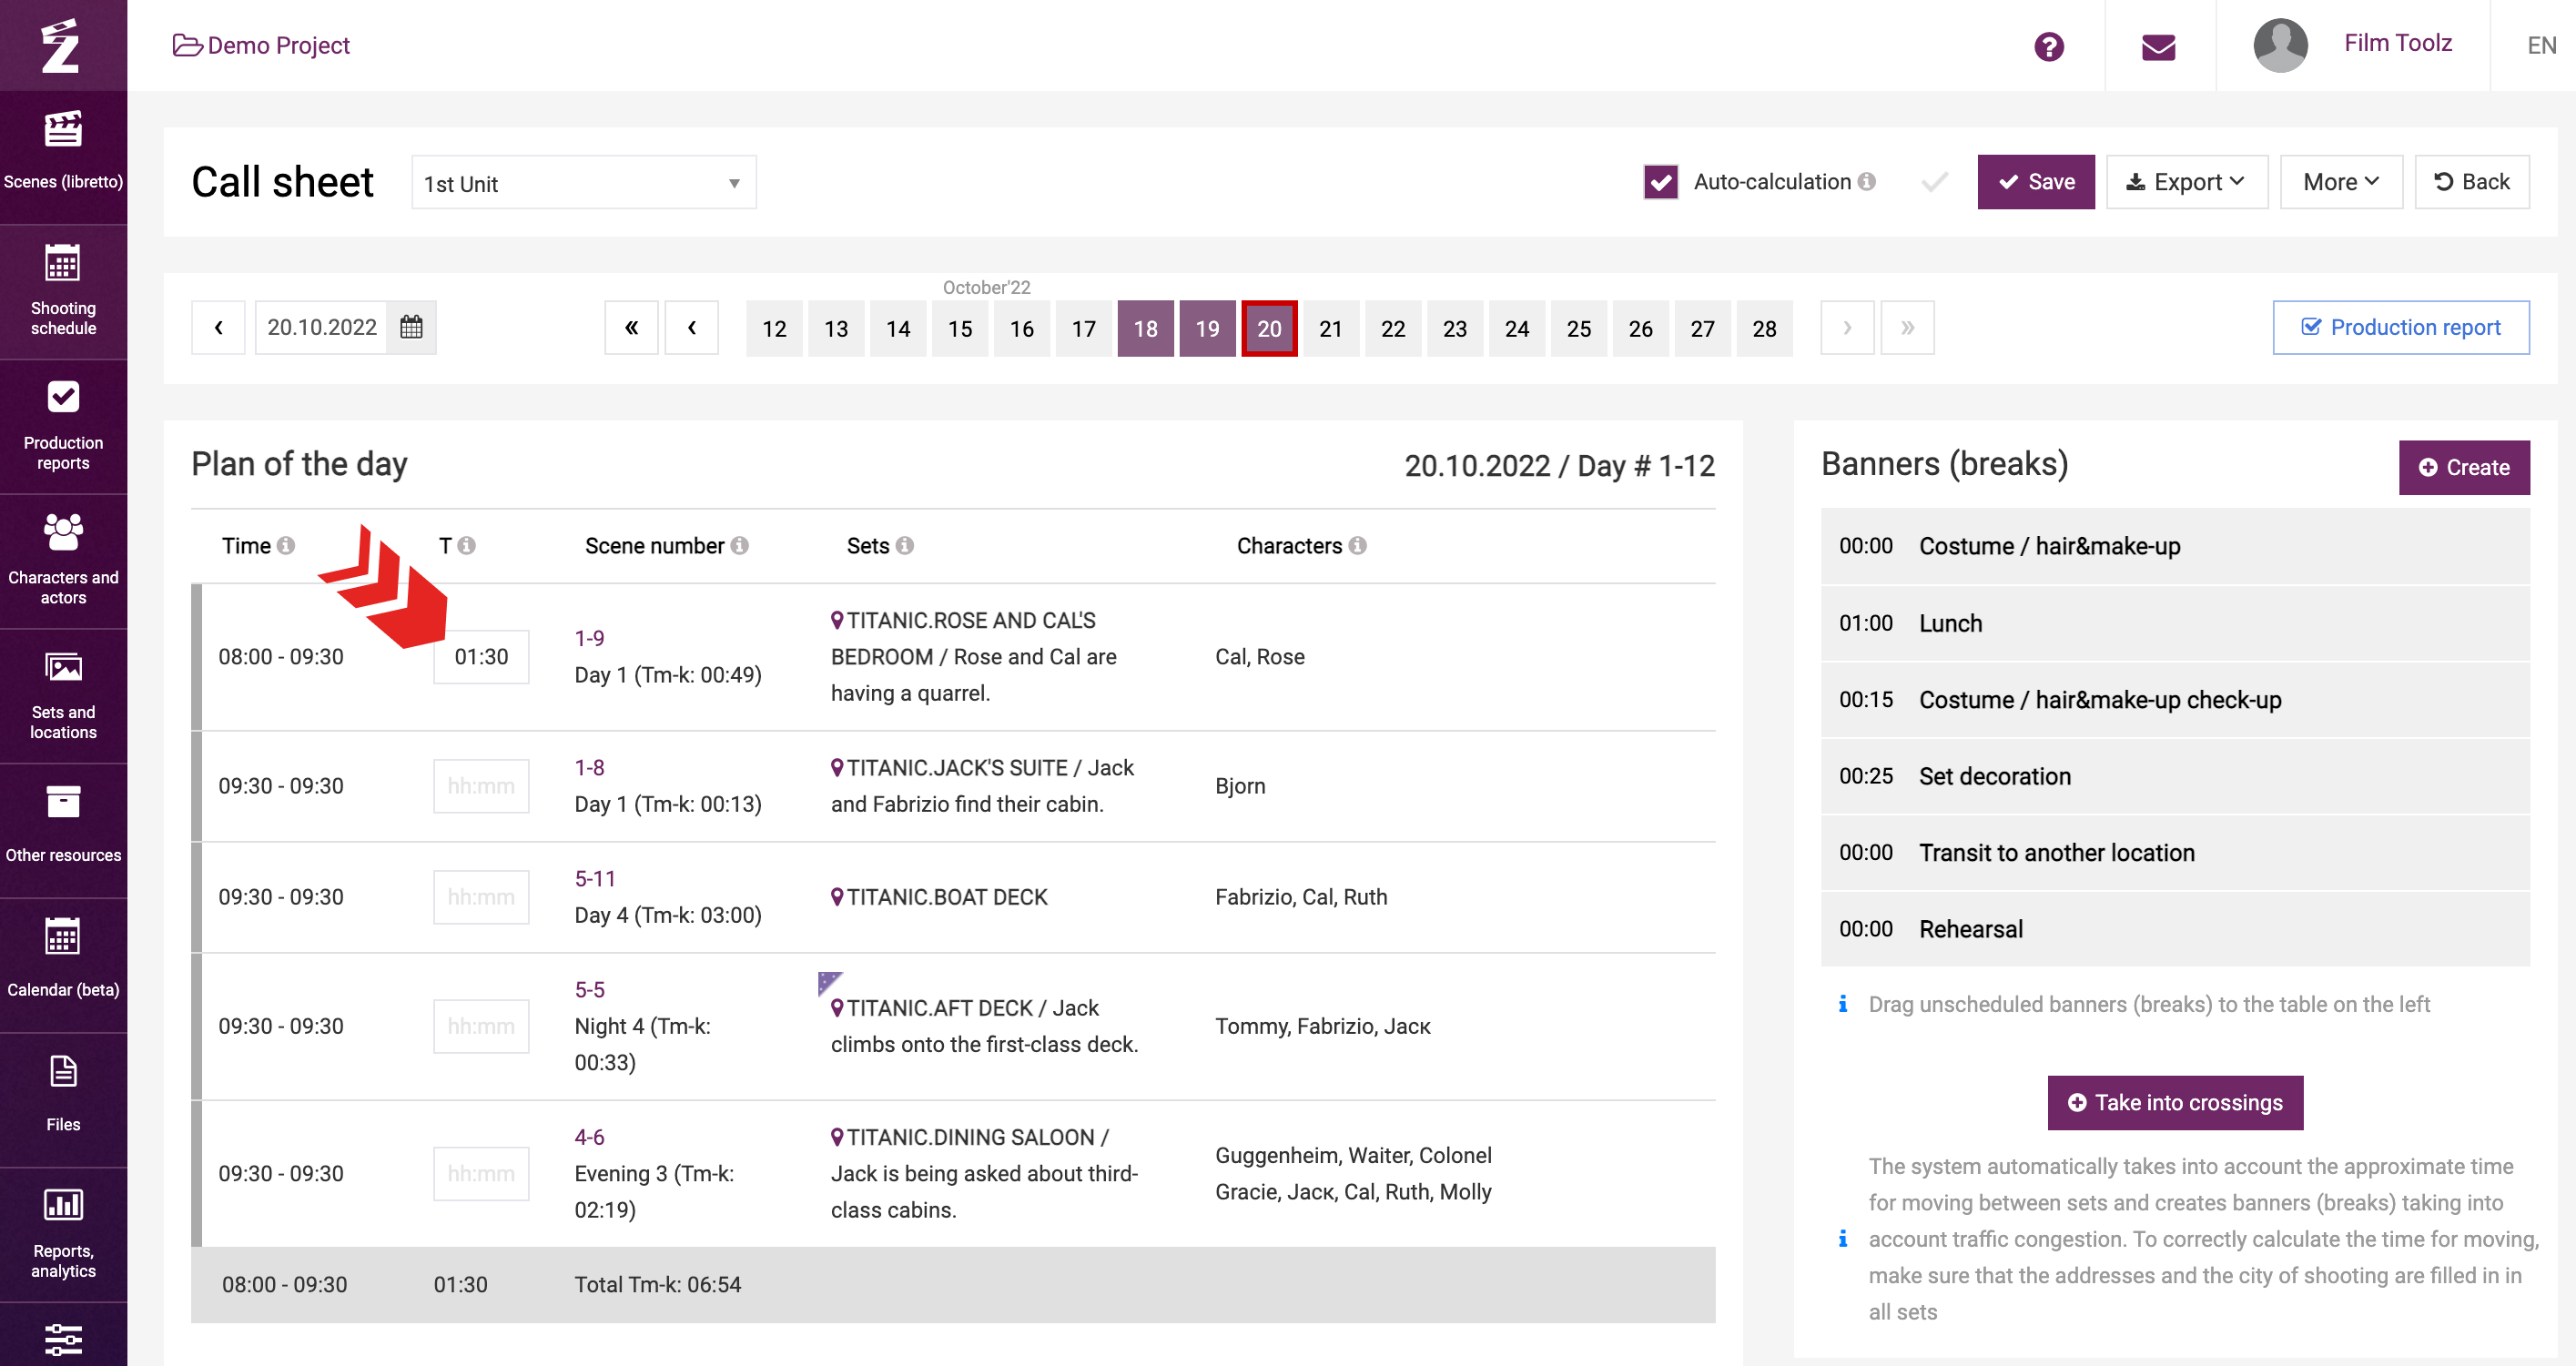
Service Breaks
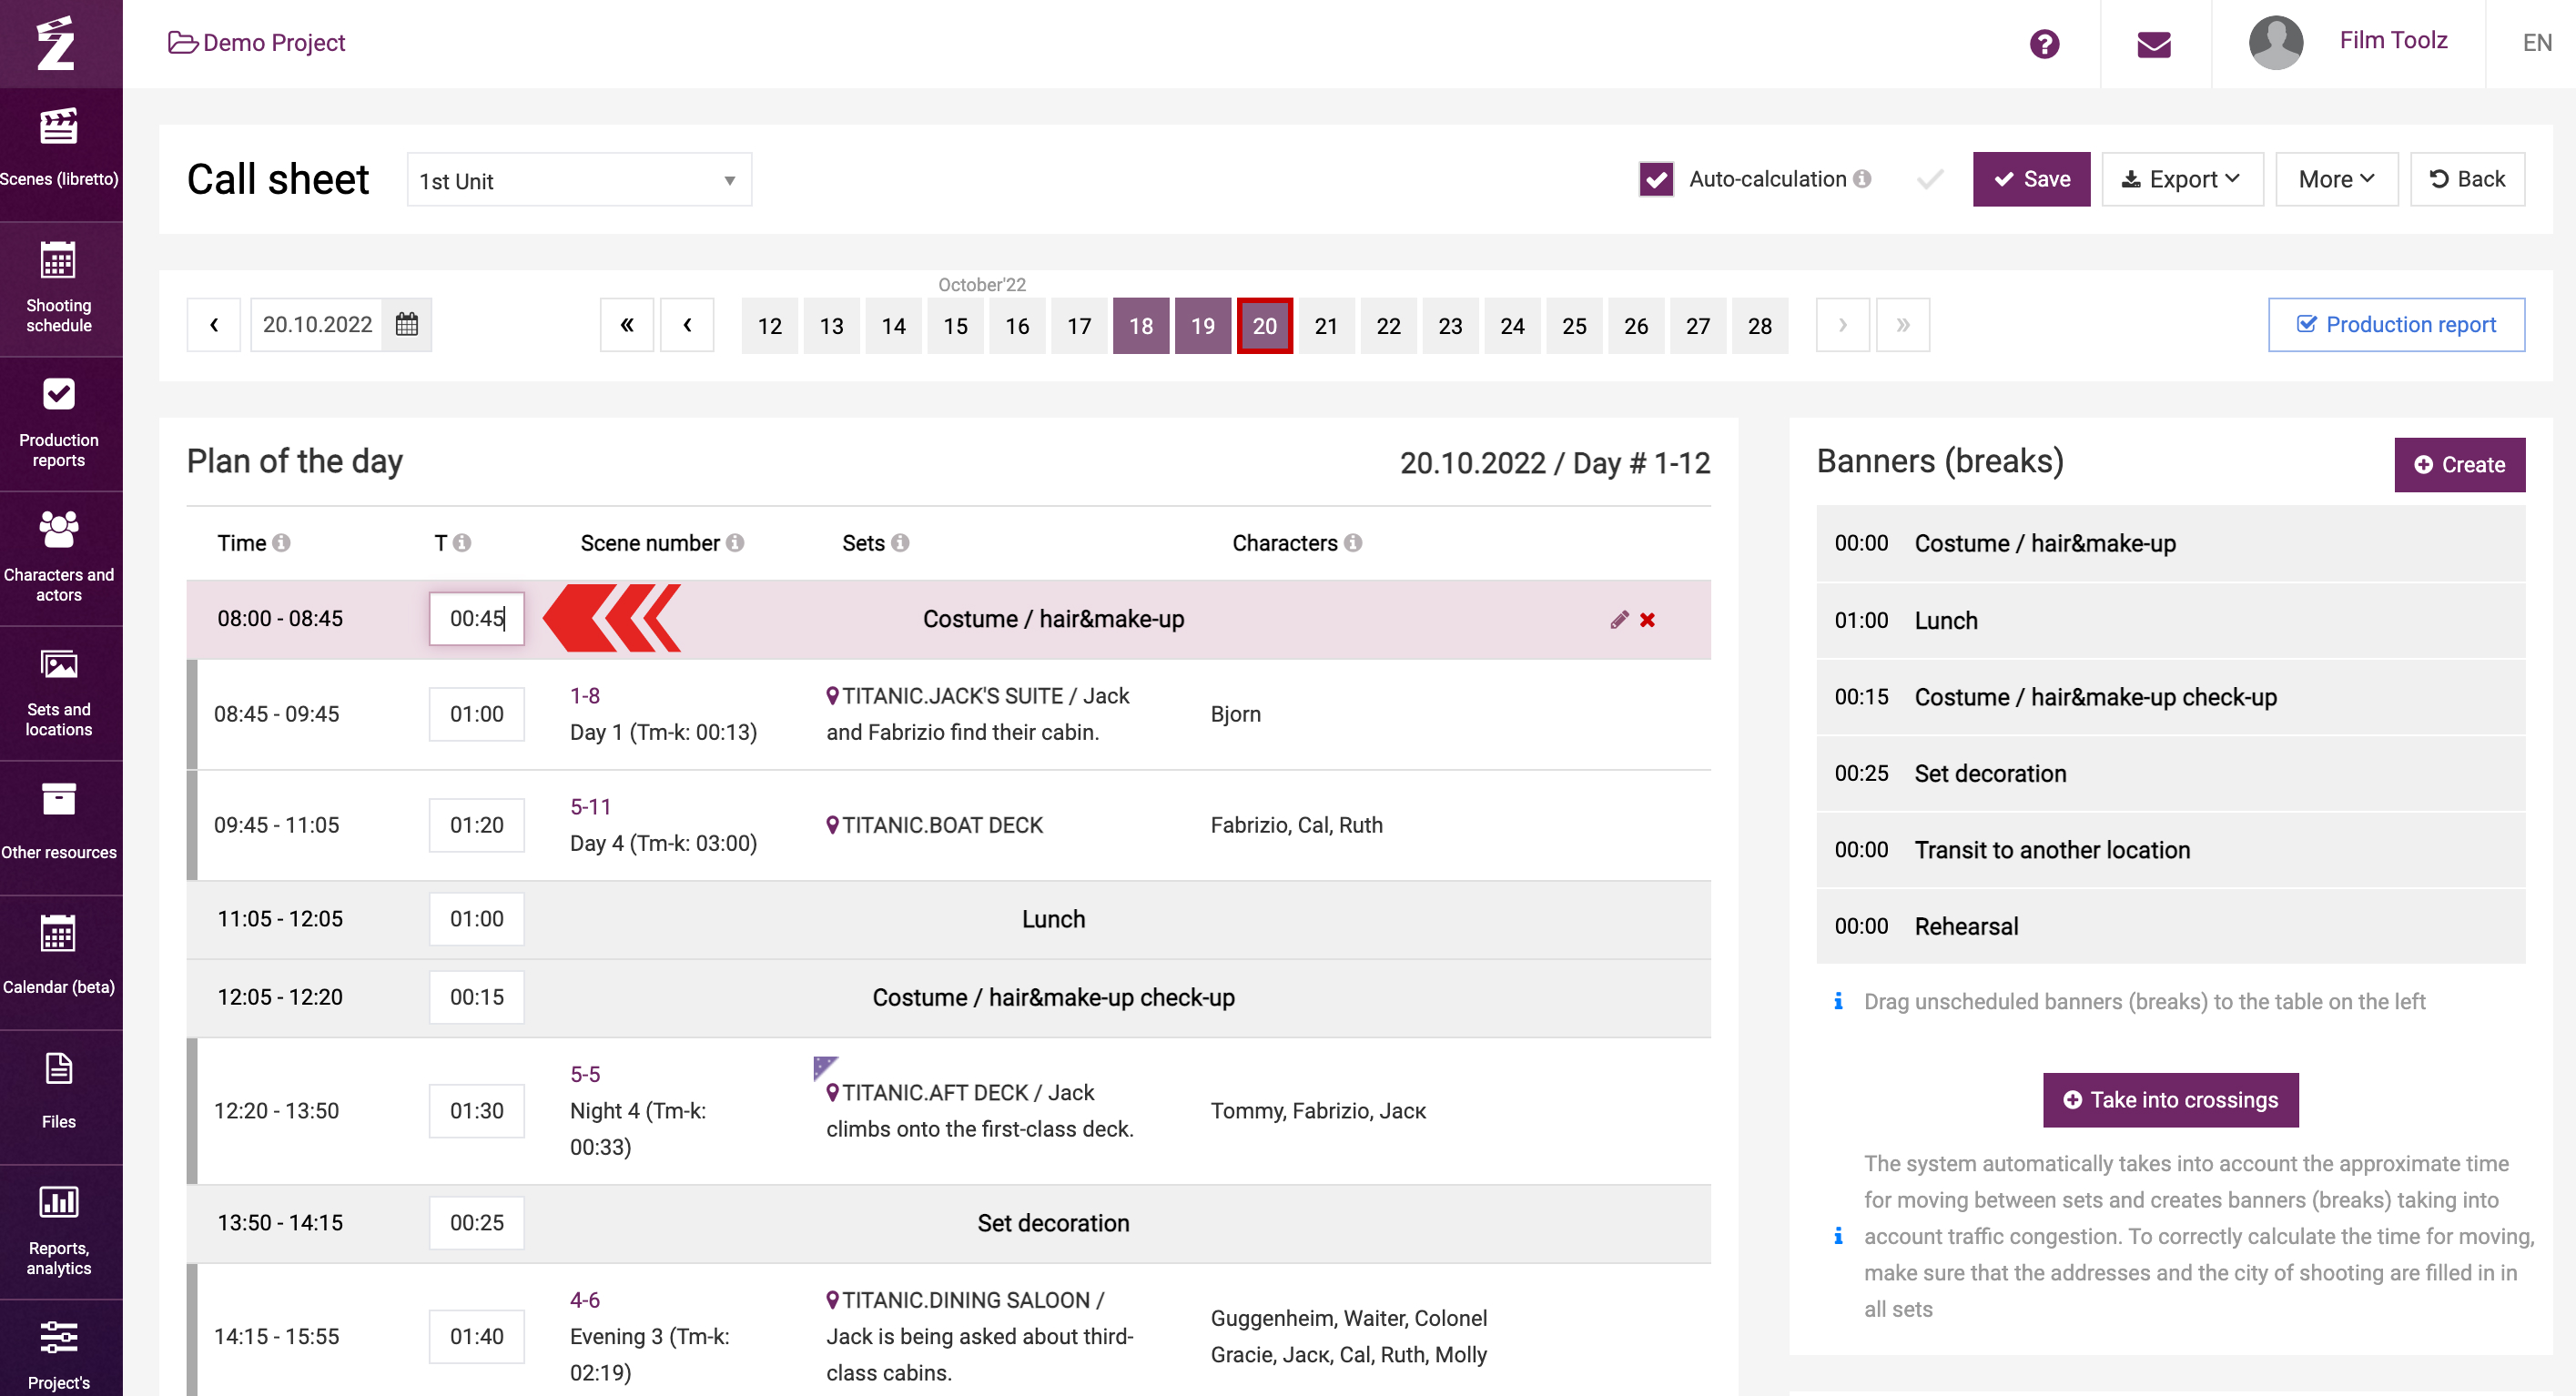
Similar to scenes, you can adjust the order of service breaks by dragging them with the mouse.

The system provides a default list of common break types, but you can rename them or add new breaks.
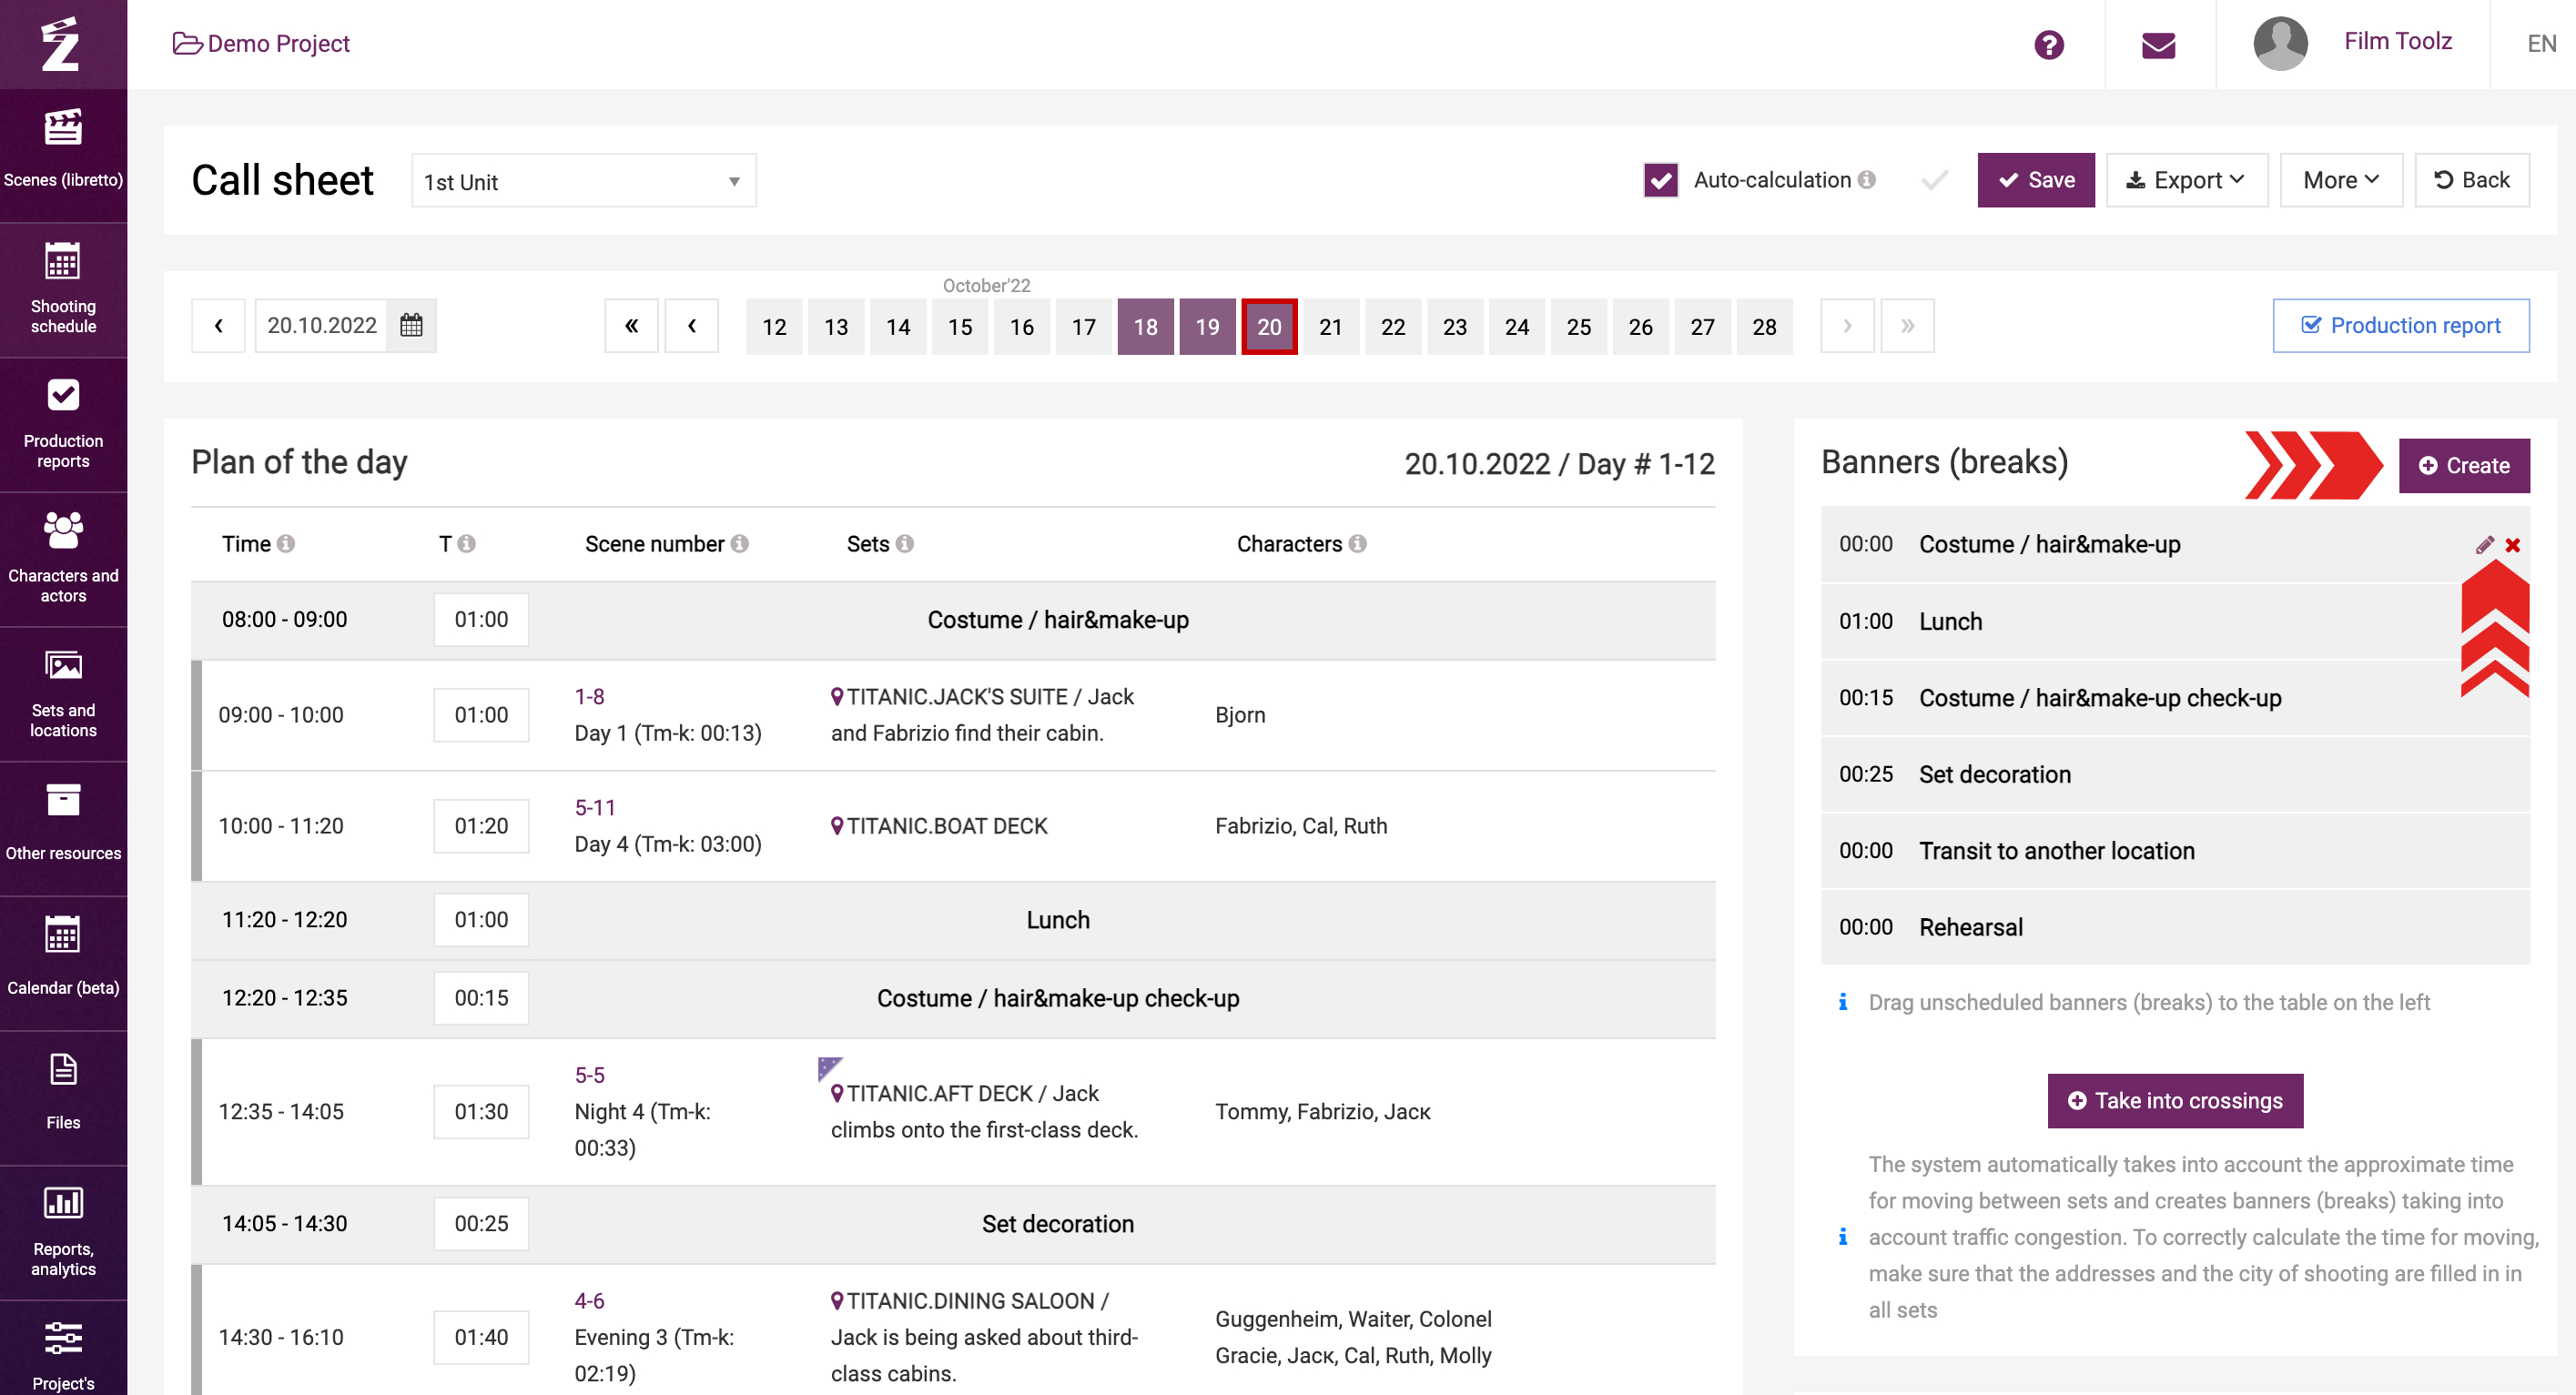
Set the duration for each break as needed.
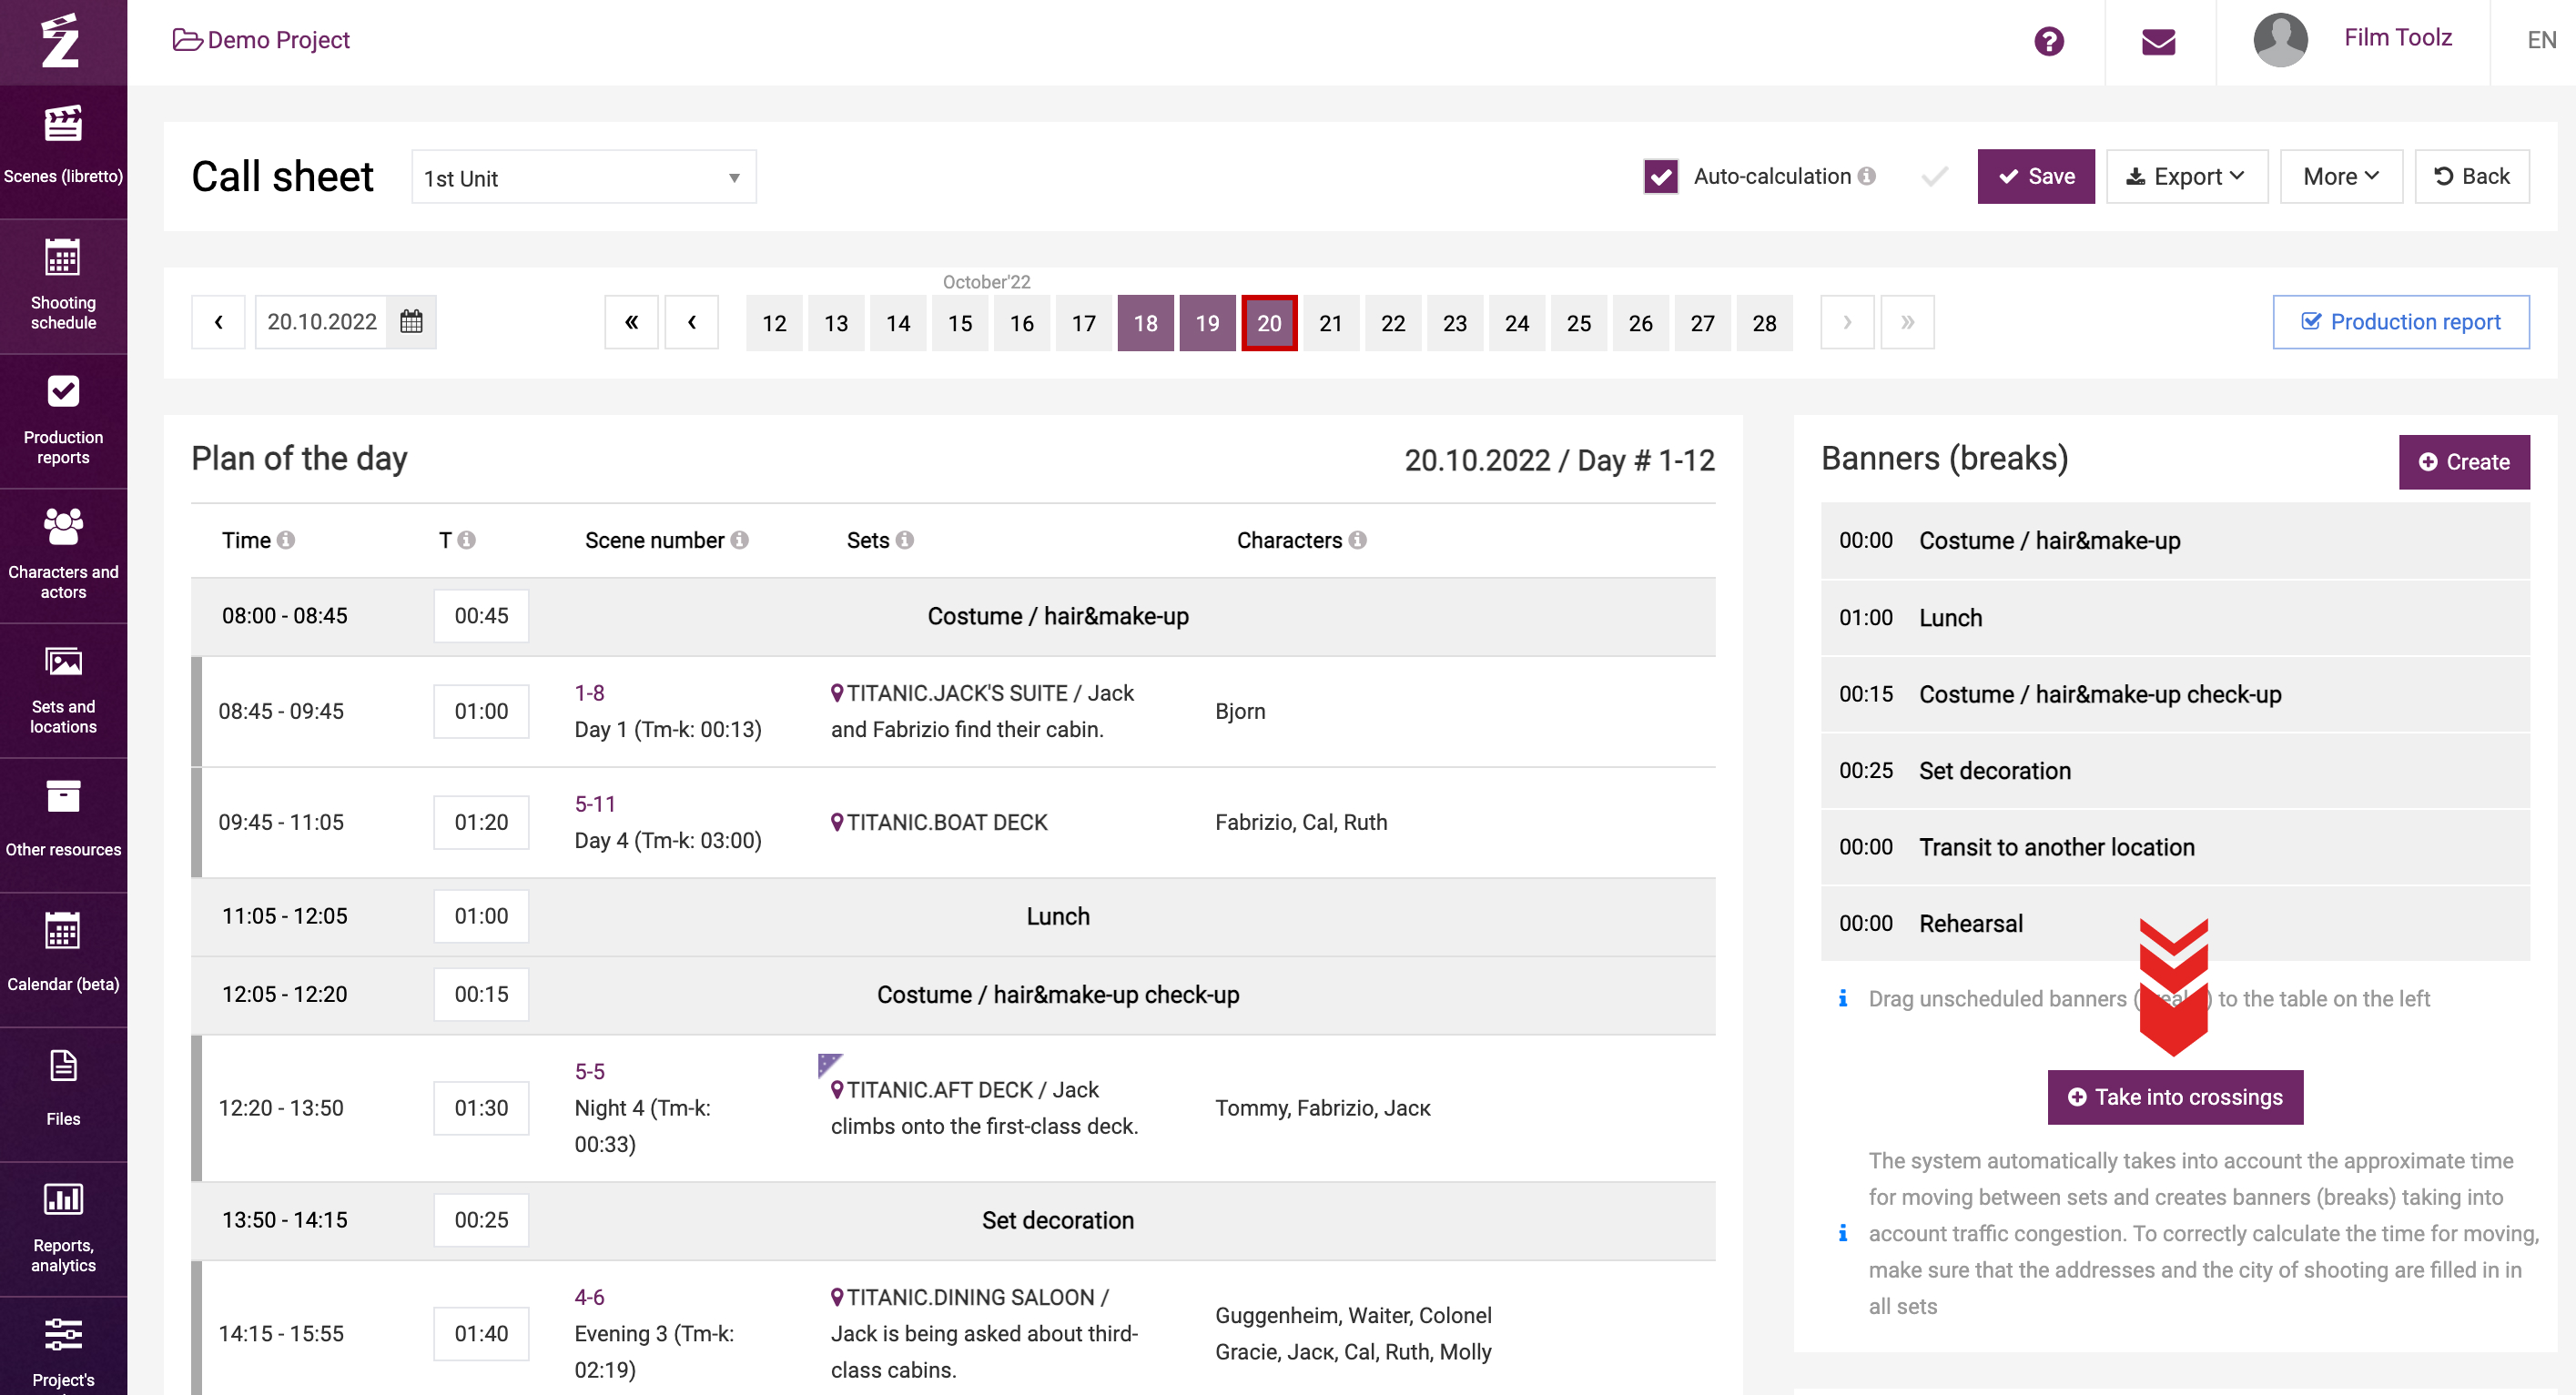
The break module includes a button labeled “Add travel time.” This feature can be useful for shooting days involving two sets with different addresses, where relocation is necessary. Clicking this button will calculate the approximate travel time.
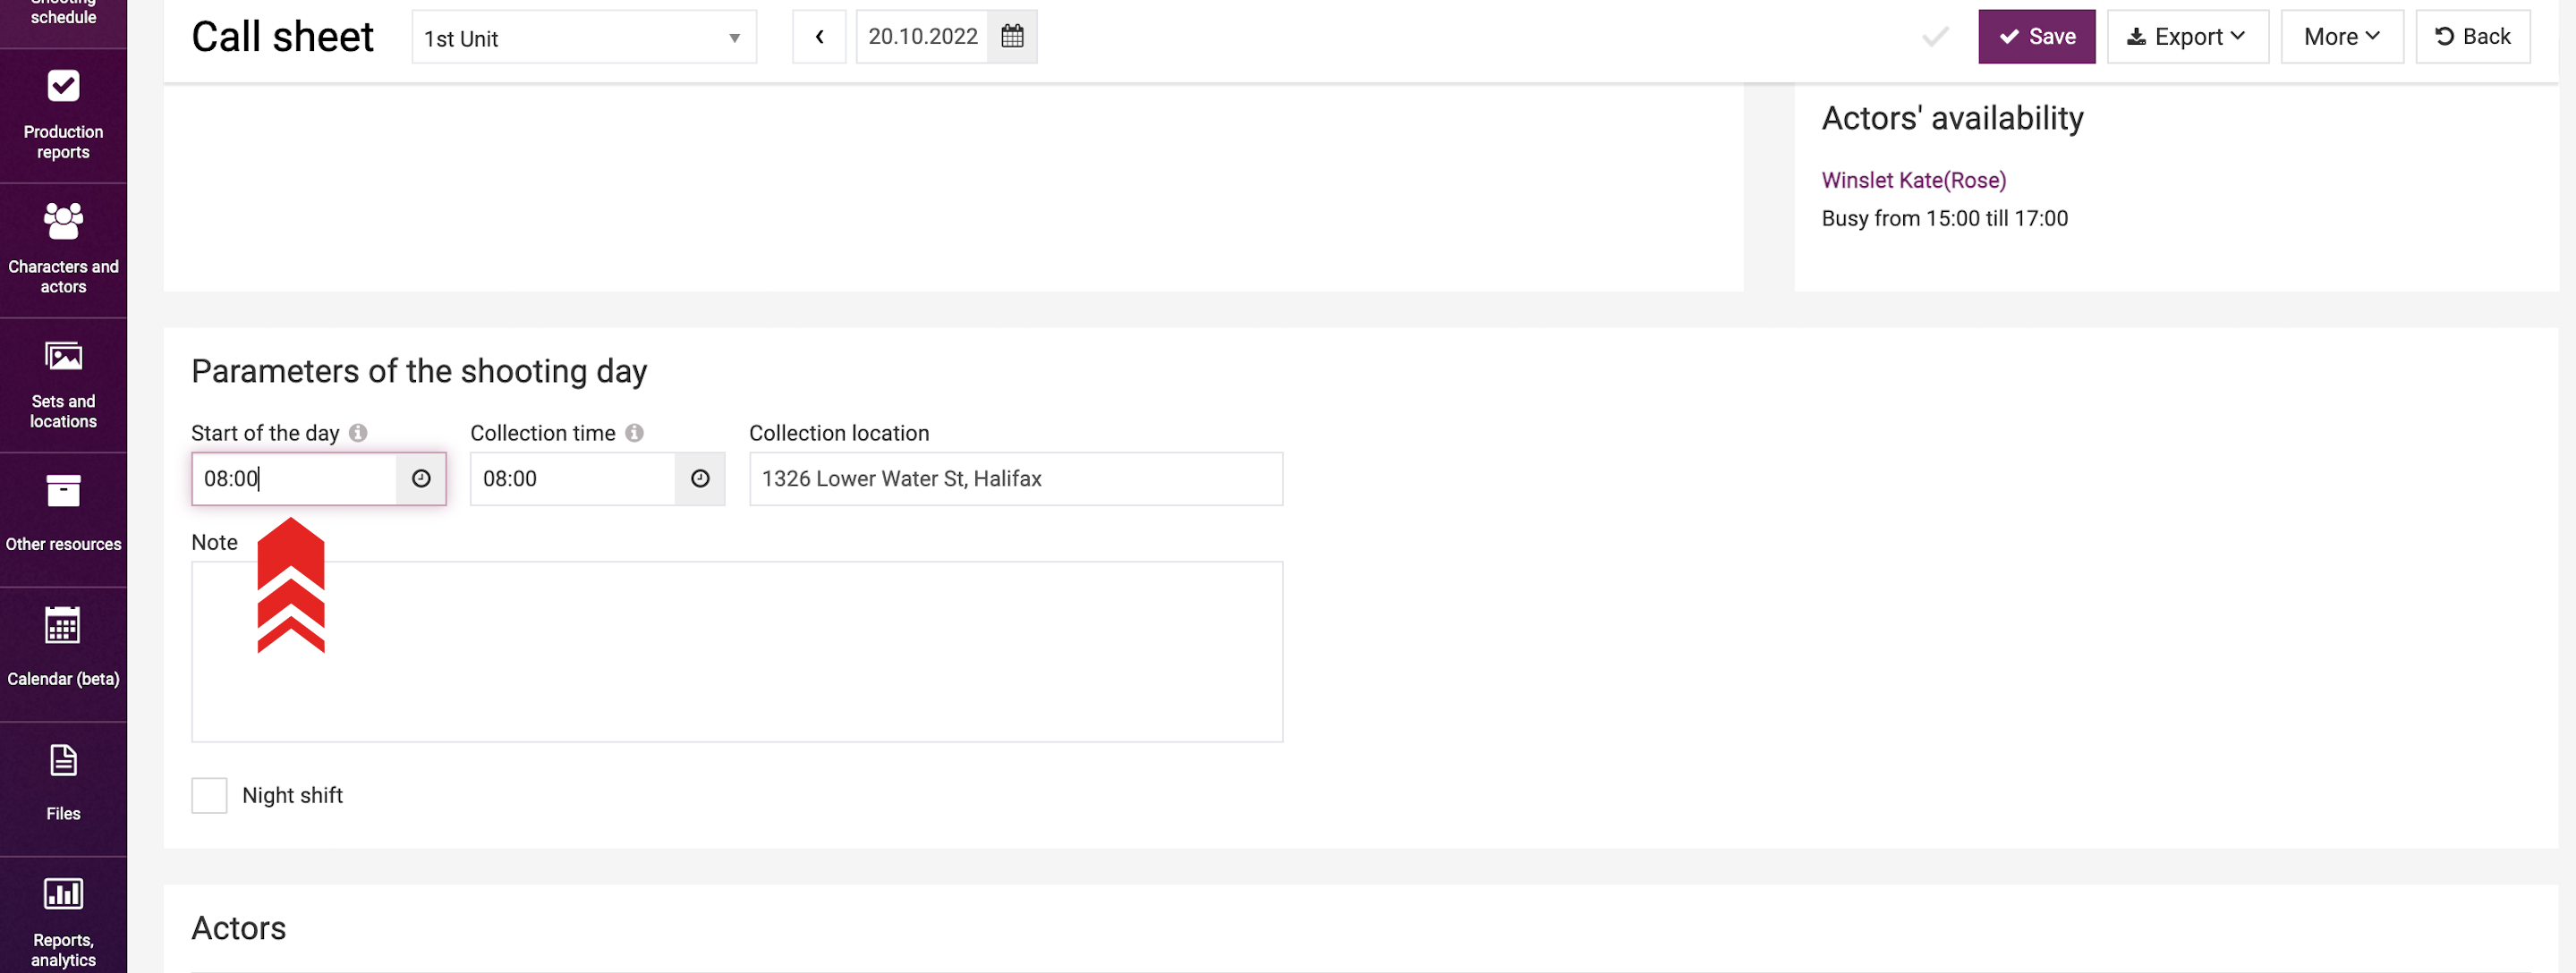
Start of a Shooting Day and its Parameters
It's important to note that all scheduled duration values are calculated in the call sheet from the start of the shooting day. This information is derived from the parameters set in your project settings.
If you want to change the shooting day start time for a specific date, simply modify the time on the page of specific call sheet manually. Once the shooting day start time is changed, the time in the scheduled durations of the day schedule for the scenes and service breaks will change automatically.
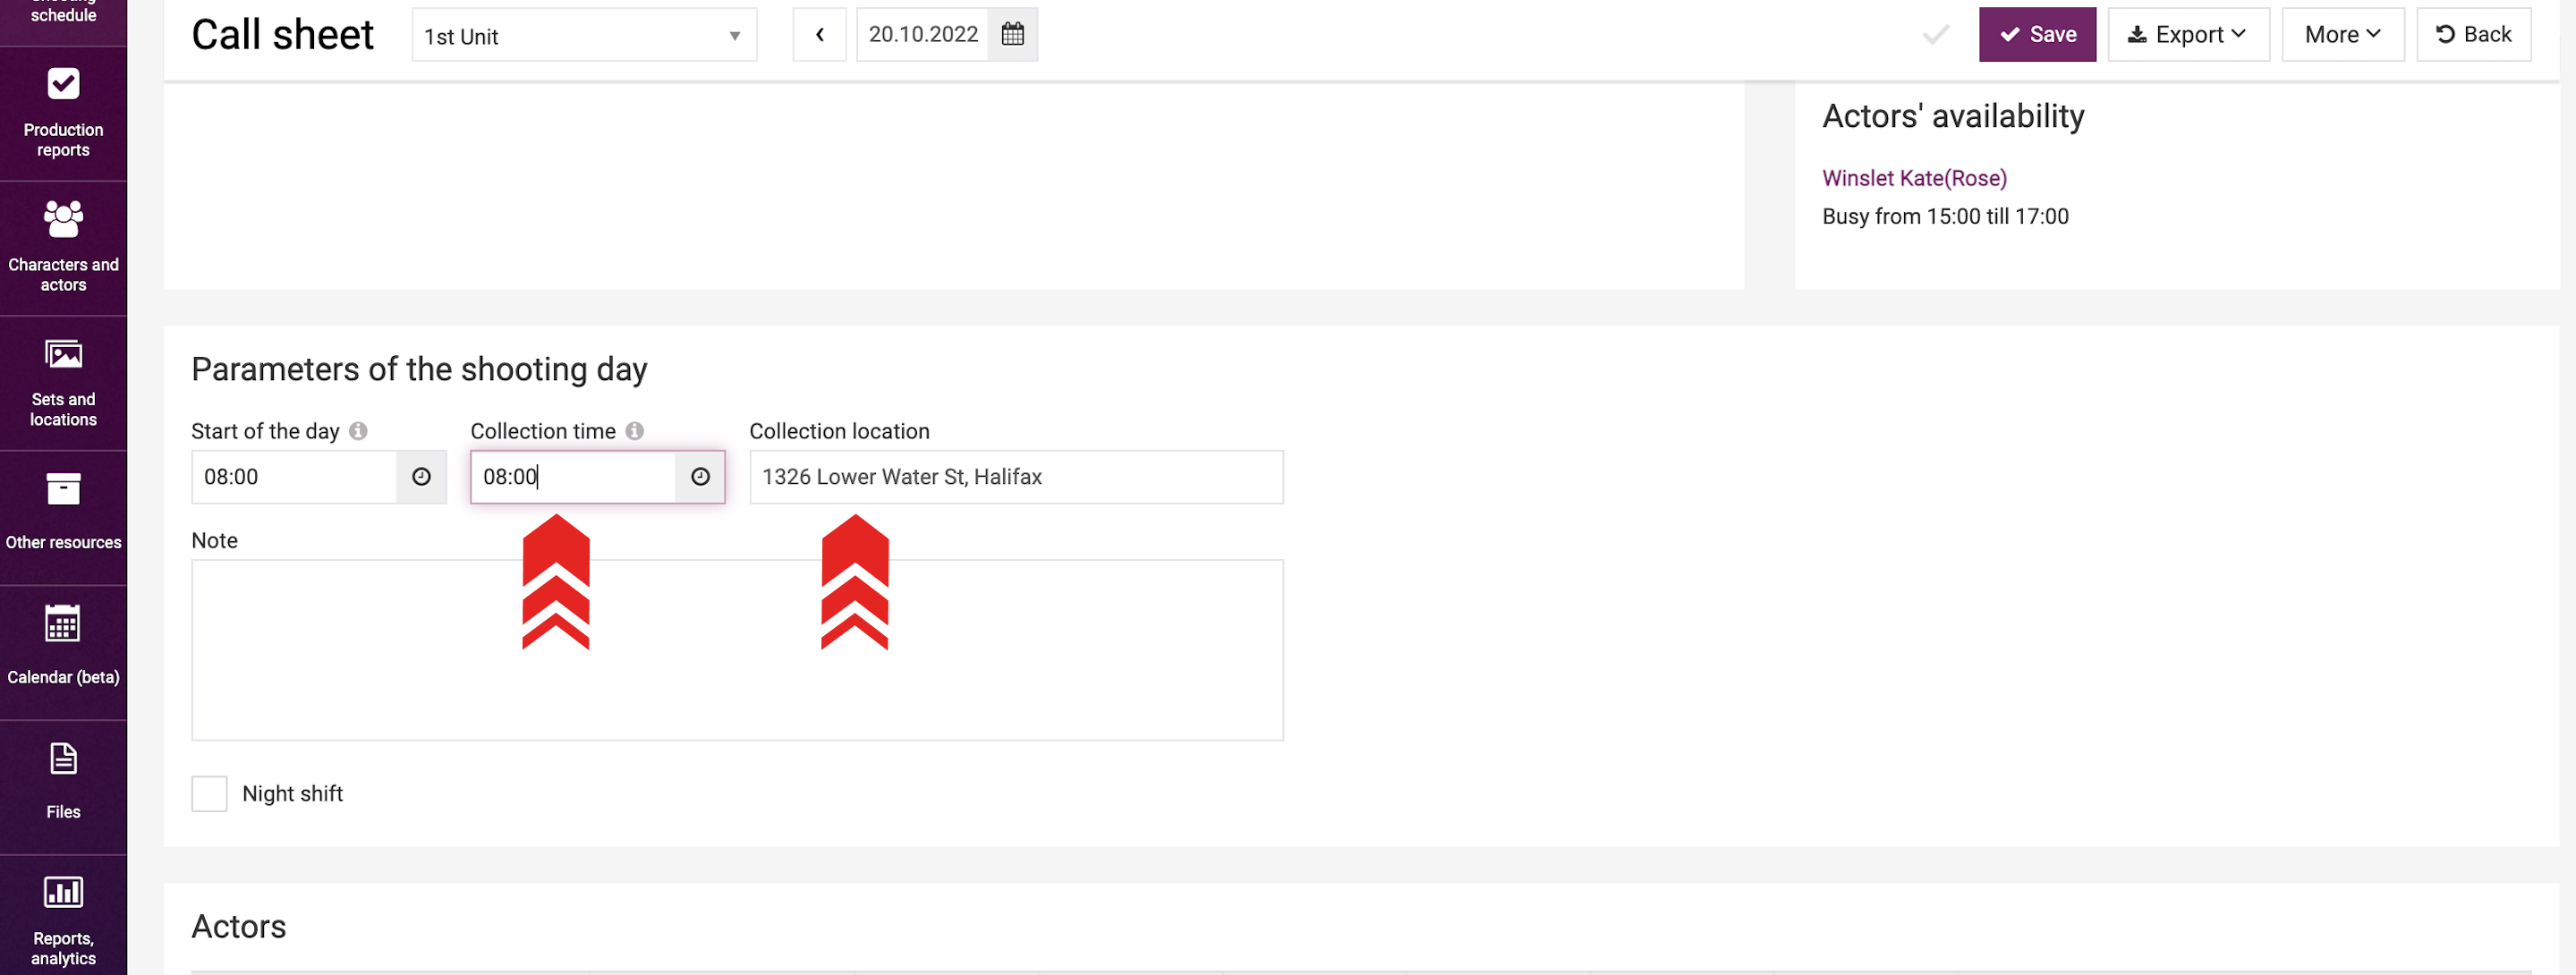
You can indicate call time and location next to the shooting day start time field. These fields are intended for reference and organizational purposes and are shown in the exported call sheet. Initially, the call time is the same as the shooting day start time, but it may be adjusted manually.
The meeting point will be the same as the address of the location for the first scene. If the first scene has no address yet, this field will be left blank.
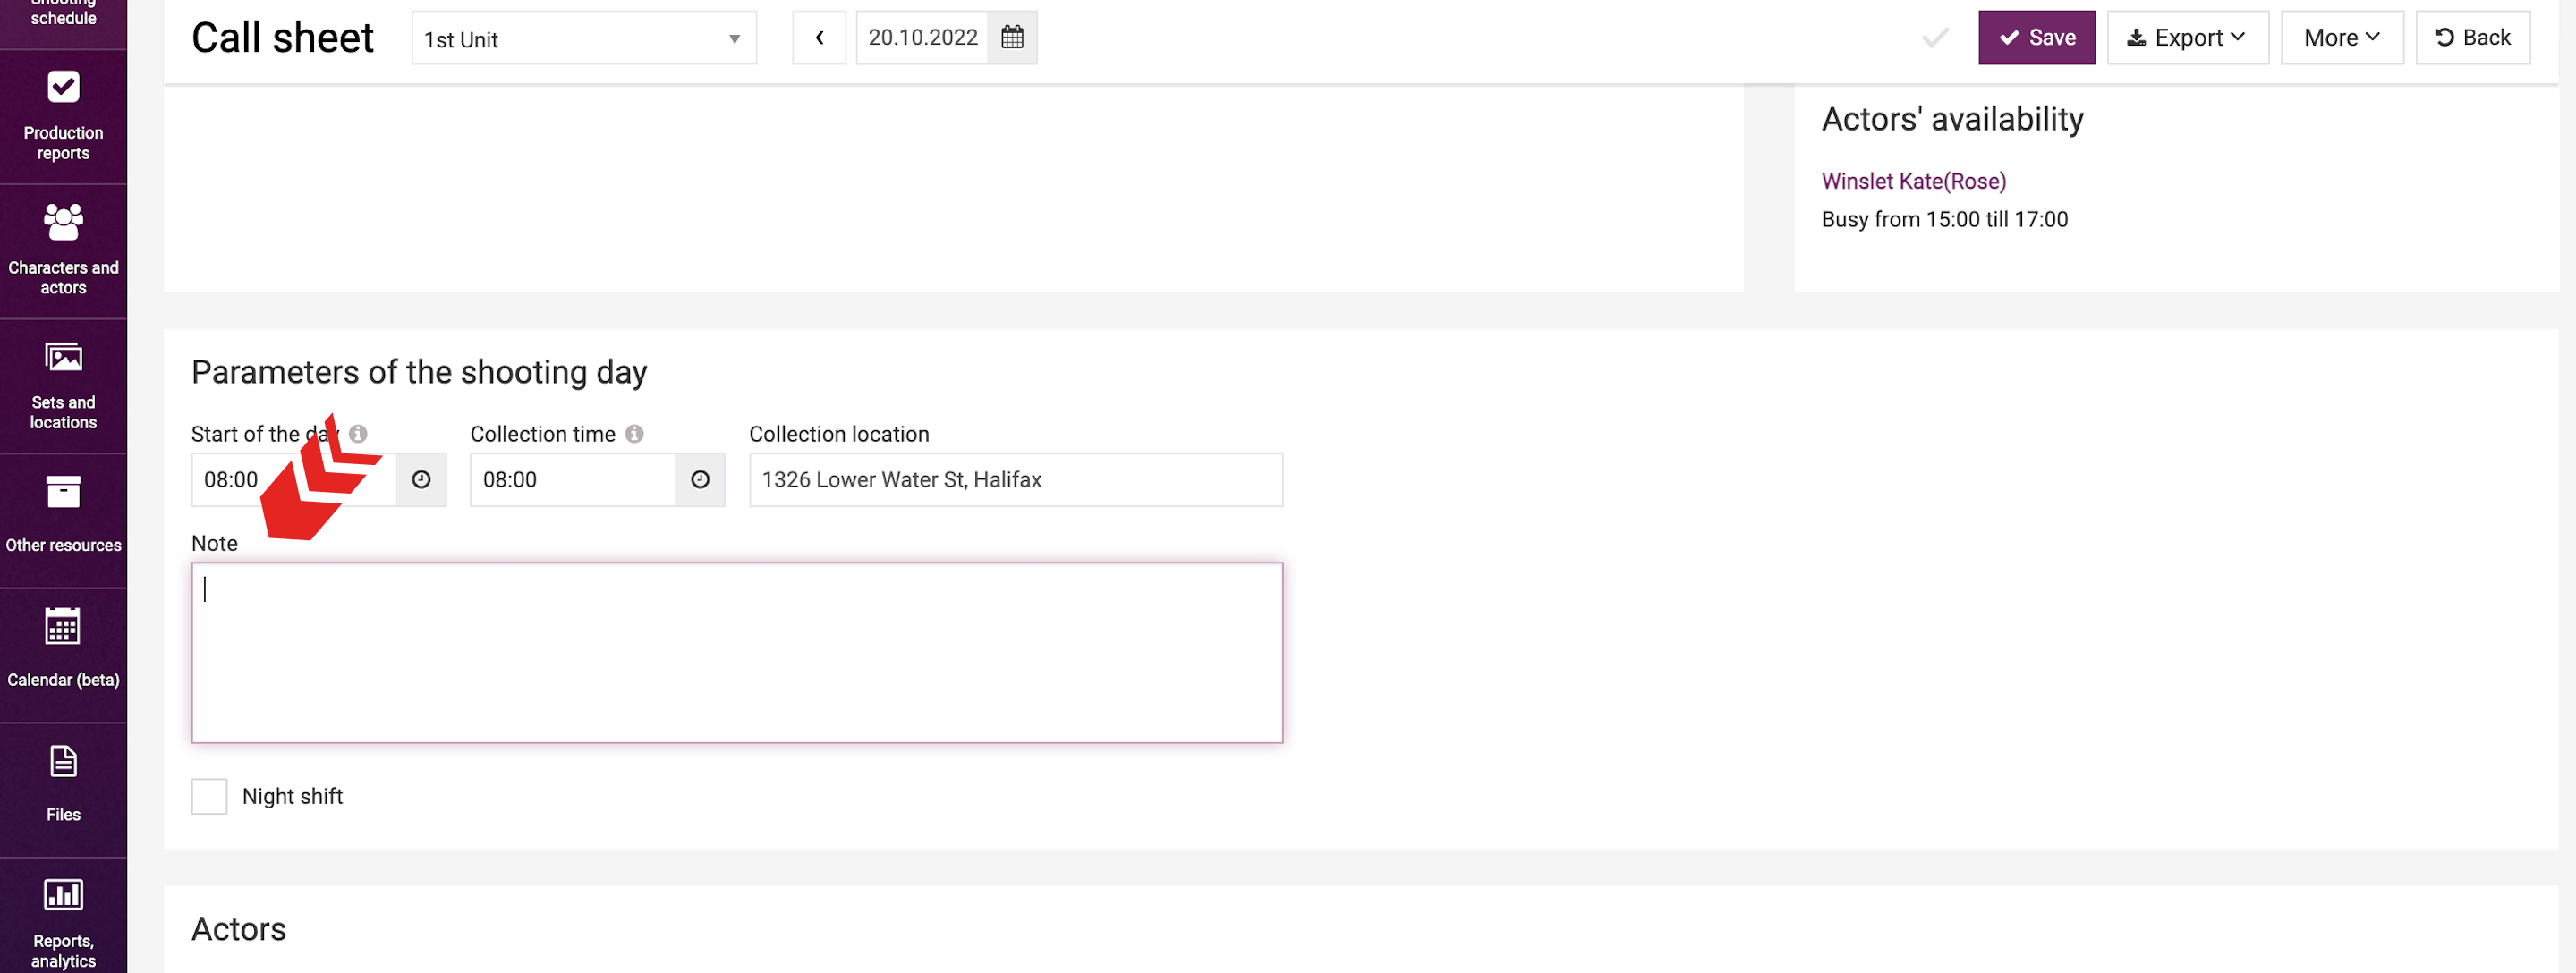
You can leave a ‘Note’ below. This text will end up in the file of the call sheet to be exported.
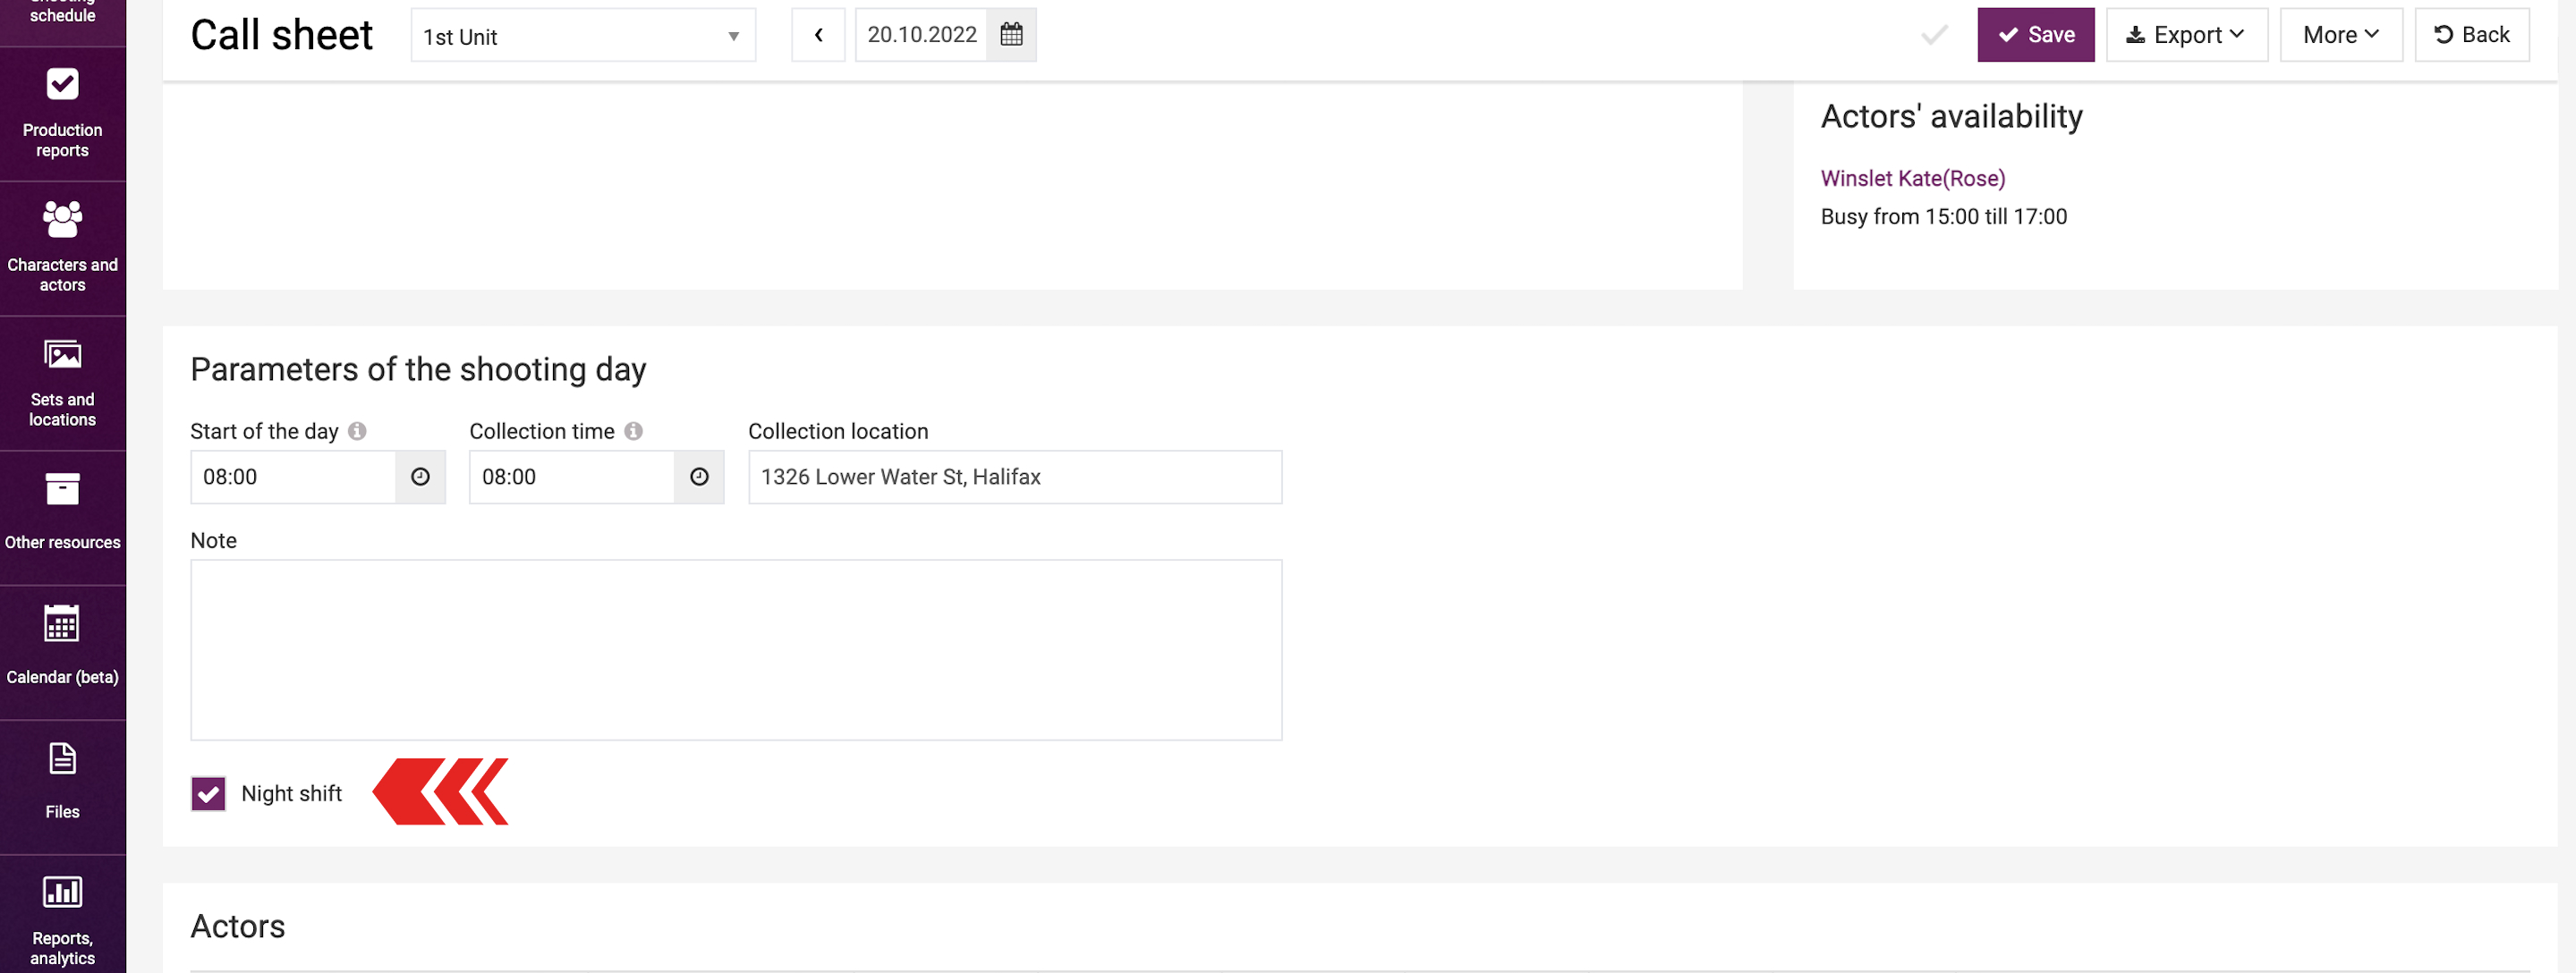
You can indicate under the remark that this is a night shoot.
Under the shooting day parameters, you will see the tables listing the shooting day participants: actors, shooting day elements and scene-by-scene elements.
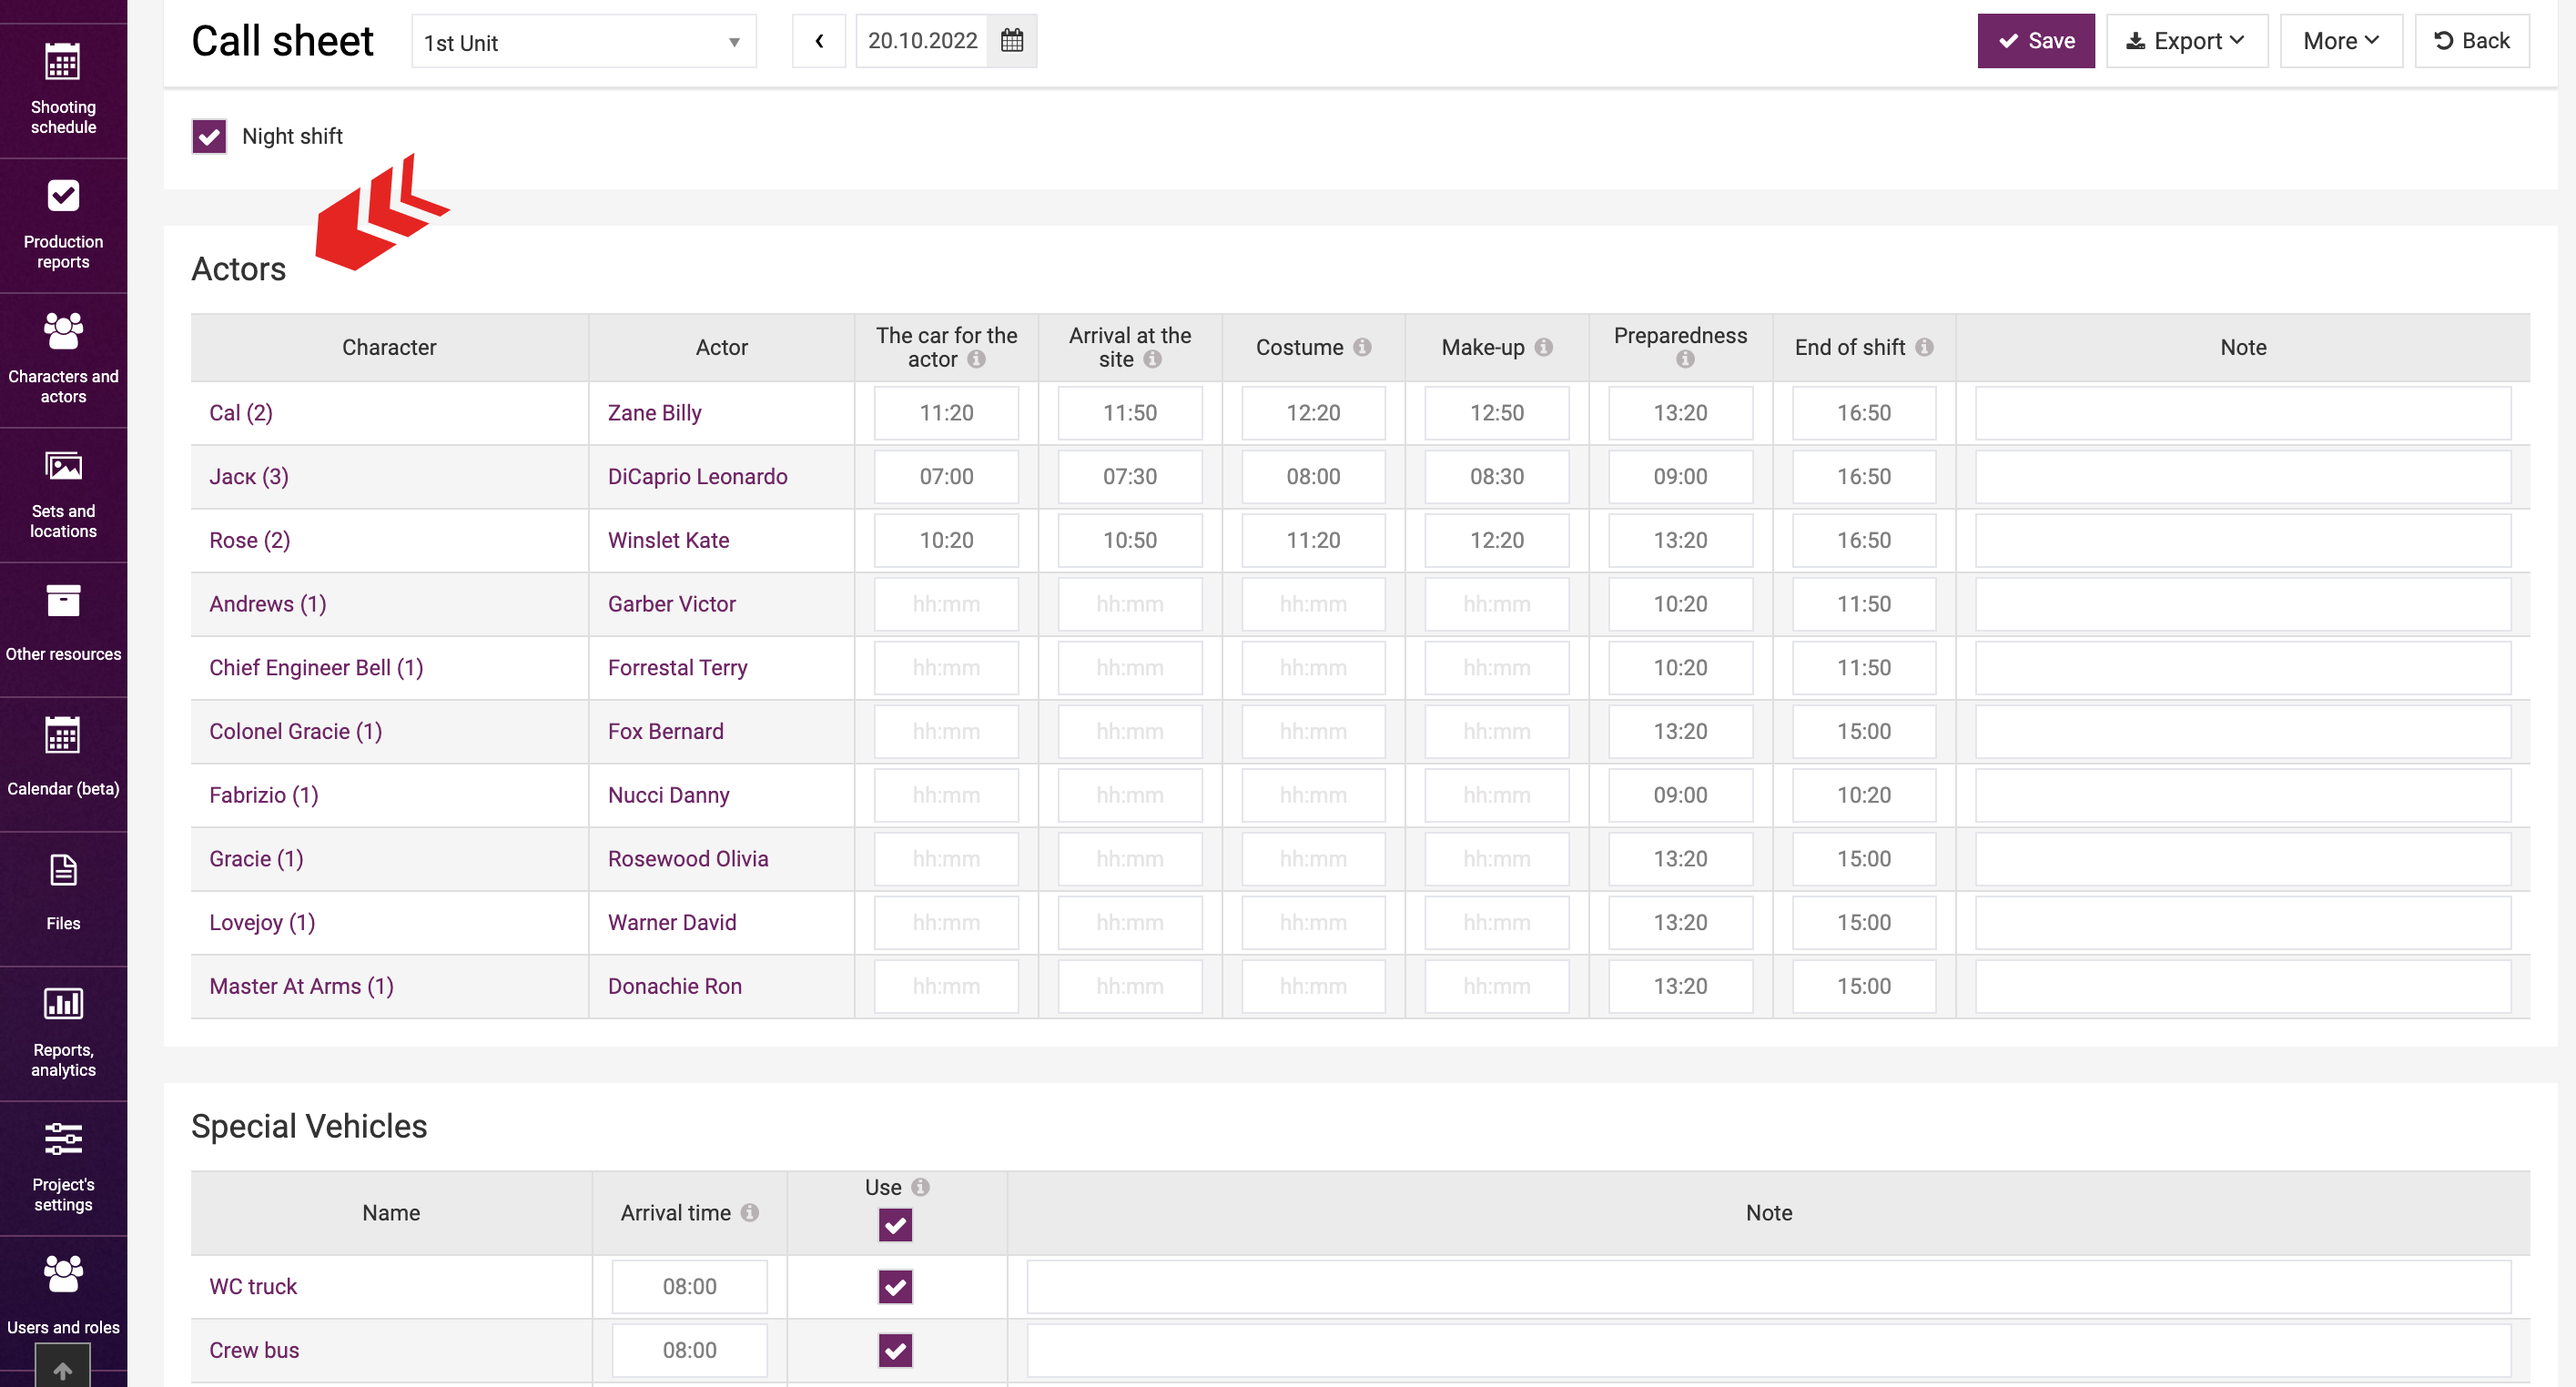
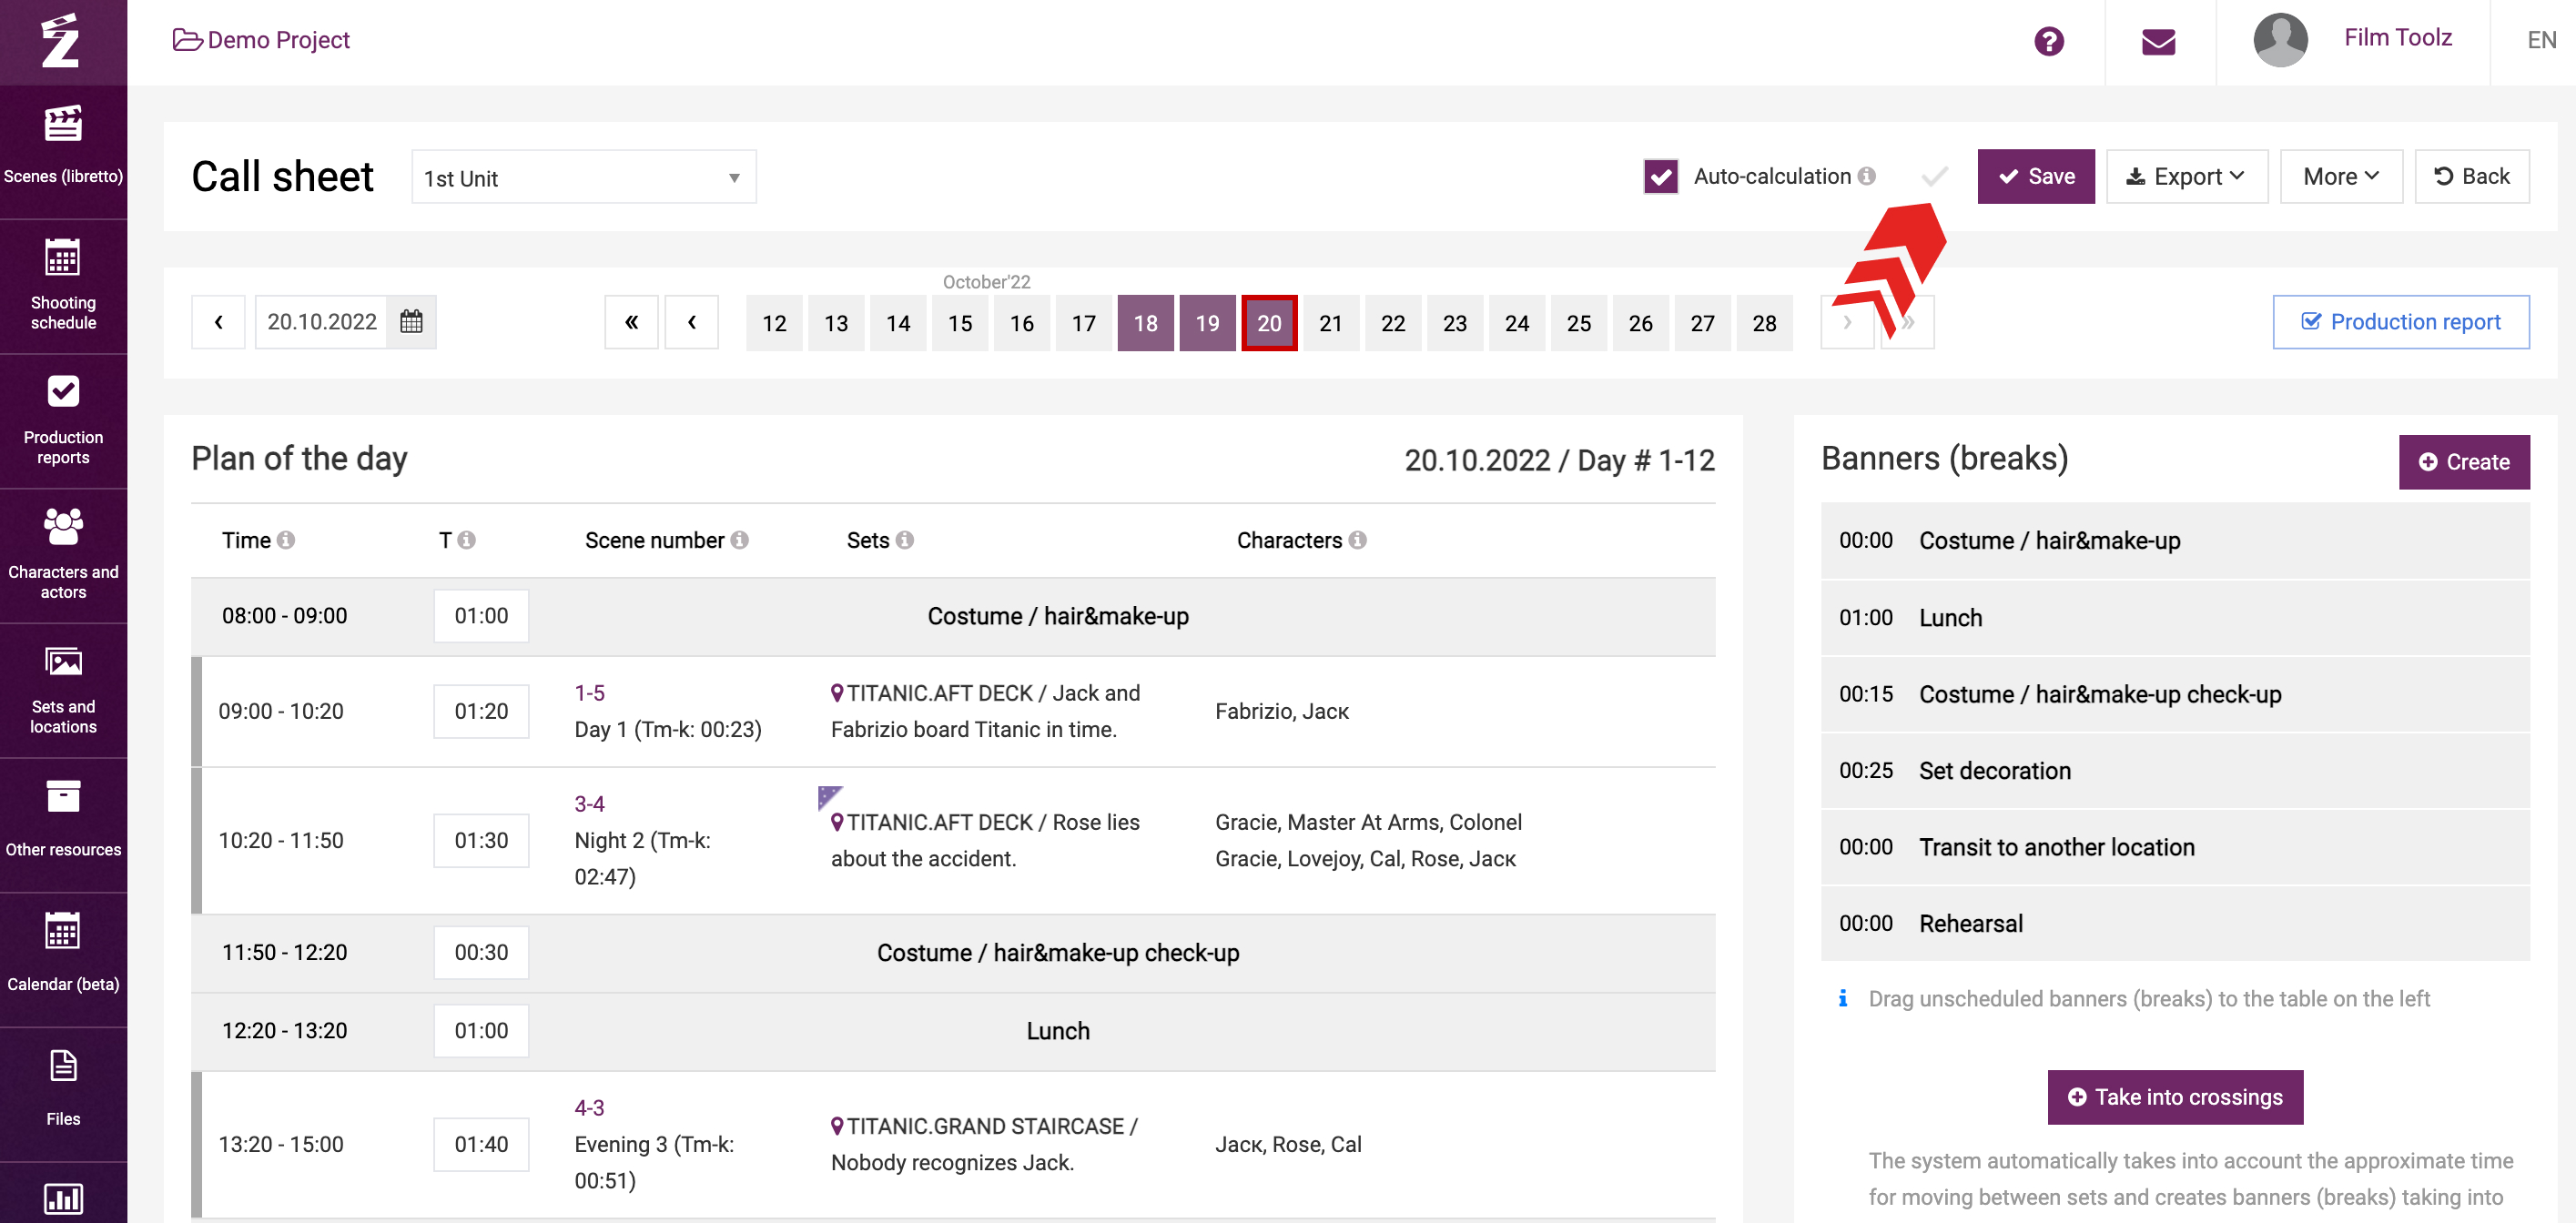
If there is a tick in the “Auto-calculation” box next to the “Save” button, the set time and out time for the actors will be indicated according to the start time of the first scene and end time of the last scene and will be highlighted in grey. This means that the set time and out time are the same as in the day schedule.
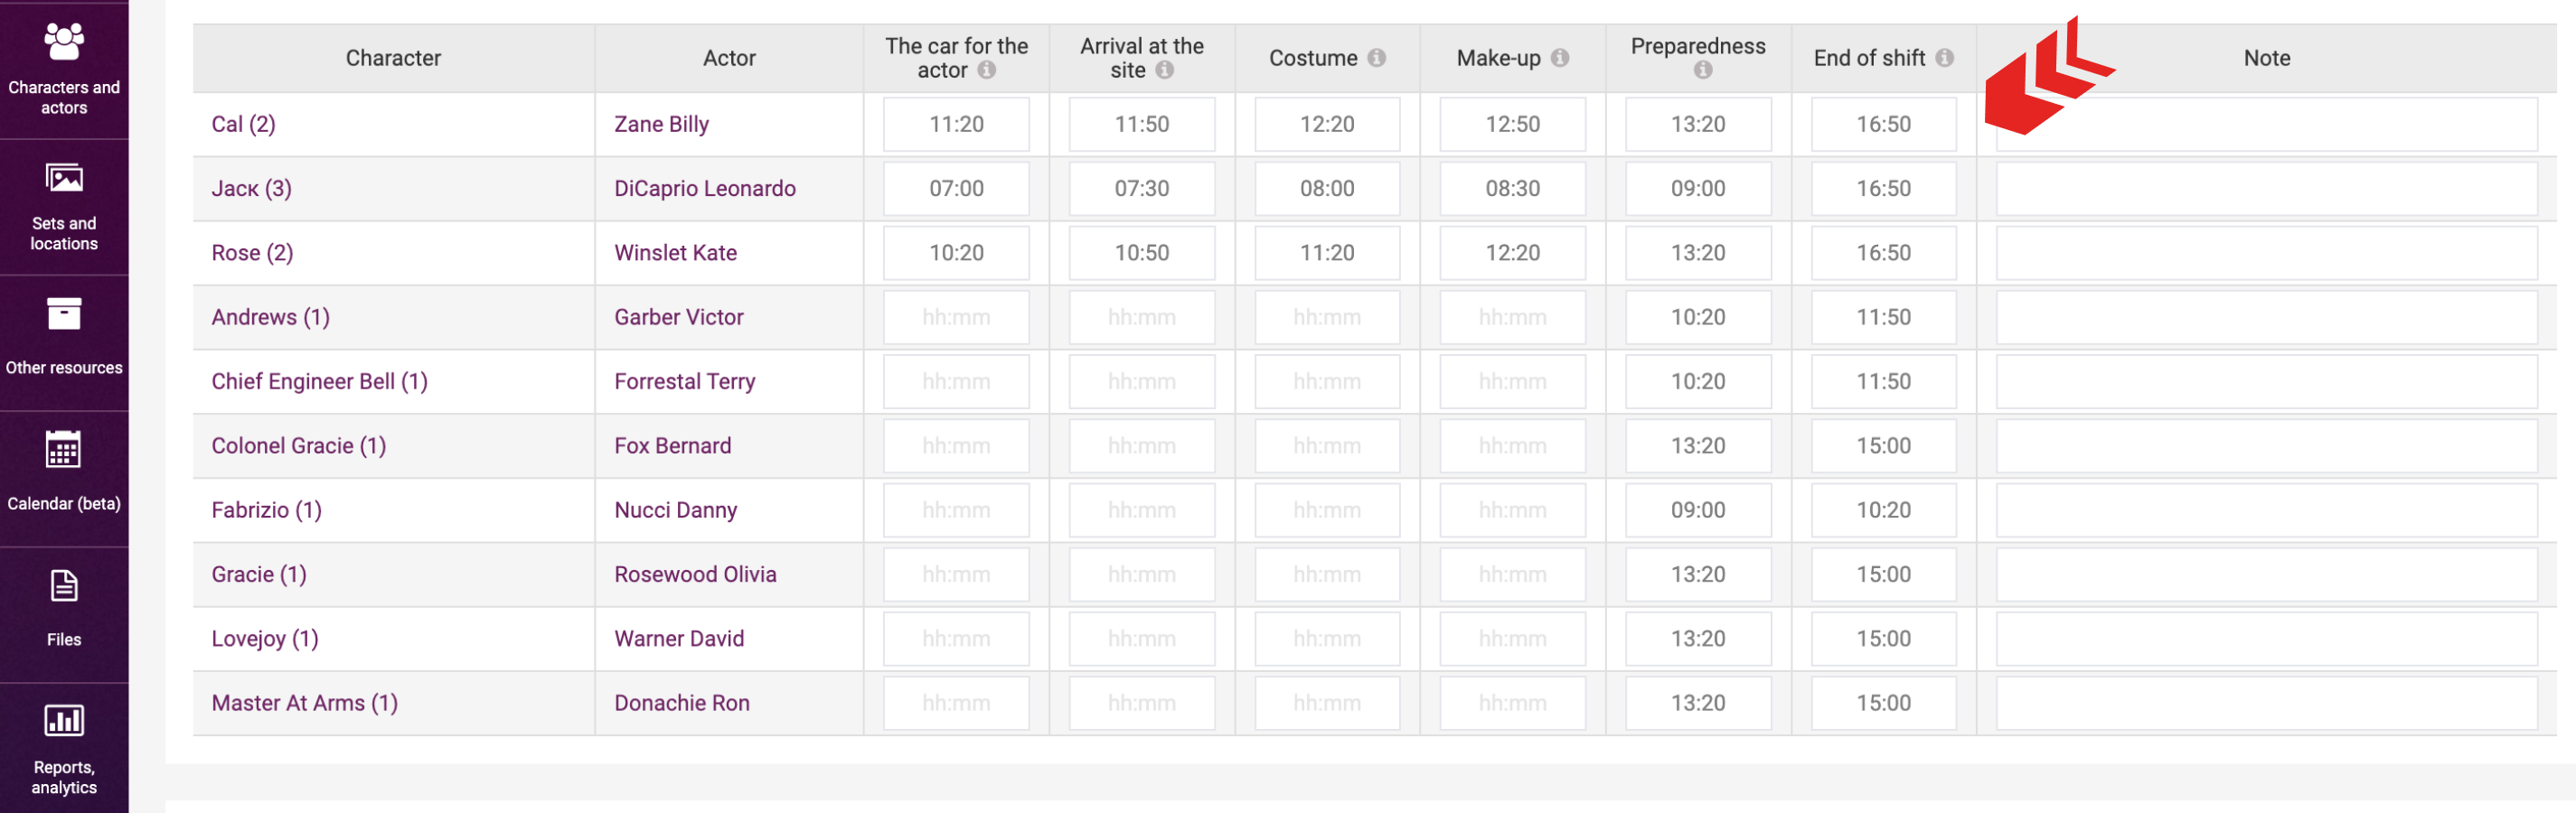
For instance, in case of character Rose, the first scene featuring her starts at 10:20, and the last scene ends at 14:50. Therefore, the actor’s set time will be scheduled for 10:20, and the out time will be scheduled for 14:50, accordingly.
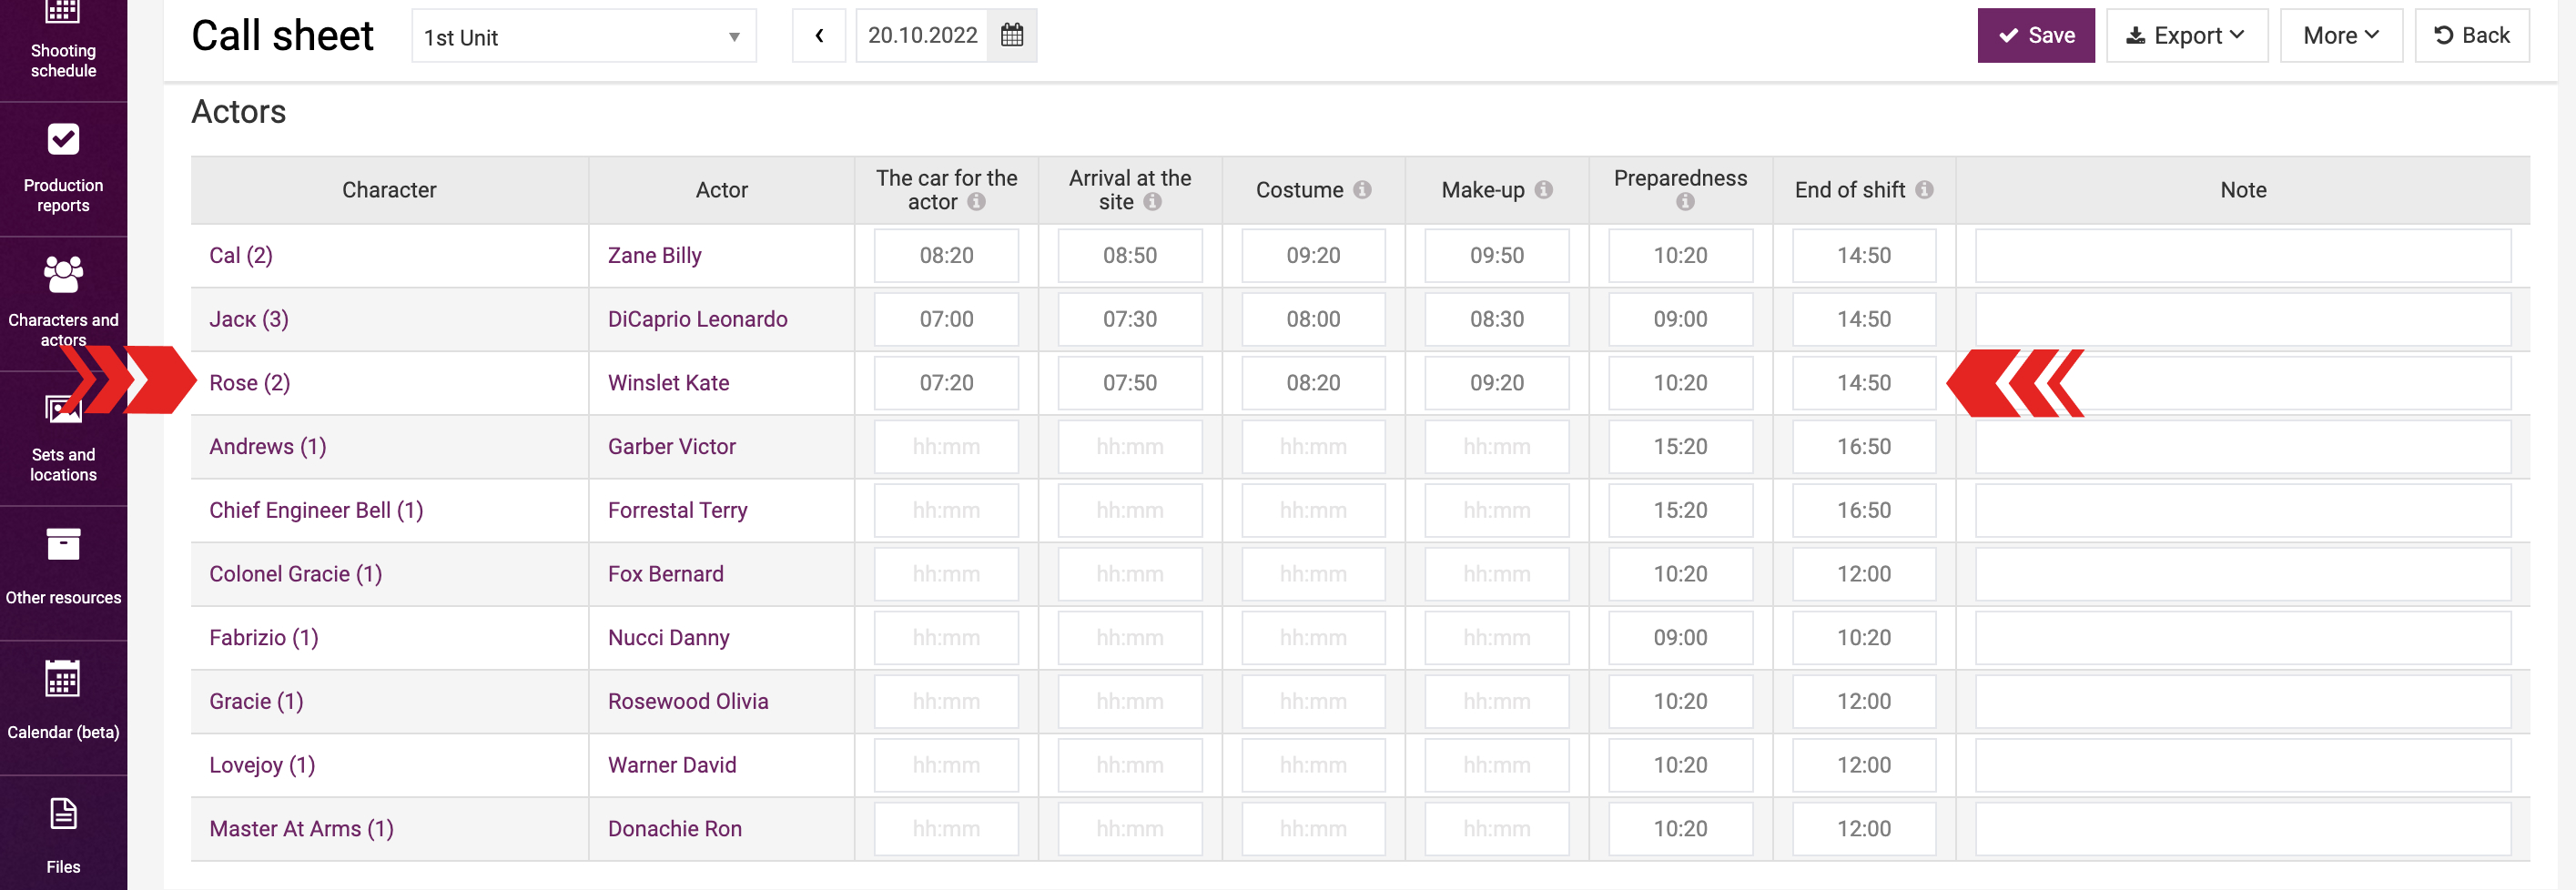
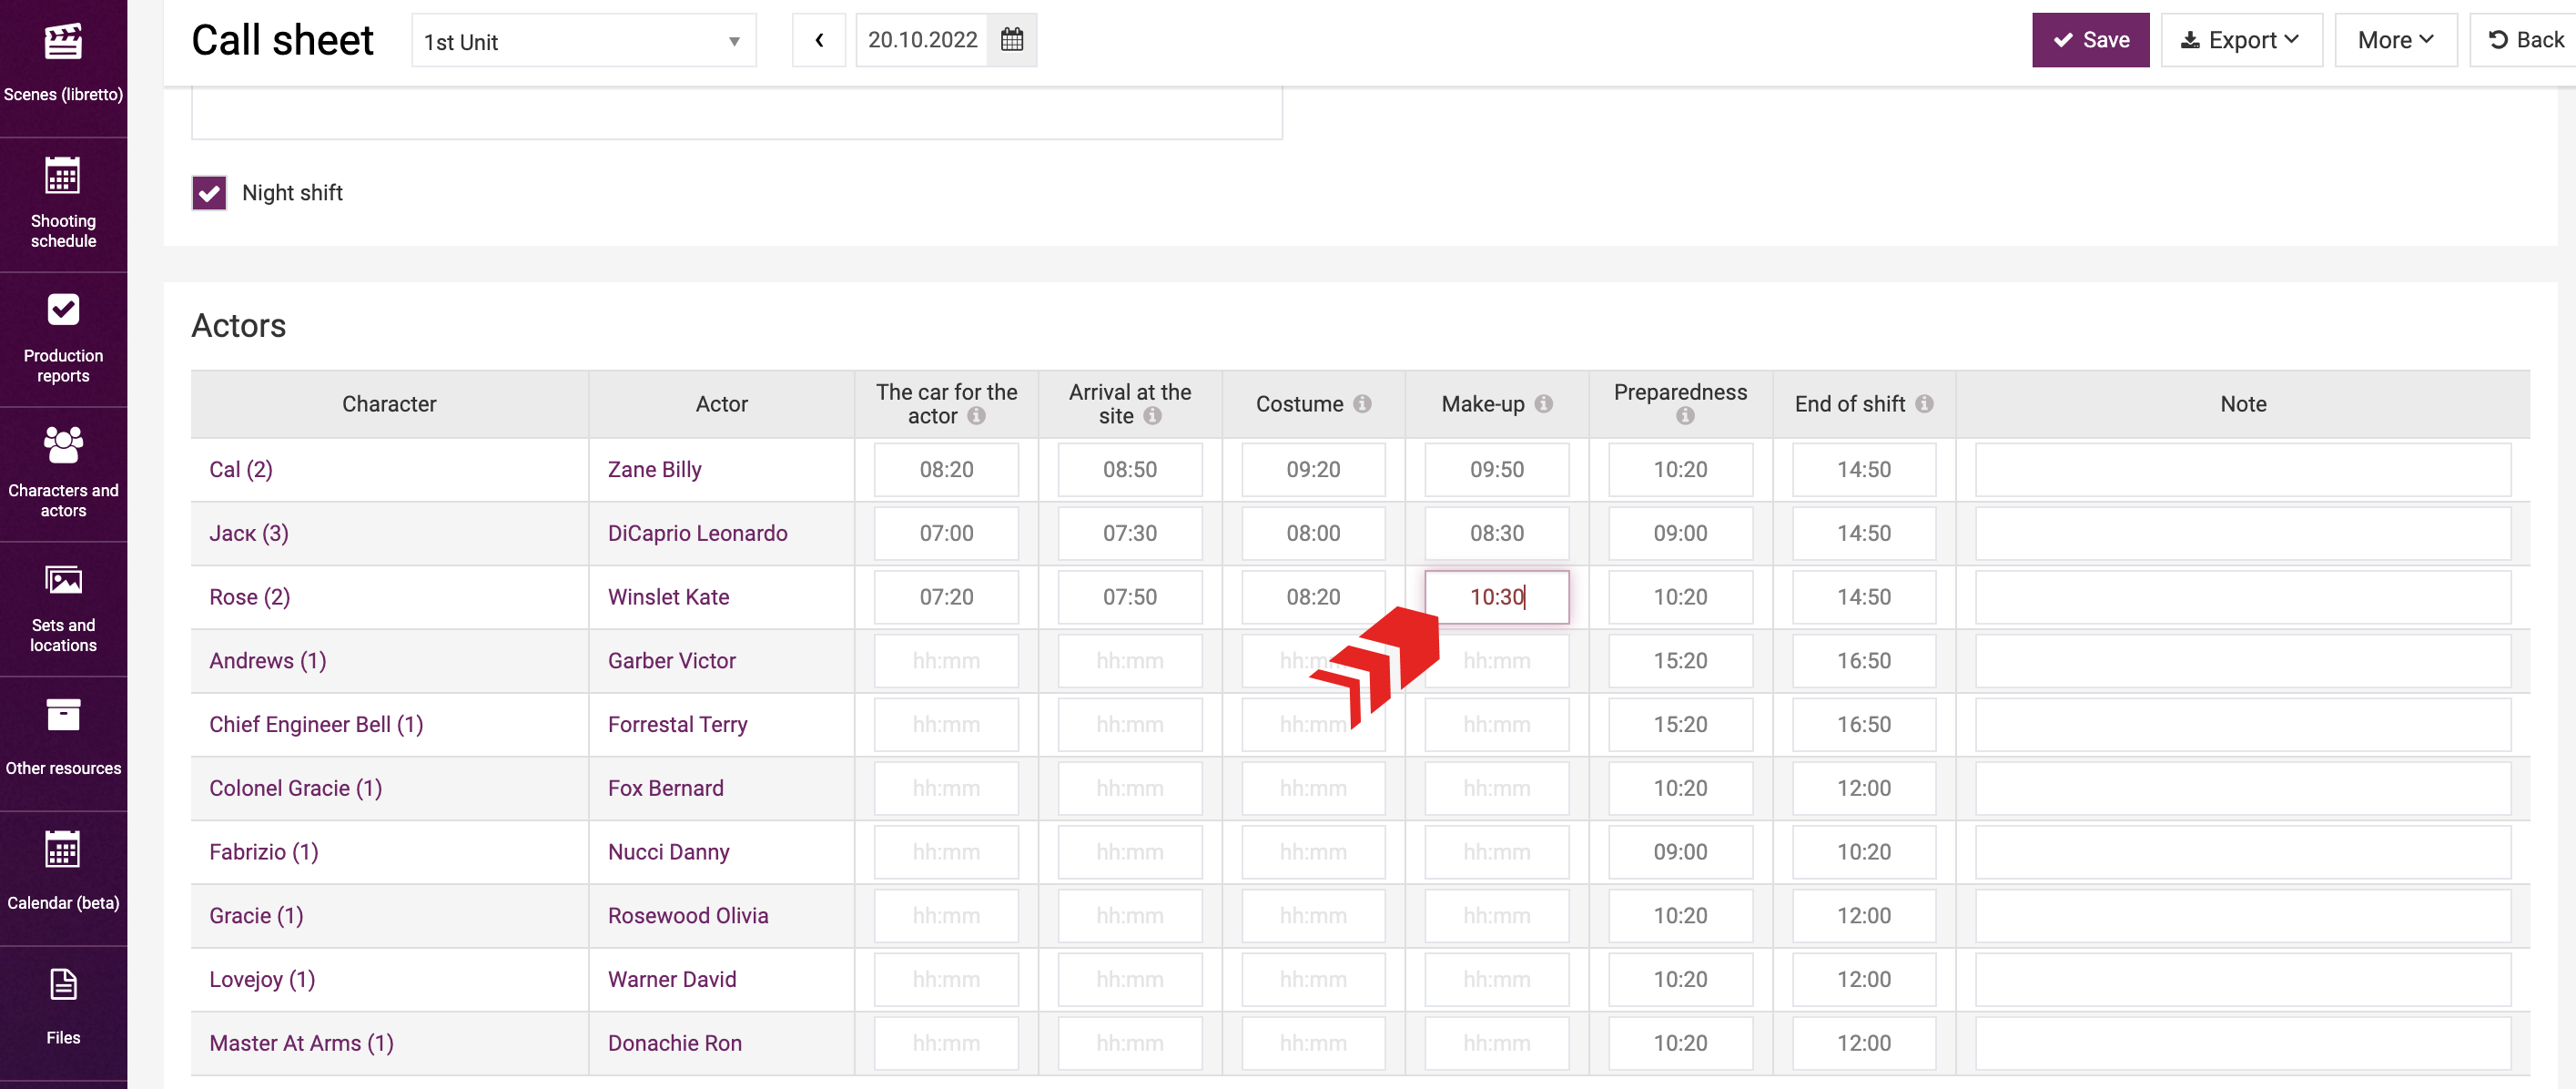
The set time and out time can also be adjusted manually. The time adjusted manually will be highlighted in red; if moused over, the time of the scene will pop up.
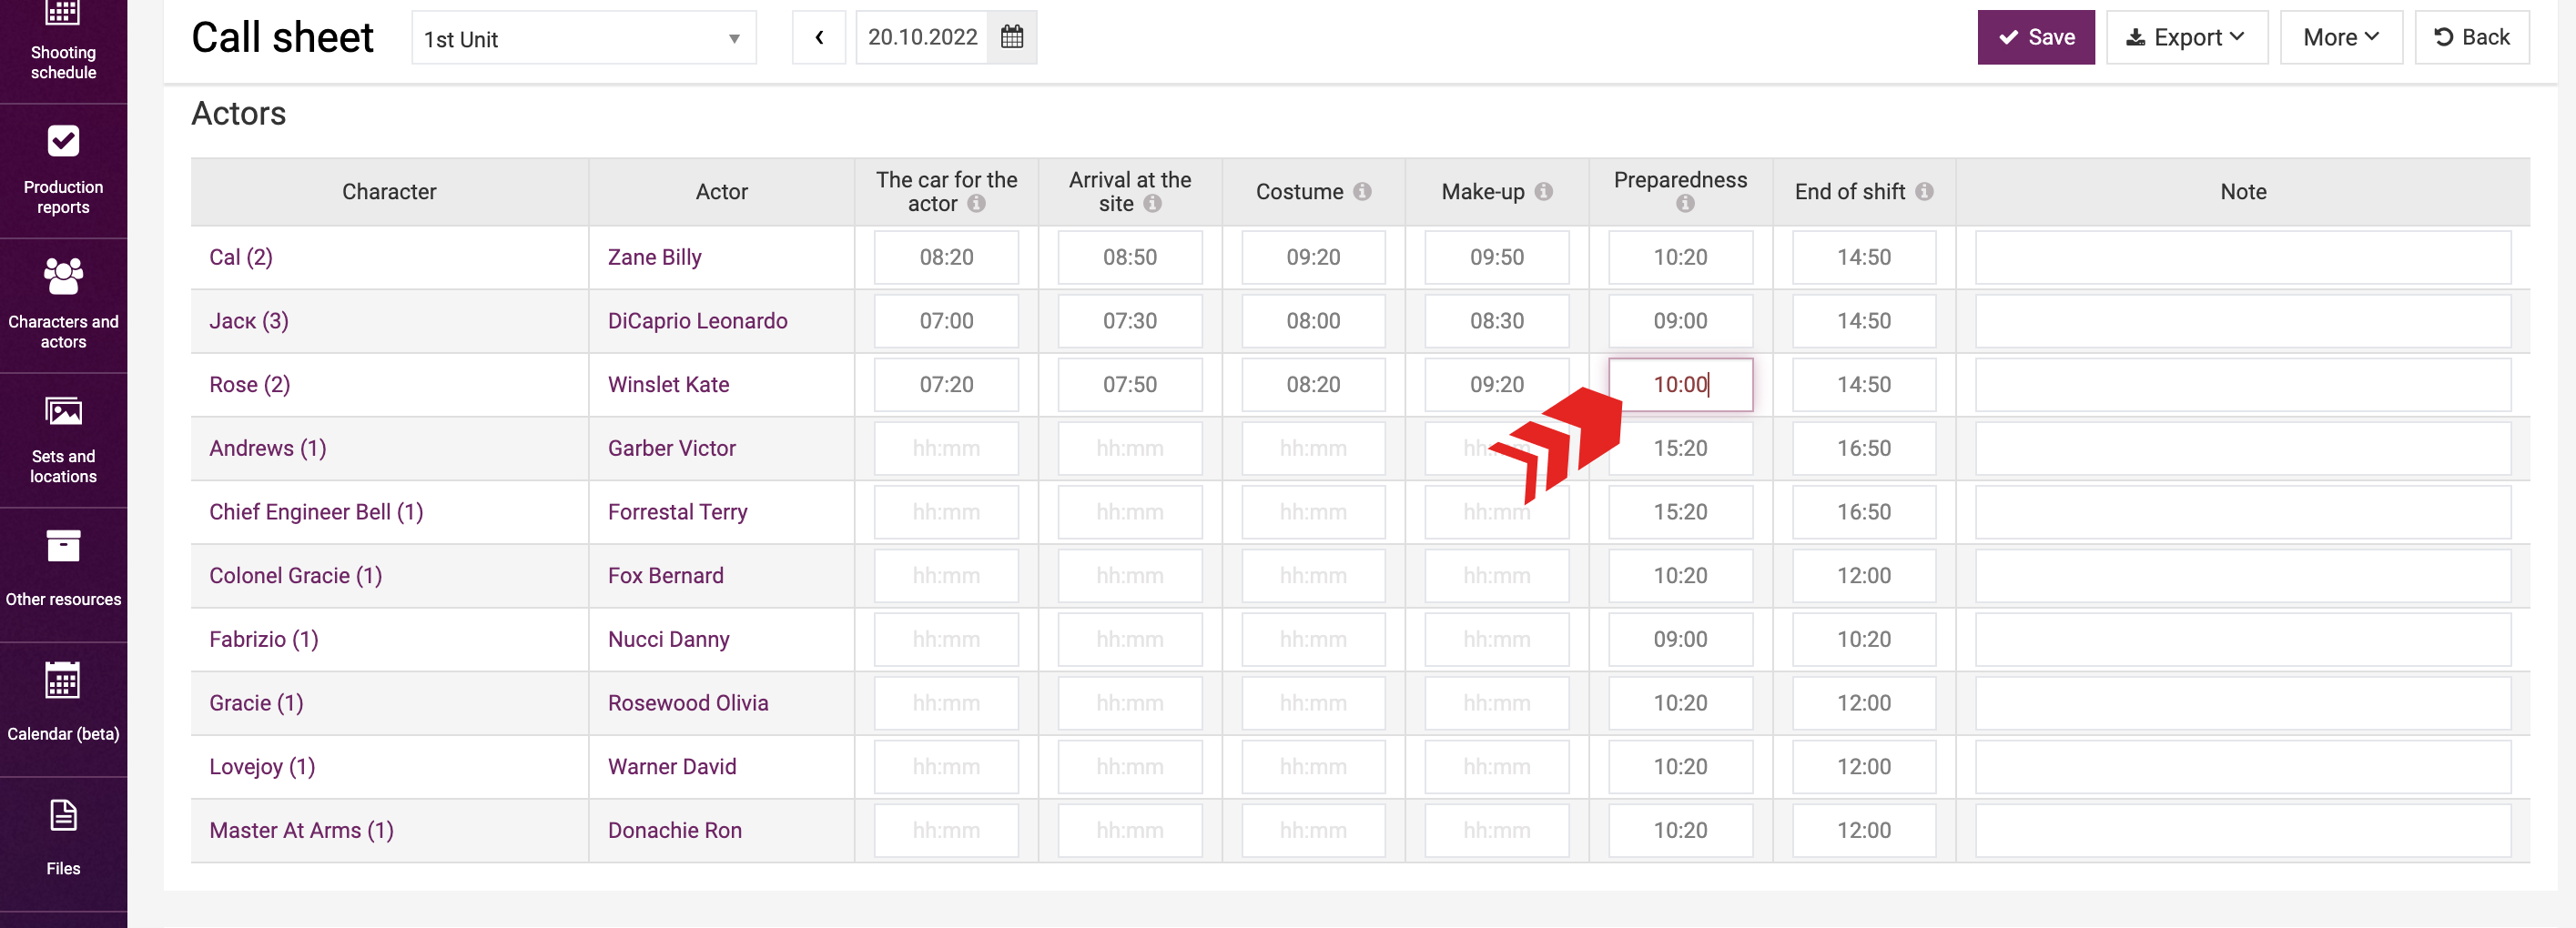
Such fields as “The car for the actor”, “Call”, “Costume", "Make-up” can be filled out manually. The time you indicate will be shown in this call sheet only. Learn more about automatic calculation of these fields in a dedicated learning module.
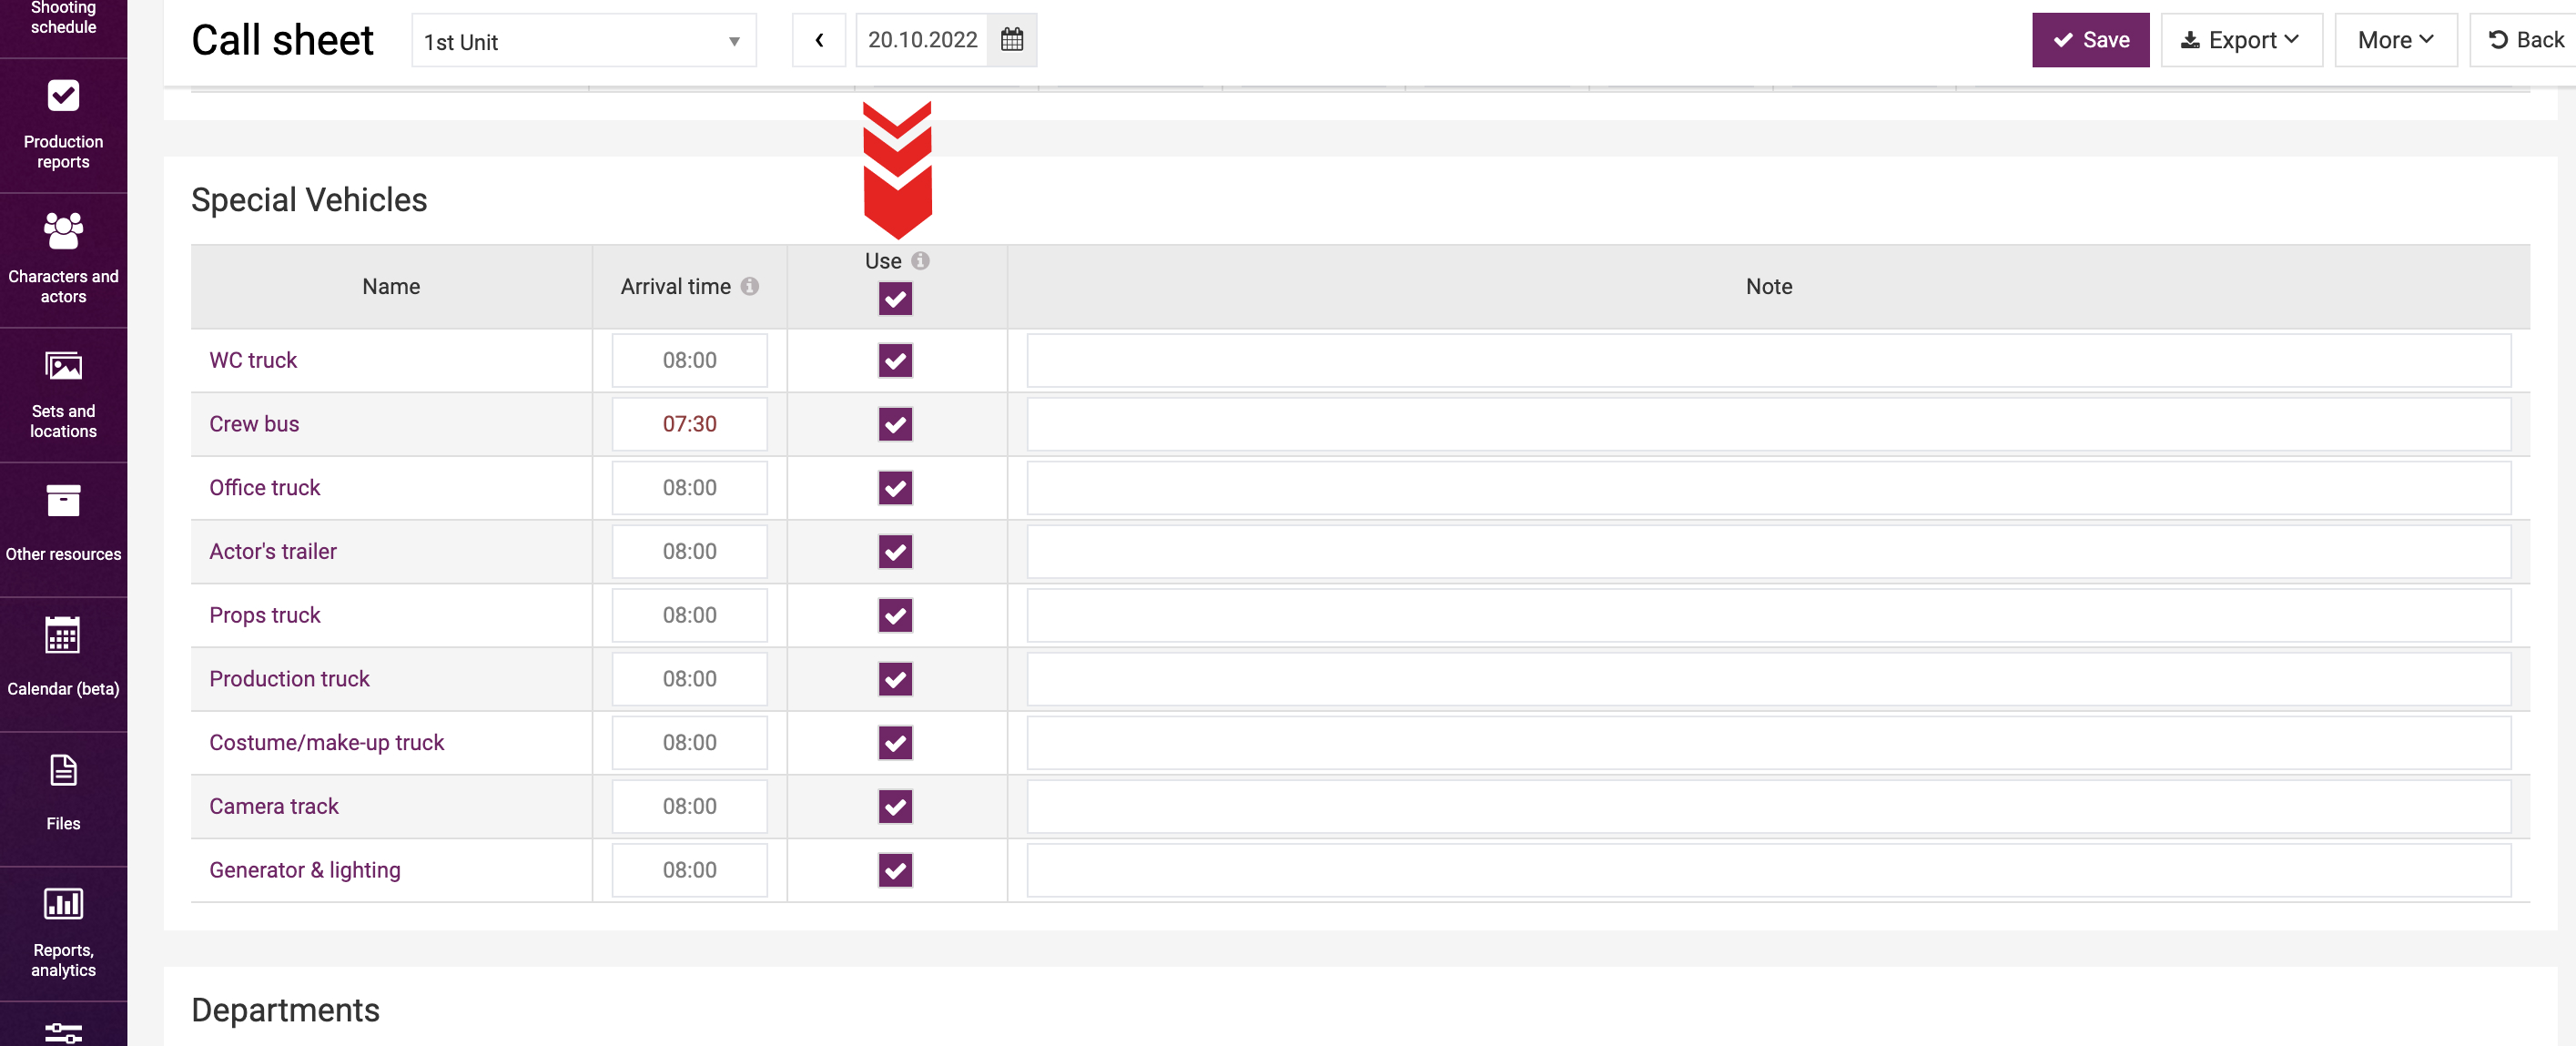
The arrival time for shooting day elements is normally the same as the shooting day start time. For example, if the shooting day start time is 08:00, then the arrival time for the shops, special vehicles, and other shooting day elements will also be 08:00. 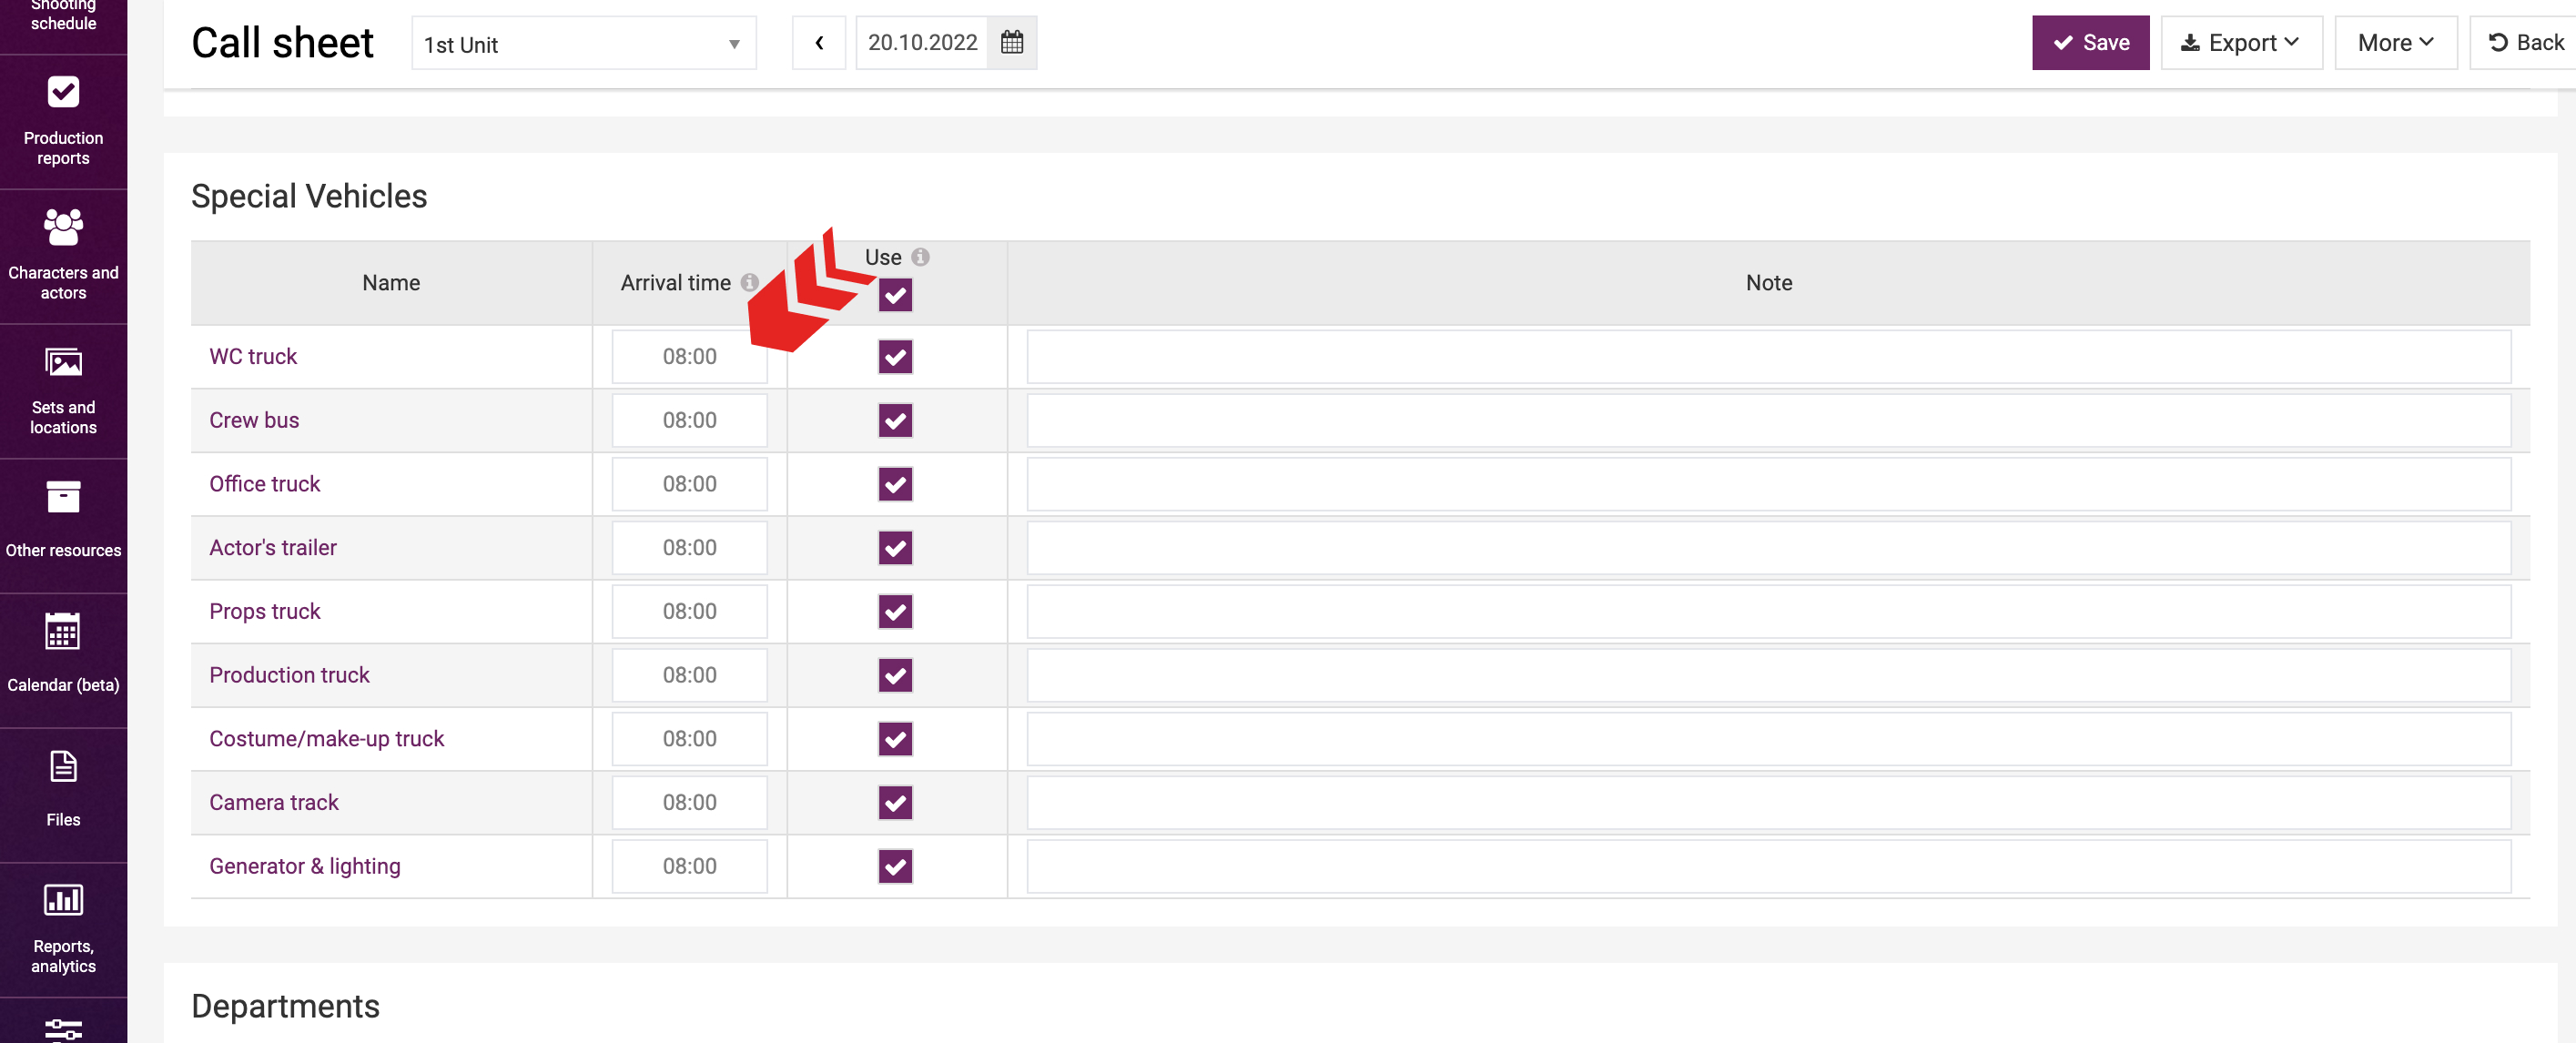
If it is necessary for a certain participant to arrive before or after the shooting day start time, then you can adjust the arrival time manually or specify the time interval starting from the shooting day start time in the settings.
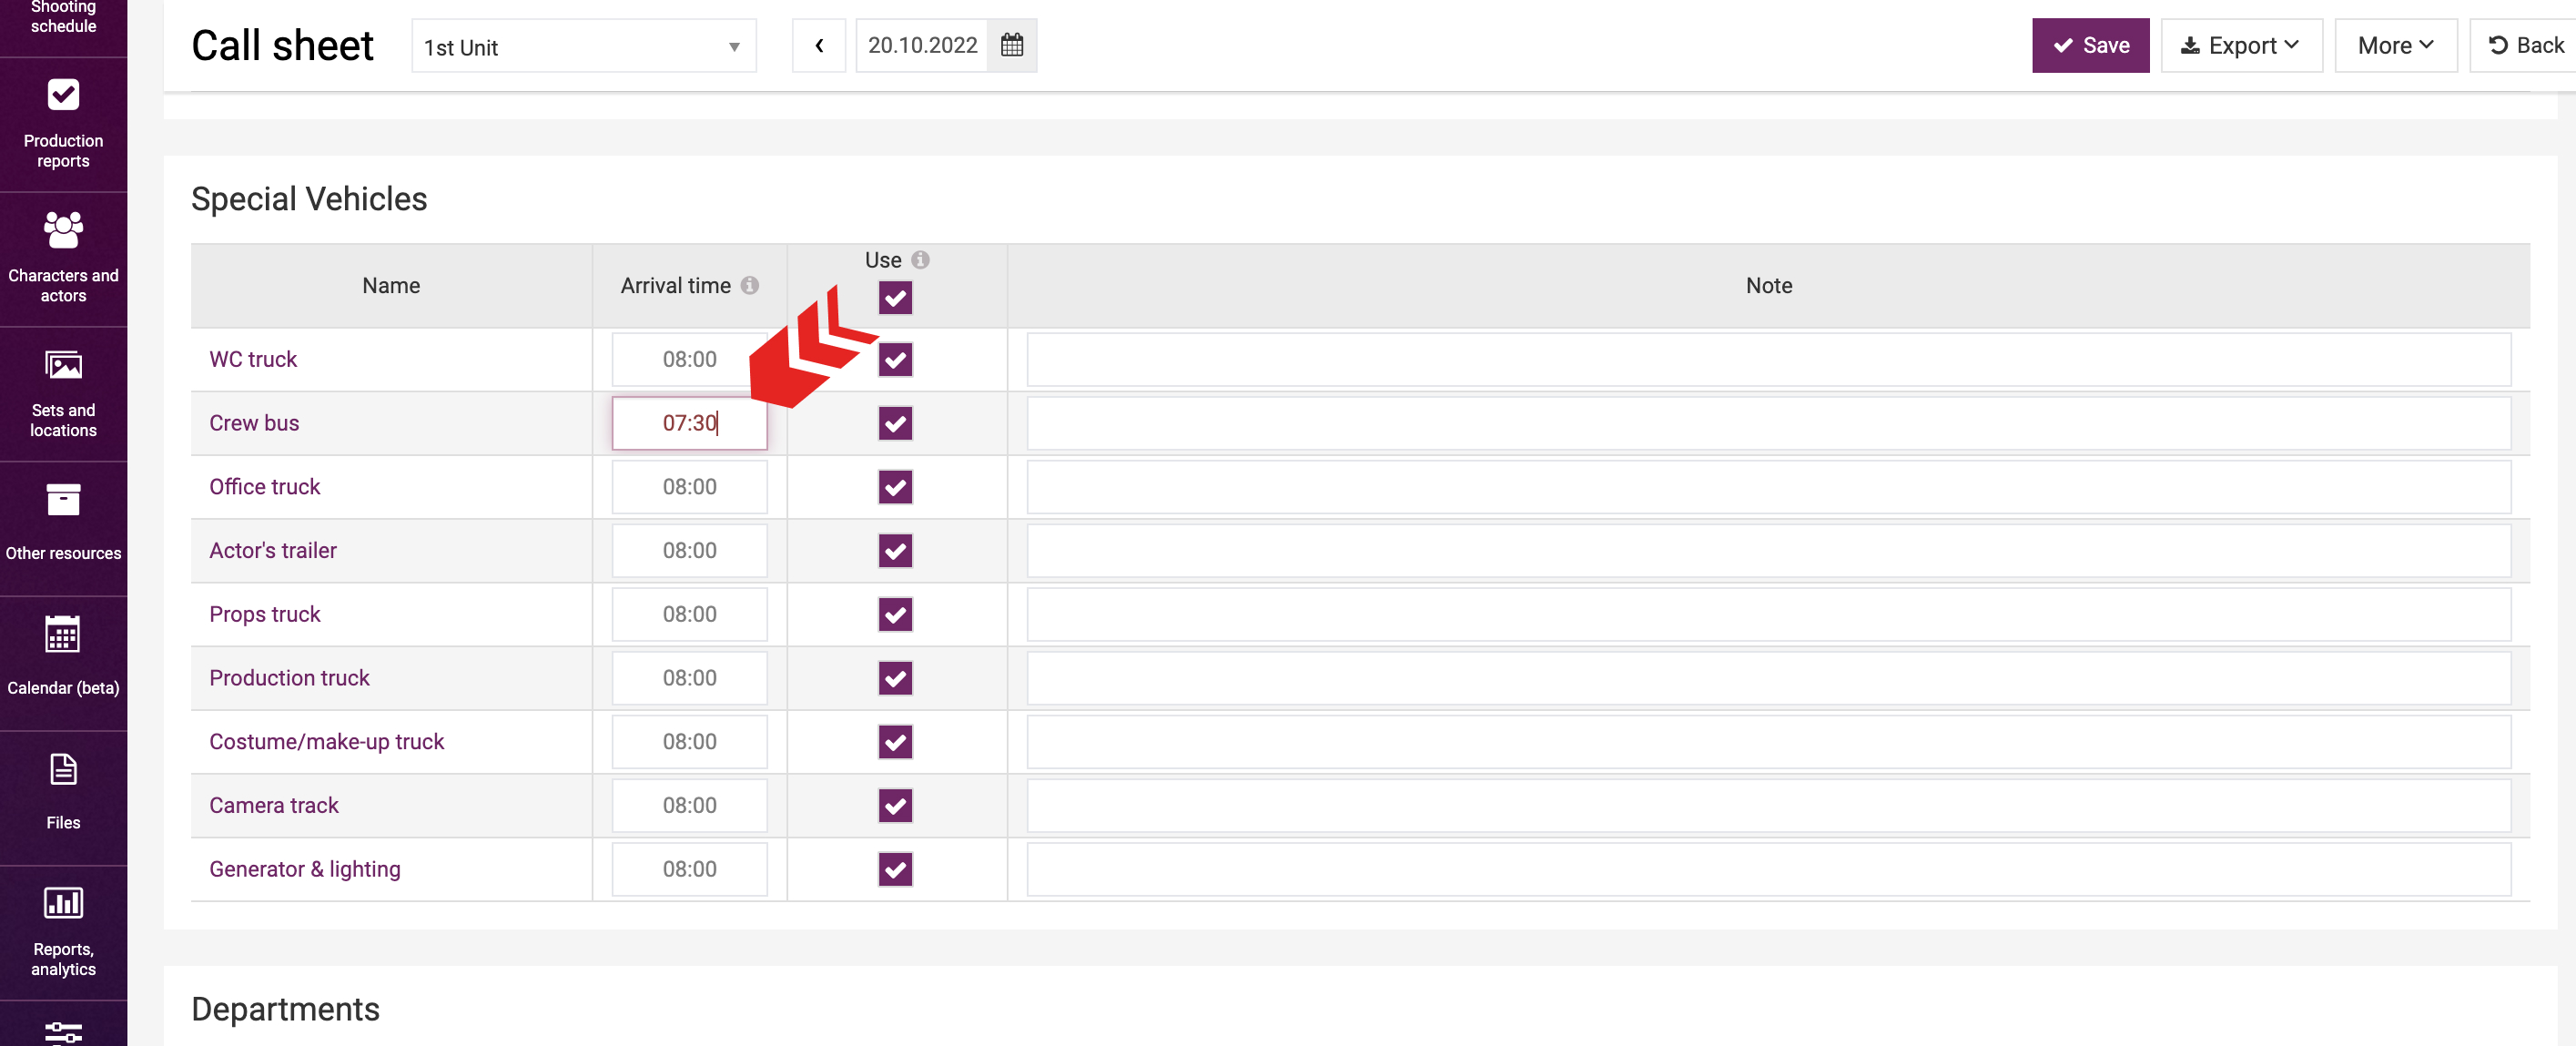
Since the table of shooting day elements contains all elements items listed in the settings, you can tick the elements items required for this specific shooting day. If an element item is not required, you can untick the “Use” box.
The last items listed in the tables are shooting day elements: extras, crowd, makeup & hair, costumes, props, in-shot vehicles, etc. The set time and out time for these elements will be calculated similarly to actors by reference to the first and last scenes in the schedule of the day where they are employed.
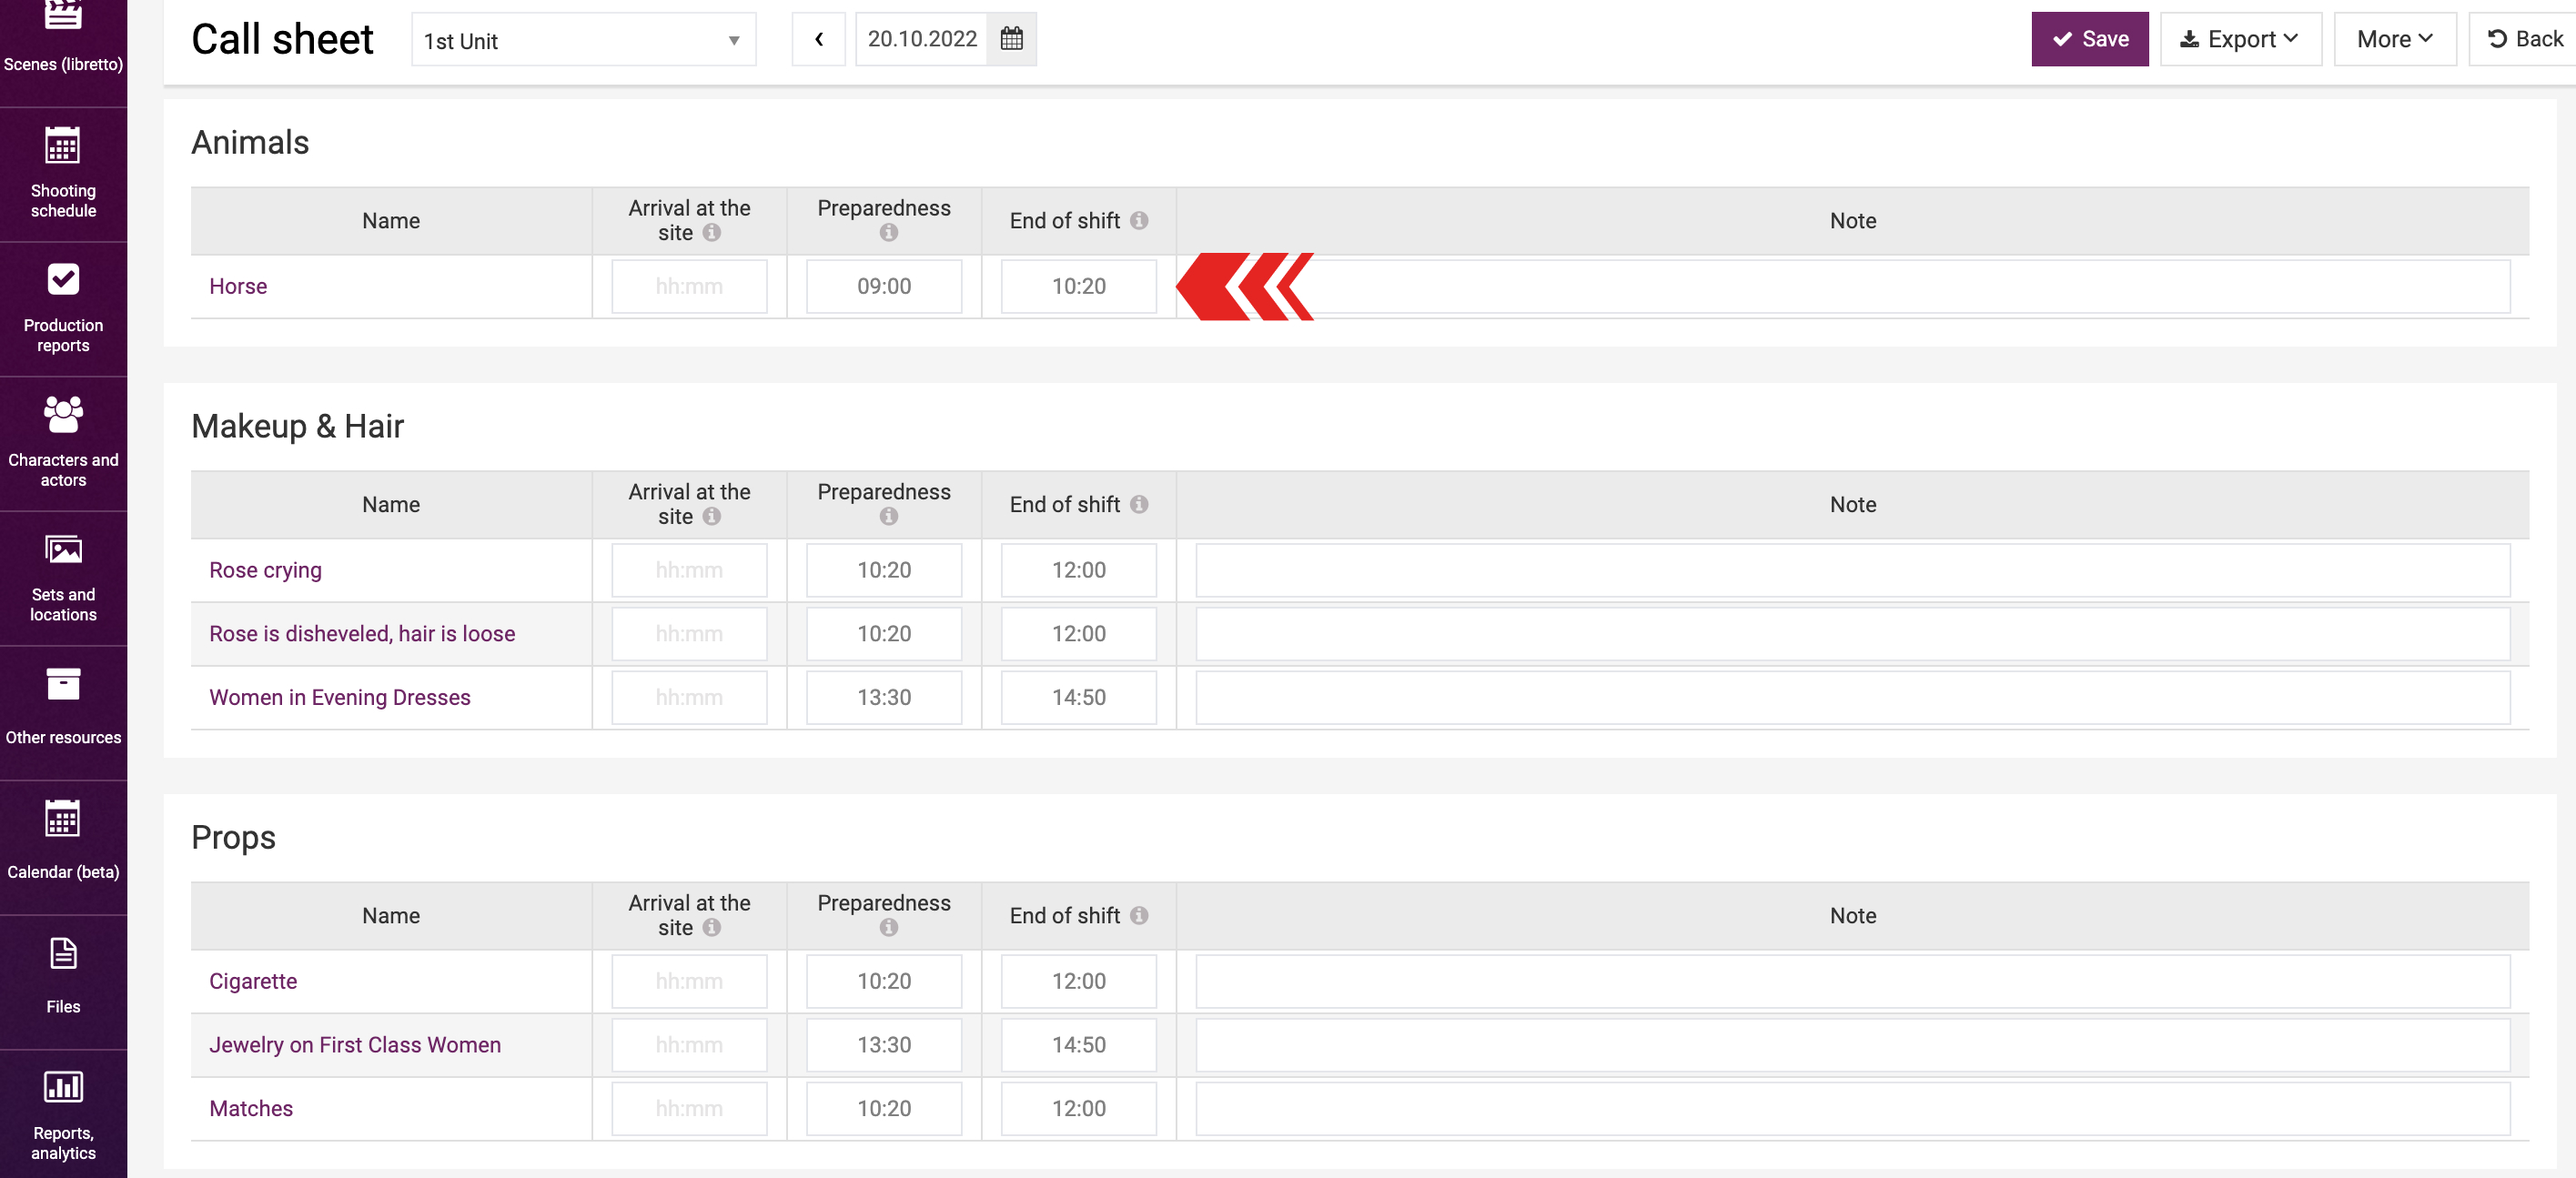
You can specify the arrival time for the elements manually or add the respective setting on the element page for automatic calculation. Learn more about the setting in a dedicated learning module.
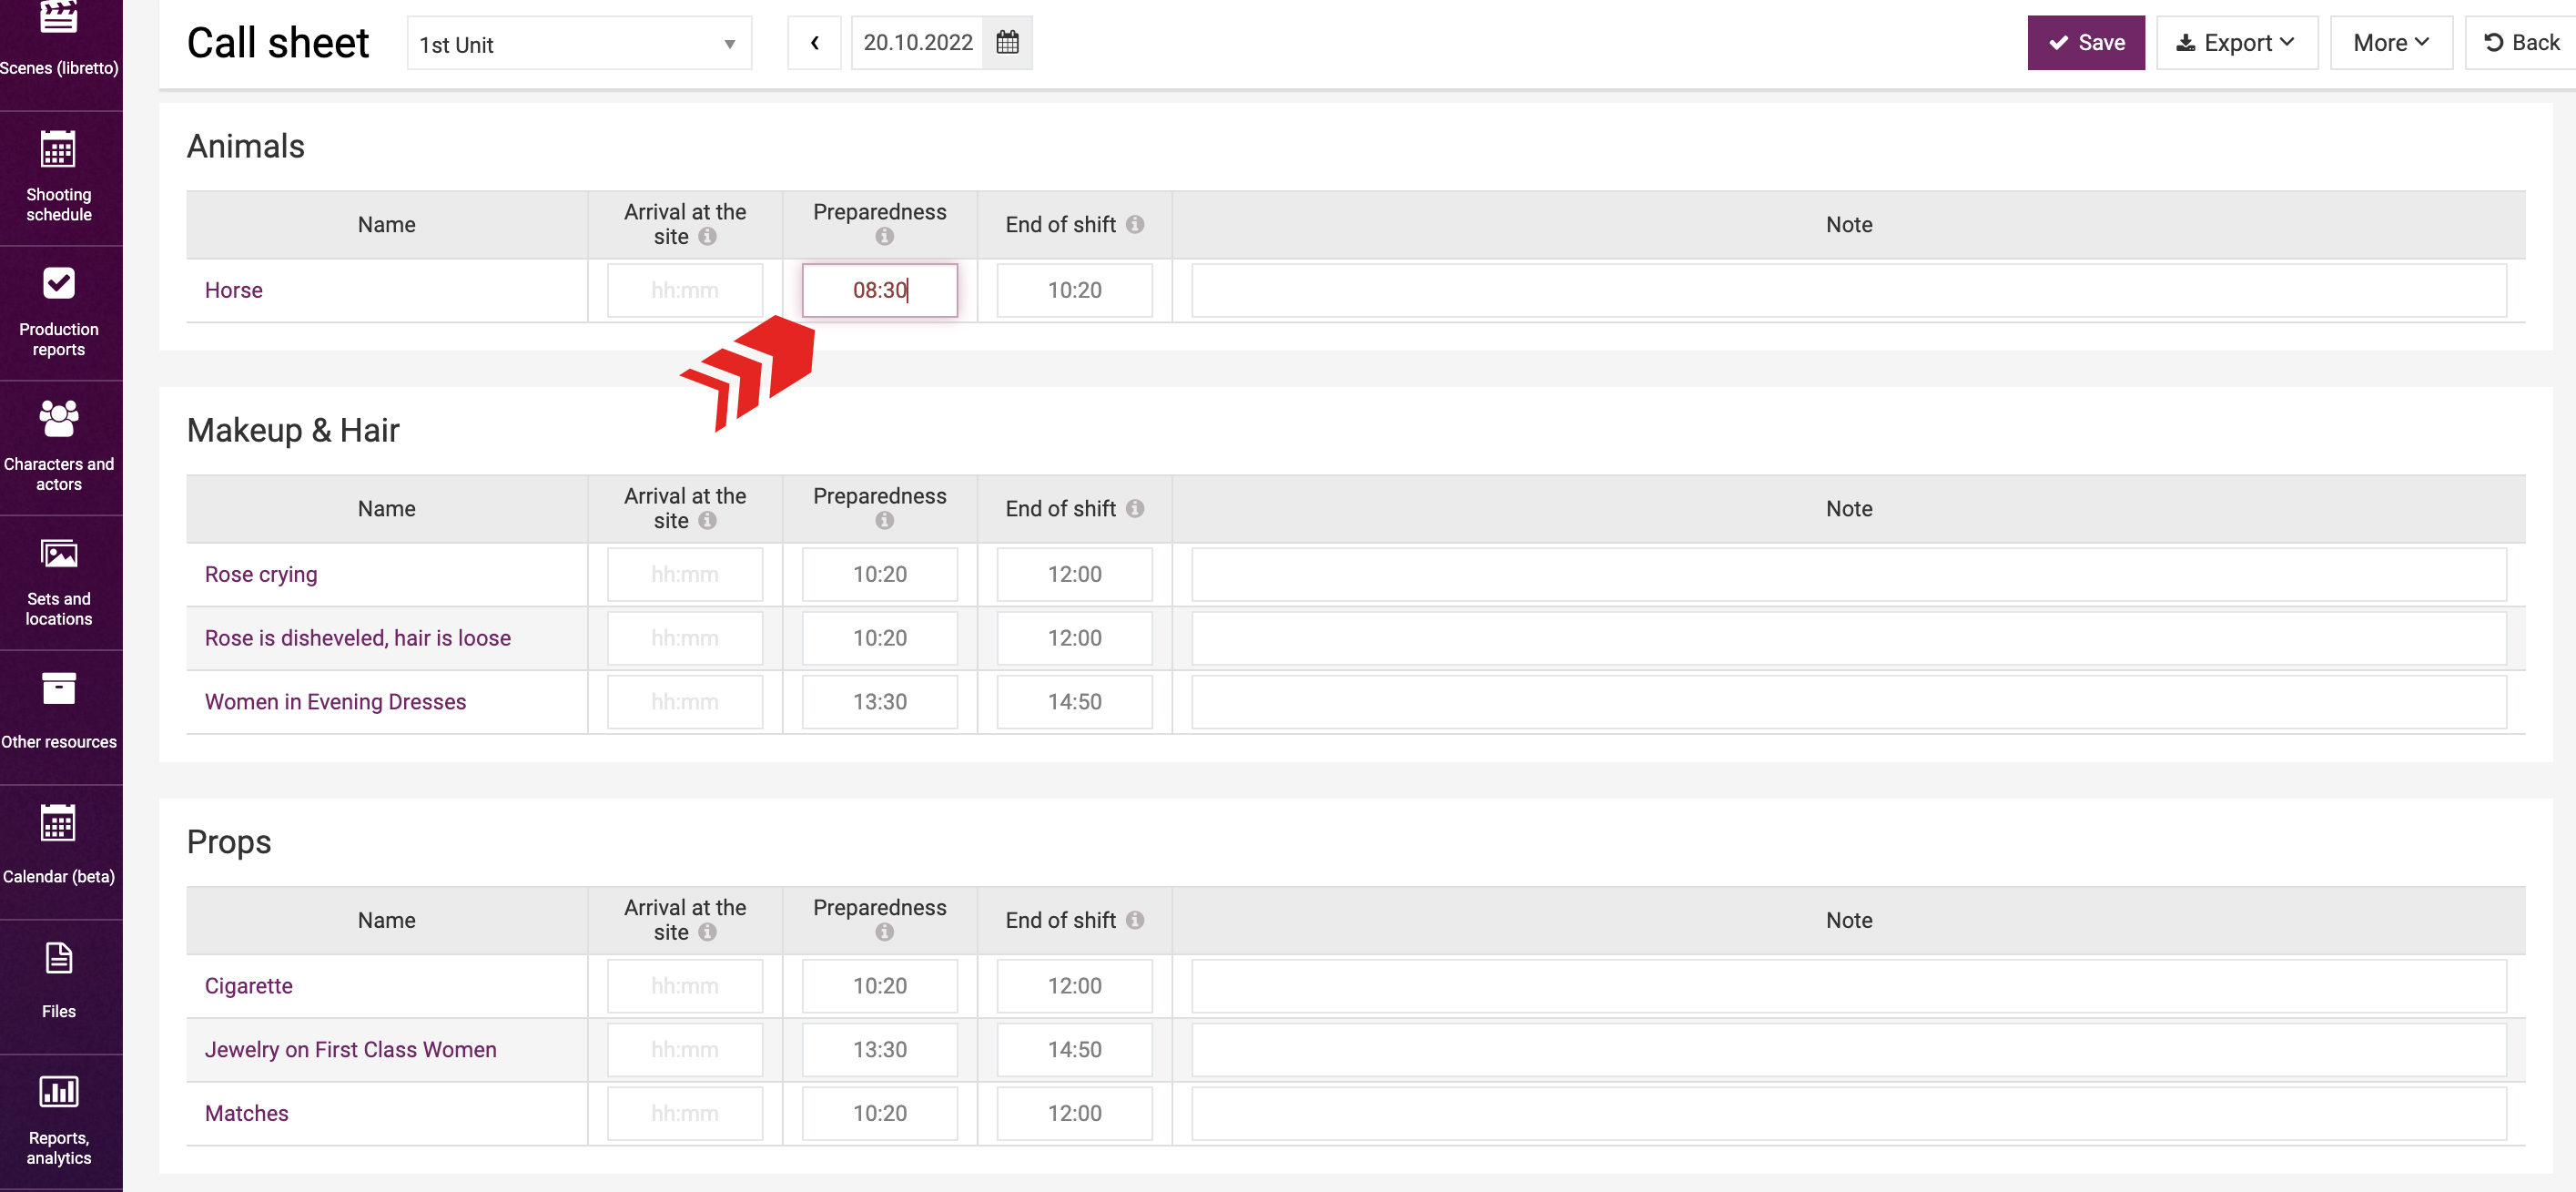
If there is no tick in the “Auto-calculation” box, then the arrival time will be the same as the shooting day start time and will be highlighted in red. This means that the set time and out time for the participants will differ from the start time of the first scene and end time of the last scene in the day schedule.

You can calculate the set time and out time for the participants by selecting “Recalculate call time” in the “More” drop-down menu.
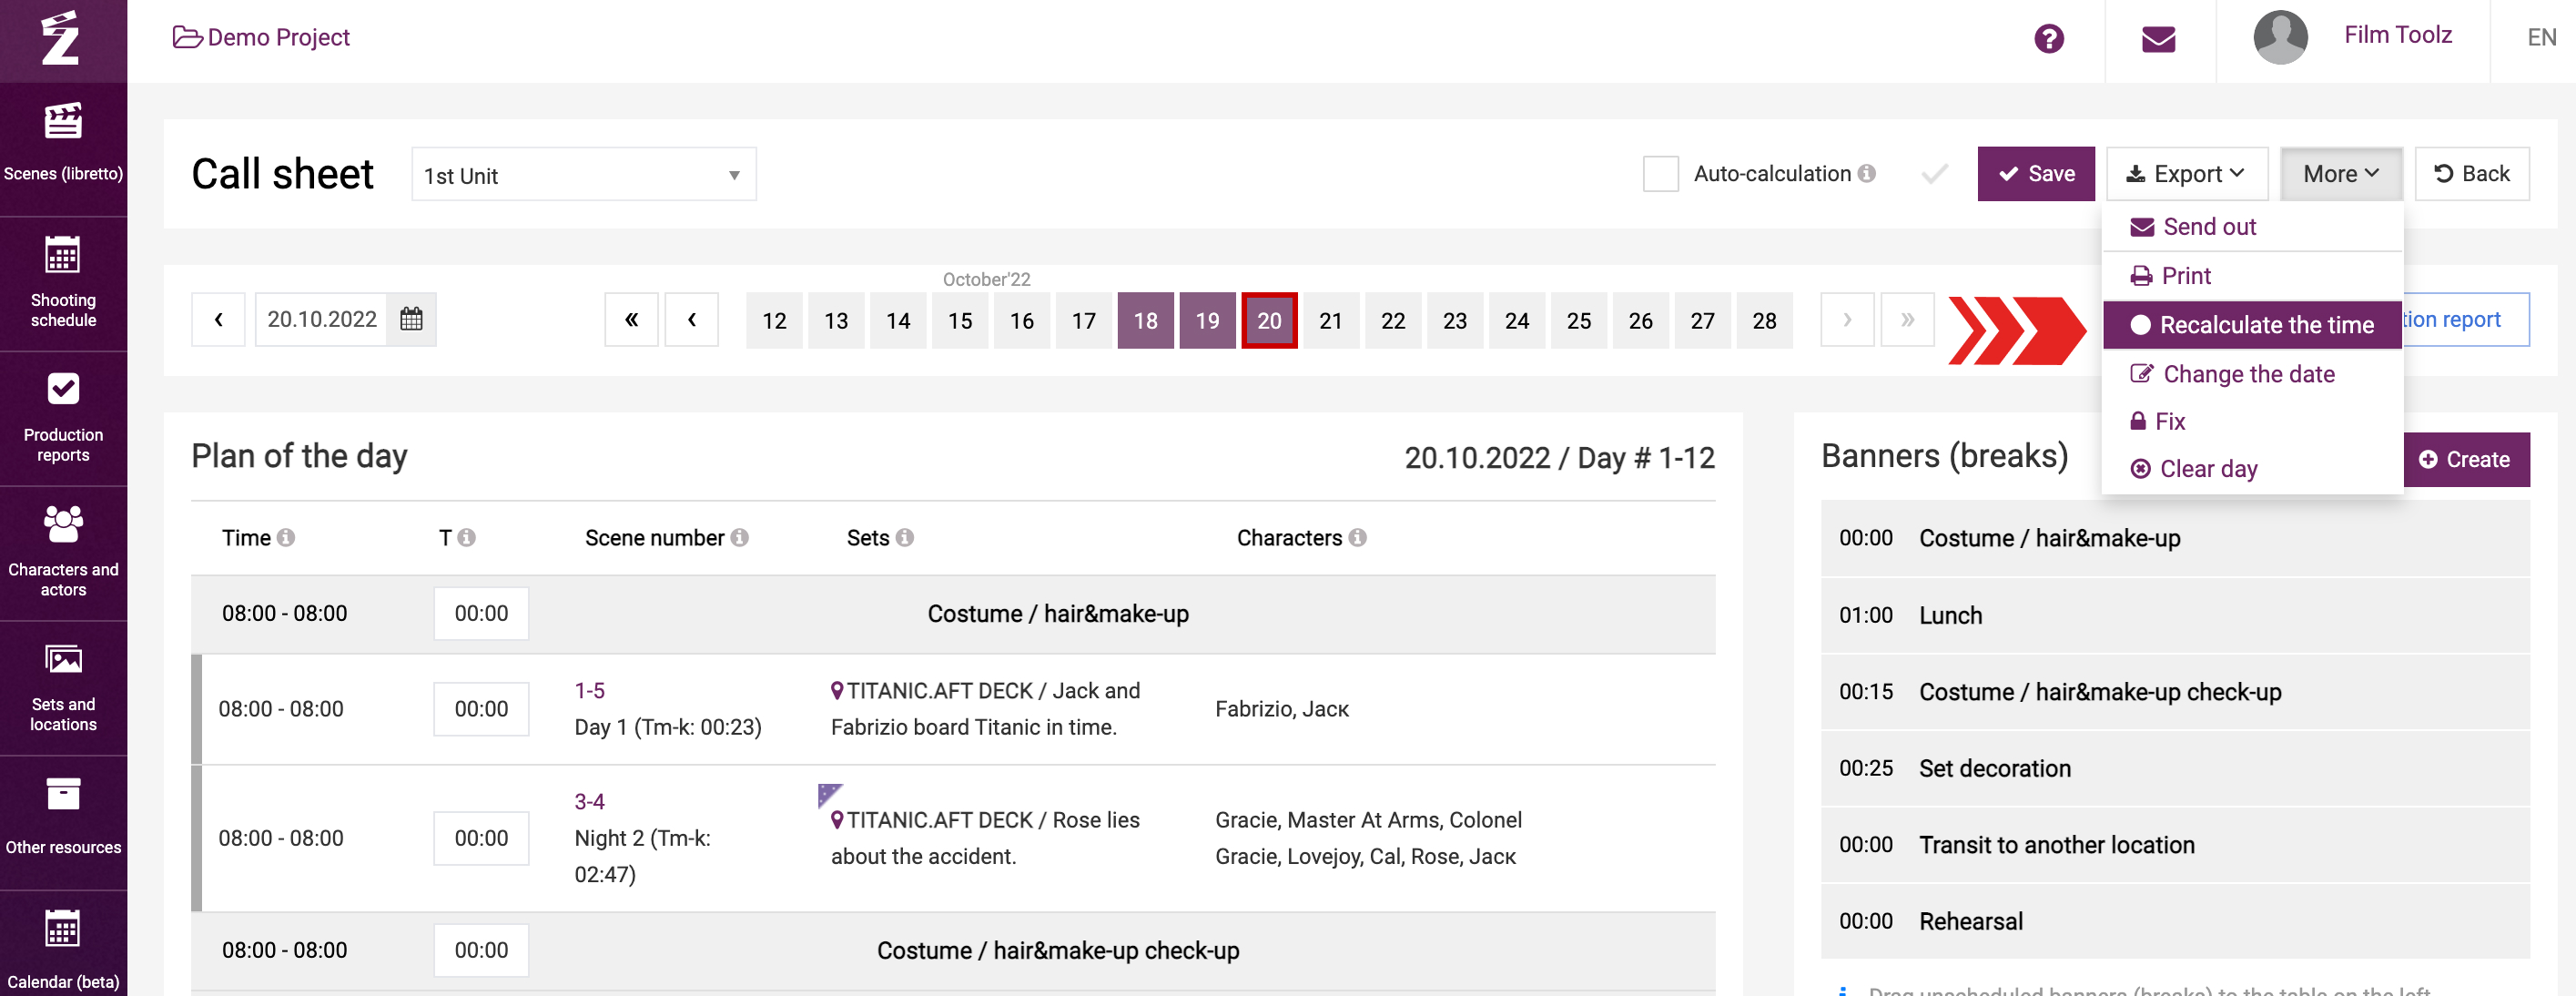
You will see a window with a preview of recalculated set time and arrival time for elements and characters. Learn more about data recalculation in the dedicated learning module.
Saving a call sheet
Once you complete scheduling of the shooting day, click on “Save”. The system will save the day schedule with all scheduled duration values and order of scenes and breaks, as well as the set time and out time for actors and elements. A grey tick next to the “Save” button indicates that the call sheet has been saved.
If you add new settings to call actors or elements after saving the call sheet, and want to apply them to the call sheet that has already been saved, you can update these data in the drop-down menu “More” – “Recalculate call time”.
Locking a call sheet
After you build and save a call sheet, you can lock the order of scenes and service breaks to protect them against accidental change by clicking on “Lock”.
Should you need to make changes, you can unlock the call sheet anytime by clicking the button.
Rescheduling a shooting day to another date
You can move a fully scheduled and locked day to any vacant date, or swap any scheduled days. To do so, click on “Change the date”.
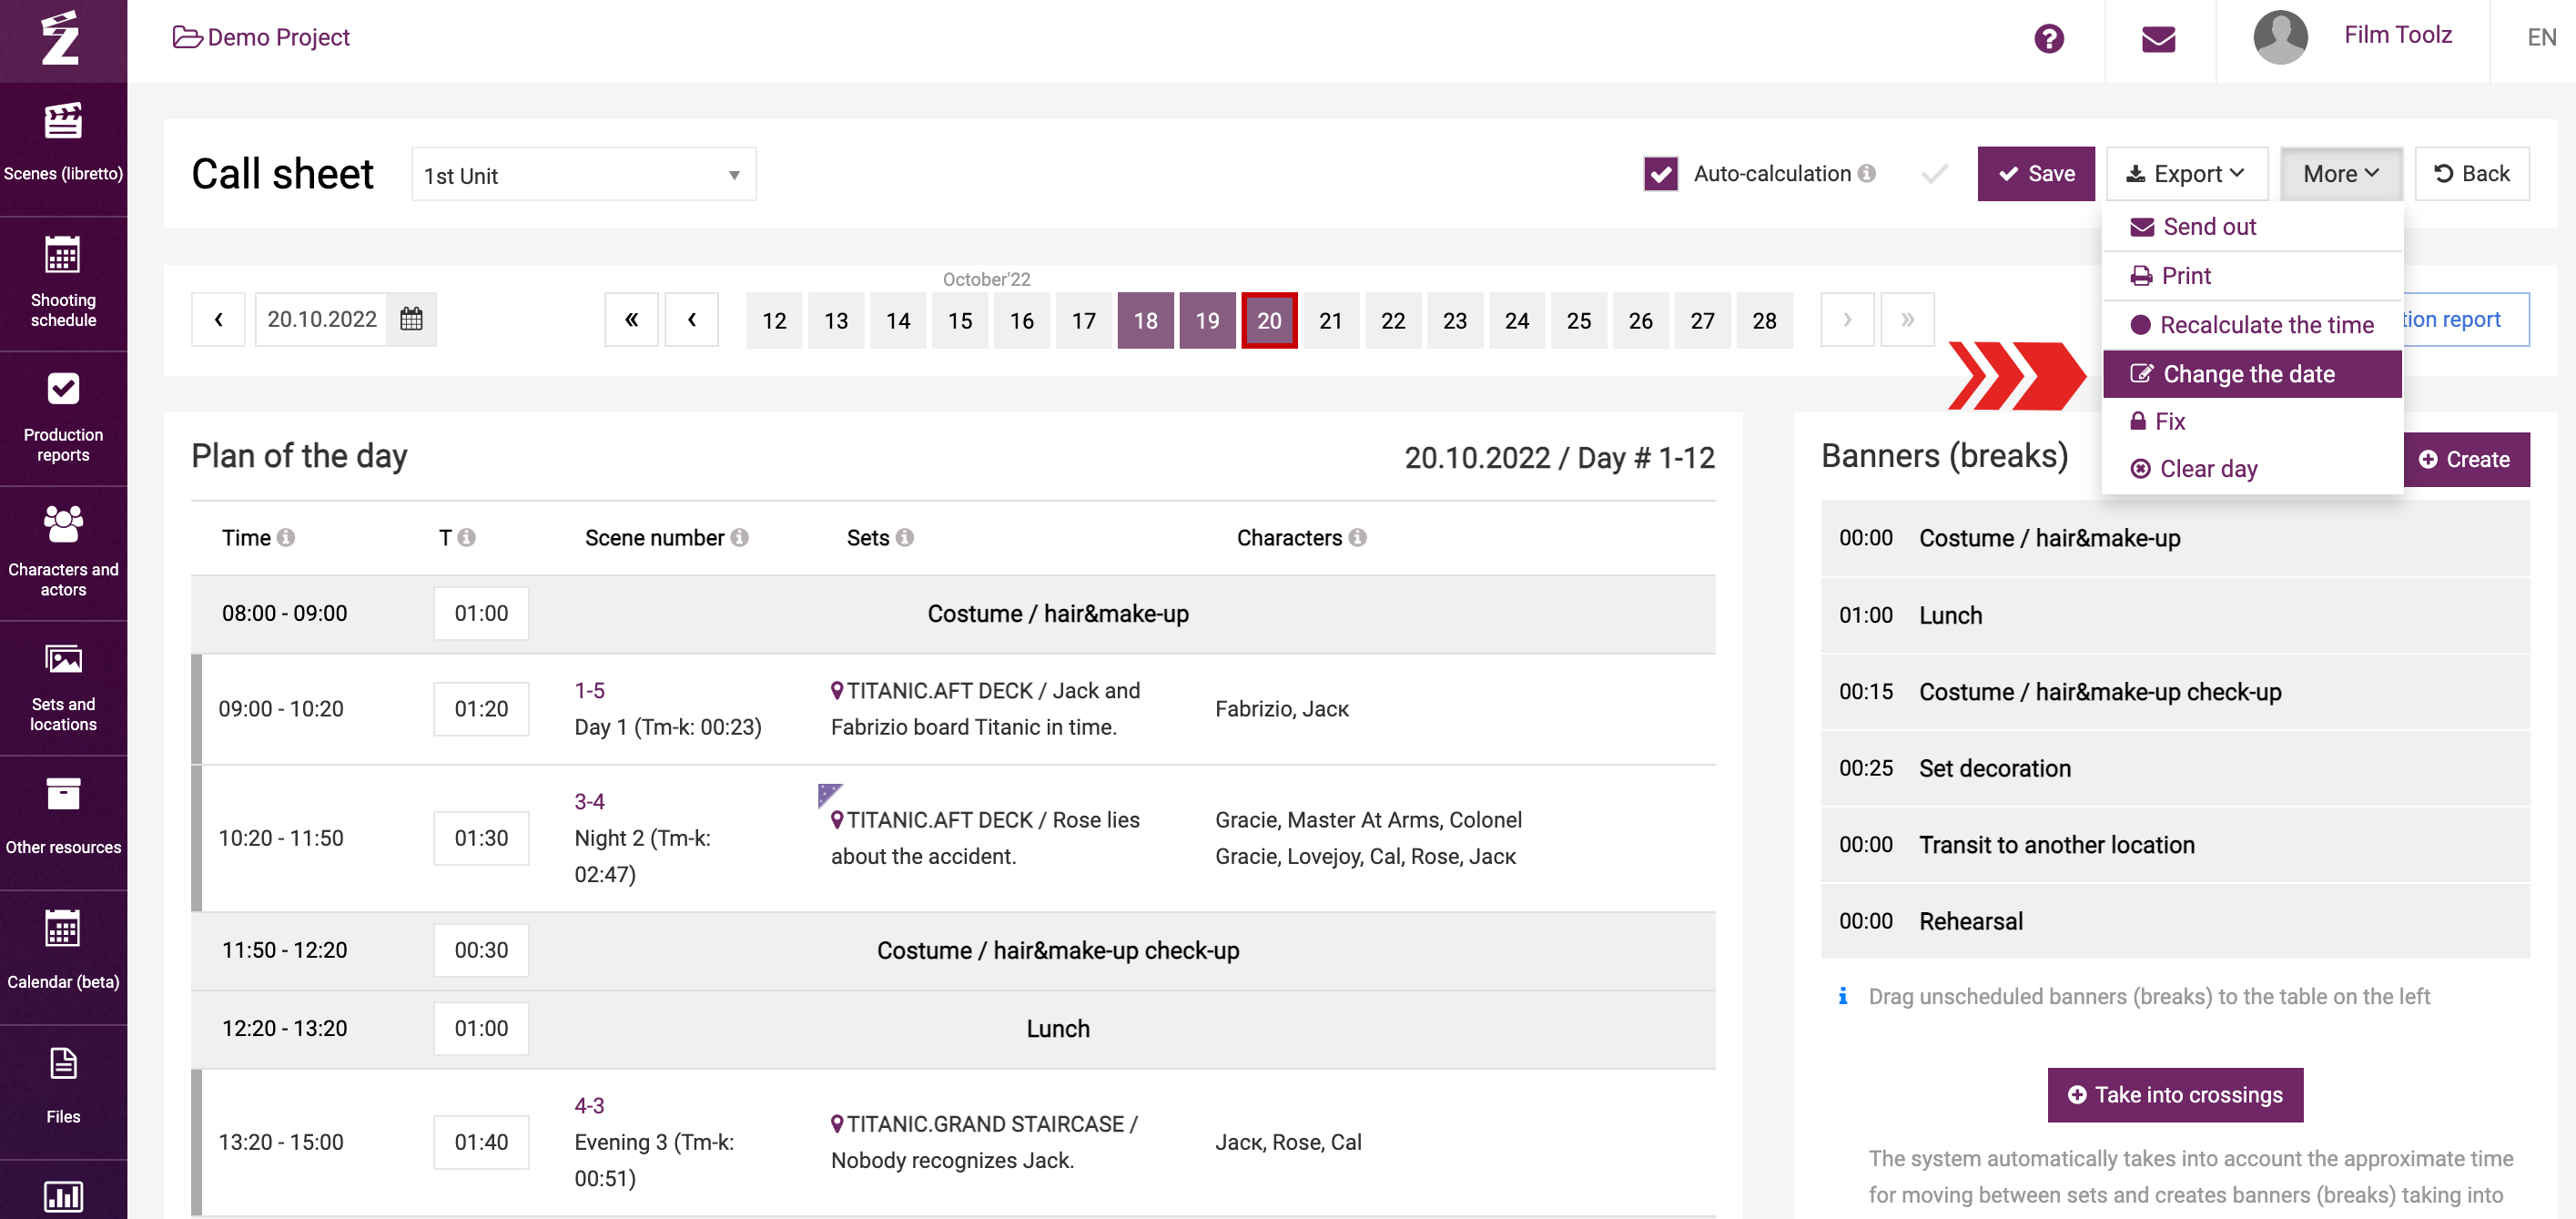
Then select the desired date in the calendar. Unless the selected date is already taken, the system will move your call sheet to the selected date and clear the date currently scheduled. If the selected date is already taken, the system will suggest swapping the shooting days.
Export and settings
Thus, you have completed basic operations with your call sheet – now you can print it out, export it in any available format, or distribute it among the crew straight away. Learn more about the export options and settings in the respective learning module. We also recommend that you review the learning module dedicated to more precise setting of the call time for actors and elements for the day.