Обучение
Configuring the Roles
FilmToolz enables simultaneous work in the project for all crew members from the first assistant director up to the post-production coordinator. Meanwhile, you can flexibly configure the access rights for each crew member, either by using the system roles or by creating your own.
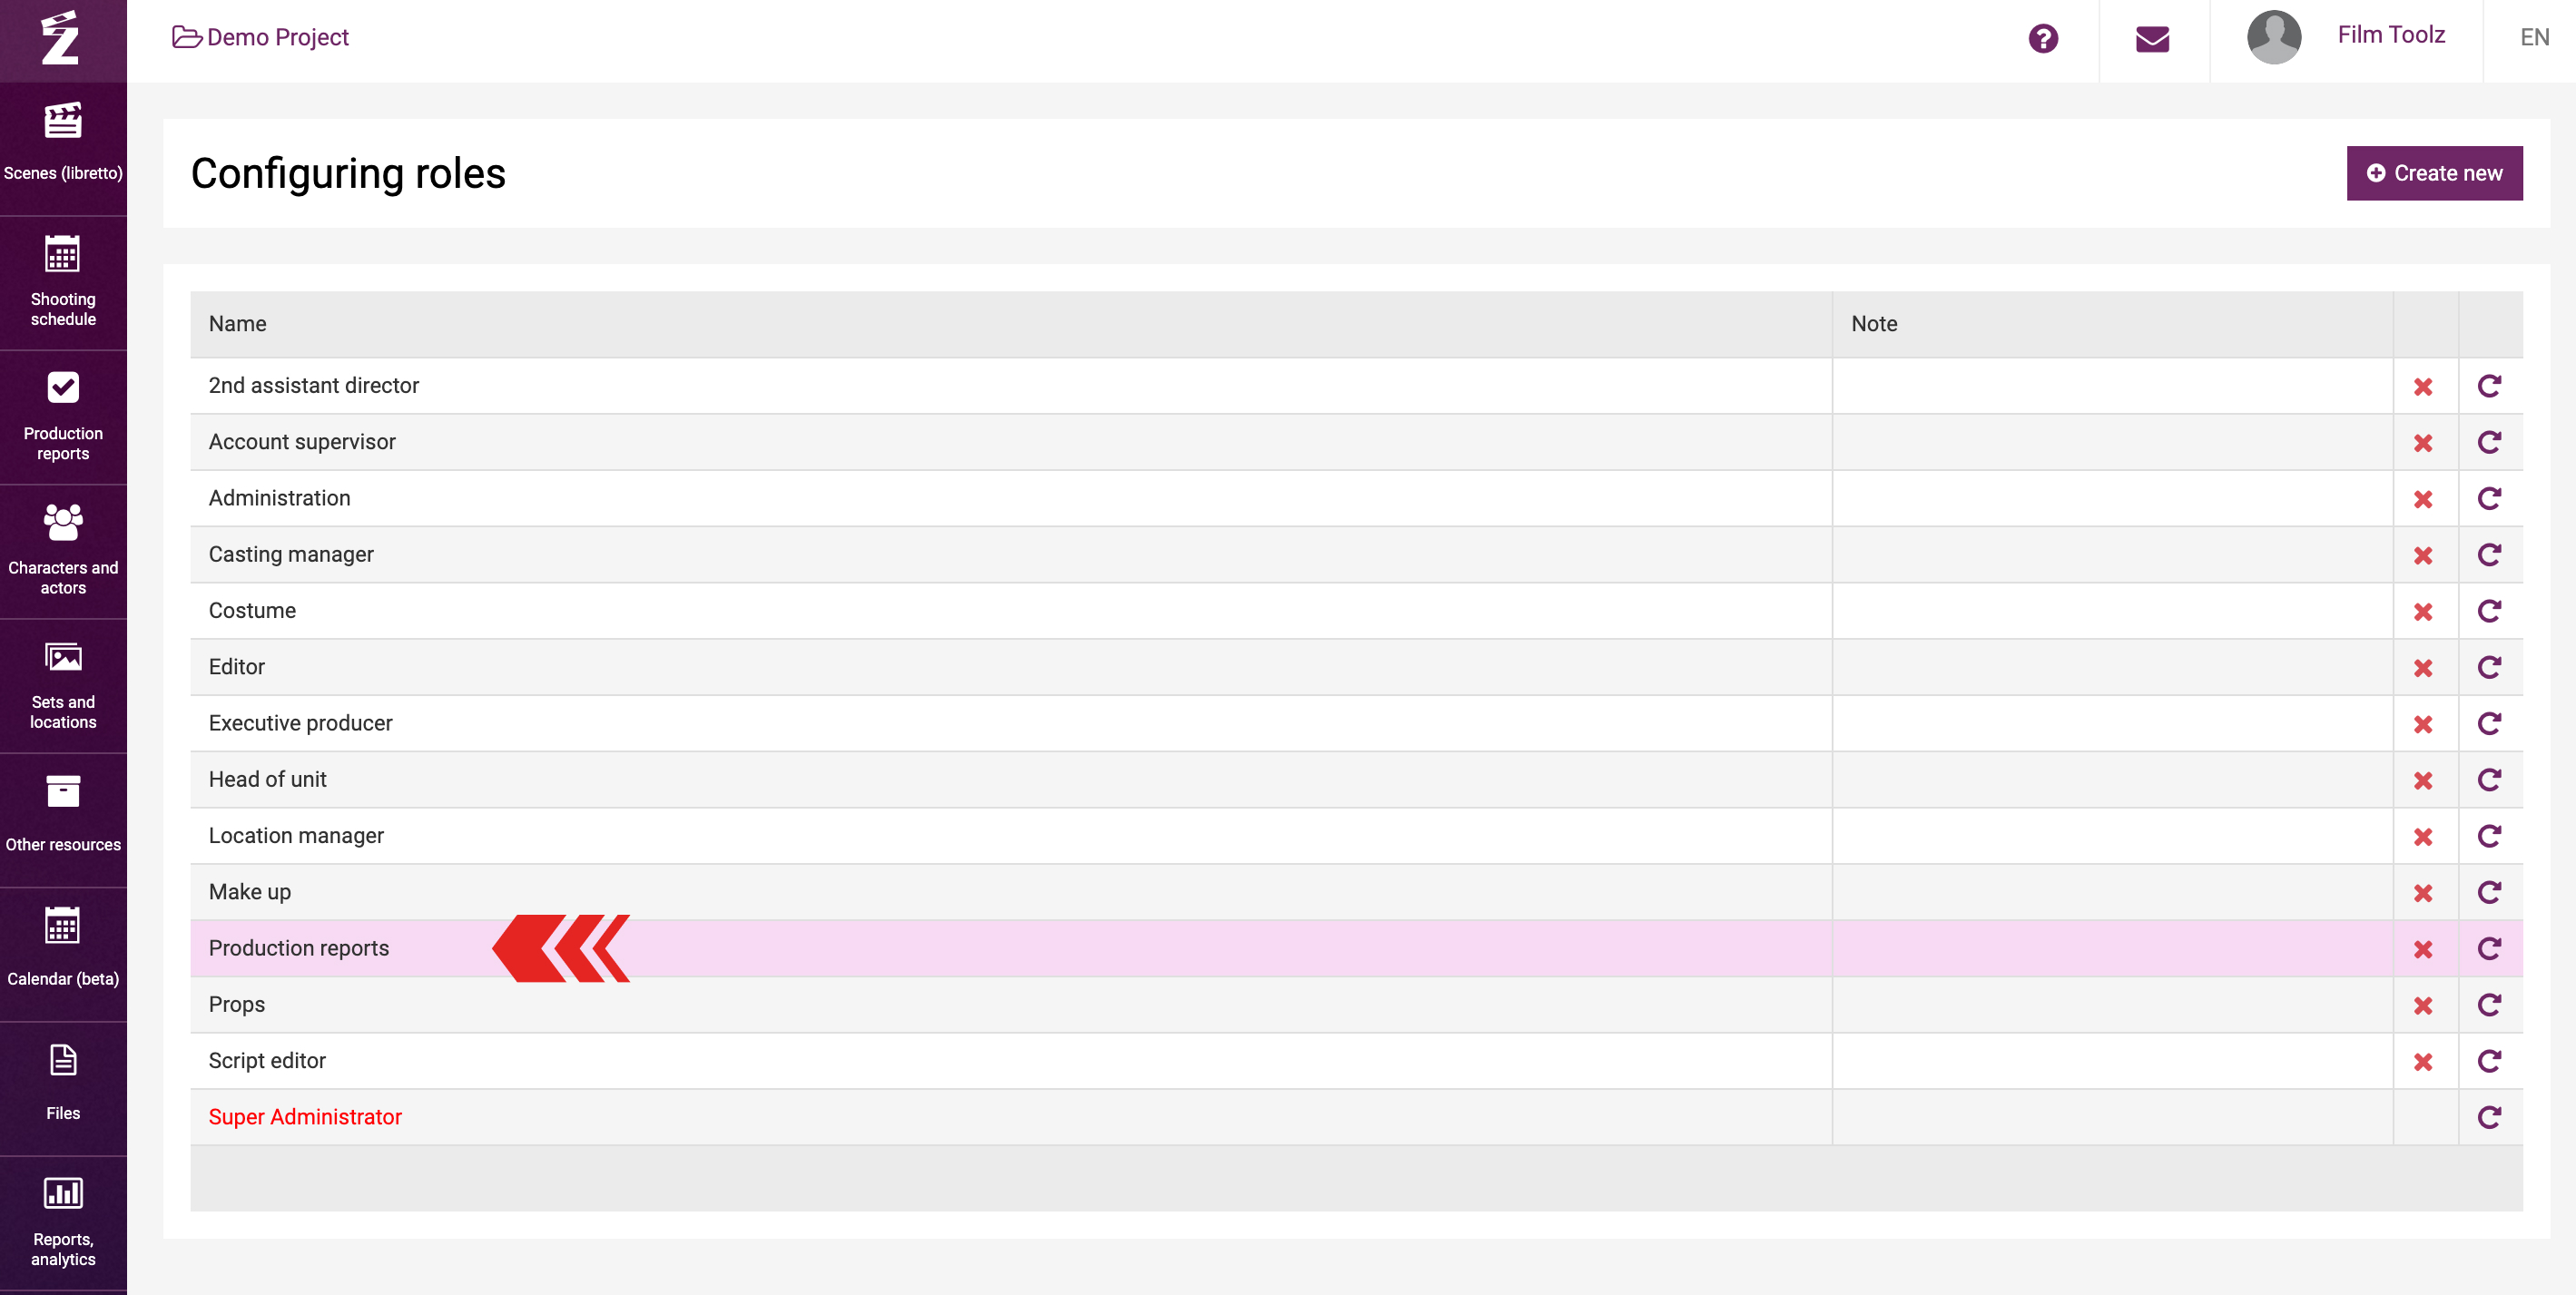
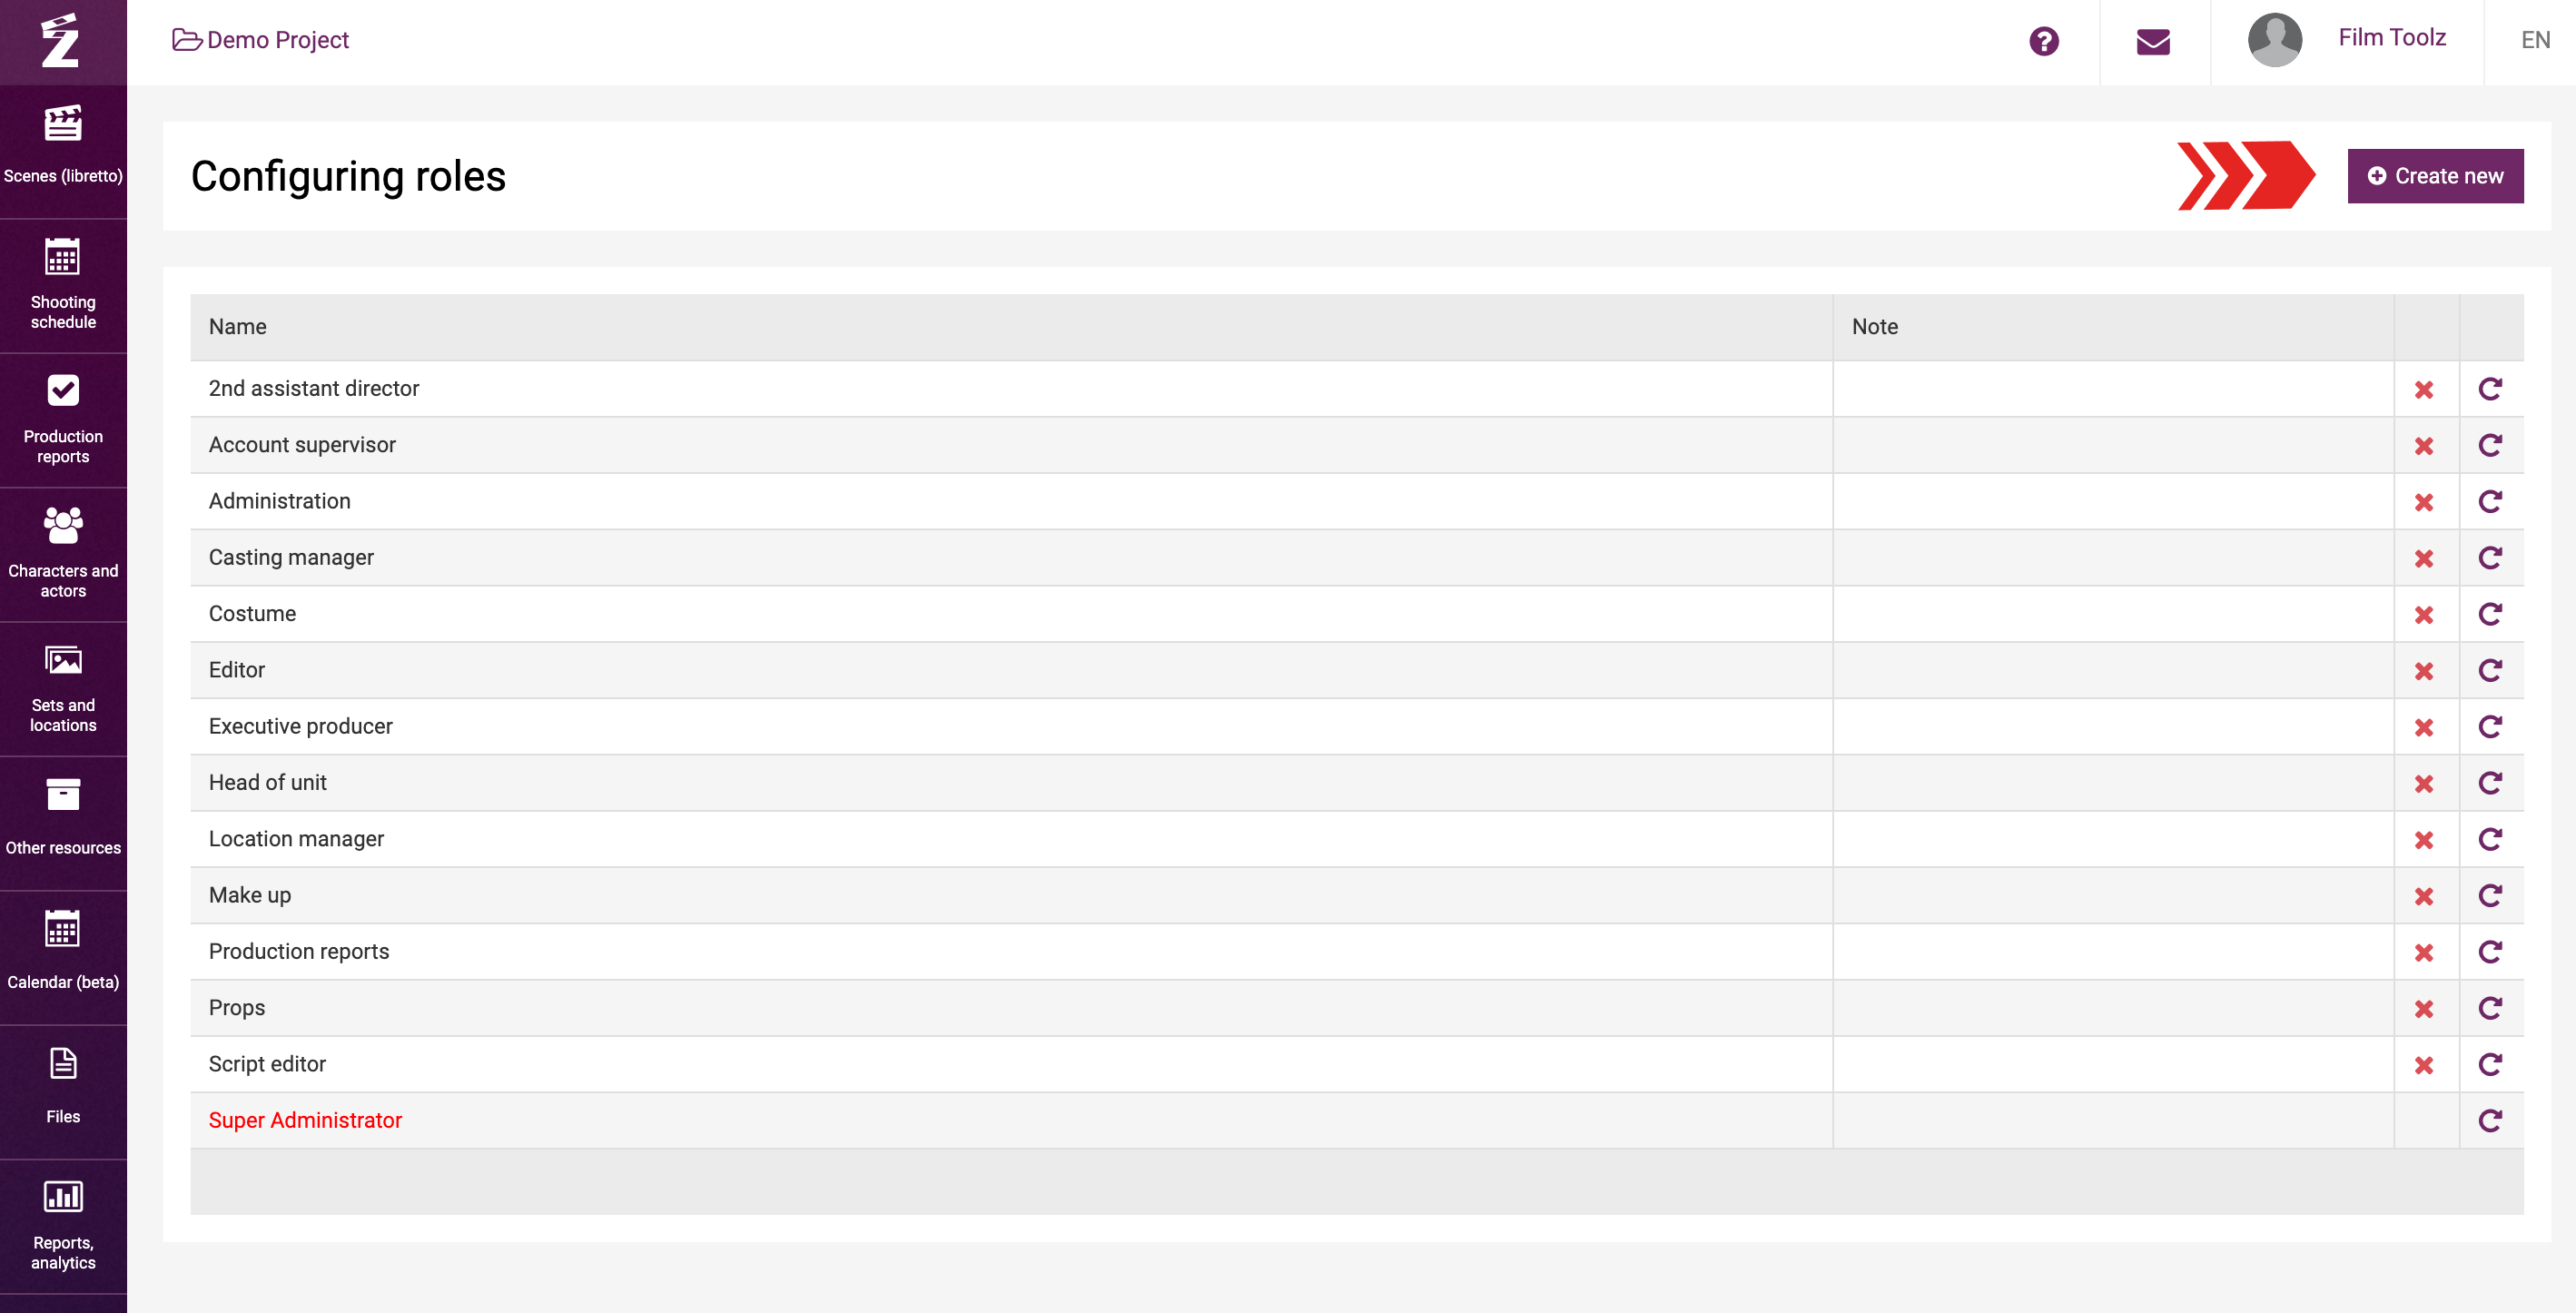
To configure the roles, select the “Roles” tab in the “Users and roles” menu.
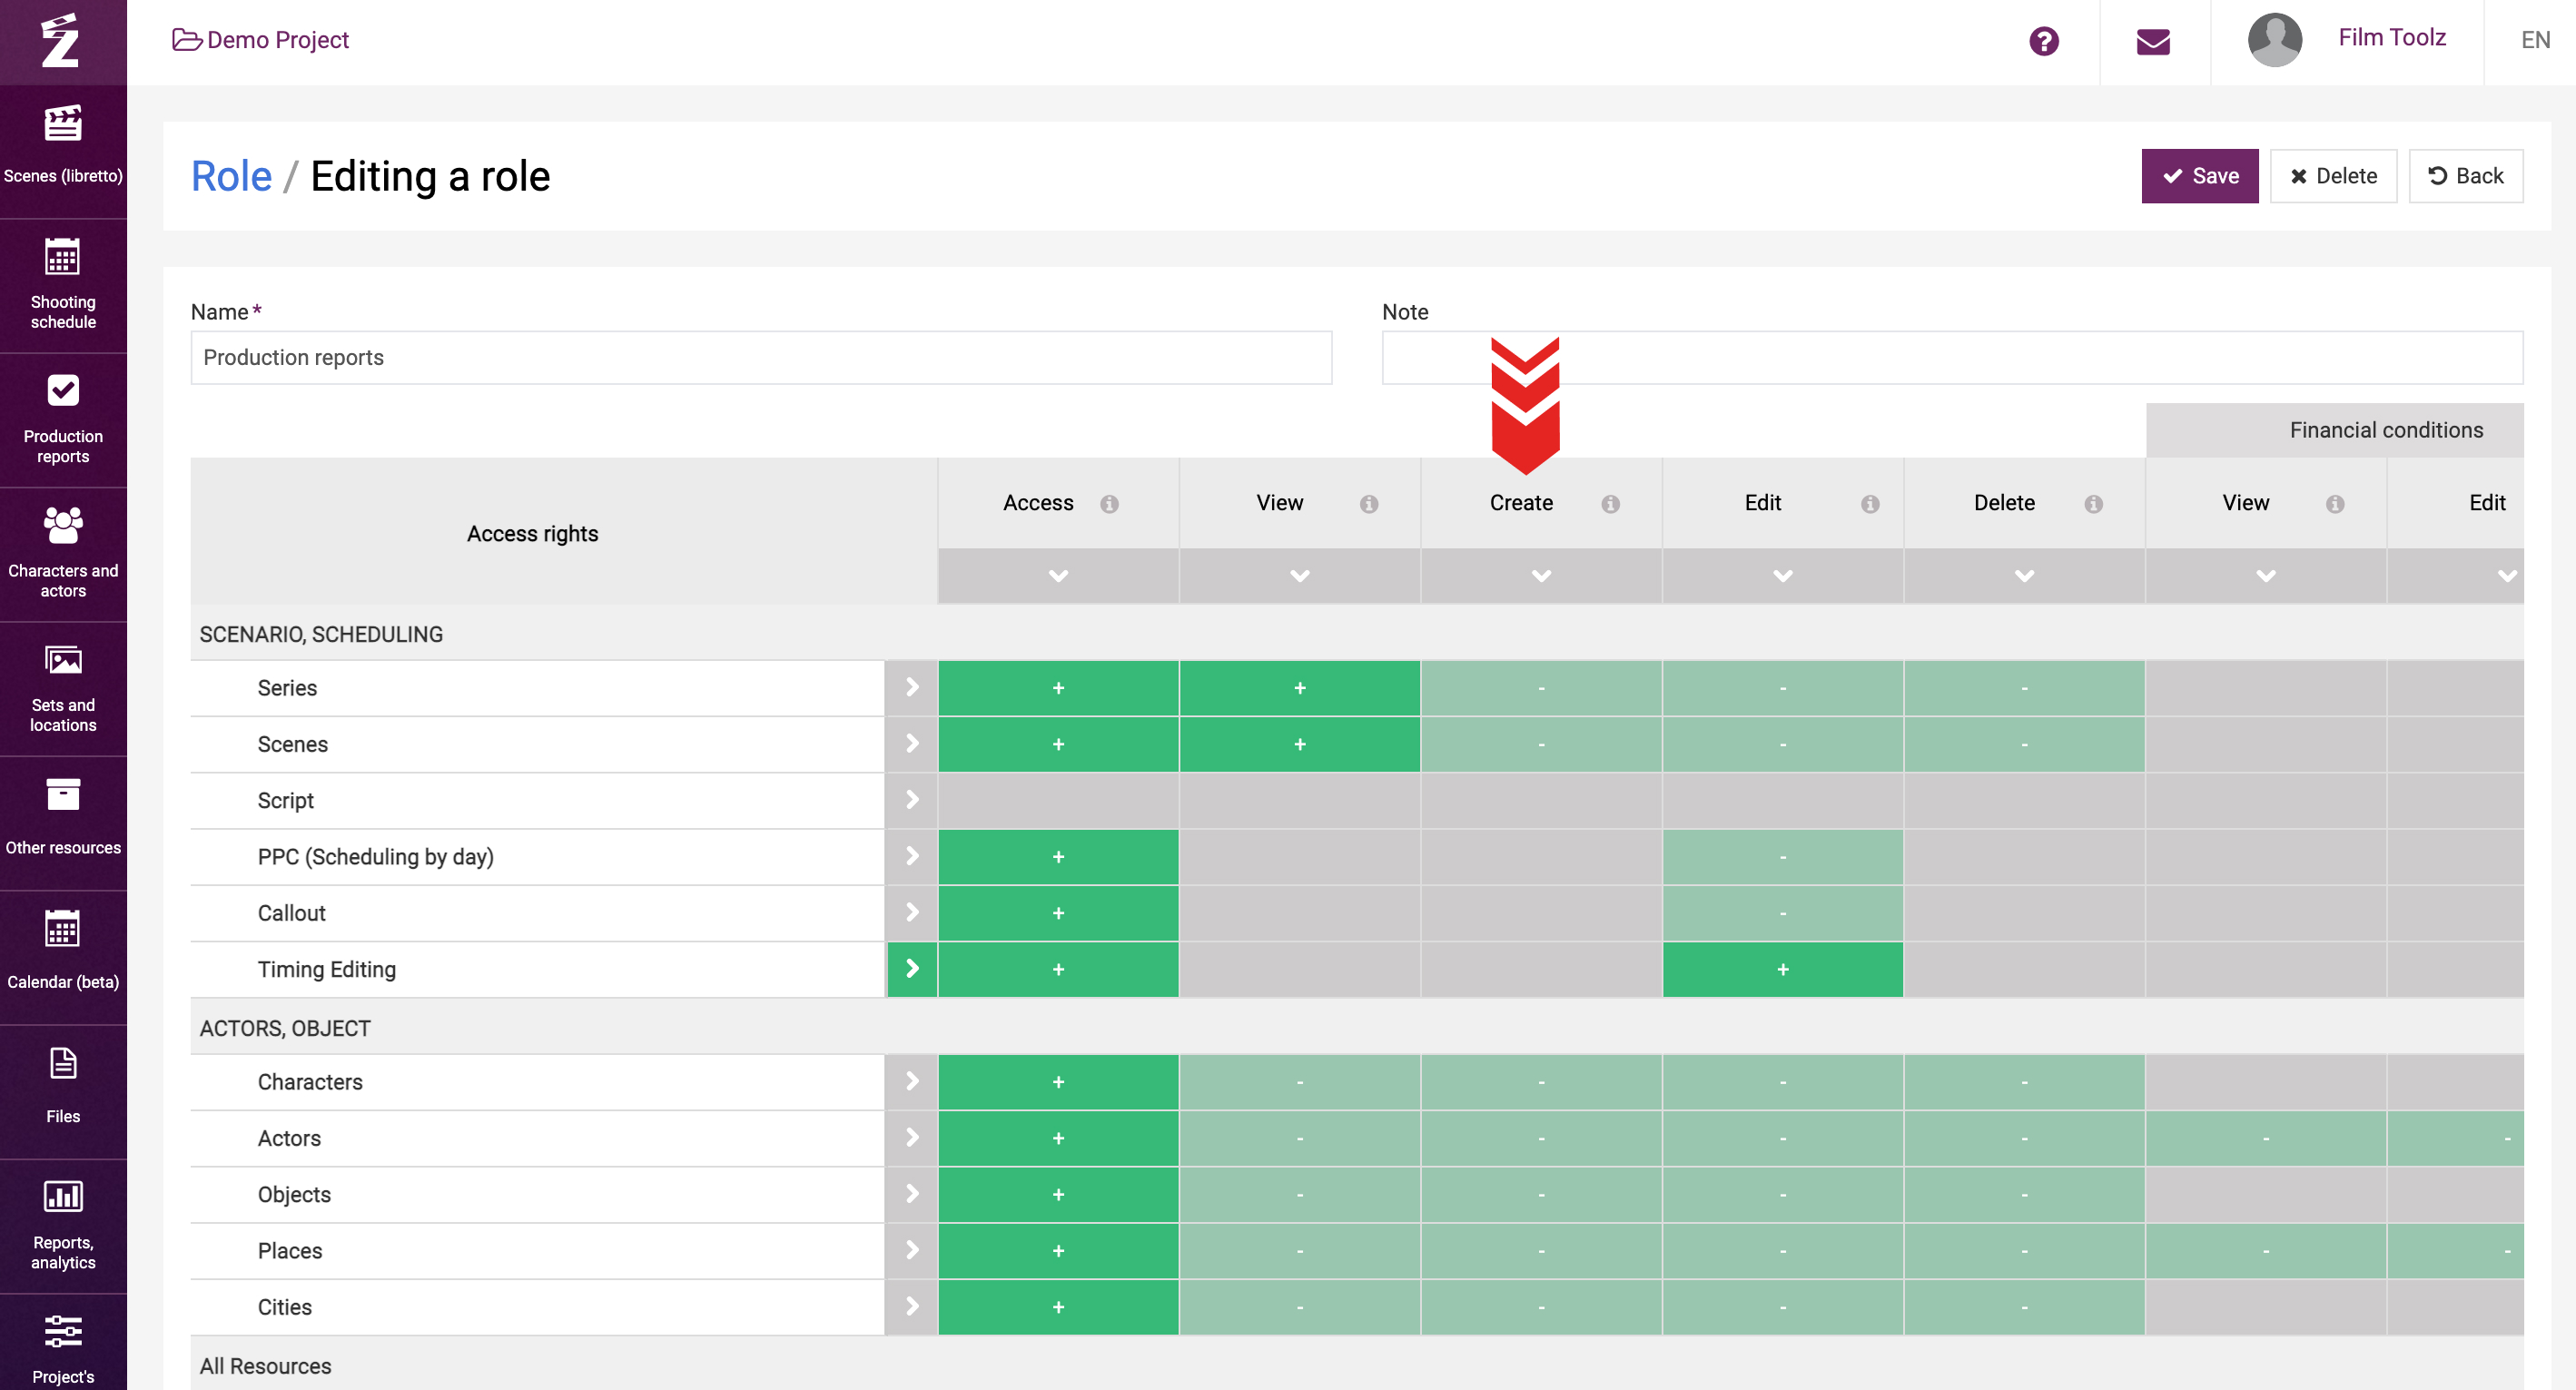
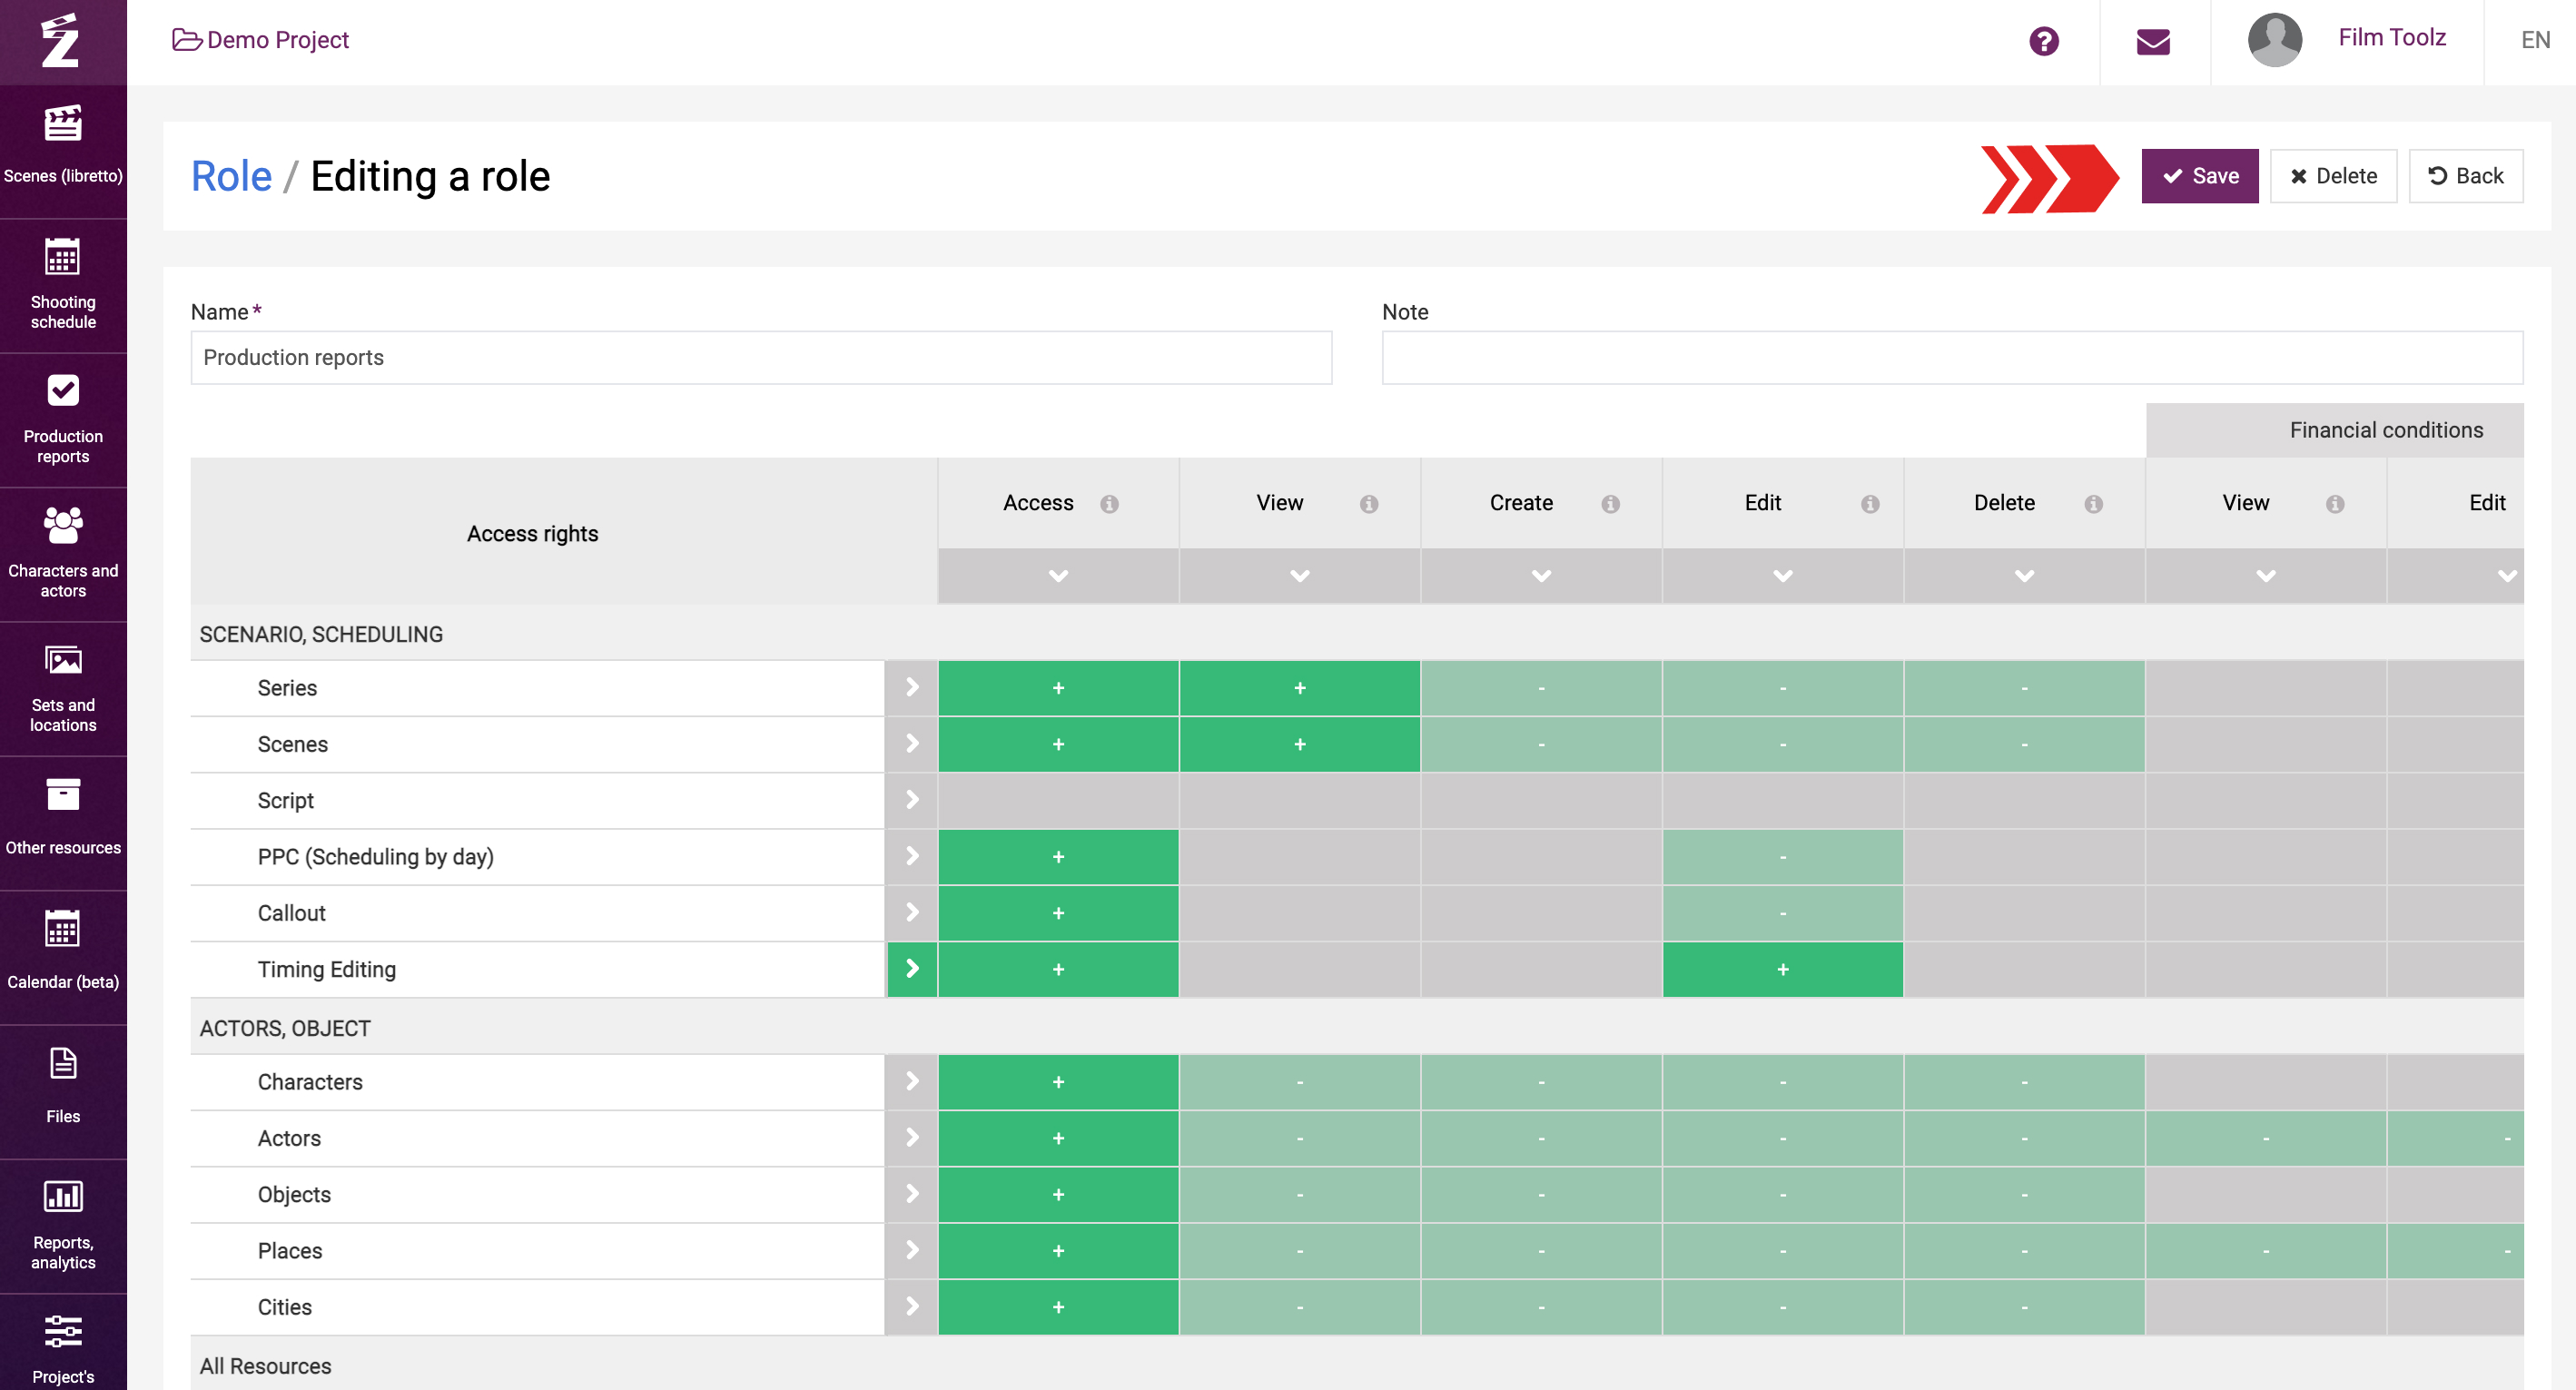
The screen will show the standard (system) roles that will be automatically presented upon creation of a project. In order to edit a role, click on it. For example, open the “Production reports” role.
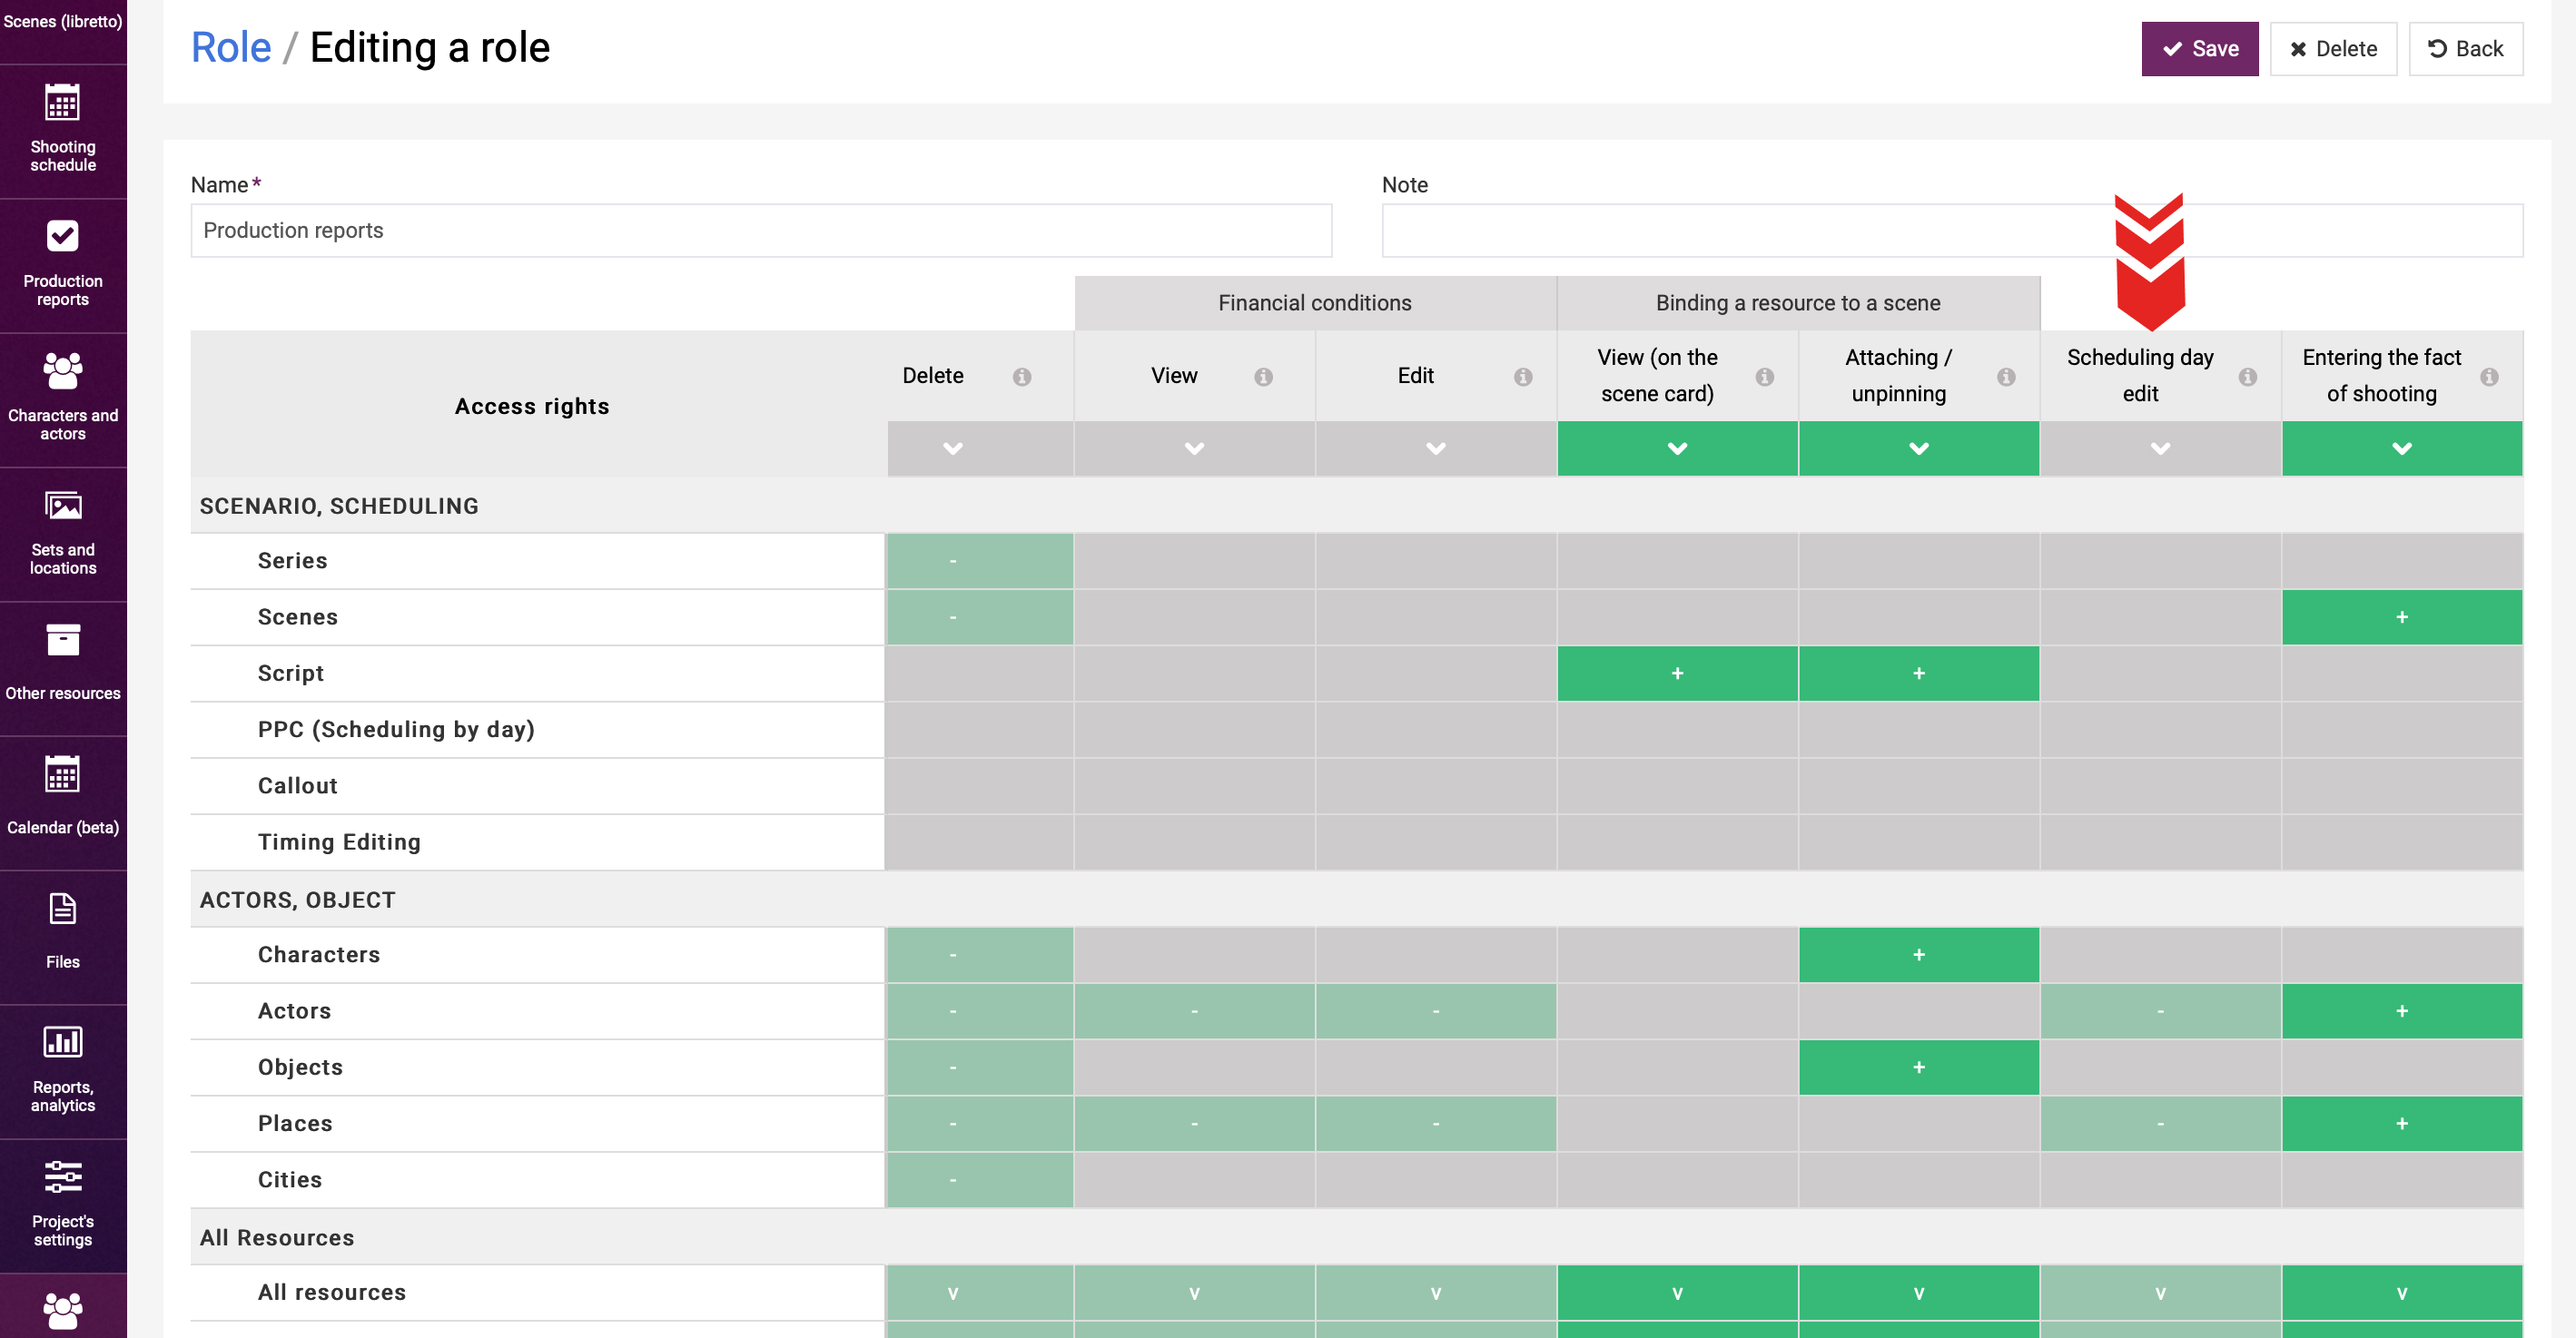
The menu on the left shows the names of the project pages – “Episodes”, “Scenes”, etc. The menu on top lists possible actions with the pages, such as “Access”, “View”, “Create”, etc. On the intersection, you can see pluses and minuses, where “+” means access, and “-” no access. Grey color marks the areas unavailable for adjustment.
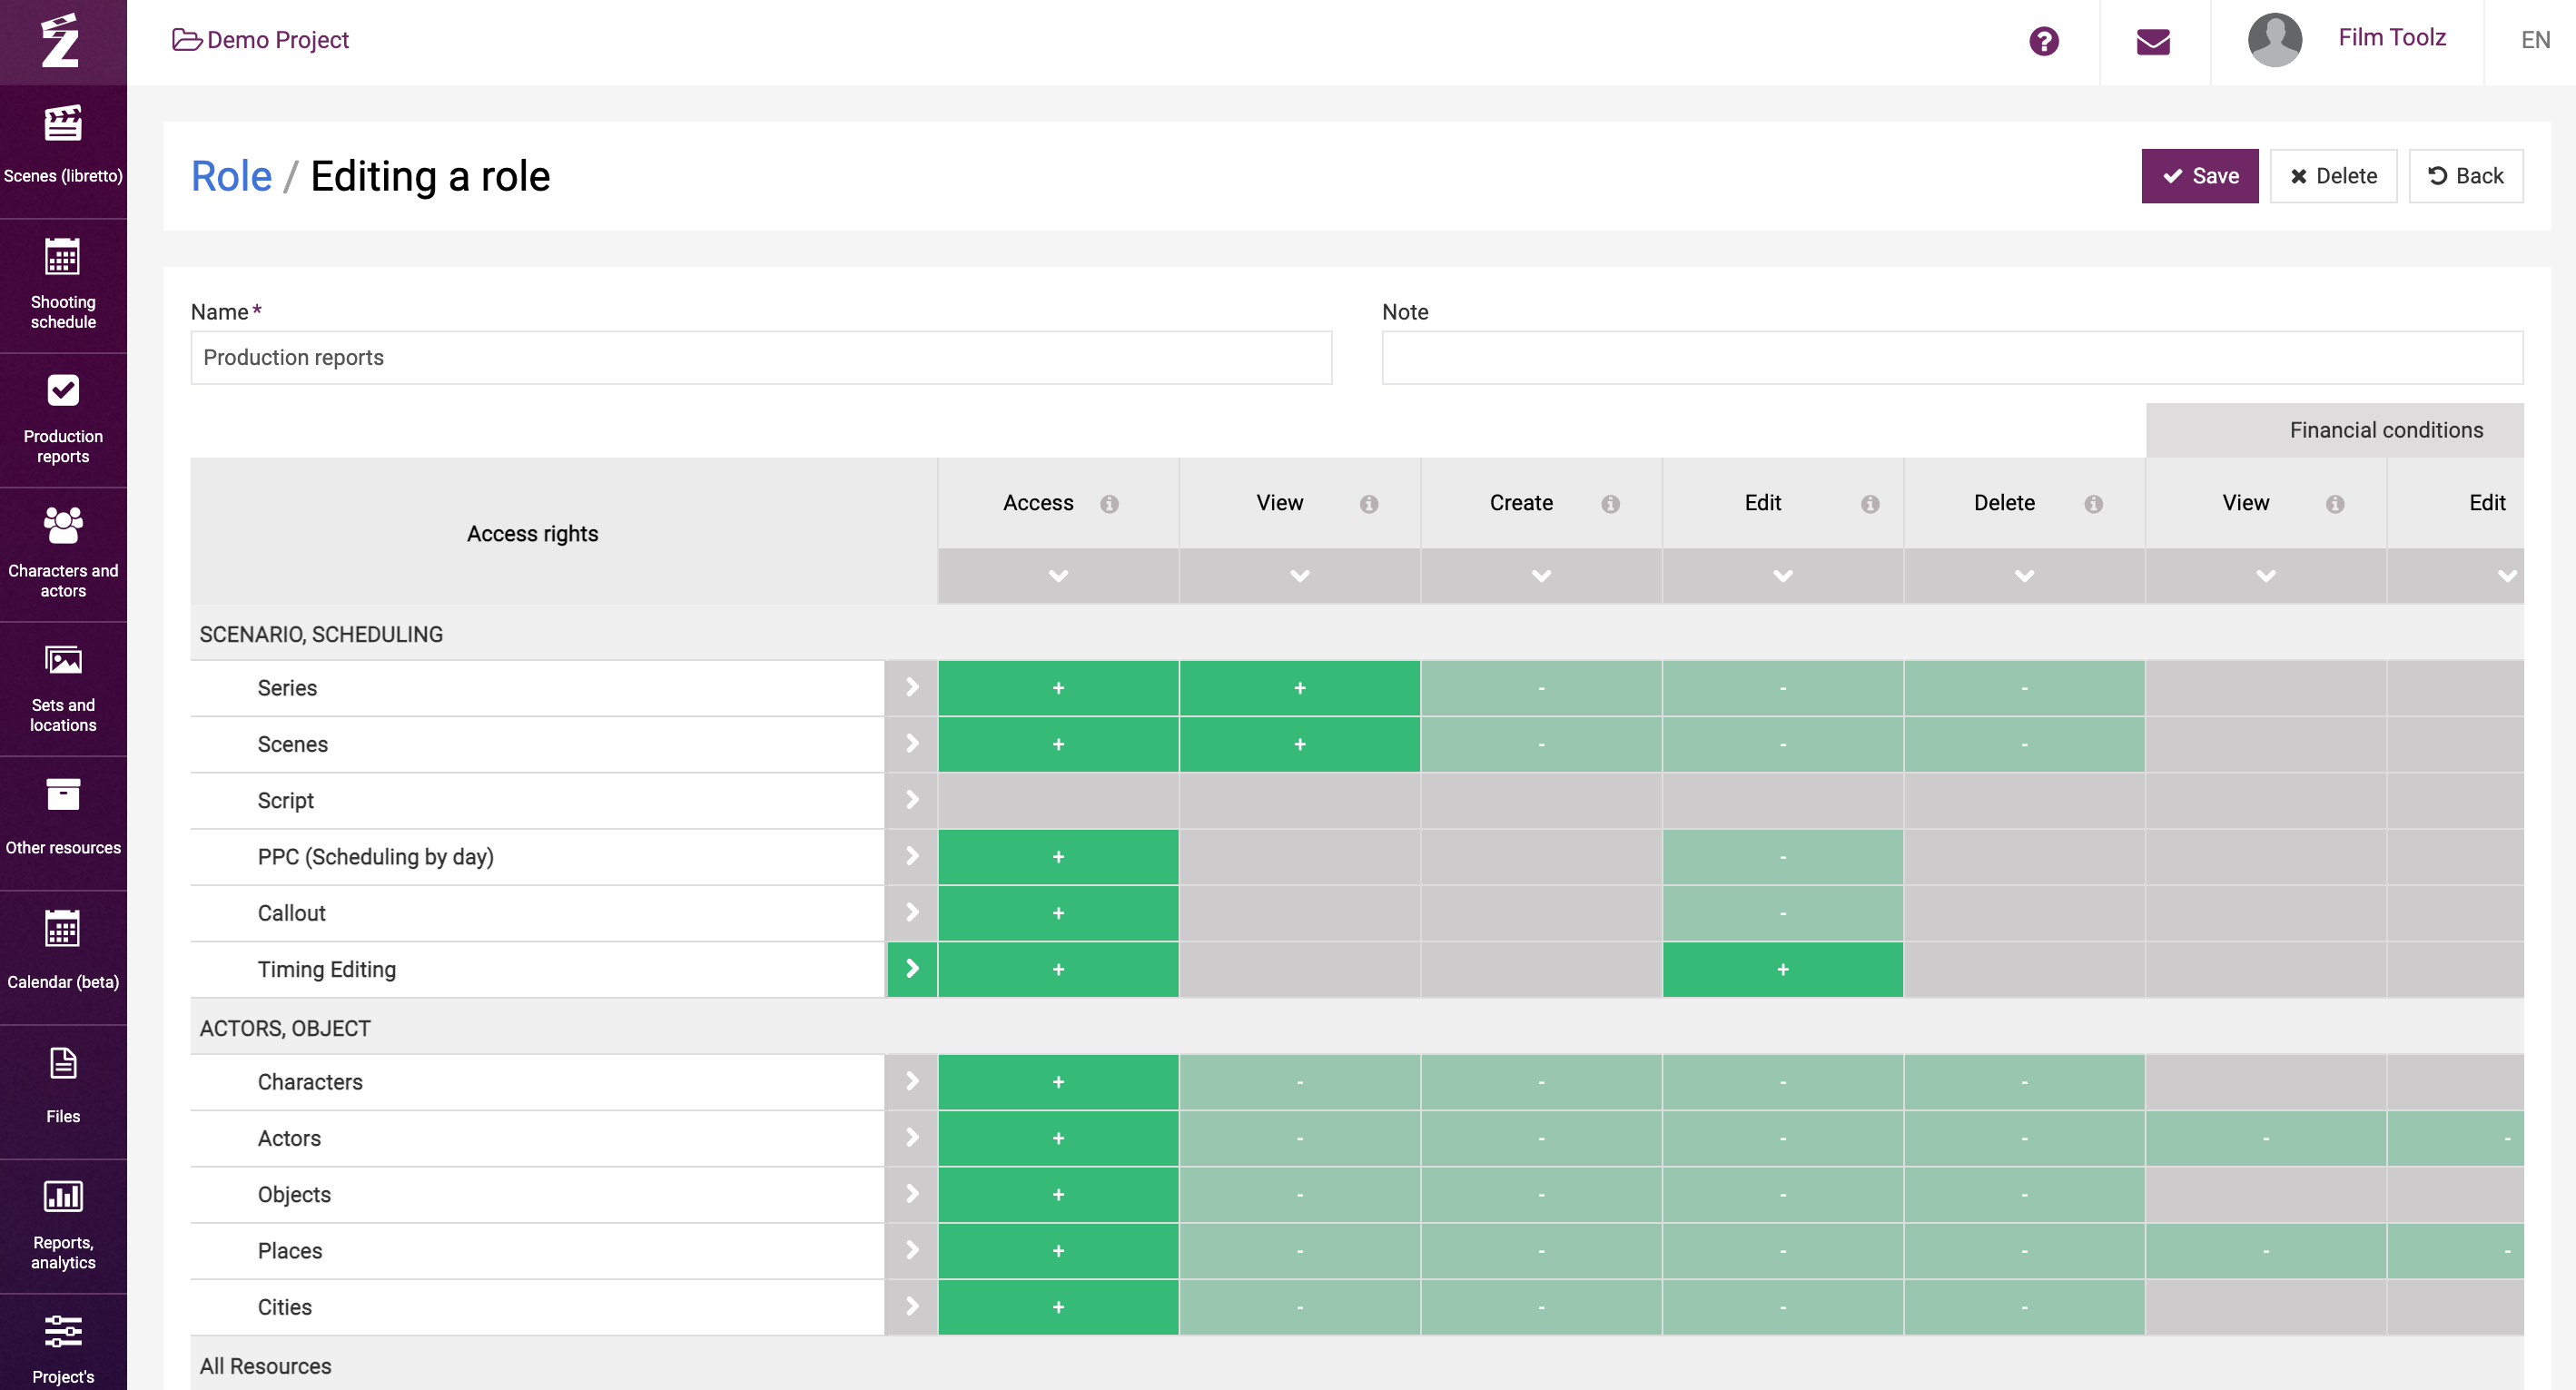
Now we will use this role as an example to look at the possible actions, such as:
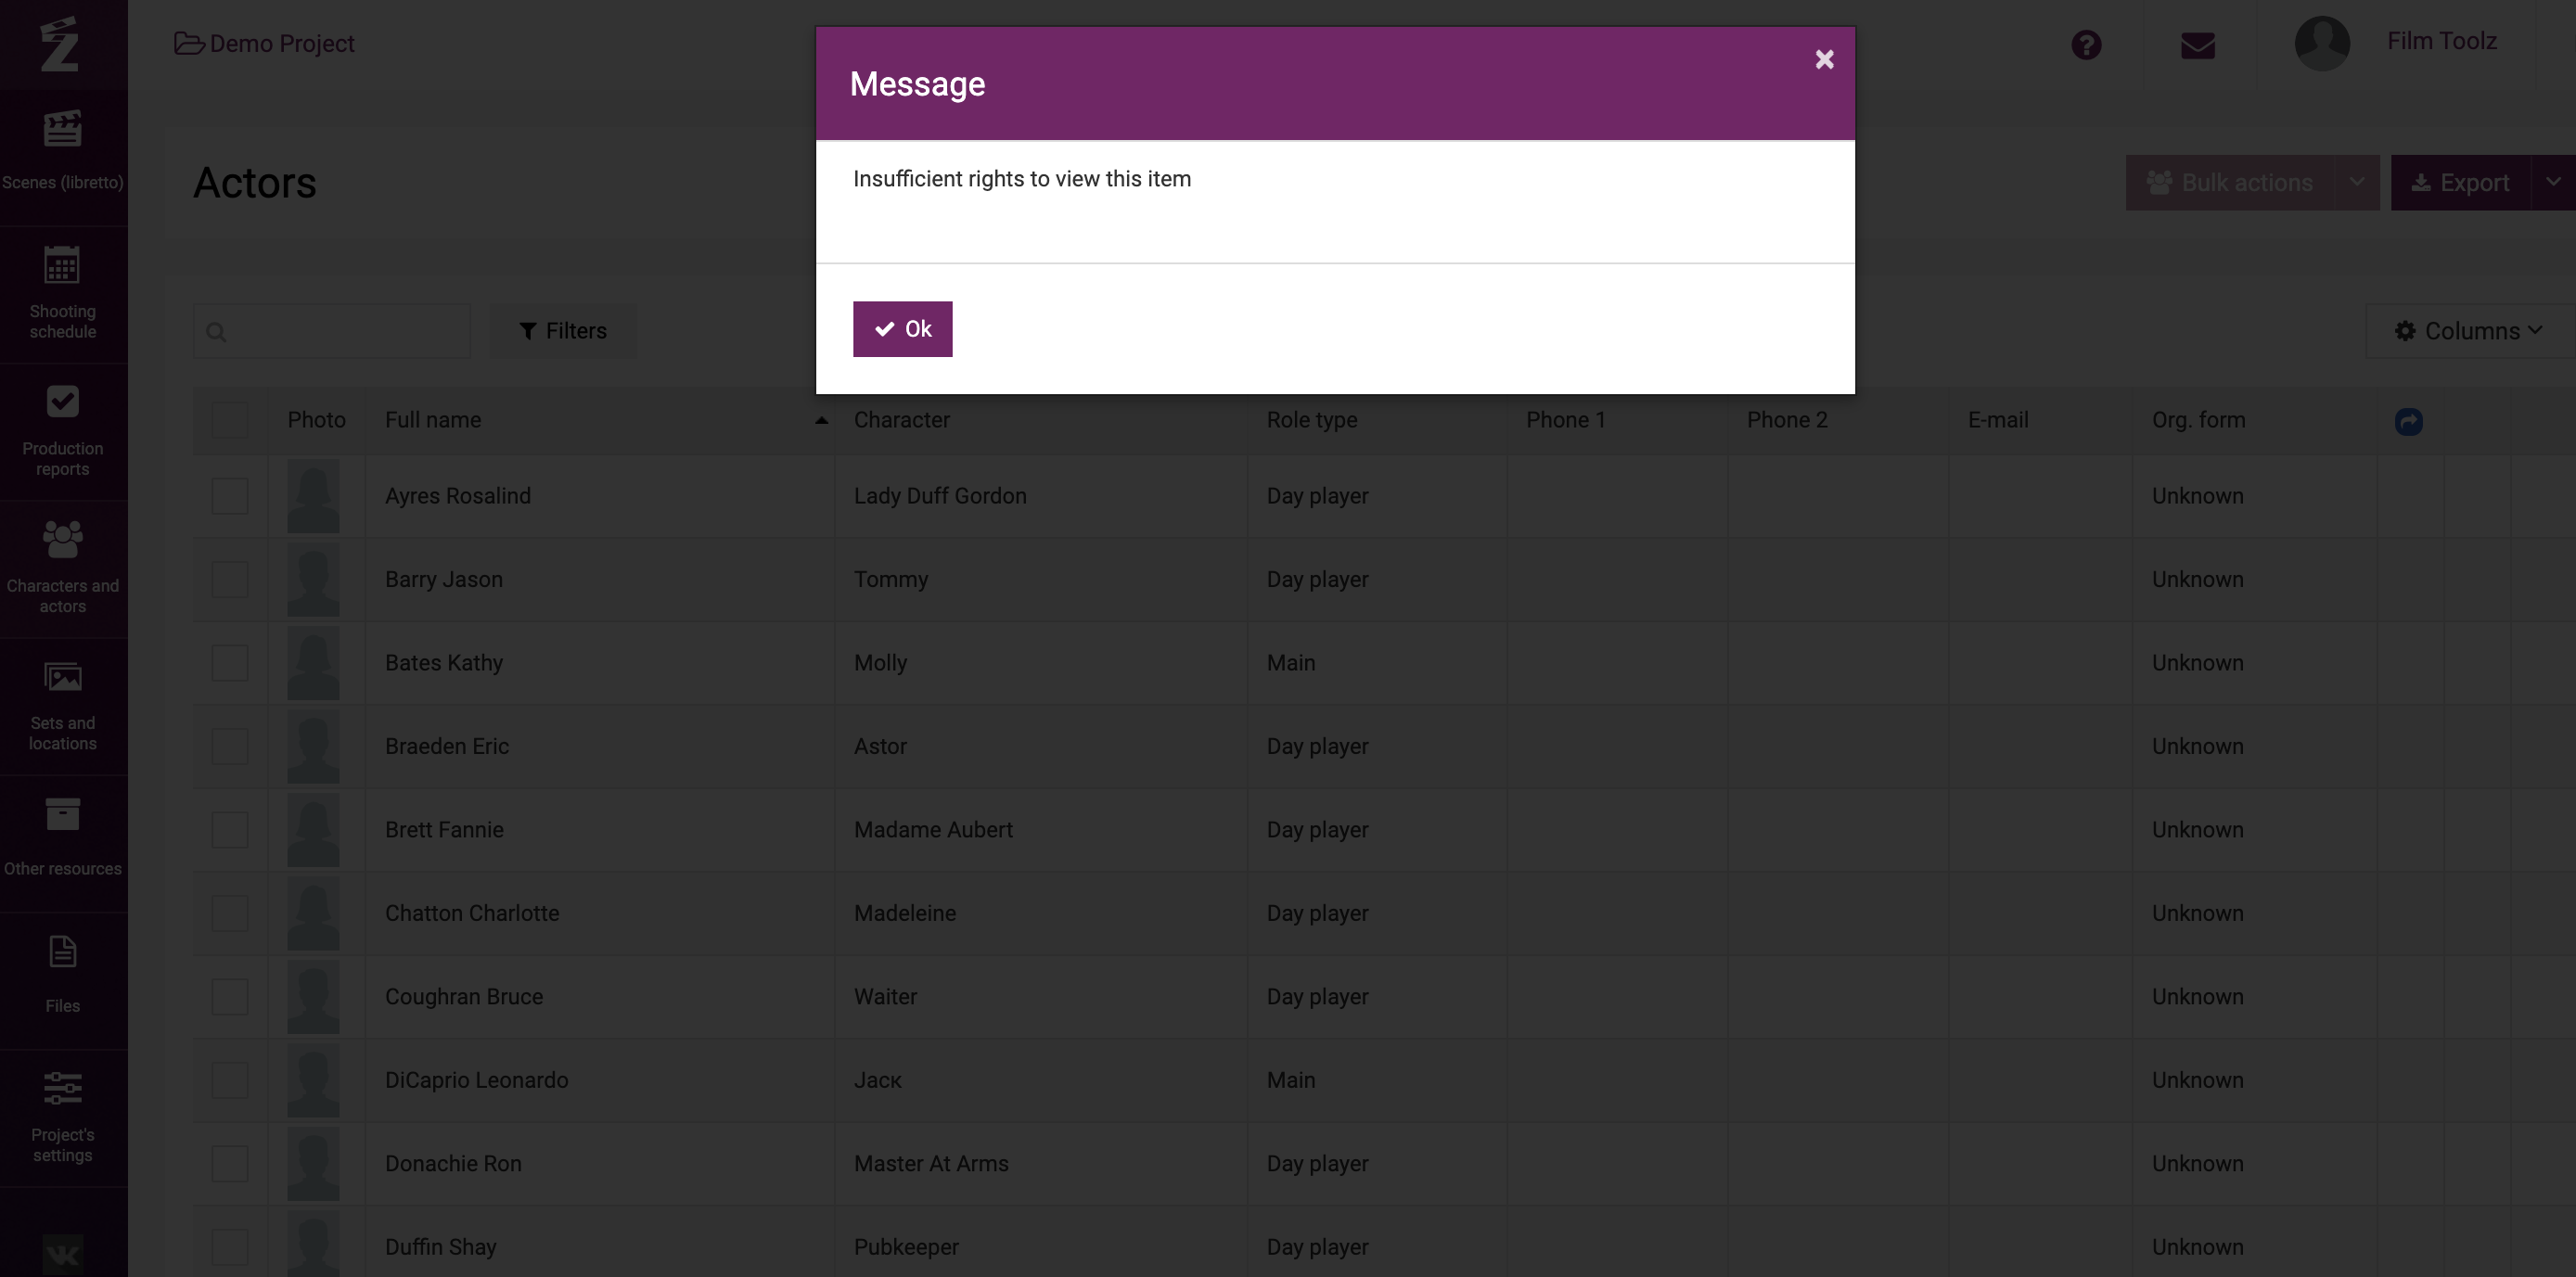
“Access” action, which enables the user to view the list of elements only, without granting access to more detailed information. For instance, the “Production reports” role provides access to the “Actors” page, which means that a user with this role assigned will be able to view the list of all actors, but will be unable to click on and view the page of a specific actor containing exhaustive information about this actor, and will also have access to the drop-down list of actors on other screens of the software. In case of an attempt to jump to the page of an element, the user will see a message indicating that they are unauthorised to view the element.
“View” action makes it possible for the user to view detailed information of an item on its page (i. e. the possibility to view the page of a specific scene, actor, etc.). For instance, the “Production reports” role makes it possible to open each scene and review the relevant information without the right to edit and delete such information.
“Create” action makes it possible to create a new element, that is, a new scene, new character, actor, etc. In our example, the “Production reports” role does not enable user to create anything new.
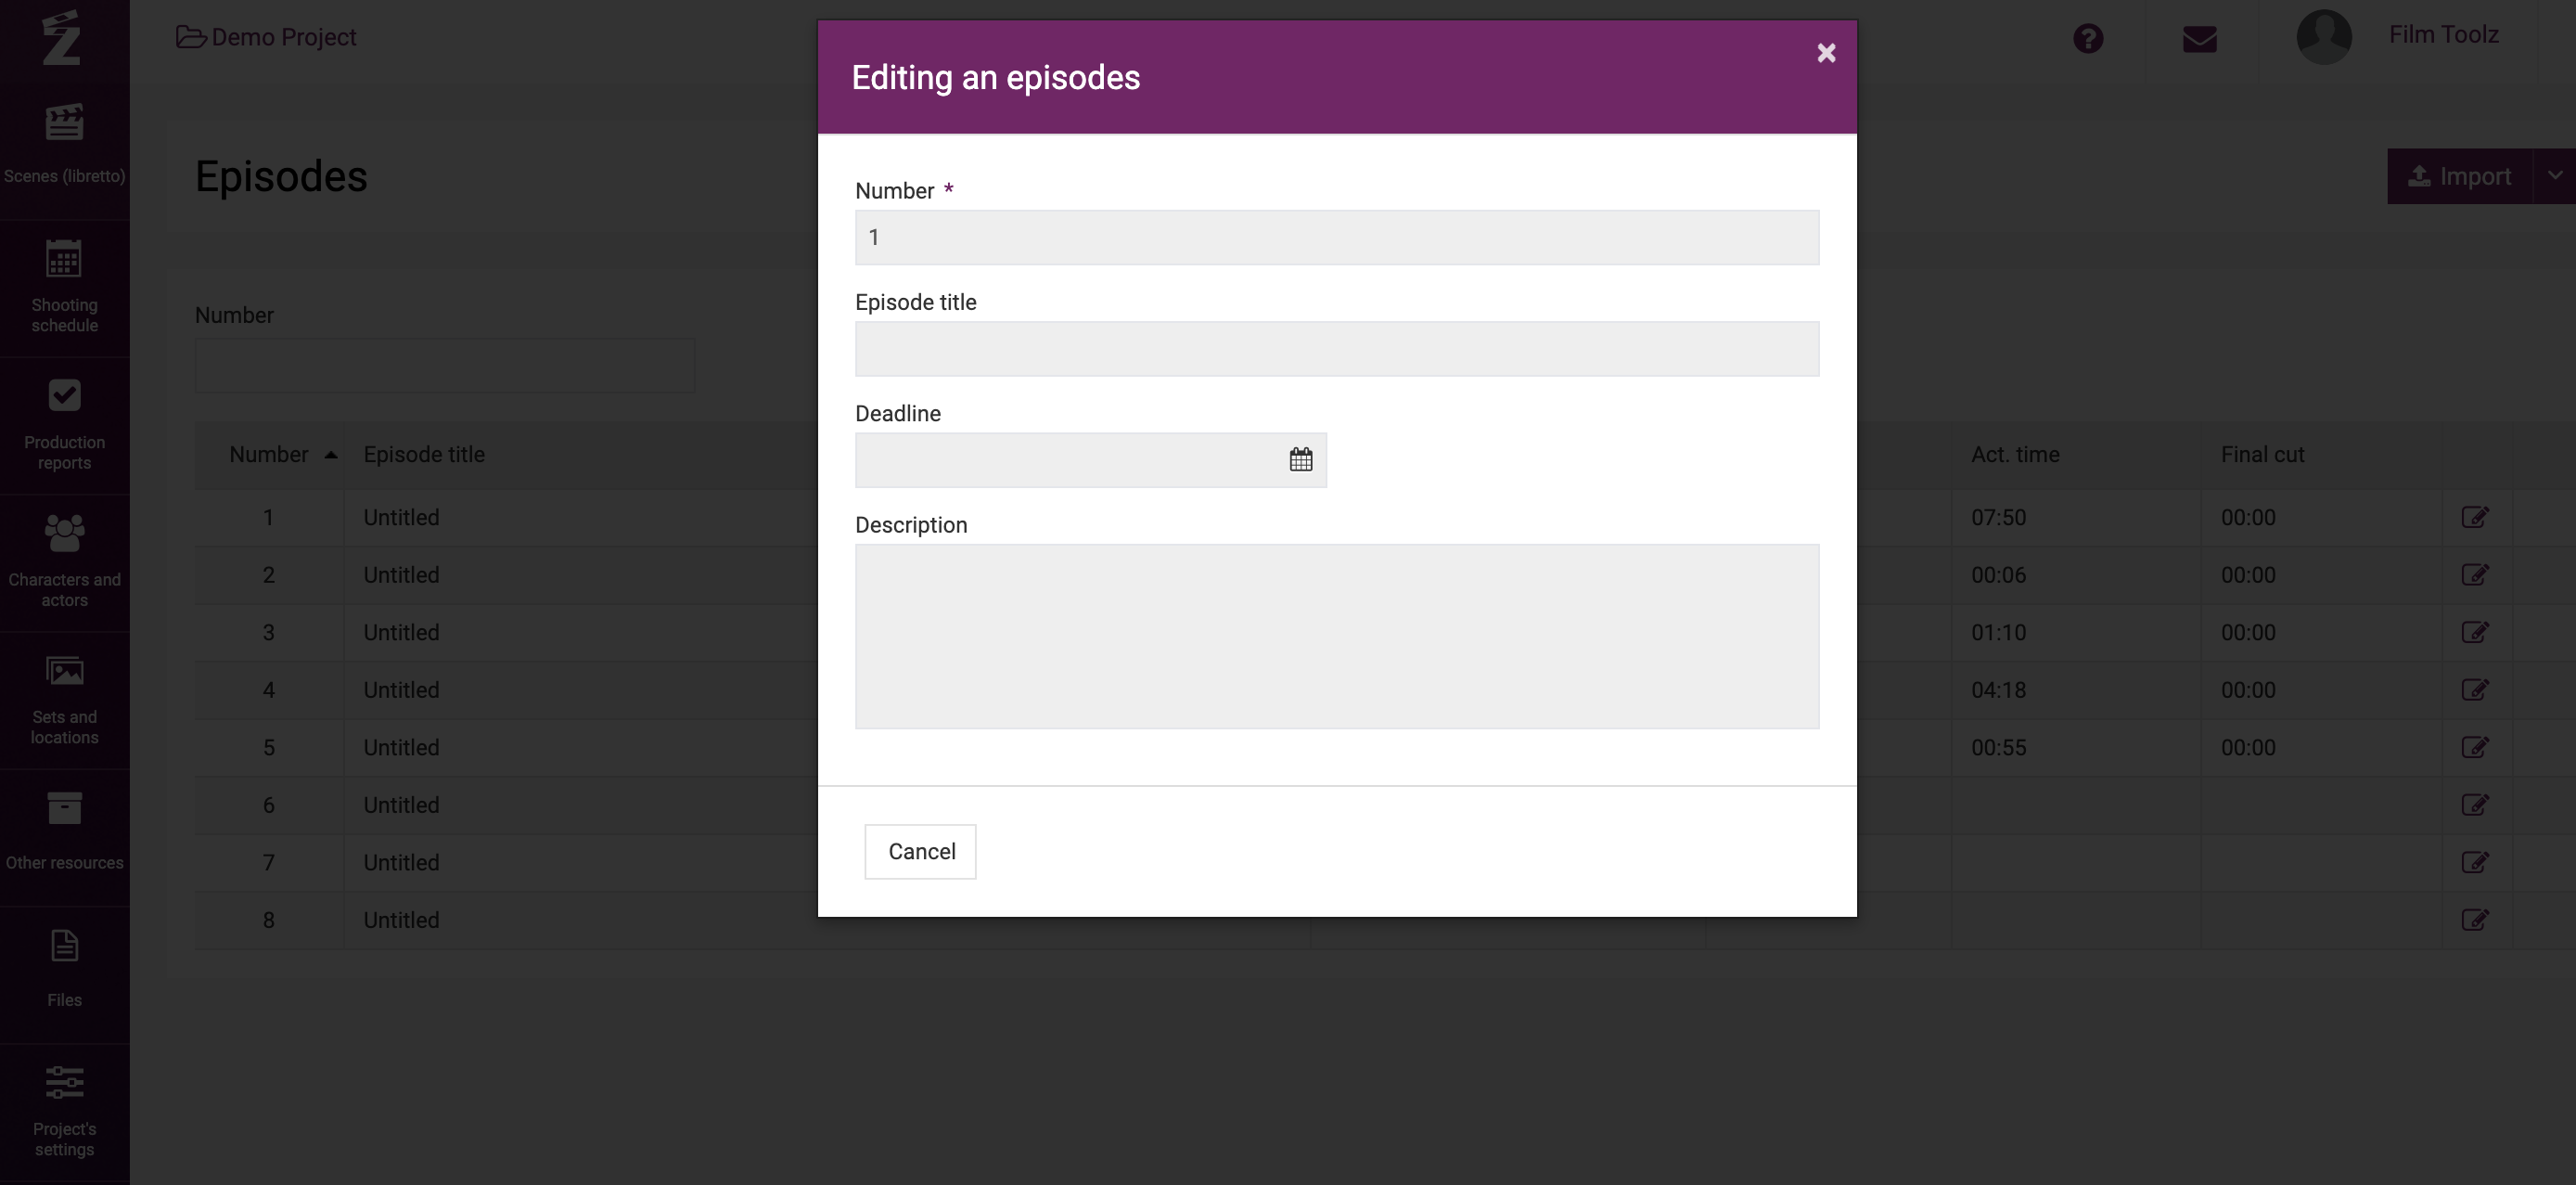
“Edit” action is the authorization to make changes. If a user is authorised to view, but not to edit the page, the input fields will be disabled and have grey color. For instance, if a user with the “Production reports” role opens any episode, they will be unable to edit the information.
“Delete” action makes it possible to delete a certain element: an episode, a scene, an actor, etc. The role in our example grants no access to deletion anywhere. Please note that even if a user has the rights to delete items, the system will not allow such user to delete items attached to other items (for instance, actors linked to the scenes) or delete the scenes that have already been shot. See detailed information about deleting items of each type in the dedicated learning modules (deletion of scenes, characters, actors, sets, etc.).
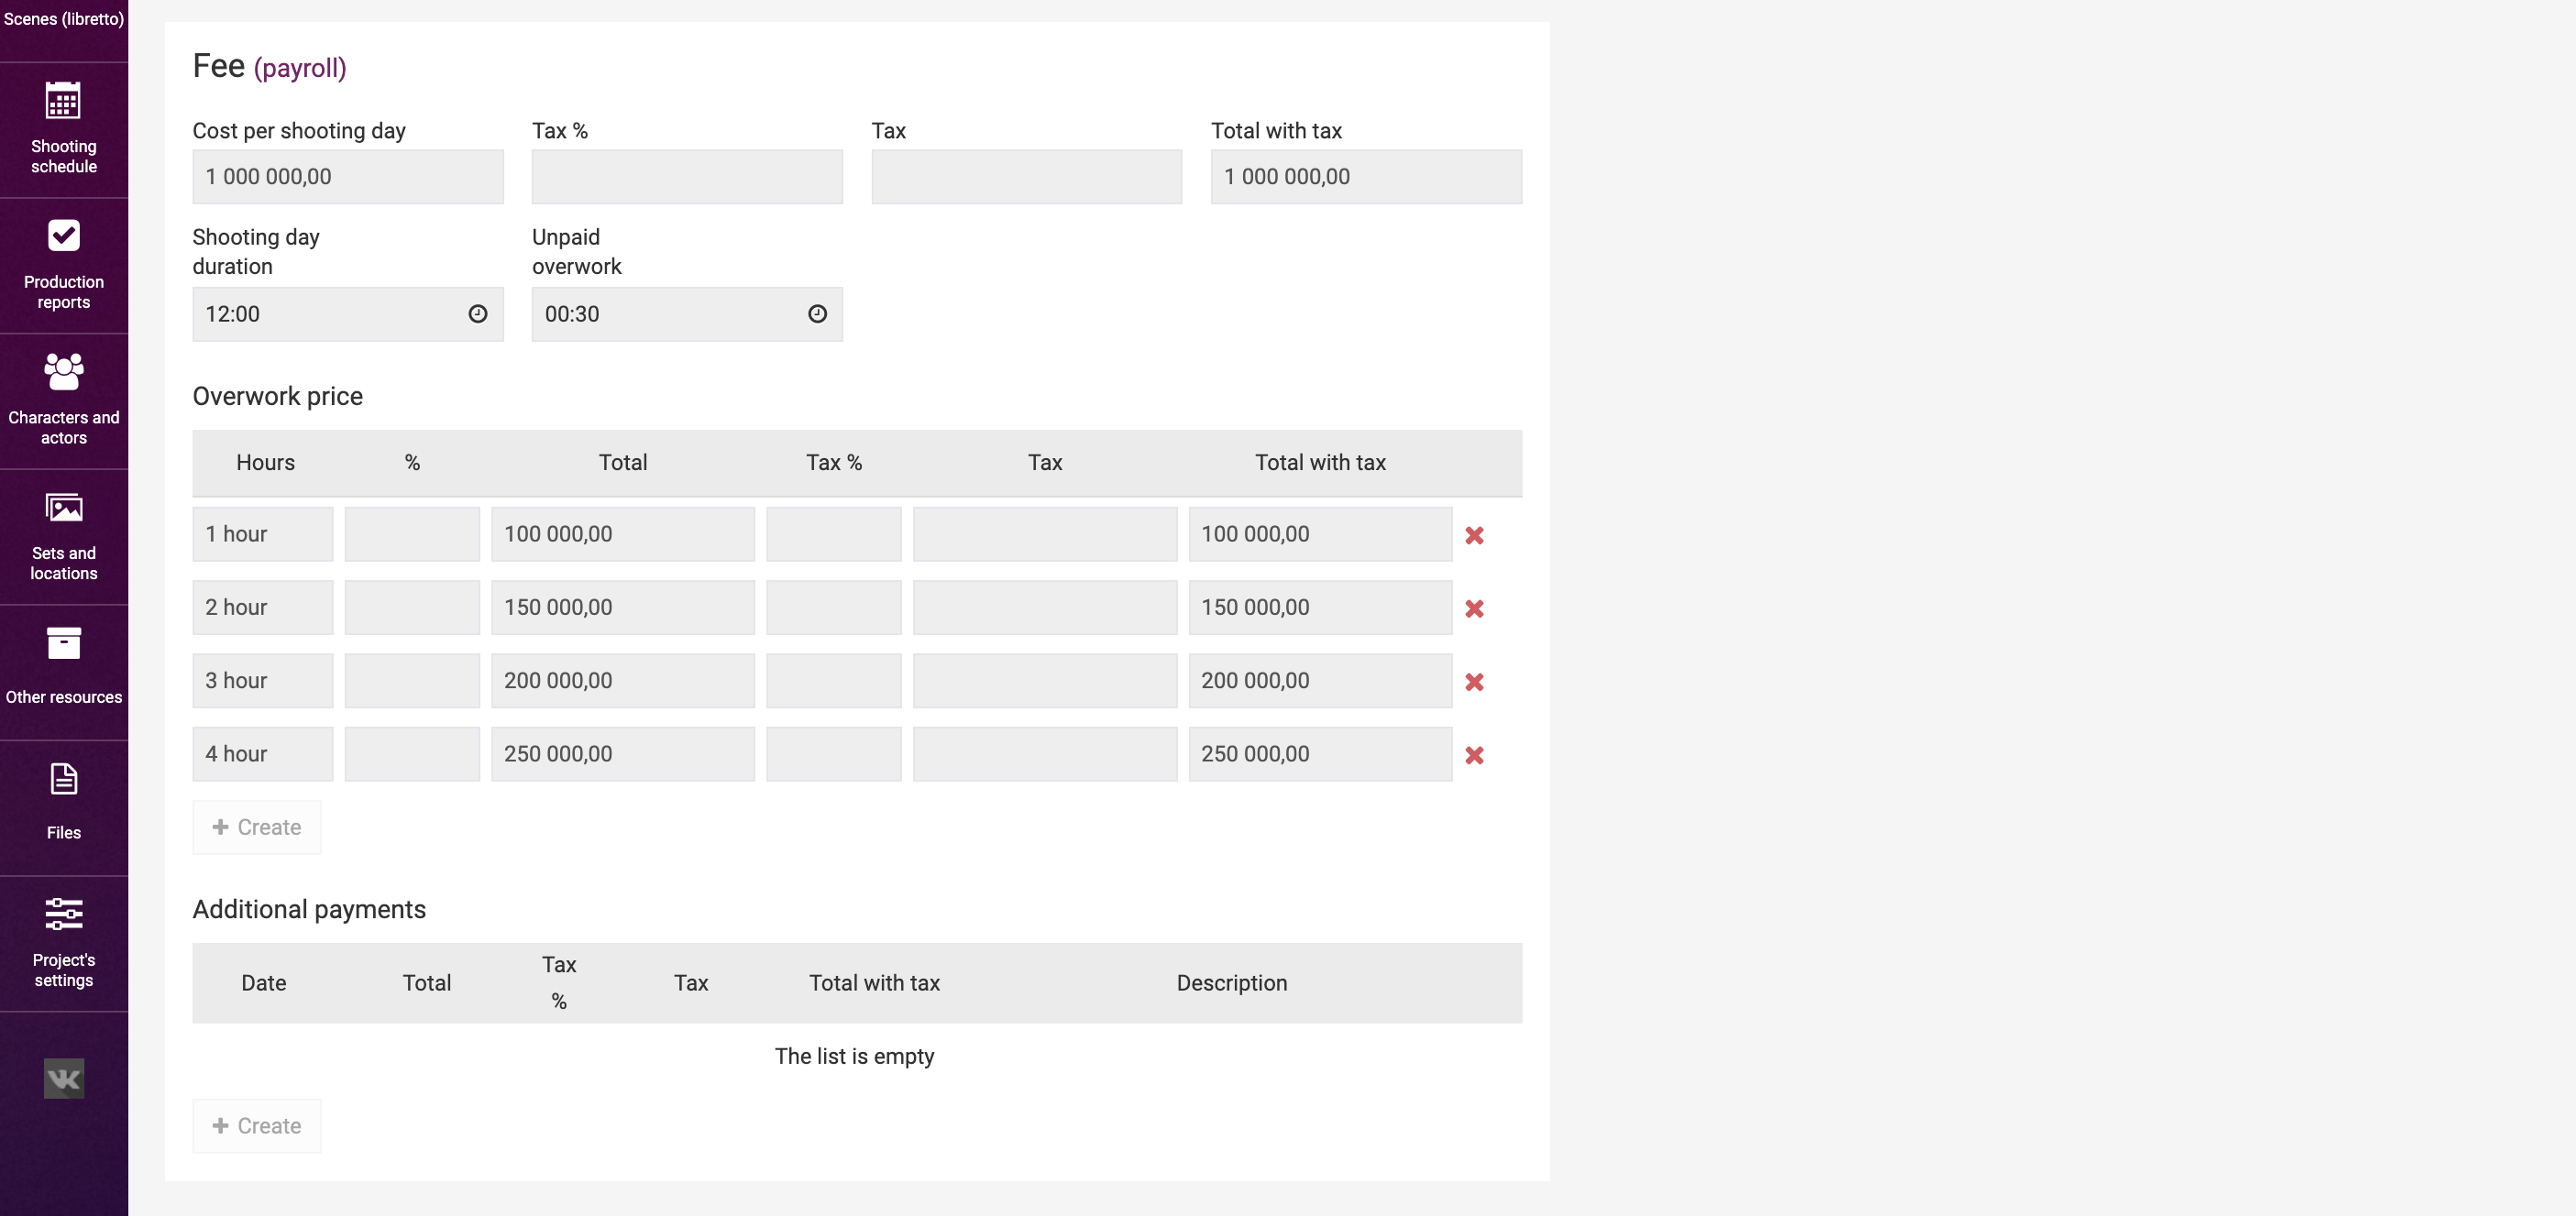
“Financial conditions” action grants access to the “Fee” block on the pages of actors, locations, and elements. This block looks as follows
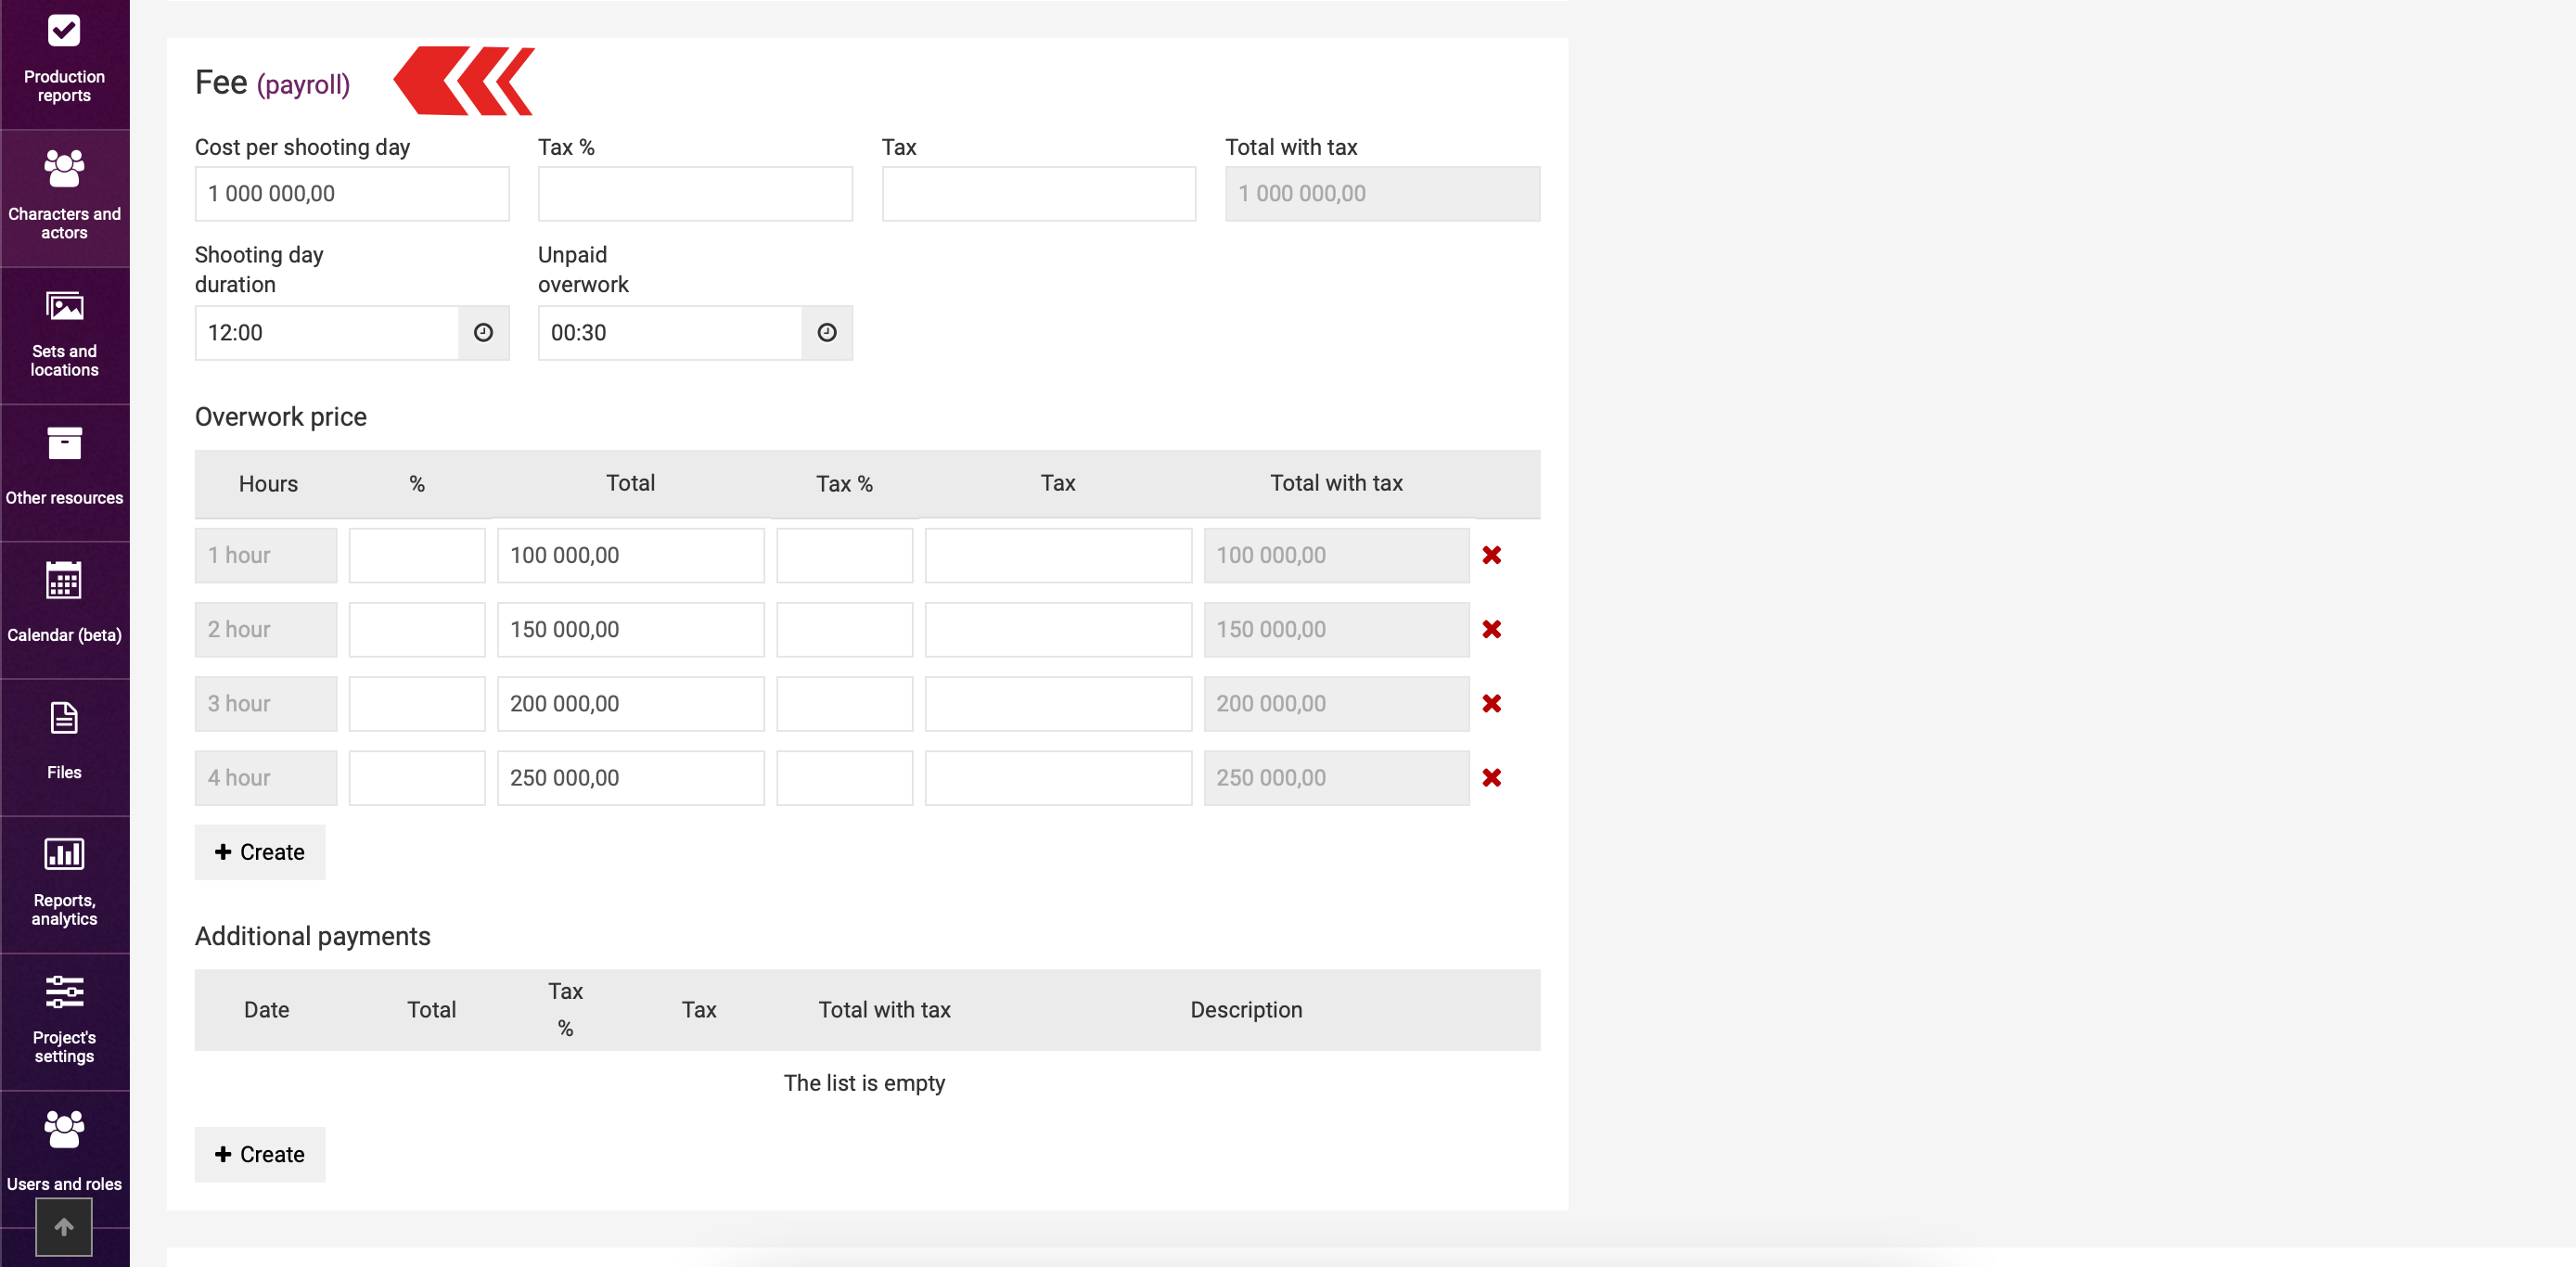
The “Production reports” role has no access to viewing or editing.
If a user is authorized to view but not to edit the information, the fields will be disabled similar to the example provided below
An important prerequisite for viewing and editing financial conditions on the pages of actors, sets, and elements is the right to view the pages themselves, i.e. ticks in the “View” box of these pages.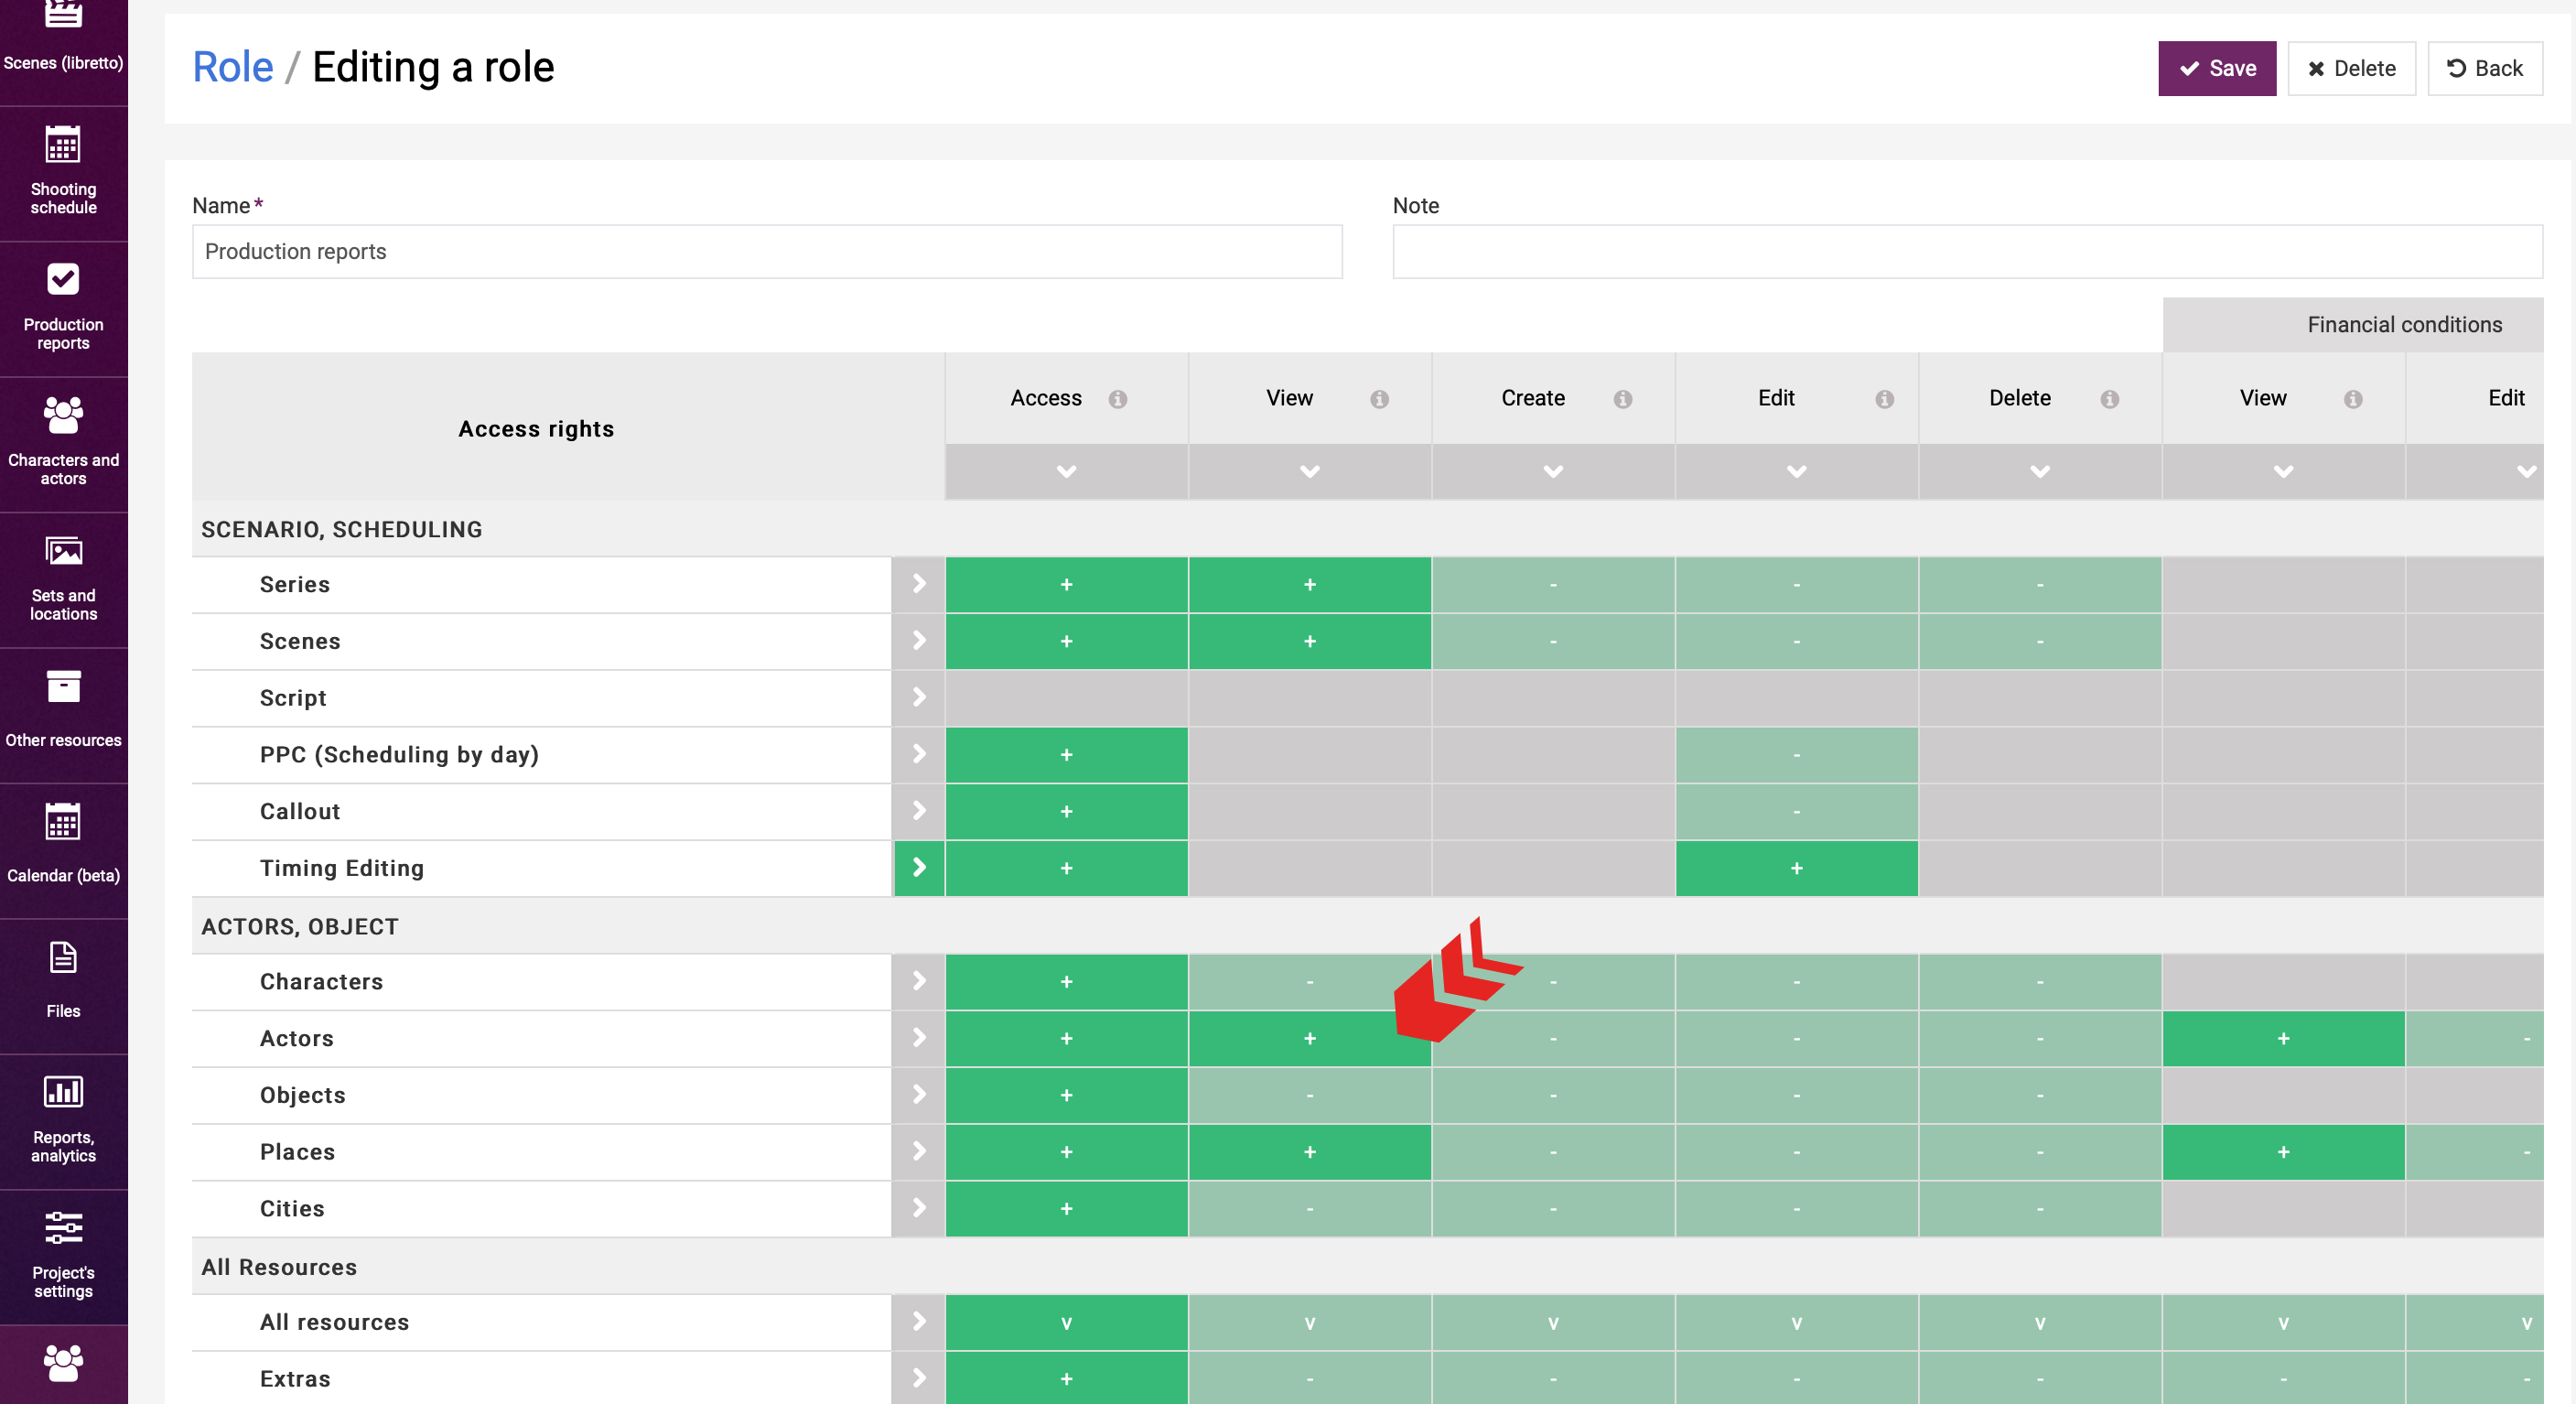
Furthermore, access to financial conditions makes it possible to view the information about the cost of elements and actors in the “Elements usage report” report.
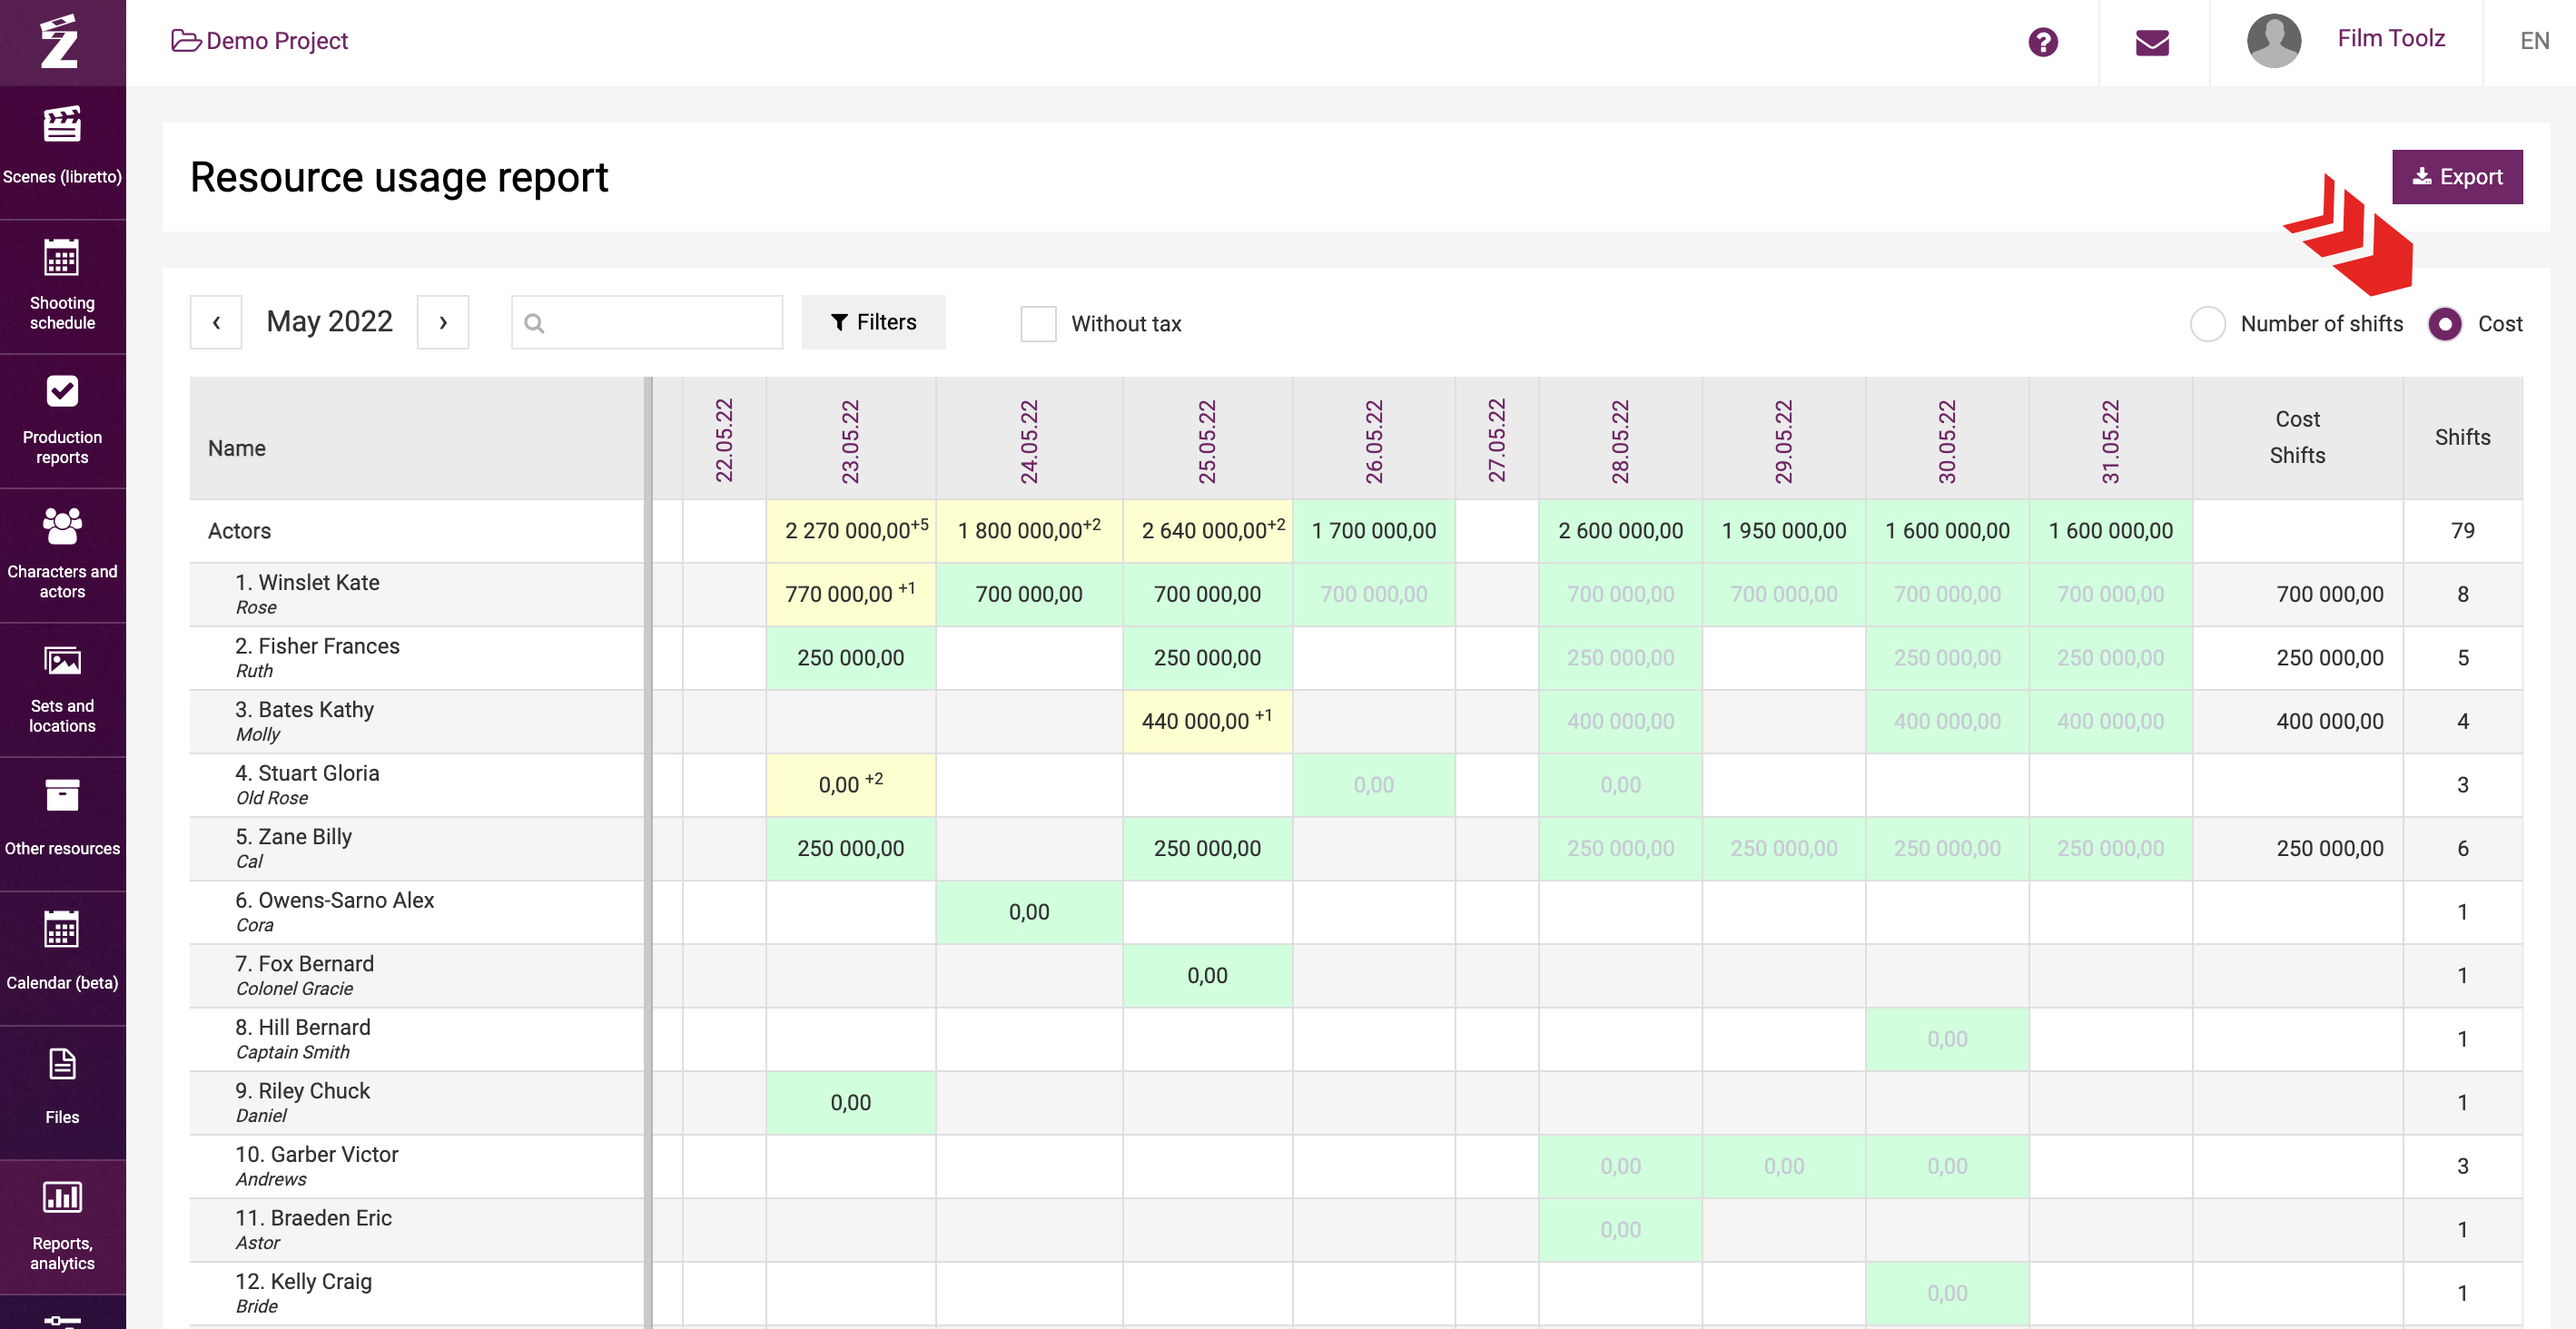
You can provide a user with access to the “Elements usage report” report without granting them the right to view the financial conditions. Such user will be unable to view the information about the cost of elements and actors, as this report will only show the shooting days to such user.
This user will be unable to see the totals under the report in the right-hand part of the table, or open the details page for a specific item in the system.
The next module is the “Binding a elements to a scene” module which handles the information on the page of the scene. “View (on scene card)” grants the rights to see the element marked on the page of each scene, and “Attaching/unpinning” grants editing rights.
In case of the “Production reports” role with no “pluses” ticked in this module, the page of a scene looks as follows
You may choose not to grant full rights to edit the page of the scene to a user after providing such user with access to the “Binding a elements to a scene” module. Then the page of the scene as a whole will be disabled, but the fields of selected elements will be enabled.
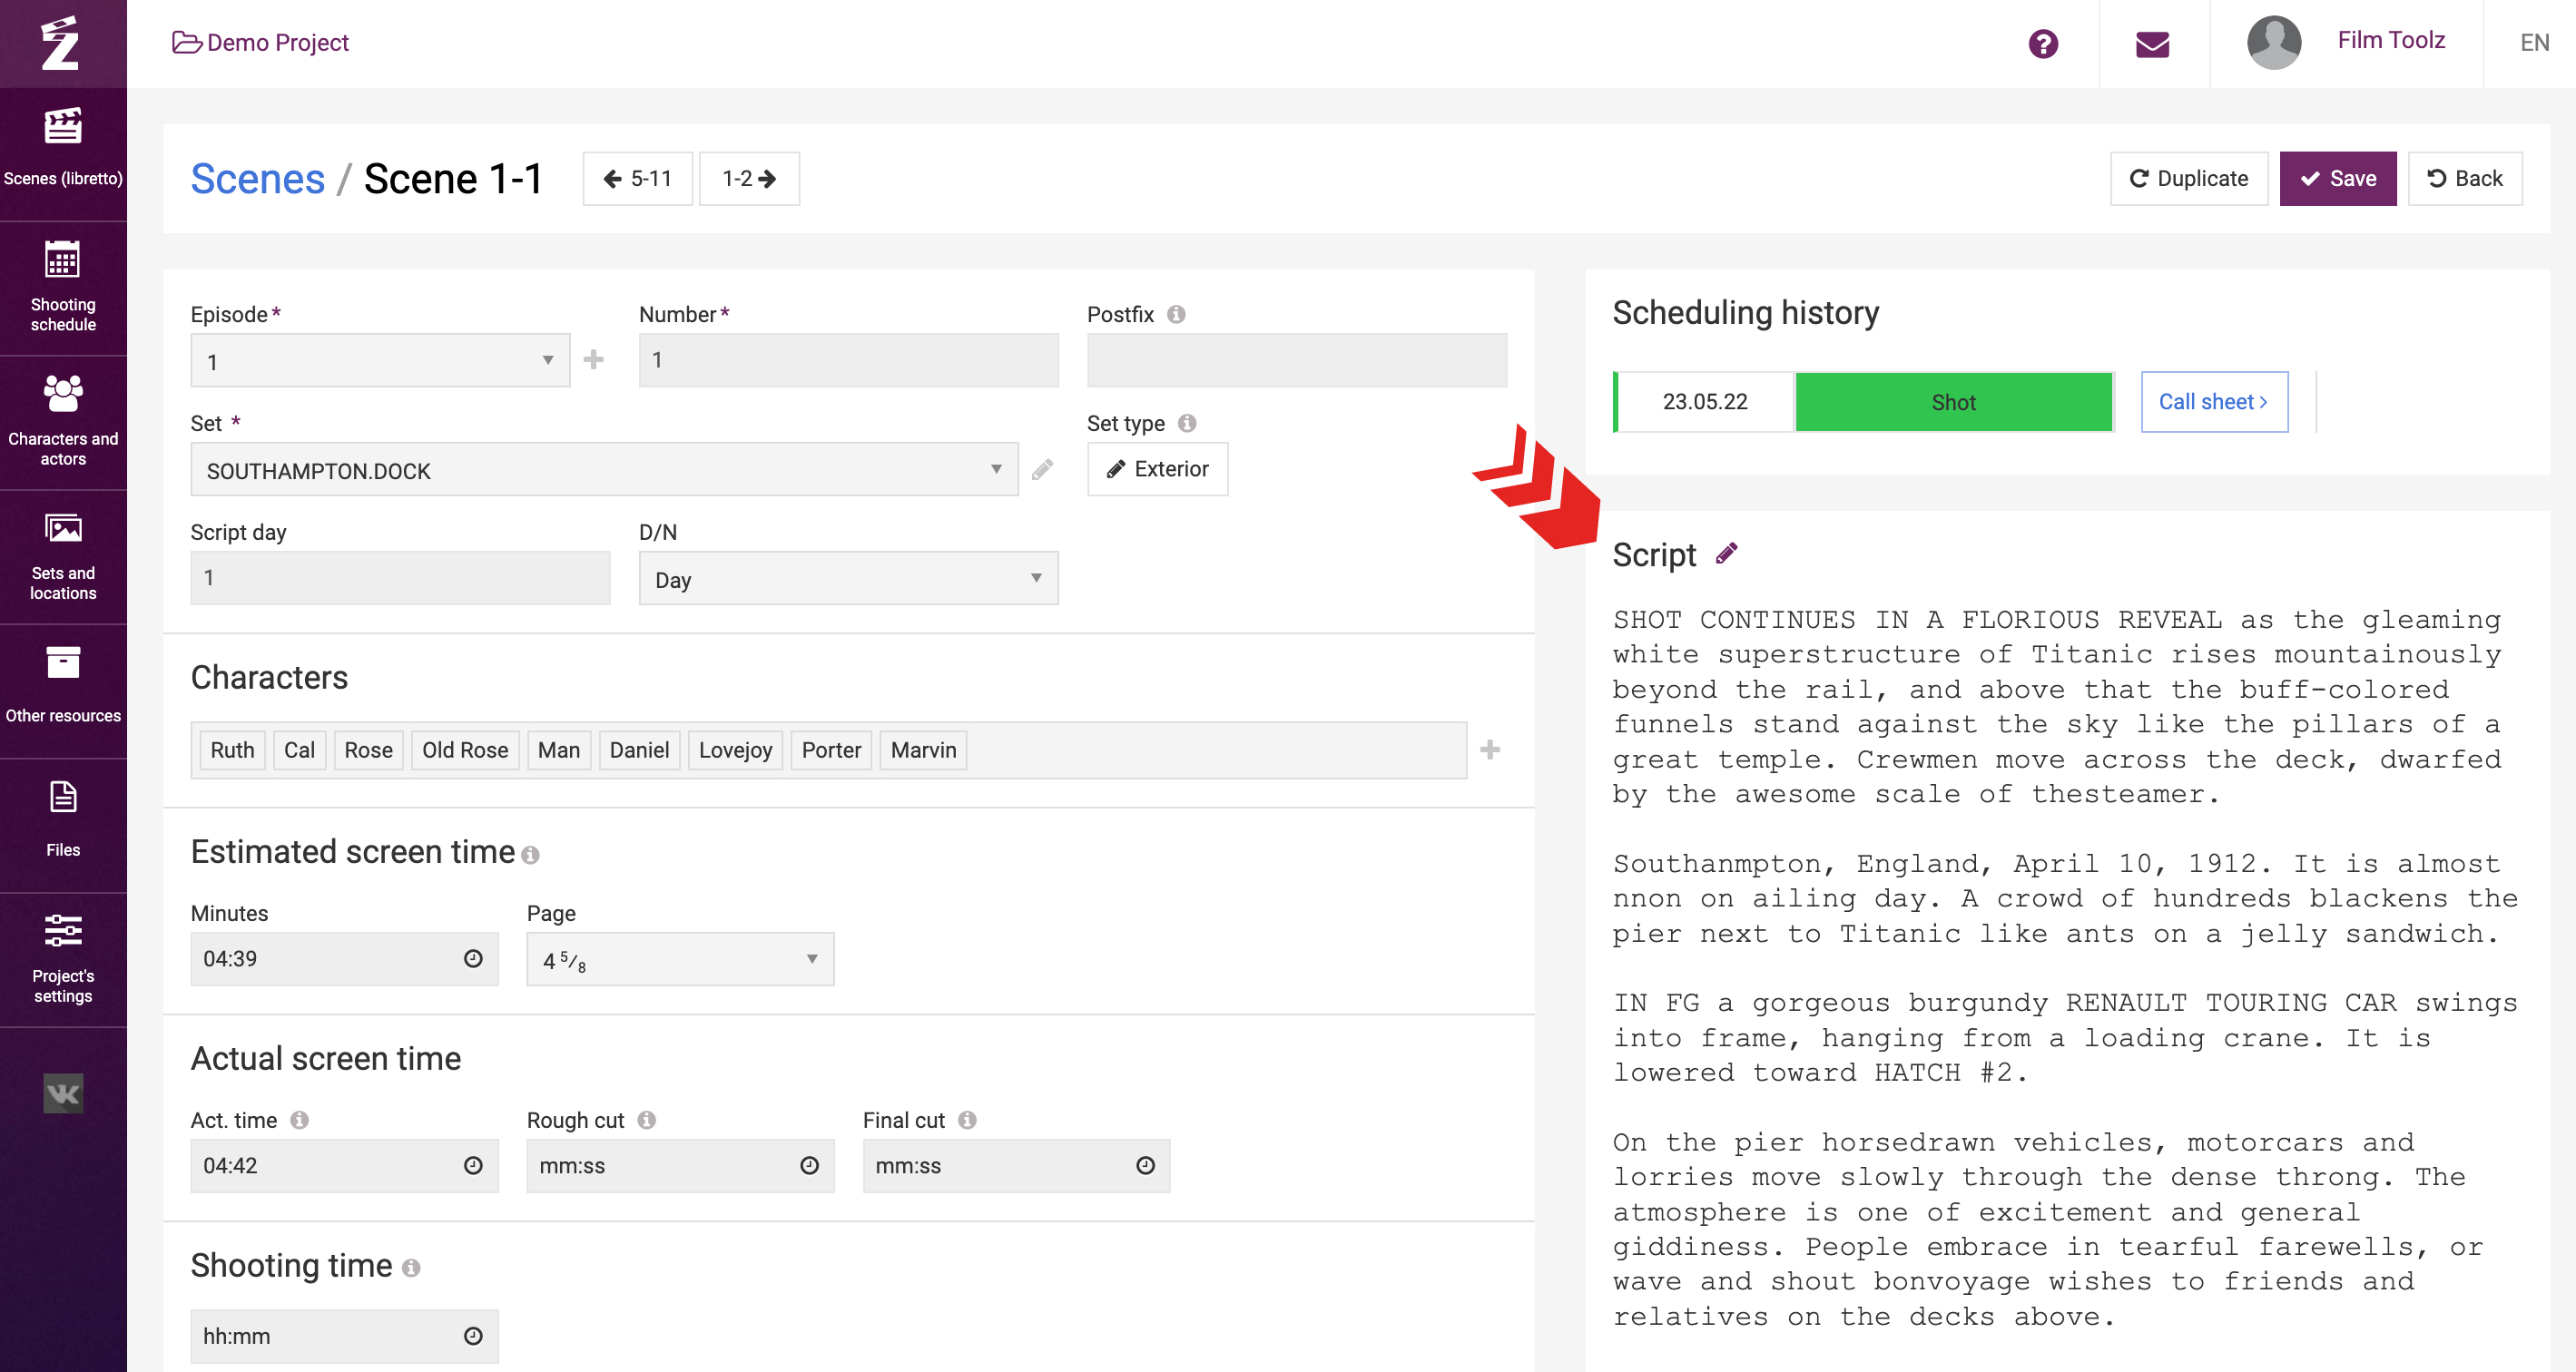
The “Script” row in the role settings makes it possible to view/edit the script on the page of the scene. Whenever viewing is available, the “Script” module will be displayed on the right:
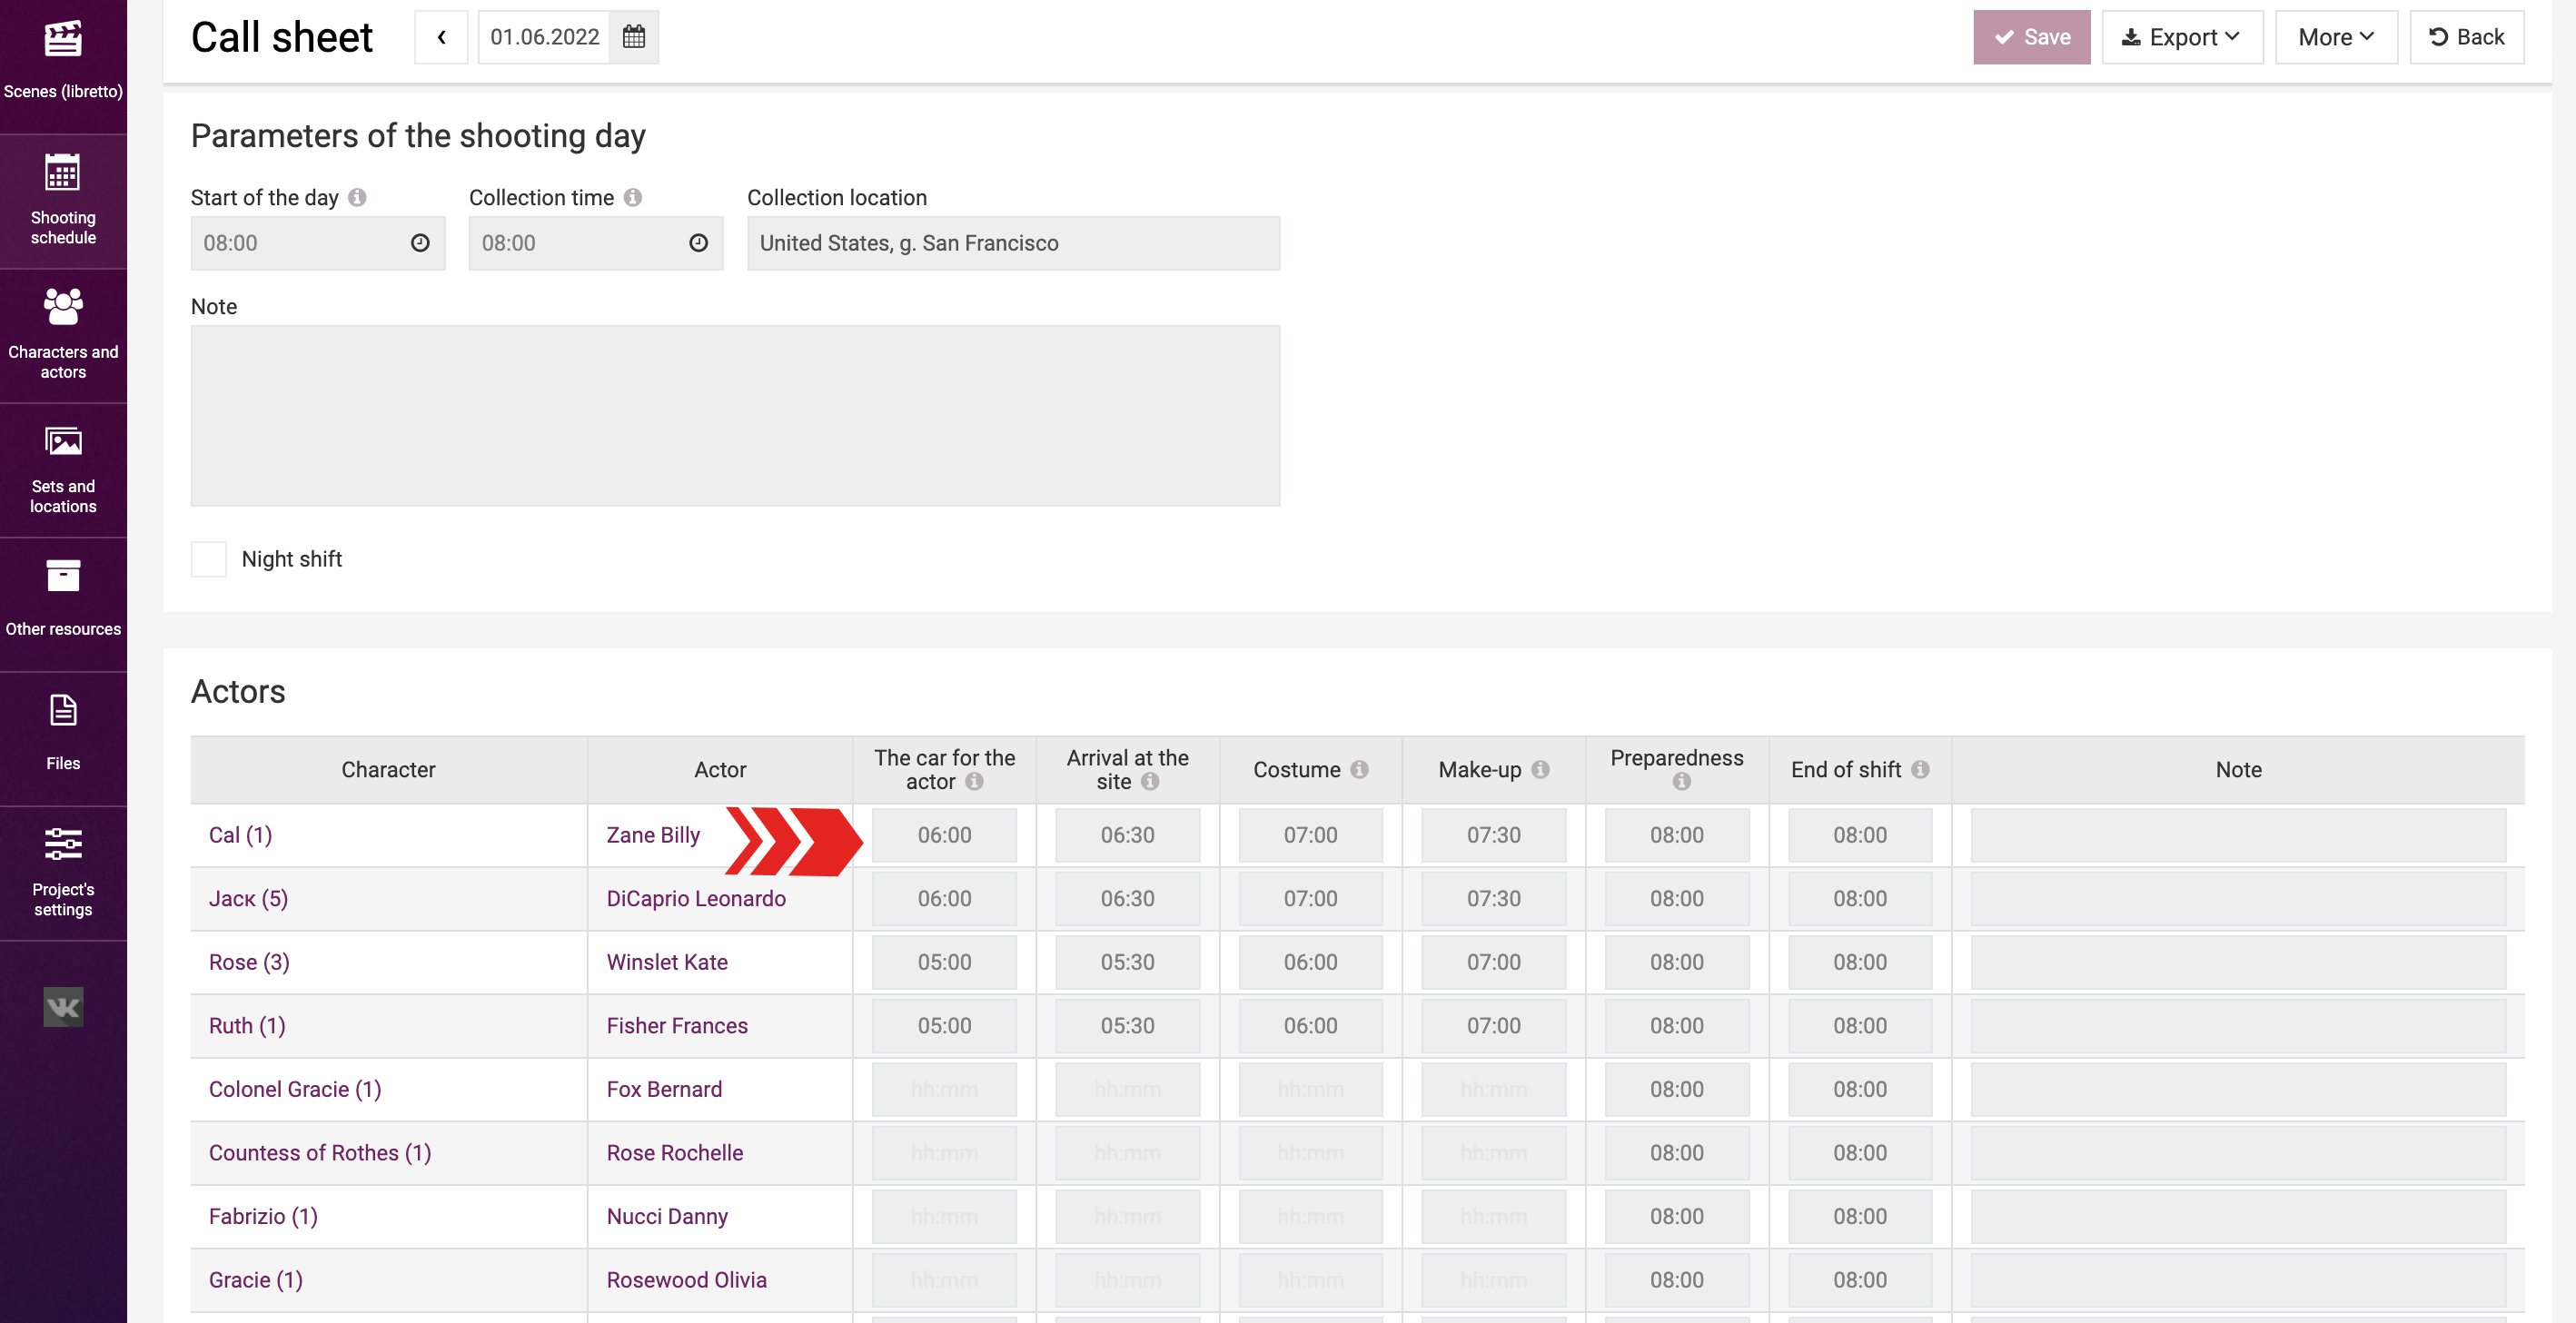
The next column – “Call sheet edit” – is intended to designate the sections that the user may edit on the “Call sheet” page.
This applies to all actors, sets, and all elements and is similar to the “Edit” feature: in case “minuses” are ticked, the fields are disabled and have grey color.
The last column, “Entering the fact of shooting”, makes it possible to enter the actual time for the scenes, actors, locations, and elements in the Production Report. The “Production reports” role is specifically designed for a person responsible for this duty, which is the reason why such person will have all “pluses” ticked here
All standard roles may be edited, with a minor exception for the “Super-administrator” role. This role does not allow changes in the “Settings: Users and roles” row, as it is a system role, and it cannot be deleted.
Alongside the access settings, you may change the role name and leave a remark. After making changes, it is important to save them by clicking on “Save” in the top right corner.
If you want to create your own roles, click on “Create new” on the page displaying the list of roles. You will be redirected to a page where you can enter the name, tick the relevant “pluses,” and save the role.
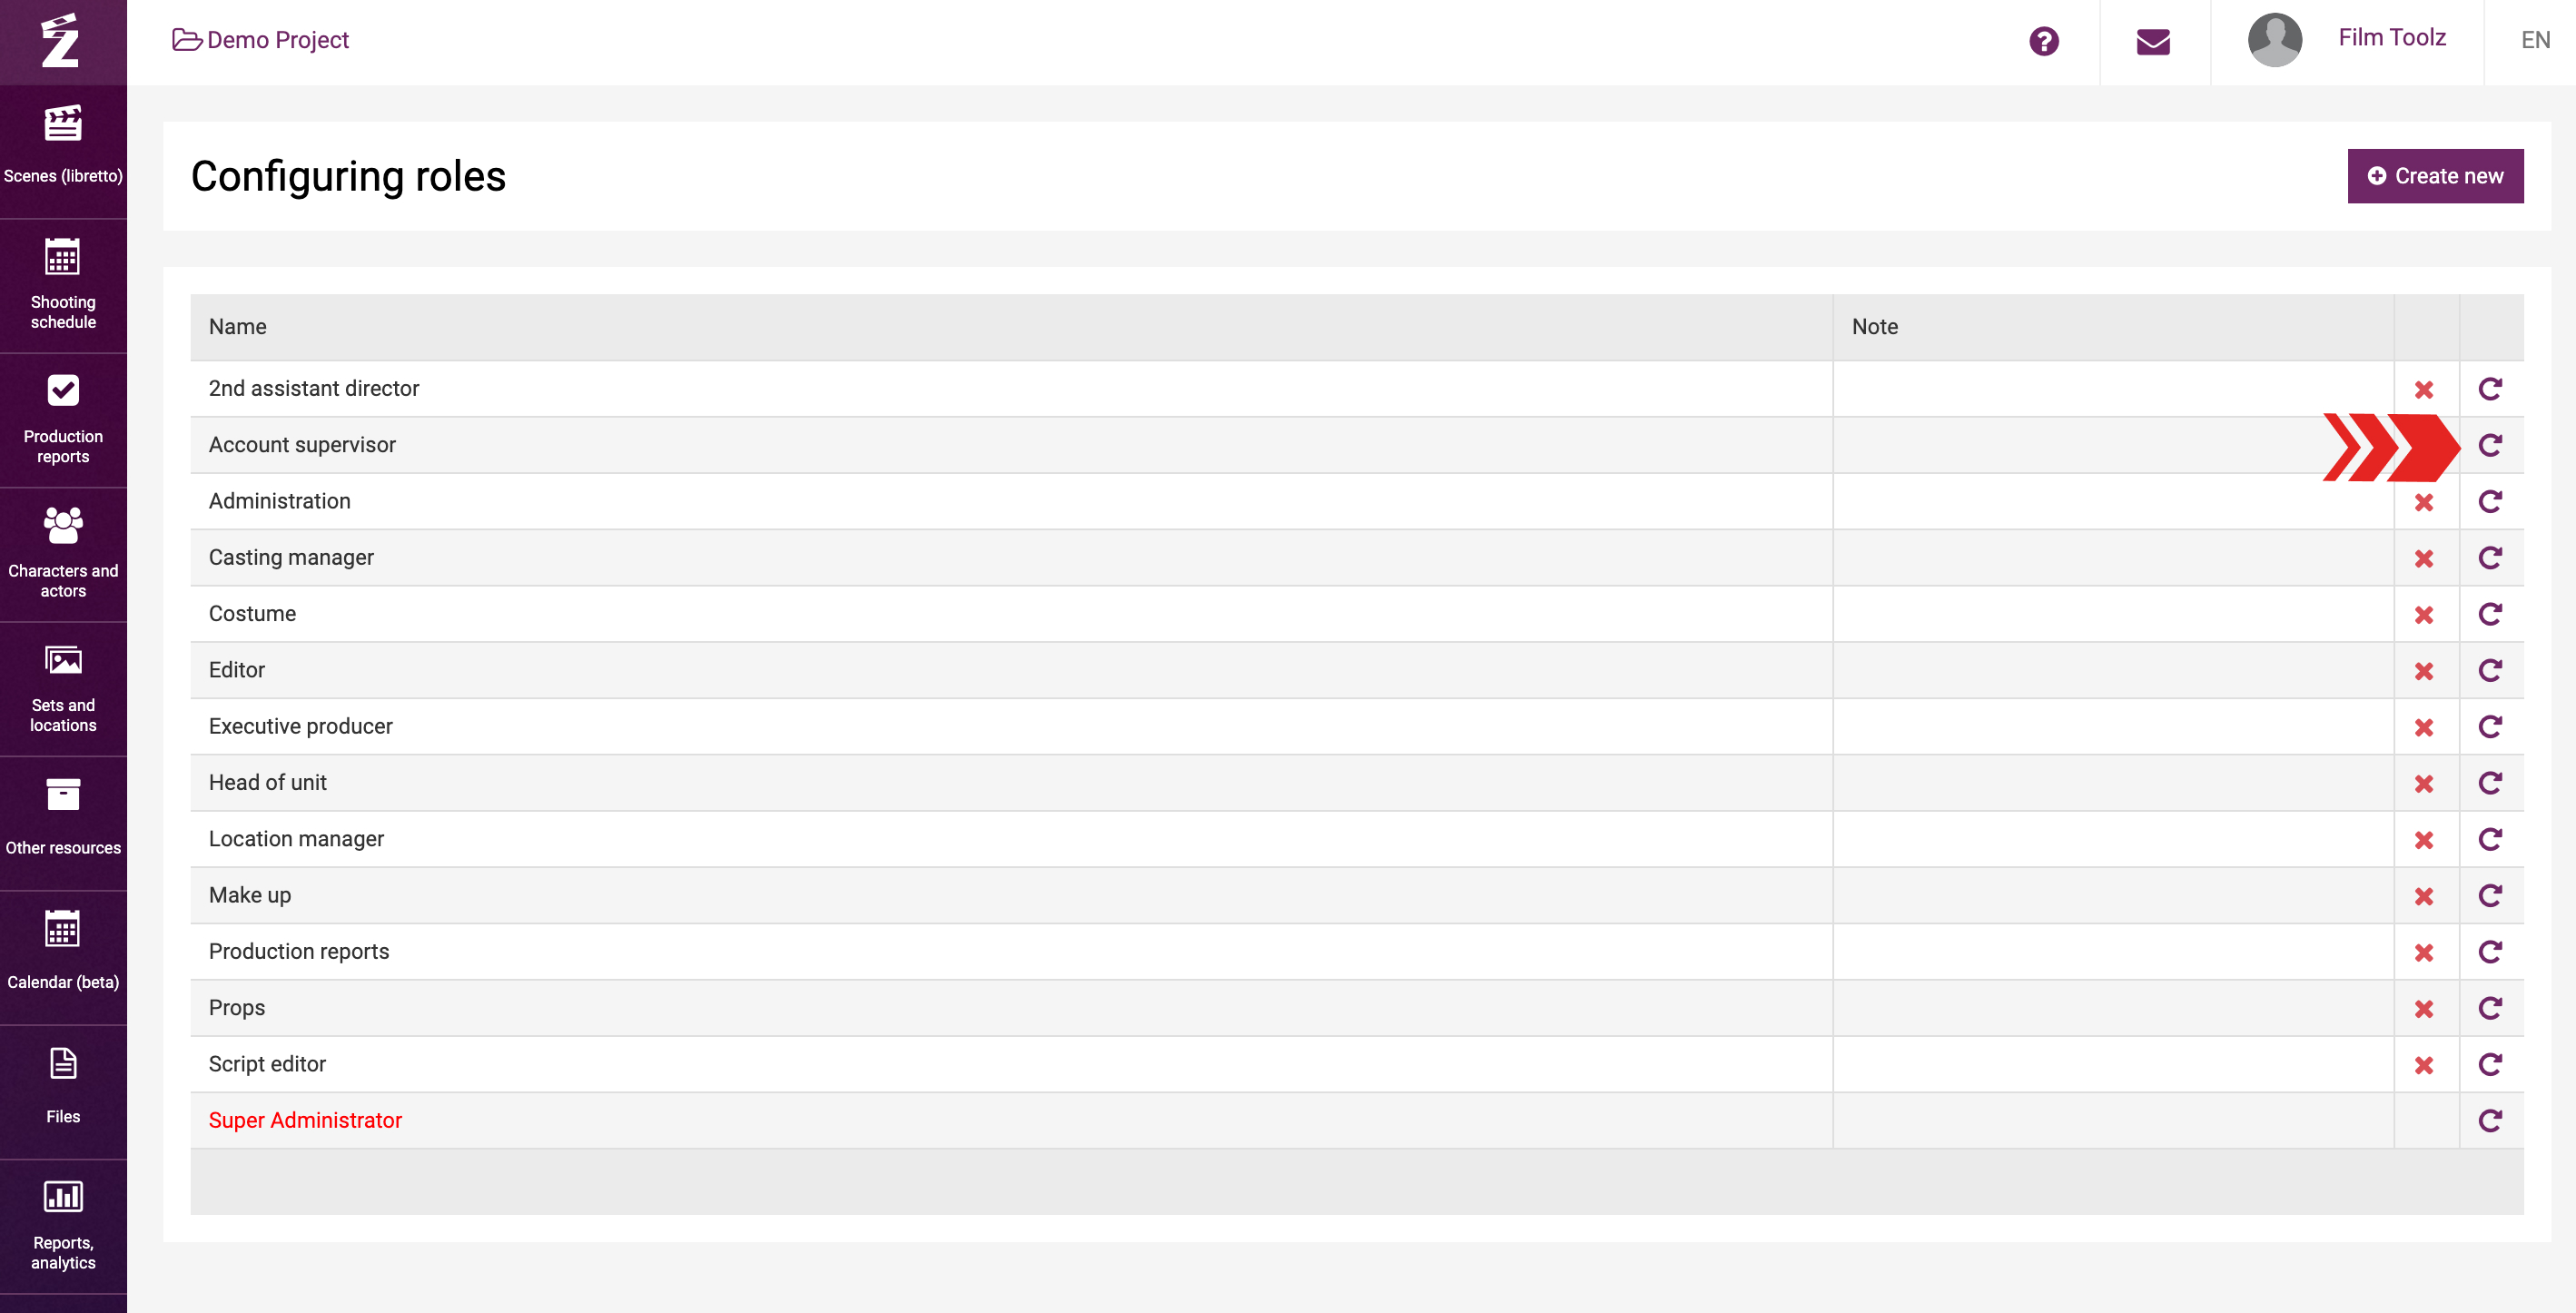
In some cases, you may create a necessary role and then need one more role with a similar set of features, but with a couple of differences. To achieve this, use the “Repeat” feature. Clicking the icon will lead you to a “Create” page for a role that will be an exact copy of the role you have just added. The only thing you need to do is make the necessary adjustments and save.
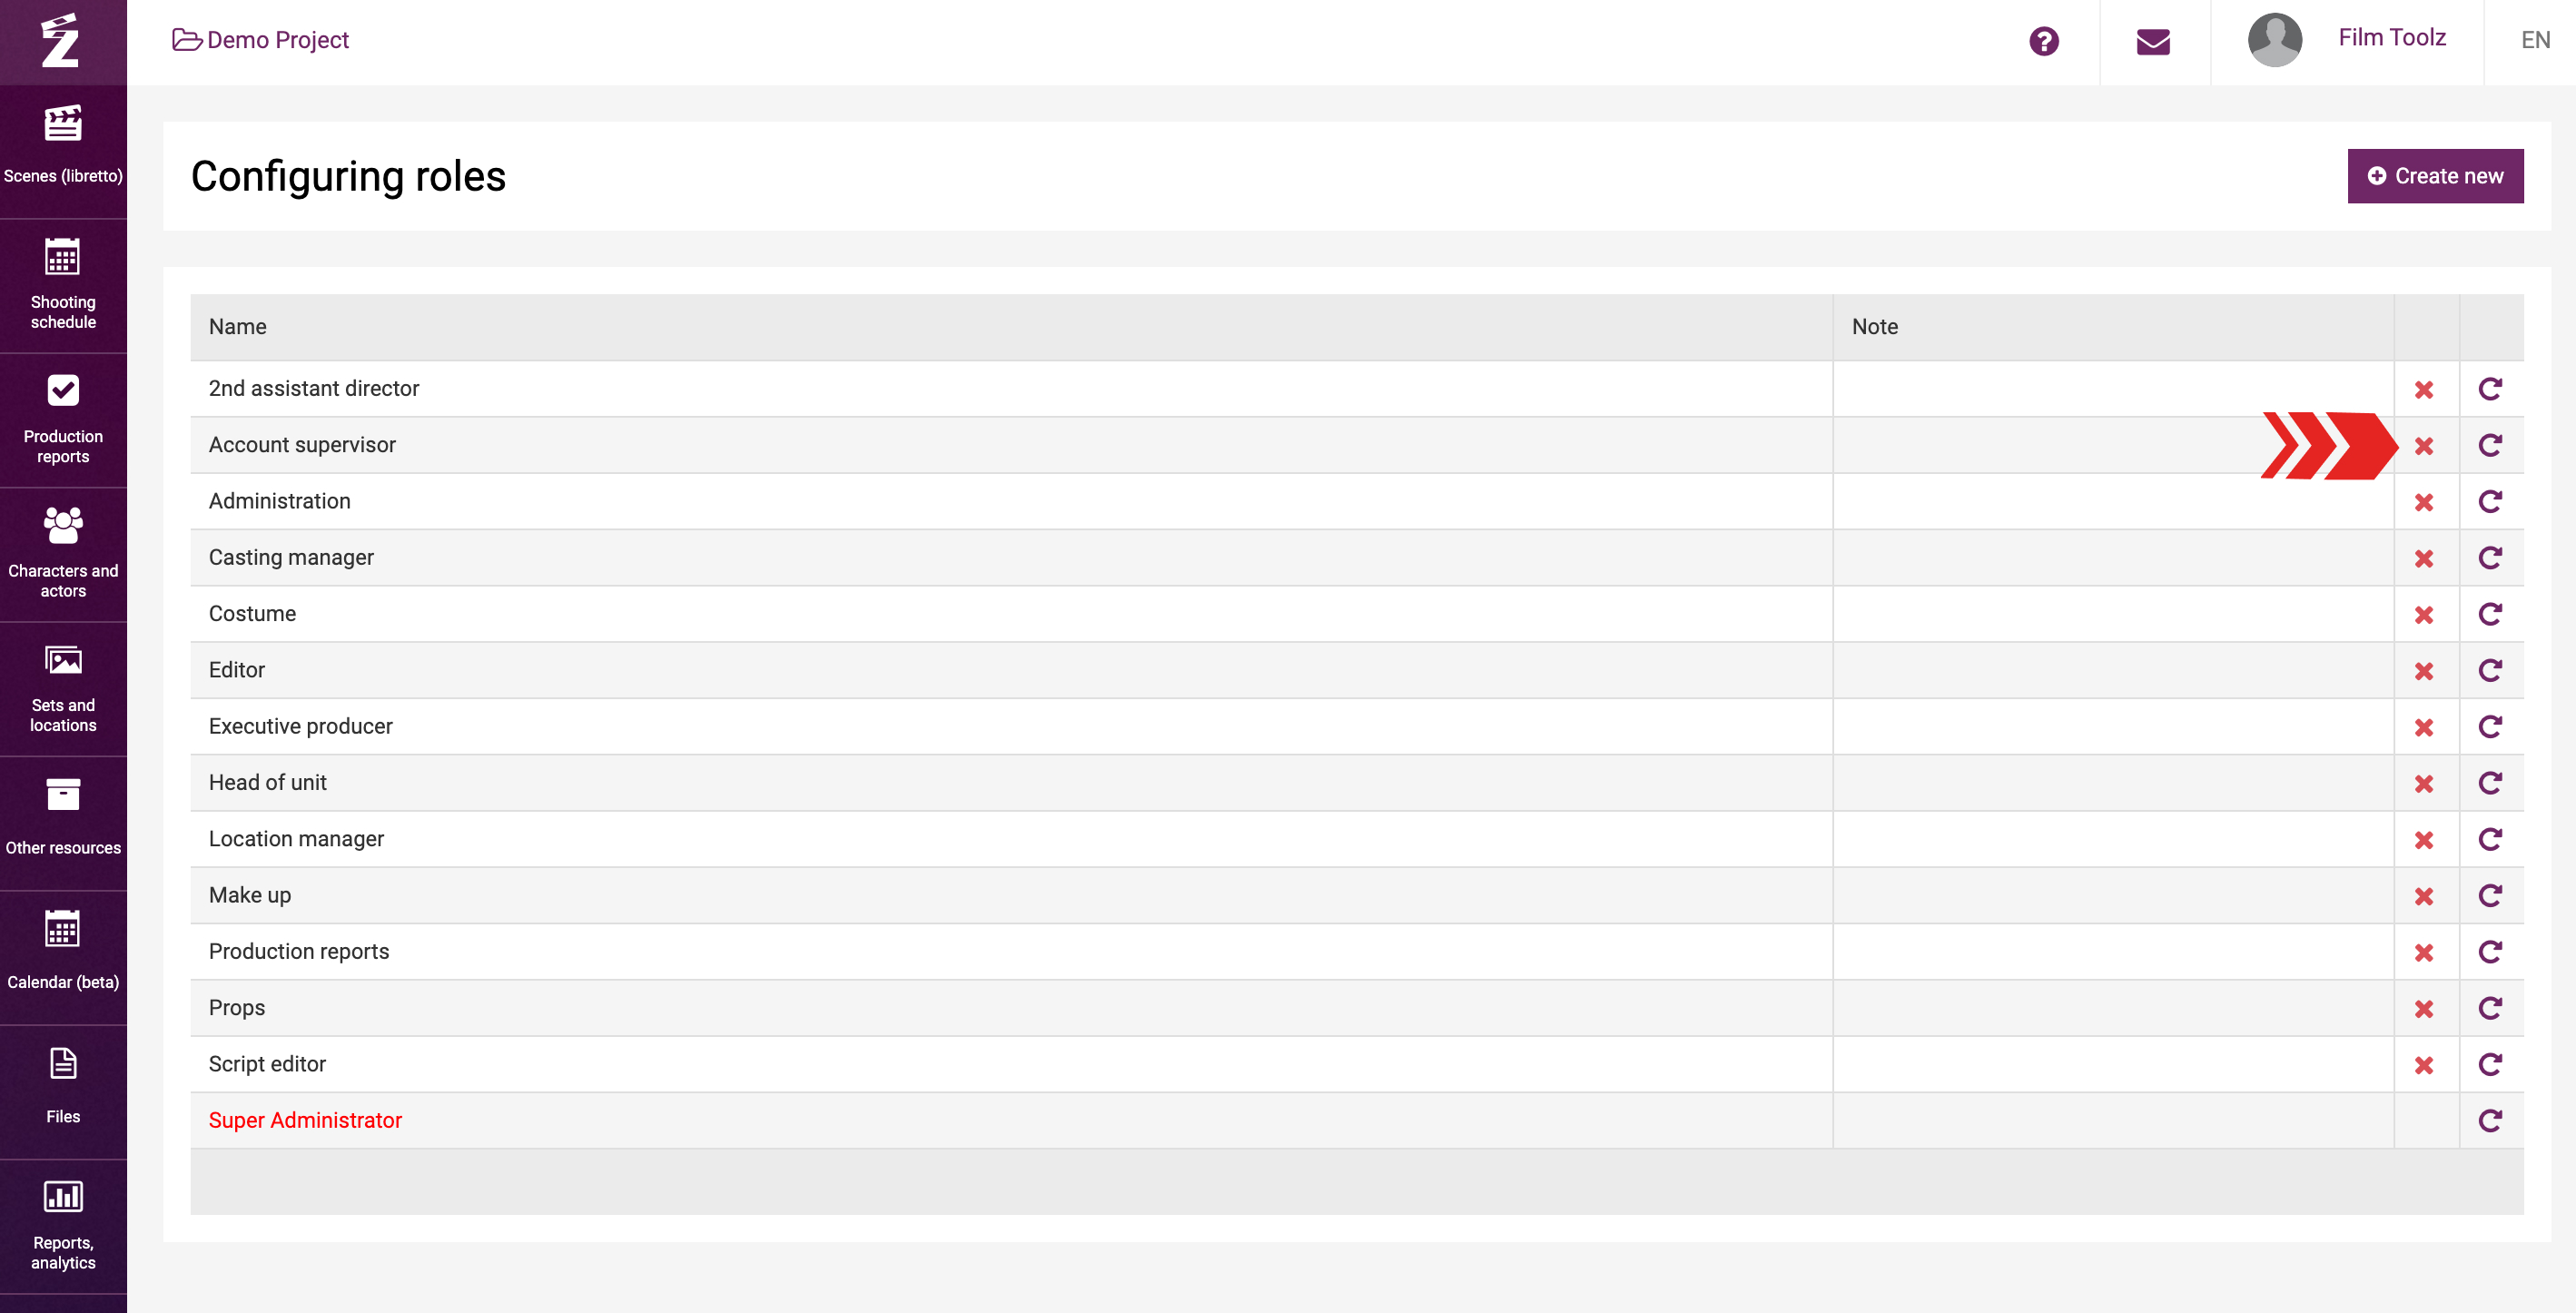
To delete a role, use the red “х” in the list of roles.
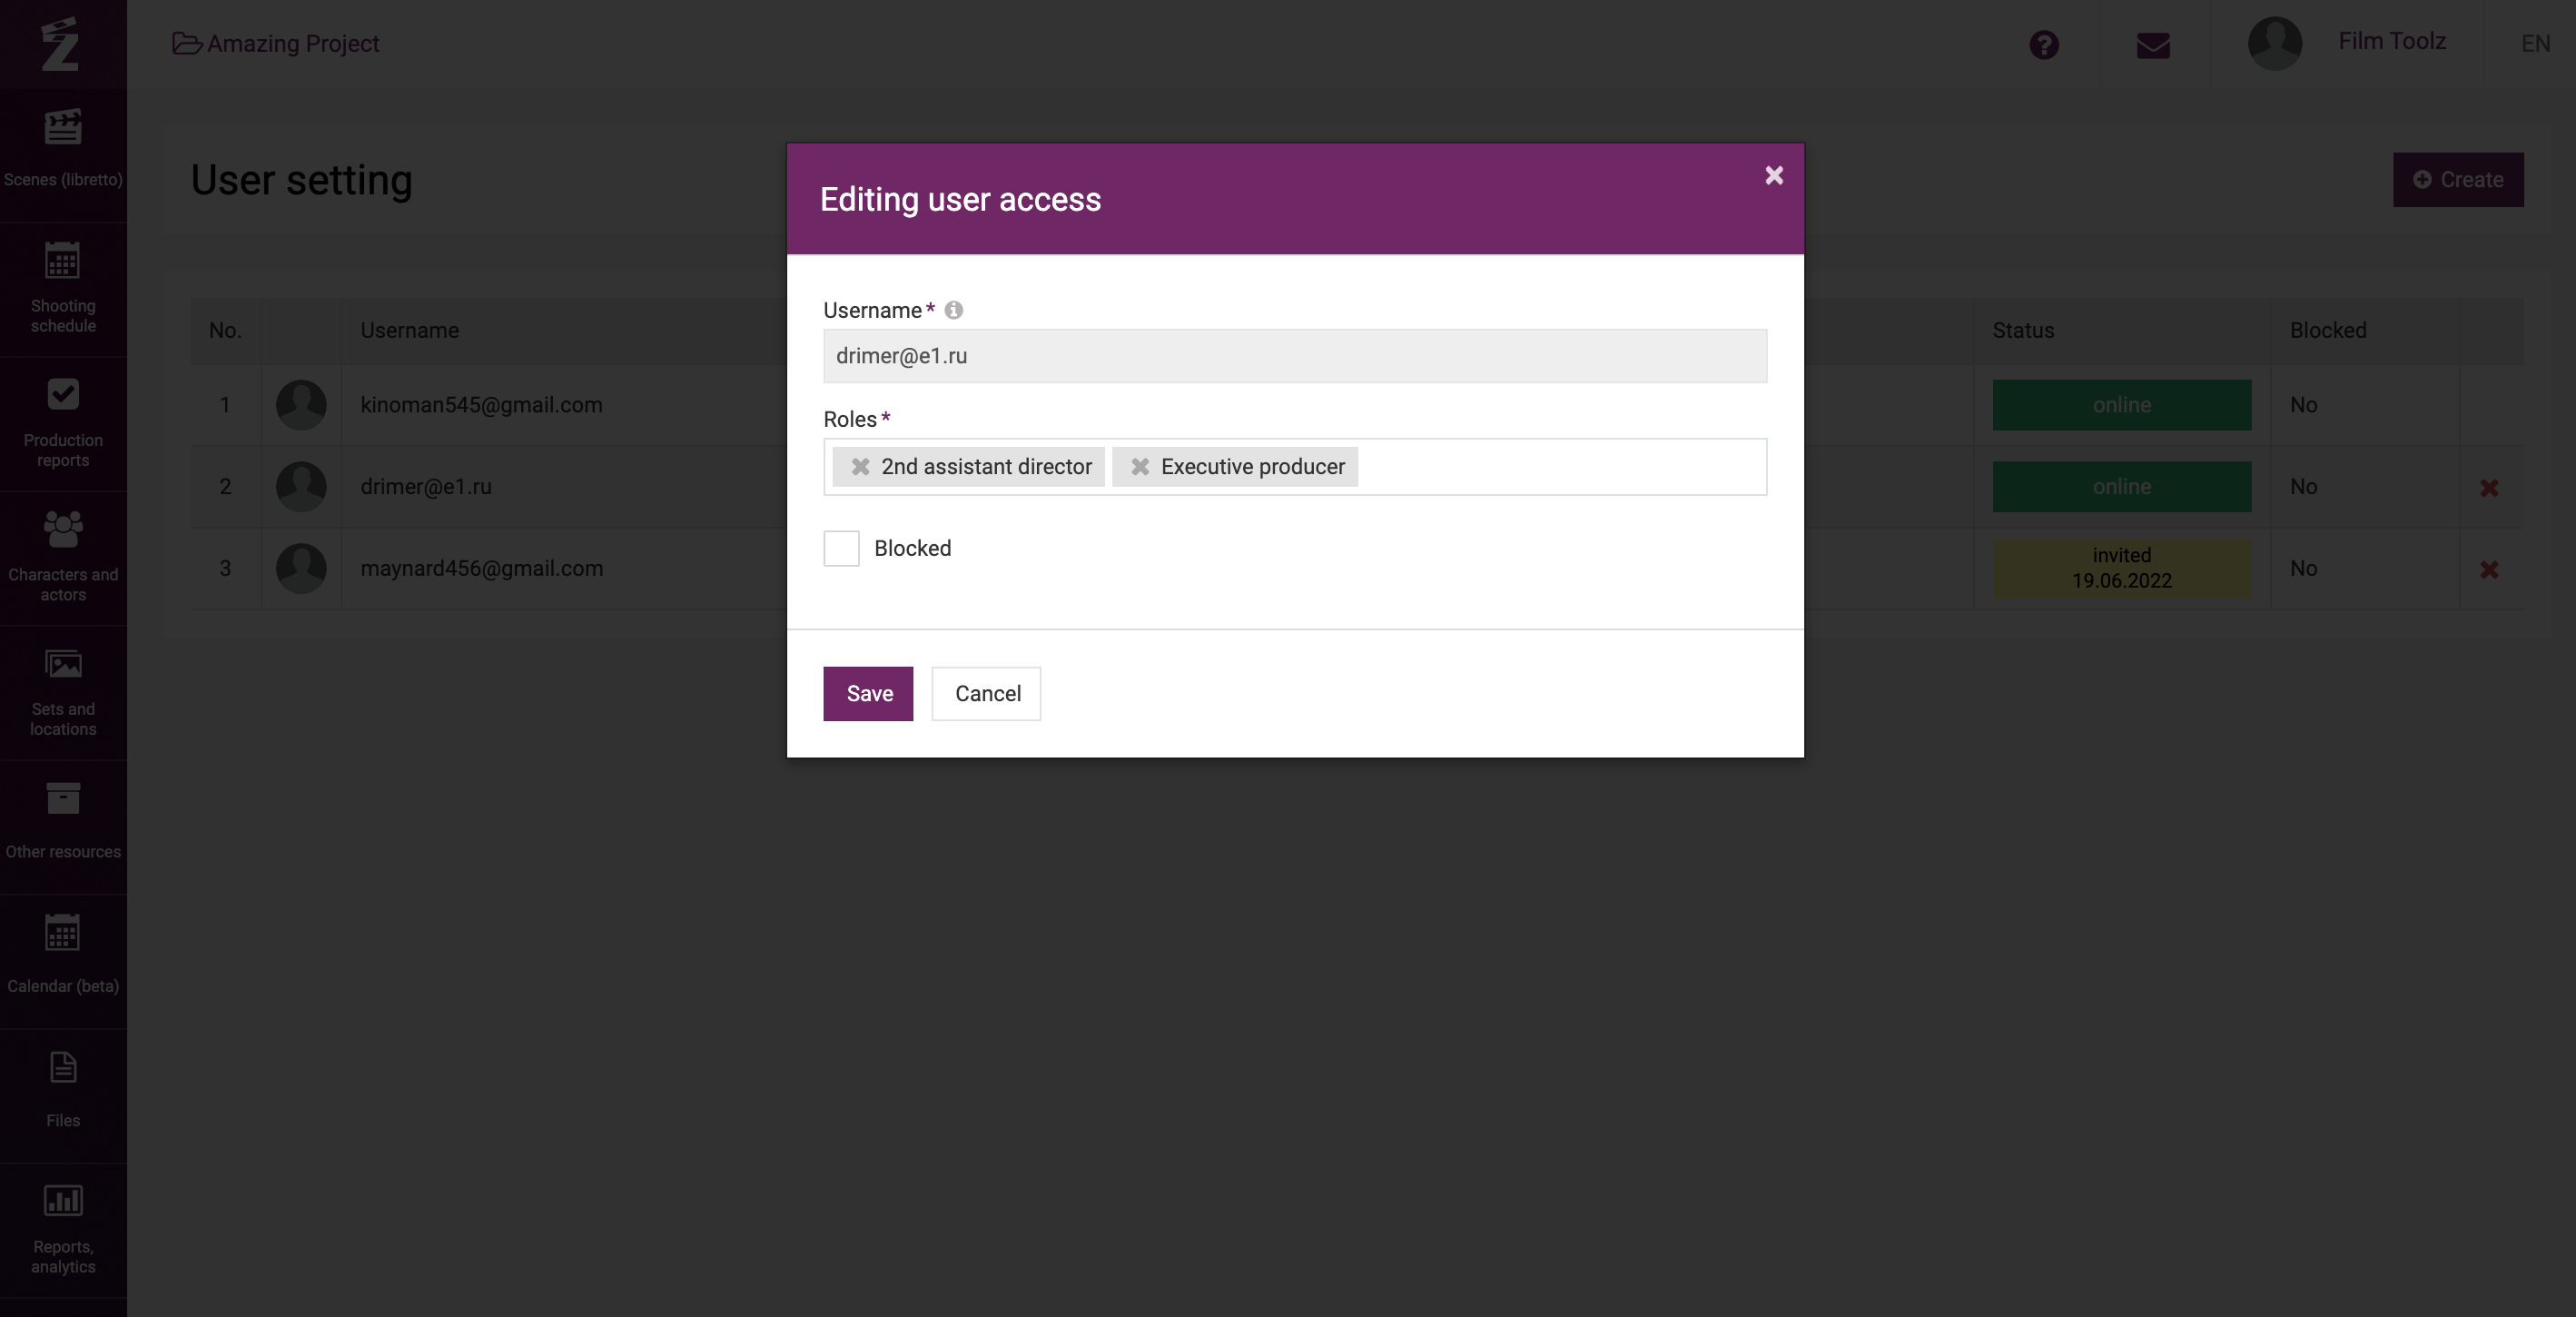
The role will be assigned to a user when you add them to the project or at a later stage via the list of users. If you assign no role to a user, they will see the project in the list but will have no access to it.
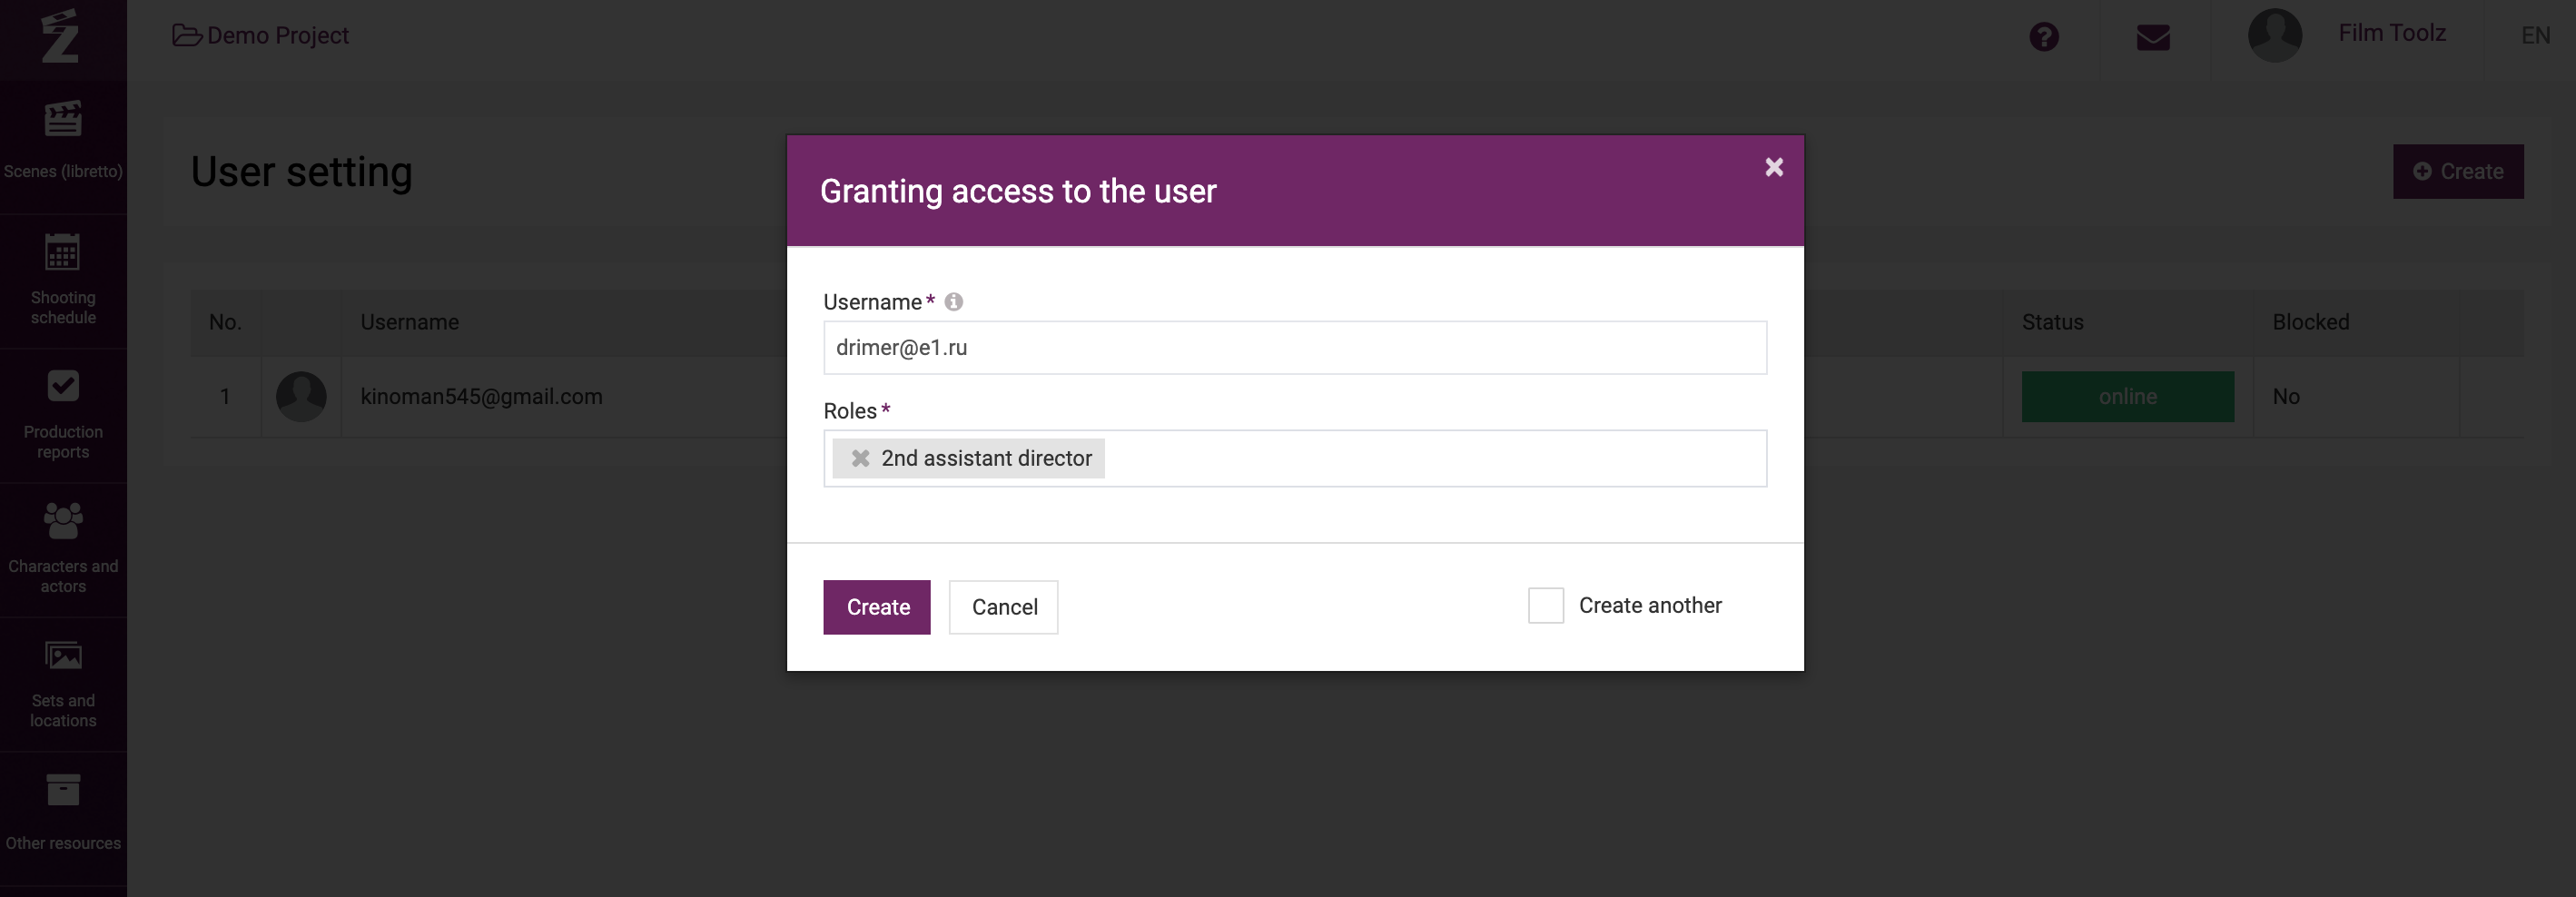
You may assign multiple roles to a single user. In this case, all “pluses” of the roles will be added up, and the user will have the rights granted by both roles.